No Space? How to Convert a Hallway Alcove into a Cozy Mini Nursery Nook
Hello, beautiful mama. If you are currently standing in the middle of your home, hands resting on your growing belly, wondering where on earth you are going to fit a baby into your current floor plan—take a deep, cleansing breath. Drop your shoulders. You are not alone, and I promise you, you do not need a massive, magazine-spread nursery to be an incredible mother or to give your baby a beautiful start to life.
As a doula and a mama who has seen every type of home setup imaginable, I am here to tell you a little secret: babies do not care about square footage. They care about your warmth, your smell, and feeling secure. In fact, large, cavernous rooms can sometimes feel overwhelming to a newborn who just spent nine months tightly curled up in the coziest space of all—your womb. Creating a micro-nursery or a “nursery nook” in a hallway alcove, a wide corridor, or a large closet is not just a compromise; it is a brilliantly efficient, deeply cozy way to welcome your little one. When you are recovering from birth, whether you had a vaginal delivery or a cesarean section, having a compact, highly organized space where everything is within arm’s reach is an absolute lifesaver. You won’t be walking miles across a room at 3 AM; you will have your perfectly curated alcove.
Today, we are going to put on our interior designer hats and our practical doula thinking caps. We are going to transform that awkward, unused hallway alcove into a stunning, highly functional mini nursery nook. From mastering vertical storage and choosing the perfect mini crib, to ensuring the sleep environment is pitch-perfect for those long nights, I am going to walk you through every single step. Grab a cup of red raspberry leaf tea, and let’s start nesting!
Measuring Up: Evaluating Your Alcove for Safety and Fit
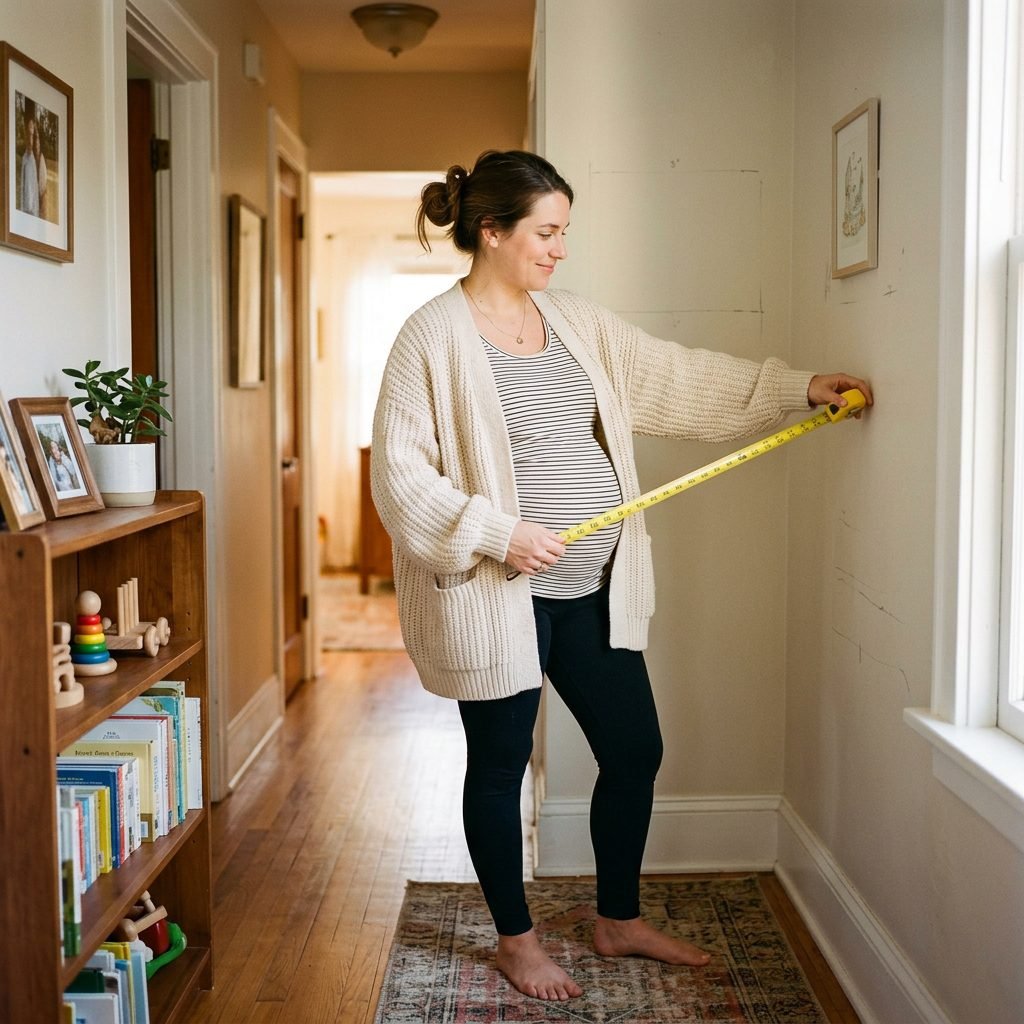
Before we start picking out adorable peel-and-stick wallpaper or buying tiny velvet hangers, we need to talk about the foundation: safety and dimensions. As a doula, my first priority is always the physical safety and well-being of your baby. Hallways can be tricky because they are transitional spaces, so we need to assess the alcove with a critical eye.
The Magic Dimensions
Grab your measuring tape, mama. To comfortably fit a standard mini crib, your alcove needs to be at least 40 inches wide and 26 inches deep. A standard mini crib mattress is typically 24 inches by 38 inches. If your alcove is slightly smaller, you might be looking at a bassinet setup for the first six months, which is completely fine! But if you have those magic dimensions, a mini crib will be your best friend.
Safety First: The Doula Checklist
When converting a non-traditional space, we have to look out for hidden hazards. Ask yourself these questions as you stand in your hallway:
- Airflow and Vents: Is there an HVAC vent directly above or below the space? We do not want cold AC blowing directly onto your newborn, nor do we want a heating vent making them dangerously hot. If there is a vent, invest in a magnetic vent deflector.
- Outlets and Cords: Are there electrical outlets nearby? You will need one for a white noise machine and a nightlight. Ensure any cords are strictly pinned to the wall and hidden using cord concealers. Dangling cords are an absolute no-go near a crib.
- Drafts and Doors: Does the alcove sit directly across from a bathroom door that swings open? Make sure the crib placement doesn’t interfere with traffic flow or put the baby in a drafty pathway.
“Your baby’s sleep space should be a sanctuary. It doesn’t need to be big, but it must be safe. A firm mattress, a fitted sheet, and a space free of loose cords, drafts, and heavy wall hangings directly over the crib are your golden rules.”
Choosing the Right Furniture: Mini Cribs and Fold-Down Magic
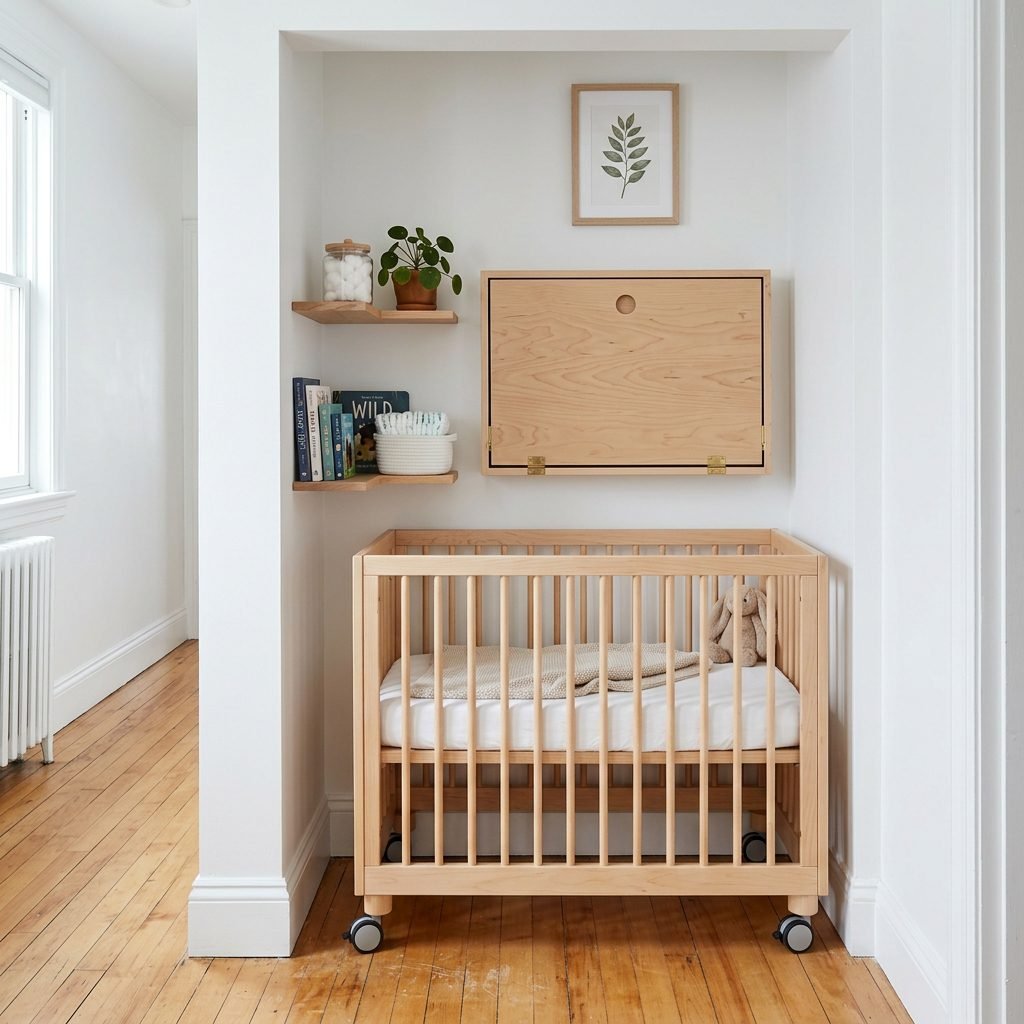
Now that we know your space is safe and properly measured, let’s talk about the heavy lifters: the furniture. In a hallway alcove, standard nursery furniture simply will not work. We need to think like a tiny-house designer. Every single piece of furniture must earn its keep, ideally by serving more than one purpose.
The Mighty Mini Crib
If you haven’t been introduced to the mini crib yet, prepare to fall in love. Mini cribs offer the exact same safety standards and structural integrity as standard cribs, but with a significantly smaller footprint. Many of them even come with wheels (casters), allowing you to gently roll the crib out of the alcove to vacuum, or roll it into your bedroom during those early, frequent-waking postpartum weeks.
| Feature | Standard Crib | Mini Crib |
|---|---|---|
| Mattress Dimensions | Approx. 28 inches x 52 inches | Approx. 24 inches x 38 inches |
| Average Lifespan | Newborn up to 3-4 years (toddler bed) | Newborn up to 18-24 months |
| Space Required | Requires a large, dedicated wall | Fits perfectly in closets, alcoves, and corners |
| Portability | Usually stationary and heavy | Often lightweight, foldable, or on wheels |
The Changing Station Conundrum
You might be thinking, “Okay, the crib fits, but where on earth do I change the diapers?” Sister, you have two brilliant options here. The first is a fold-down, wall-mounted changing table. Think of the sturdy, sleek ones you see in high-end commercial restrooms, but designed beautifully for home use in wood finishes. They fold up completely flat against the wall when not in use. Your second option is a crib-top changing tray. This is a sturdy wooden tray that locks securely onto the top rails of the mini crib, providing a safe, flat surface for diaper changes, and can be slid under the crib when baby is sleeping.
Going Up: Mastering Vertical Storage with Pegboards and Shelves
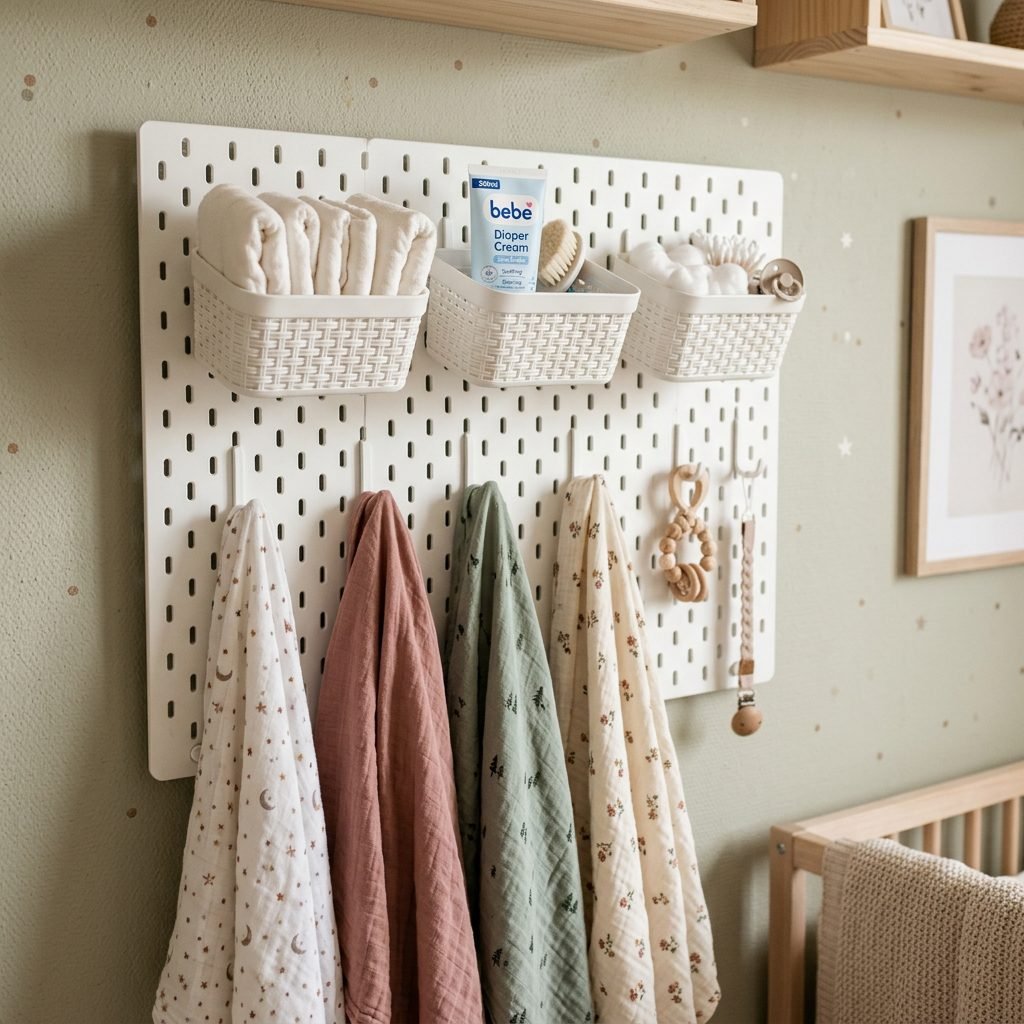
When you have zero floor space, the only way to go is up. Vertical storage is the absolute secret weapon of small-space nursery design. As a postpartum nurse, I can tell you that when you are holding a squirming, blowout-covered baby at 2 AM, you do not want to be digging through a dark drawer. You want everything visible, accessible, and right at chest height.
The IKEA Skådis Pegboard Hack
One of my absolute favorite storage solutions for a hallway nook is the pegboard. It is customizable, inexpensive, and looks incredibly chic when styled correctly. Here is exactly how to set up the ultimate baby care station using a pegboard system above your changing area or next to the crib (just ensure it is securely anchored and out of baby’s reach once they can pull to stand!).
- Measure and Anchor: Purchase a large pegboard (like the IKEA Skådis). Use heavy-duty drywall anchors to secure it firmly to the side wall of your alcove. Safety is paramount here—it must not wobble.
- Attach Hanging Baskets: Use the compatible metal baskets to create “zones.” Dedicate the bottom basket (closest to your hands) to the absolute essentials: 5-7 diapers, a pack of water wipes, and diaper rash cream.
- Create a Health Station: In a higher basket, out of reach, create your baby health kit. Include the rectal thermometer, baby nail files, saline drops, and a nasal aspirator.
- Add Hooks for Soft Goods: Use the peg hooks to hang lightweight items like a clean sleep sack, a spare pacifier on a clip, and a soft muslin burp cloth.
Acrylic Floating Bookshelves
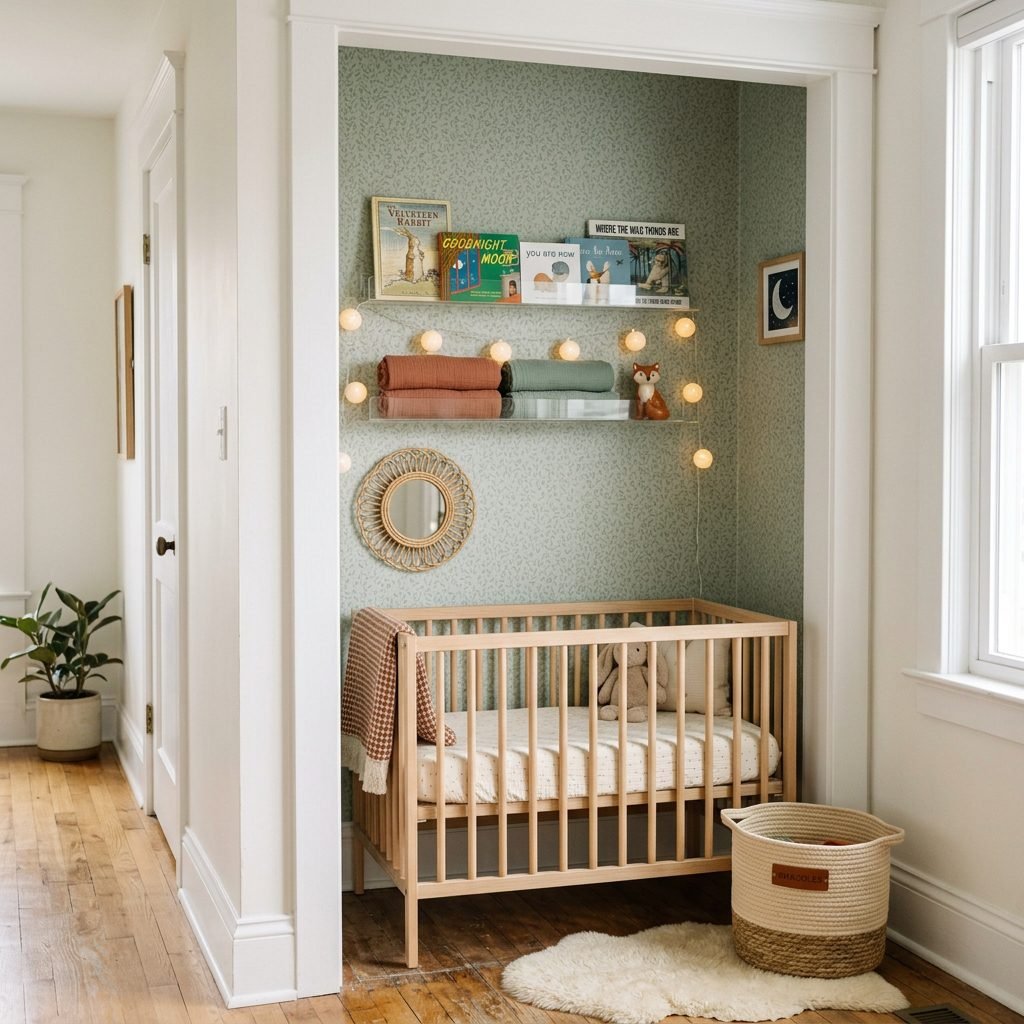
Instead of a bulky bookcase, install three to four clear acrylic floating shelves on the opposite wall of the alcove. These shelves protrude only about 2 to 3 inches from the wall, taking up virtually zero space, but they hold baby’s board books face-out. This not only provides storage but also acts as beautiful, colorful wall art for the nook!
| Storage Area | Before (Empty Alcove) | After (Nursery Nook Transformation) |
|---|---|---|
| Floor Space | 0 sq ft utilized | Mini crib + rolling under-crib storage bins |
| Wall Space | Bare drywall | Pegboard station + 3 acrylic floating shelves |
| Diaper Capacity | 0 diapers | Up to 50 diapers in vertical pegboard baskets |
Sensory Control: Lighting, Sound, and Curtains for Uninterrupted Sleep
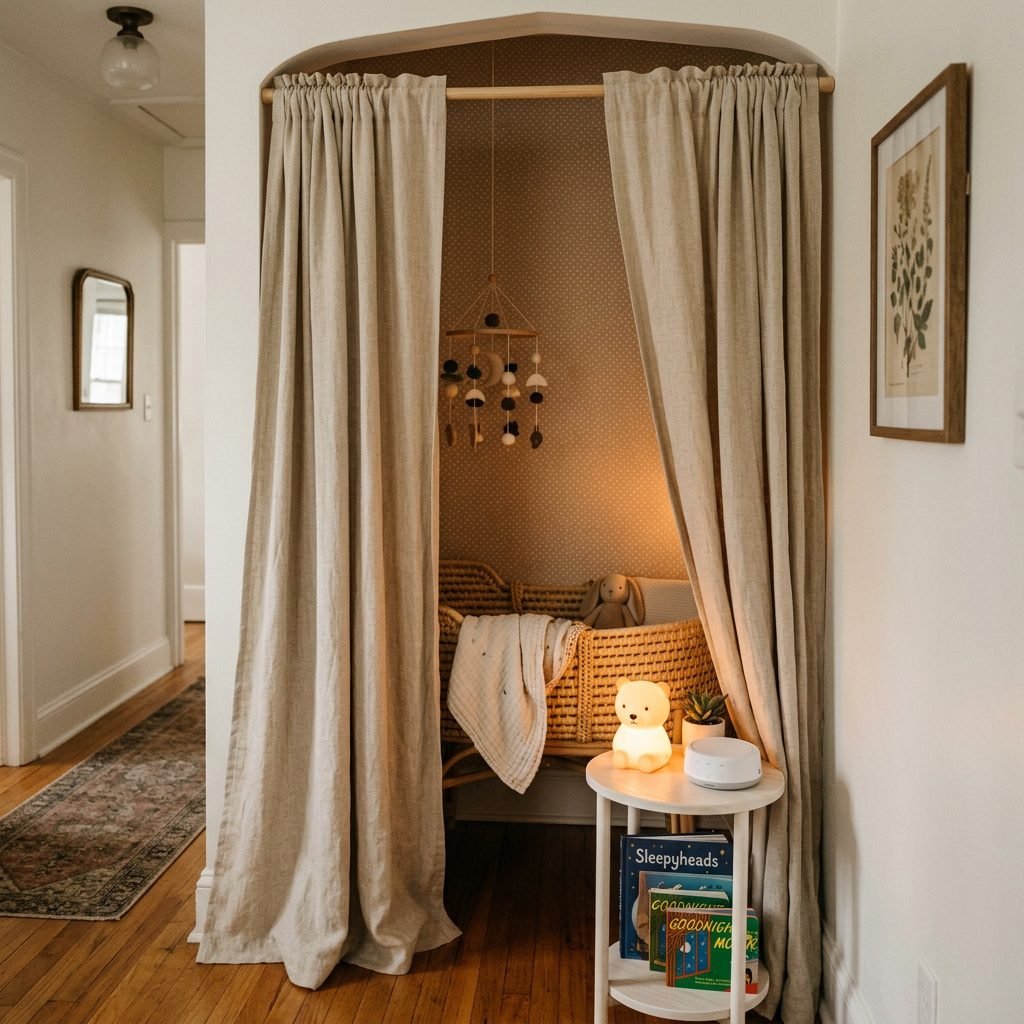
Let’s talk about the reality of a hallway. Hallways are the arteries of your home. People walk through them, lights get flicked on and off, and doors open and close. If your baby is going to sleep in a hallway alcove, we have to become masters of sensory control. As a pediatric sleep consultant, I cannot stress enough how important the sleep environment is for extending those precious naps and nighttime stretches.
The Visual Barrier: Tension Rods and Linen Curtains
To separate the alcove from the rest of the hallway, we are going to use a brilliant, renter-friendly hack: the heavy-duty tension rod. Install a strong tension rod at the very top of the alcove opening. Hang a pair of beautiful, heavy, blackout-lined curtains (linen or velvet look wonderful). During the day, you can tie these back with a stylish tassel, opening up the space. At sleep times, you pull them shut, instantly transforming the alcove into a dark, cozy, private sleep cave.
Mastering the Soundscape
Because the baby is in a high-traffic area, a standard white noise machine might not be enough. You need continuous, deep-frequency sound to mask the sharp noises of footsteps or older siblings. Look for a sound machine that offers pink noise or brown noise, which have deeper, more rumbling frequencies than standard white noise. Place the sound machine on one of your floating shelves, between the crib and the open hallway, to act as a sonic barrier.
Lighting the Night
When you wake up to feed your baby in the middle of the night, turning on the overhead hallway light will instantly signal to your baby’s brain (and yours!) that it is time to wake up. You need a dedicated, low-wattage light source inside the nook. Look for a small, rechargeable tap-light that emits a warm amber or red light. Red light does not interfere with the production of melatonin (the sleep hormone), allowing both you and baby to stay in a drowsy, restful state during night feeds.
“Remember, mama: your baby doesn’t need total silence to sleep. In the womb, they were subjected to the constant, loud whooshing of your heartbeat and digestion—often as loud as a vacuum cleaner! A robust white noise machine in your hallway nook will feel like a comforting piece of home to them.”
Styling Your Nook: Paint, Peel-and-Stick Wallpaper, and Sisterly Touches
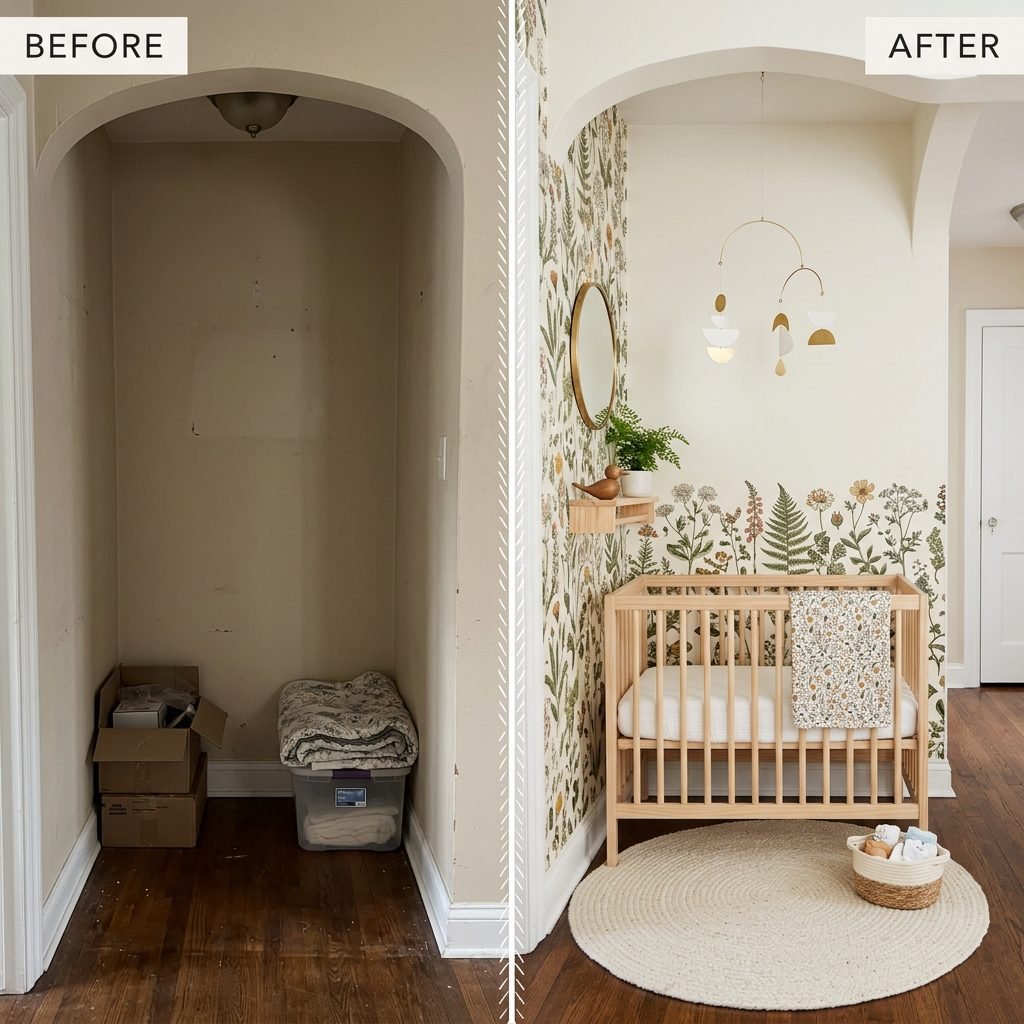
Just because this space is small and highly practical does not mean it can’t be absolutely breathtaking. This is your nesting phase, and you deserve a space that makes your heart flutter every time you walk past it. To make the alcove feel like an intentional room rather than just a crib shoved into a hallway, we need to use visual anchors.
Color Drenching or Wallpapering
One of the best interior design tricks for an alcove is to treat it as a distinct “jewel box.” You can achieve this by using peel-and-stick wallpaper on the back wall of the alcove. Choose a pattern that brings you joy—perhaps a soft vintage botanical, a gentle watercolor stripe, or a whimsical woodland scene. Because the square footage is so small, you will only need one or two rolls, making this a very budget-friendly upgrade!
Alternatively, try “color drenching.” Paint the back wall, the side walls, and even the ceiling of the alcove in one solid, soothing color. A soft sage green, a warm terracotta, or a deep, moody navy can instantly make the space feel like a cozy, deliberate architectural feature rather than an afterthought.
The Postpartum Care Corner
Mama, as you design this space for your baby, do not forget about yourself. Your body is doing something miraculous, and your recovery matters just as much as the baby’s comfort. Dedicate one small shelf or one basket on your pegboard entirely to your postpartum needs. Keep a beautiful water bottle, a few of your favorite protein bars or lactation cookies, some nipple cream, and a spare phone charger right there in the nook. When you are standing in the hallway at 3 AM swaying your sweet baby back to sleep, you will be so grateful to have a sip of water and a snack within arm’s reach.
Final Touches
Add a small, washable rug under the front legs of the mini crib to add texture and warmth to the hallway floor. Hang a small, lightweight mobile from the ceiling using a simple command hook. These tiny touches elevate the space from a “storage closet” to a true nursery nook.
Conclusion
Oh, mama, look at what you have created! You took a blank, overlooked hallway alcove and transformed it into a masterpiece of love, efficiency, and warmth. You have proven that you don’t need a sprawling estate to provide a beautiful, safe, and deeply comforting environment for your little one. Nesting isn’t about how much money you spend or how much space you have; it is about the intention, the care, and the fierce love you are already pouring into your baby’s life.
As you fold those tiny onesies and arrange the diapers in your new vertical storage baskets, take a moment to place your hands on your belly or hold your newborn close, and feel proud of yourself. You are resourceful, you are creative, and you are going to be an absolutely incredible mother. This cozy little nook is just the beginning of the beautiful life you are building together. Sleep well, sweet baby, and rest easy, mama. You’ve got this.