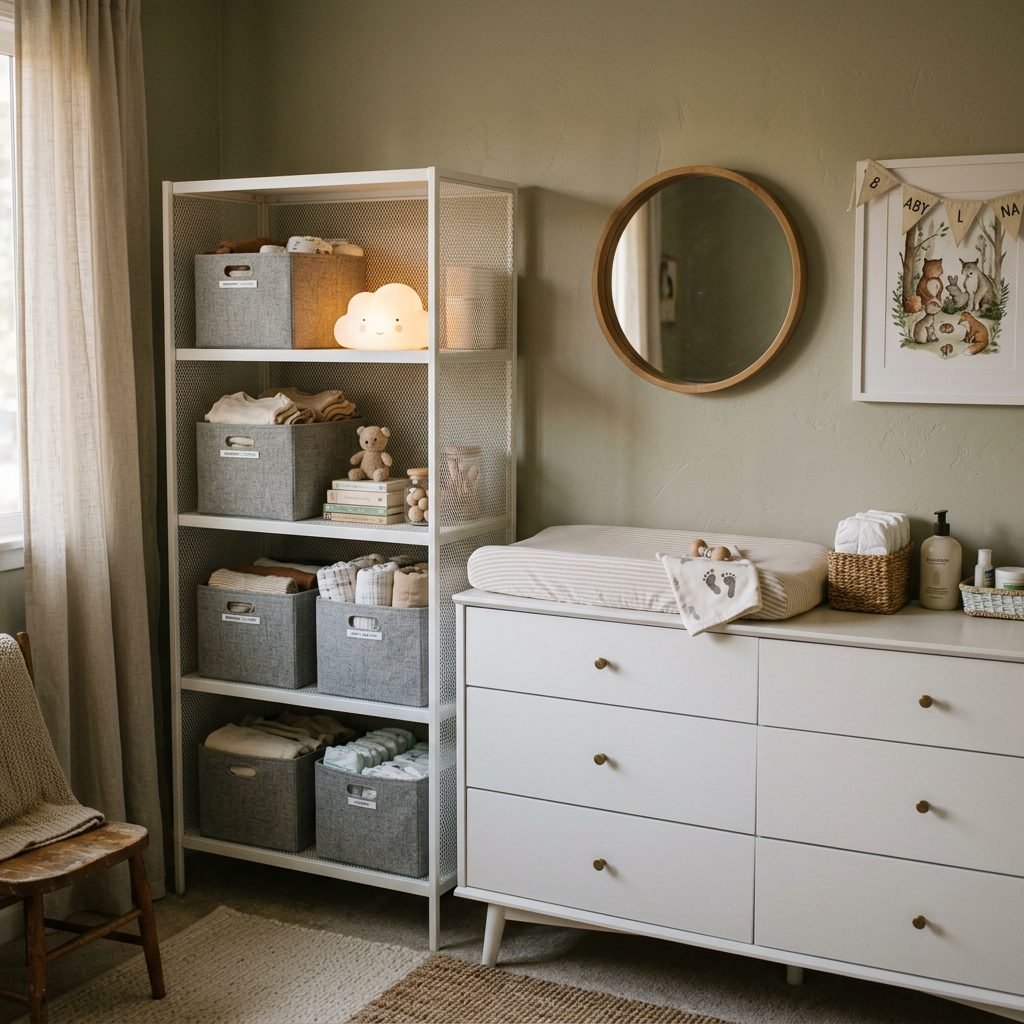
The $40 IKEA Baggebo Hack to Create the Ultimate Compact Changing Table Station
Hello, beautiful mama. If you are currently standing in the middle of a tiny bedroom, an apartment, or a shared living space, looking at a pile of baby clothes and wondering, ‘Where on earth is all of this going to go?’—take a deep, cleansing breath. You are not alone, and I promise you, we are going to figure this out together.
As a doula and postpartum nurse, I have walked into hundreds of homes to help families navigate those overwhelming first few weeks. One of the most common stressors I see is the pressure to have a massive, magazine-perfect nursery. Society tells us we need a sprawling, six-drawer wooden dresser topped with a plush changing pad, surrounded by acres of floor space. But the reality? Many of us are nesting in cozy apartments, converting a home office into a nursery, or setting up a baby corner right in our own master bedroom.
You do not need a massive room to be a wonderful mother, and you certainly do not need to spend hundreds of dollars on bulky furniture to have a highly functional, beautifully organized space. What you need is a command center. You need a setup that honors your healing postpartum body, keeps your baby safe, and prevents you from frantically searching for a diaper wipe at 3:00 AM while running on two hours of sleep.
Enter the hero of our small-space story: the humble, wildly affordable IKEA Baggebo metal shelving unit. By utilizing vertical space and its unique mesh siding, we are going to create the ultimate ‘sidecar’ changing station hack for under $40. This setup will sit flush next to your crib, bassinet, or a small dresser, ensuring every single cream, diaper, and burp cloth is exactly an arm’s reach away. Grab a cup of red raspberry leaf tea, get cozy, and let’s build your dream compact changing station.
The Small Space Dilemma & Postpartum Ergonomics

Before we dive into the nuts and bolts of the hack, we need to talk about your body. The fourth trimester is a period of intense physical healing. Whether you are recovering from a vaginal delivery with perineal tearing, or managing the deep abdominal healing of a Cesarean section, your mobility will be restricted. The repetitive motions of bending, twisting, and reaching can place unnecessary strain on your healing pelvic floor and abdominal wall.
Why Ergonomics Matter More Than Aesthetics
When designing a changing station, many parents prioritize how it looks over how it functions. But when you are changing up to twelve diapers a day, ergonomics are everything. A traditional changing table setup often requires you to step away or bend down to open heavy dresser drawers. In a small space, opening a drawer might even mean stepping backward into a wall or a crib.
“Your healing body needs a command center, not an obstacle course. Everything you need to care for your baby should be accessible without you ever having to take a hand off your little one, bend your knees, or twist your spine.”
The IKEA Baggebo metal shelving unit is a towering beacon of postpartum ergonomics. Standing at about 45 inches tall with four open shelves and mesh walls, it acts as a vertical ‘sidecar’ to whatever surface you are using to change your baby. Because it has no doors or drawers to pull open, you can grab a fresh diaper or a tube of rash cream with one hand—or even just two fingers—while your other hand remains safely on your baby’s tummy.
The $40 Baggebo “Sidecar” Blueprint & Budget Breakdown
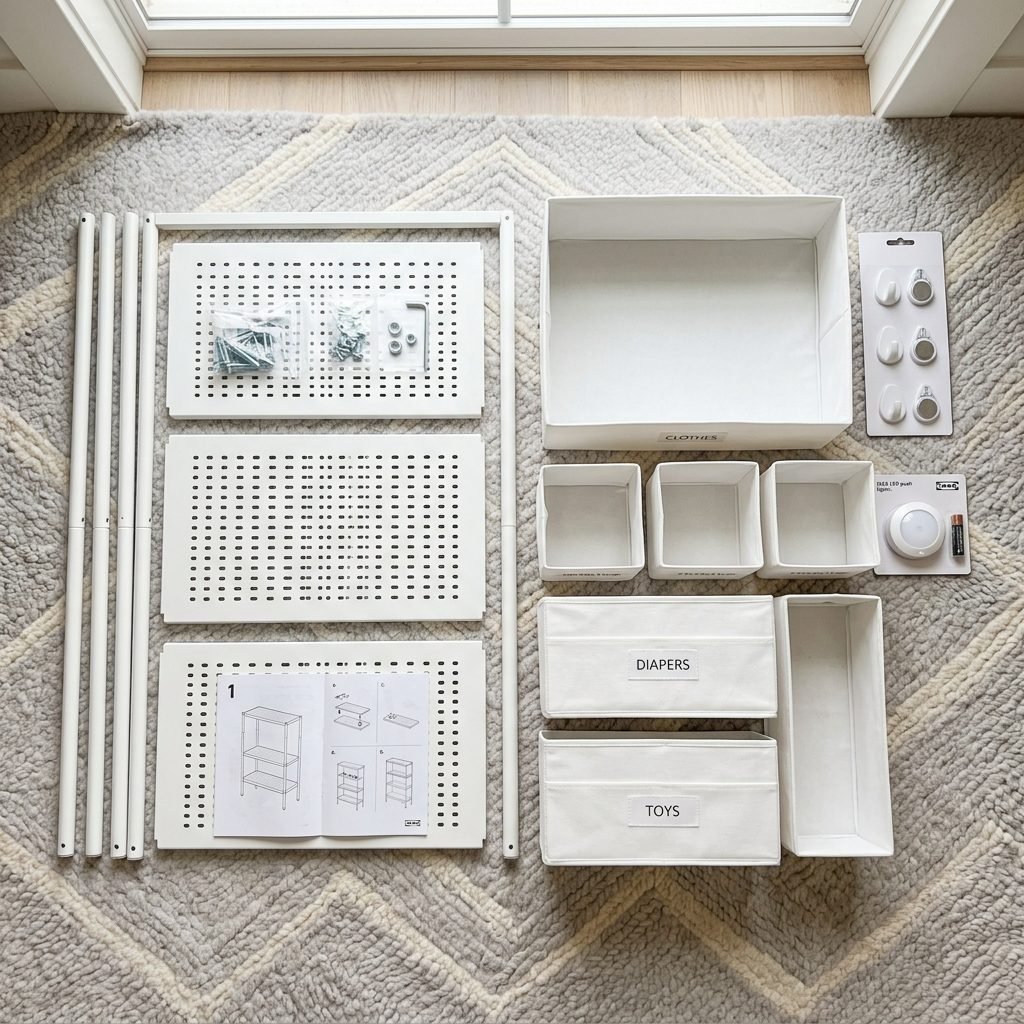
Let’s get down to the practical details. The beauty of this hack lies in its incredible affordability and modularity. The Baggebo metal shelving unit itself retails for around $19.99 (prices may vary slightly by region). This leaves us with a generous $20 budget to outfit the station with the organizational accessories that will make it sing.
Your Complete Shopping List
To execute this hack perfectly, you will need to gather a few specific items. The goal is to utilize the open shelves for bulk storage and the mesh side panels for hanging immediate necessities. Here is your exact shopping list and budget breakdown.
| Item Description | Purpose in the Hack | Estimated Cost |
|---|---|---|
| IKEA Baggebo Shelving Unit (Metal) | The core vertical structure and main shelving. | $19.99 |
| IKEA SKUBB Box (Set of 6) | Fabric bins to corral diapers, clothes, and burp cloths neatly on the shelves. | $7.99 |
| Magnetic Hooks (Pack of 4) | To attach to the metal frame for hanging wet bags, pacifiers, or trash bags. | $5.00 |
| SUNNERSTA Containers (x2) | Small plastic cups that clip onto the mesh sides to hold creams, thermometers, and nail clippers. | $1.98 |
| Battery-Operated Push Light | A soft, warm light to stick under the top shelf for gentle 3 AM illumination. | $5.00 |
| Total Investment | A fully customized, ergonomic command center. | $39.96 |
With these supplies in hand, you are ready to transform a basic piece of flat-pack furniture into a highly specialized maternal wellness tool. Let’s move on to the assembly.
Step-by-Step: Assembling and Securing Your Baggebo Station
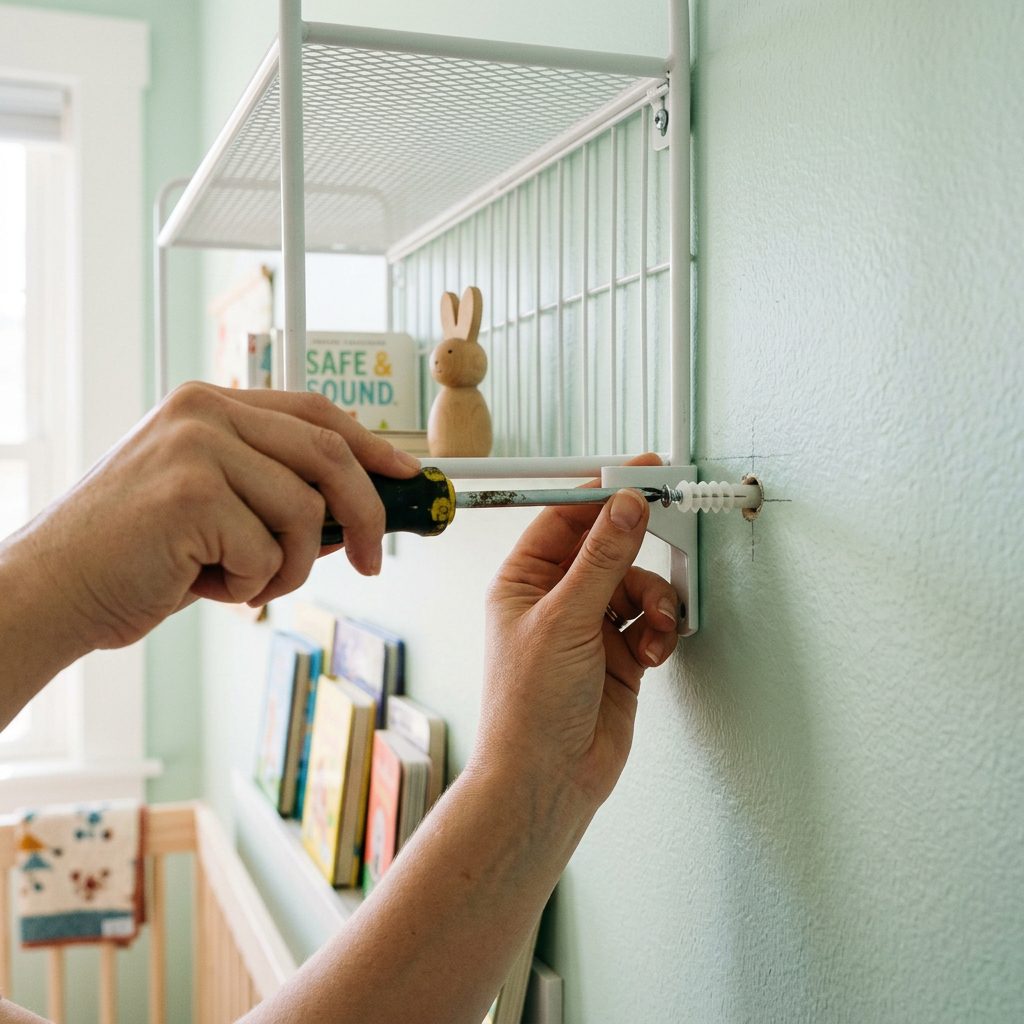
Assembly time! If you are heavily pregnant or currently in your postpartum recovery window, please enlist your partner, a friend, or a family member to do the physical building. Your only job right now is to point, direct, and hydrate.
The Assembly Process
- Build the Frame: Follow the standard IKEA instructions to assemble the metal frame. It is incredibly lightweight and usually takes less than 15 minutes to screw together.
- Position the Unit: Place the Baggebo unit directly to the left or right of your changing surface (whether that is a small dresser, a sturdy desk, or a mini-crib with a changing topper). Ensure the open shelves are facing you, and one of the mesh sides is easily accessible.
- Anchor to the Wall (CRITICAL STEP): This is where my doula and nurse voice gets very serious. You must anchor this unit to the wall. Even though it is lightweight, once it is loaded with supplies, a crawling baby or a pulling toddler could easily tip it over. Use the provided wall anchoring hardware and secure it into a wall stud.
- Install the Lighting: Take your battery-operated push light and use strong double-sided adhesive to attach it to the underside of the top shelf. This ensures the light shines downward onto the changing pad, illuminating the diaper zone without shining directly into your baby’s sleepy eyes.
- Attach the Side Accessories: Clip your SUNNERSTA containers onto the mesh siding at waist height. Place your magnetic hooks higher up on the frame to hang your wet bag or a small laundry tote.
“Safety Reminder: A changing station is only as good as its safety profile. Never leave your baby unattended on a changing surface, not even for a second. With the Baggebo anchored right beside you, you will never have to.”
Organizing the Tiers: A Postpartum Nurse’s Guide to Efficiency
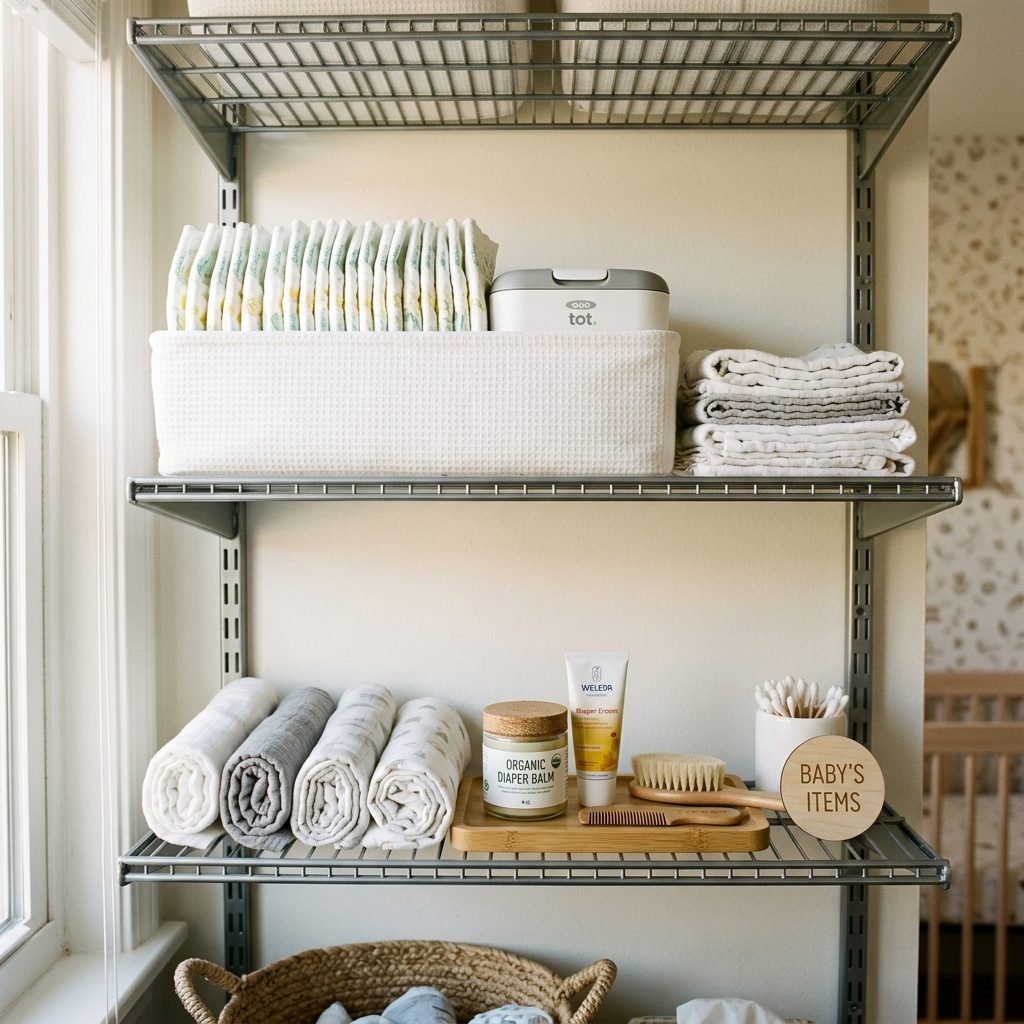
Now comes the fun part: the organization. When you are operating on a sleep deficit, your brain relies on muscle memory. We need to organize these four tiers so intuitively that you could change a blowout in the pitch dark with your eyes closed. We will use the SKUBB fabric boxes to compartmentalize each level.
Tier 1: The Immediate Emergency Zone (Top Shelf)
This shelf is your lifeline. It should sit right at arm’s level. Here is what belongs in the top SKUBB boxes:
- Diapers: Take them out of the plastic packaging and line them up vertically so you can grab one instantly.
- Wipes: Keep your wipe dispenser here. Pro-tip: If you are using a wipe warmer, ensure the cord is safely tucked behind the Baggebo unit.
- Hand Sanitizer: For you, immediately after the diaper is secured.
Tier 2: The Apothecary and Grooming Level
This shelf is for the items you need frequently, but perhaps not for every single diaper change. Use smaller SKUBB boxes or the clip-on side containers for these.
- Diaper Creams & Balms: Keep a spatula applicator here to keep your fingers clean.
- Nail Clippers & Emery Boards: The best time to file a newborn’s nails is while they are distracted on the changing pad.
- Thermometer & Saline Drops: Essential for when you suspect a little fever or a stuffy nose.
Tier 3: The Textile Backup Zone
Spit-ups and blowouts happen. When they do, you do not want to be digging through a closet across the room.
- Burp Cloths: Roll them tightly (KonMari style) so you can see exactly how many you have left.
- Fresh Onesies: Keep 3-4 plain, neutral onesies here for emergency middle-of-the-night wardrobe changes.
- Swaddles: Keep one or two clean swaddles ready to wrap baby right back up for sleep.
Tier 4: The Overstock Vault (Bottom Shelf)
Since bending down is exactly what we are trying to avoid, the bottom shelf is reserved for items you only need to access once a week. This is where you store your unopened sleeves of diapers, bulk packages of wipes, and extra trash bags for your diaper pail.
Sensory Play & Distractions for the “Wiggly Alligator” Phase
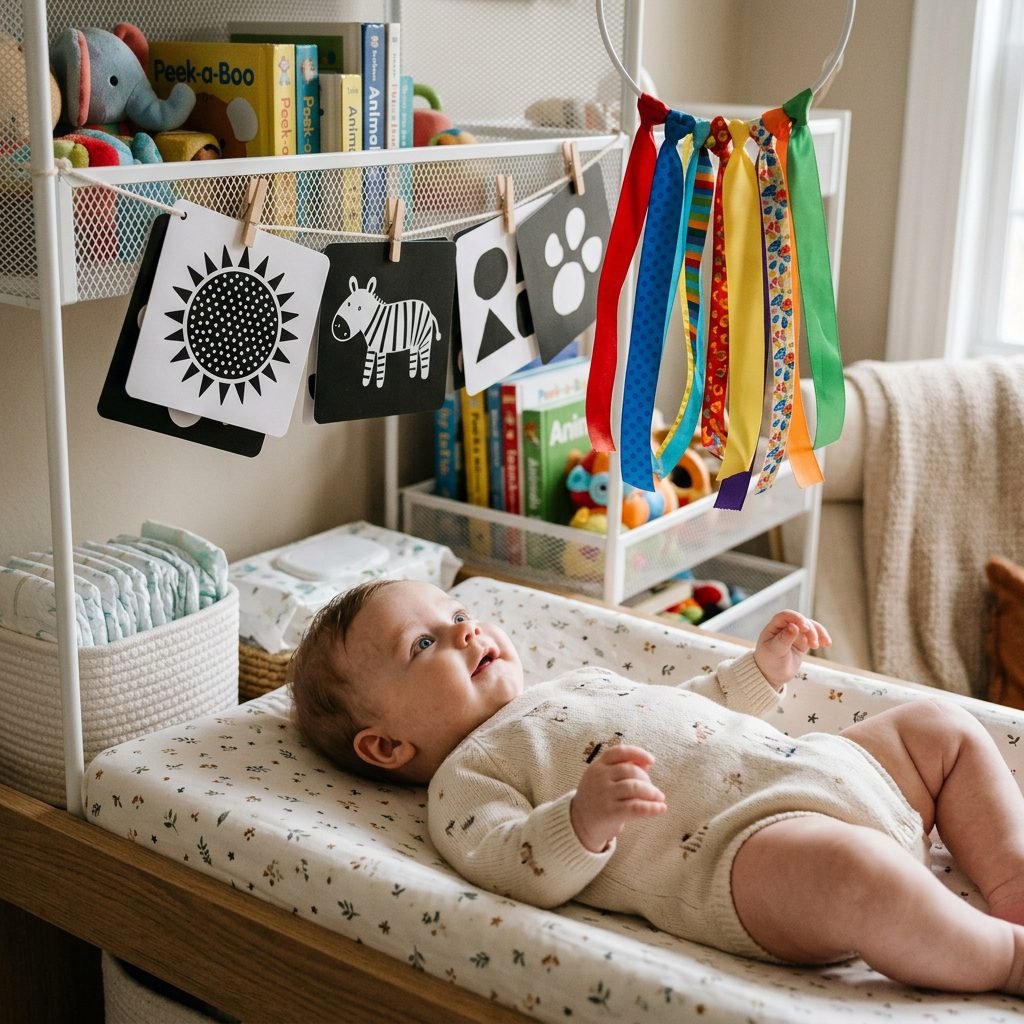
As your sweet newborn grows into a robust, curious infant (usually around the 4-to-6-month mark), diaper changes can suddenly feel like you are wrestling a tiny, slippery alligator. They want to roll, they want to grab, and they definitely do not want to lie still. This is where the mesh siding of the IKEA Baggebo becomes a secret weapon for infant brain development and distraction.
Hacking the Mesh for Sensory Engagement
Because the sides of the Baggebo are made of a metal grid, it is the perfect canvas for creating a vertical sensory board right next to your baby’s head. By keeping their eyes and hands engaged upwards and sideways, you keep them happily on their back.
- High-Contrast Art: During the newborn phase, clip black-and-white high-contrast art cards directly to the mesh using small binder clips. Your baby’s developing eyesight will be captivated by the bold geometric patterns.
- Tactile Ribbons: Tie brightly colored, textured ribbons through the mesh holes. As your baby gains motor control, they will love reaching out to stroke the satin, grosgrain, and velvet textures.
- Magnetic Toys: Since the unit is metal, you can stick large, baby-safe magnetic toys or mirrors right onto the side. A baby looking at their own reflection is a baby who is perfectly still for a diaper change!
By integrating these simple, low-cost sensory hacks, you are turning a mundane care task into an opportunity for cognitive development. You are engaging their visual tracking, encouraging reaching and grasping, and most importantly, saving your own sanity during a messy diaper change.
Future-Proofing: Life Beyond the Diaper Years
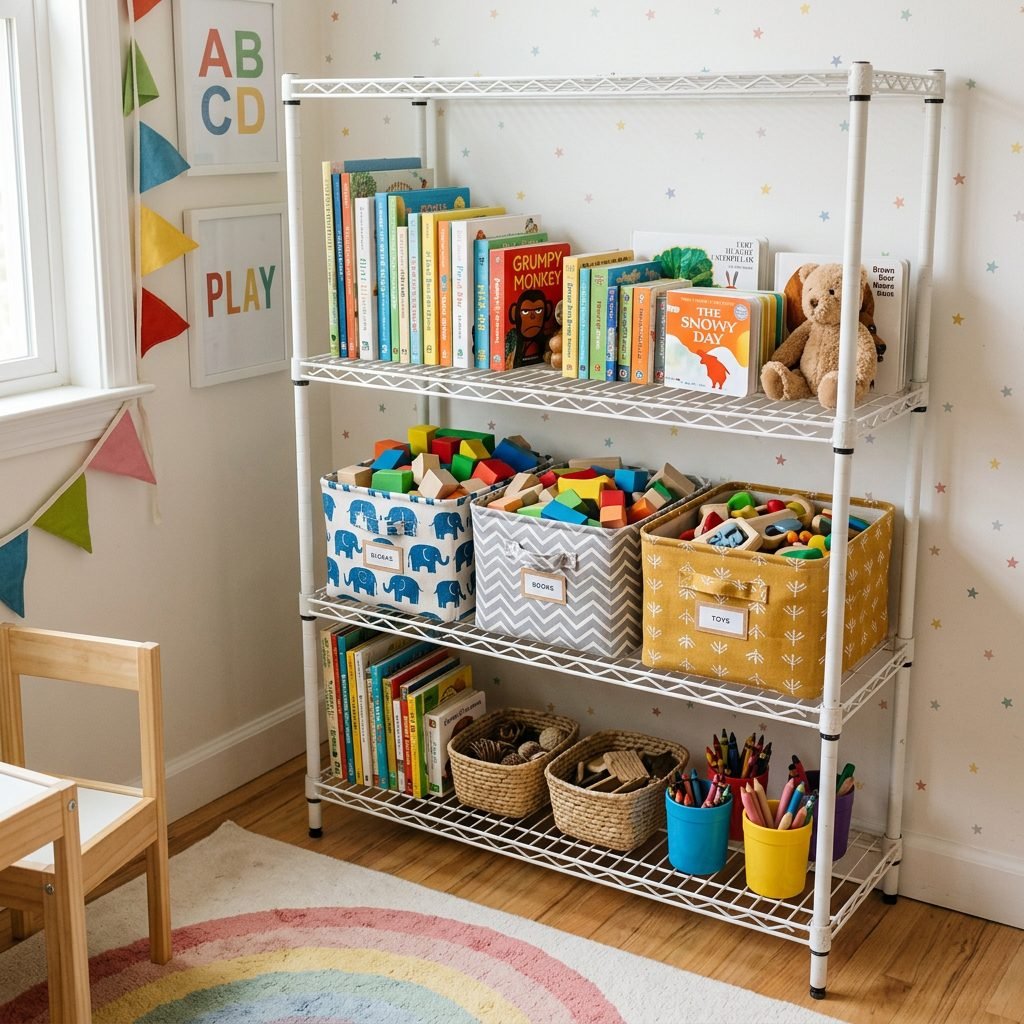
One of the most frustrating aspects of traditional baby furniture is its short lifespan. A bulky wooden changing table with a built-in topper is incredibly difficult to repurpose once your child is potty trained. It often ends up sitting in a garage or being sold for a fraction of its price. The Baggebo hack, however, grows effortlessly with your child.
Transitioning to a Toddler Command Center
When the days of diapers and rash creams are finally behind you, this $40 investment simply transforms into its next phase of life. Because it is securely anchored to the wall, it becomes a safe, accessible storage unit for a growing toddler.
- The Art Cart: Remove the diapers and replace them with crayons, washable markers, construction paper, and playdough. The side containers that once held diaper cream are now perfect for holding paintbrushes.
- The Montessori Bookshelf: Use the shelves to display board books facing outward. The open design allows your toddler to easily see and select their bedtime stories, fostering independence and a love for reading.
- The Toy Rotation Station: Keep open-ended toys, like wooden blocks or magnetic tiles, in the SKUBB boxes. You can easily rotate the boxes down to the lower shelves when it is time to play, and move them up high when it is time to clean up.
This little metal shelf will serve your family faithfully from the very first newborn blowout all the way through the chaotic, colorful toddler years.
Final Thoughts for the Nesting Mama
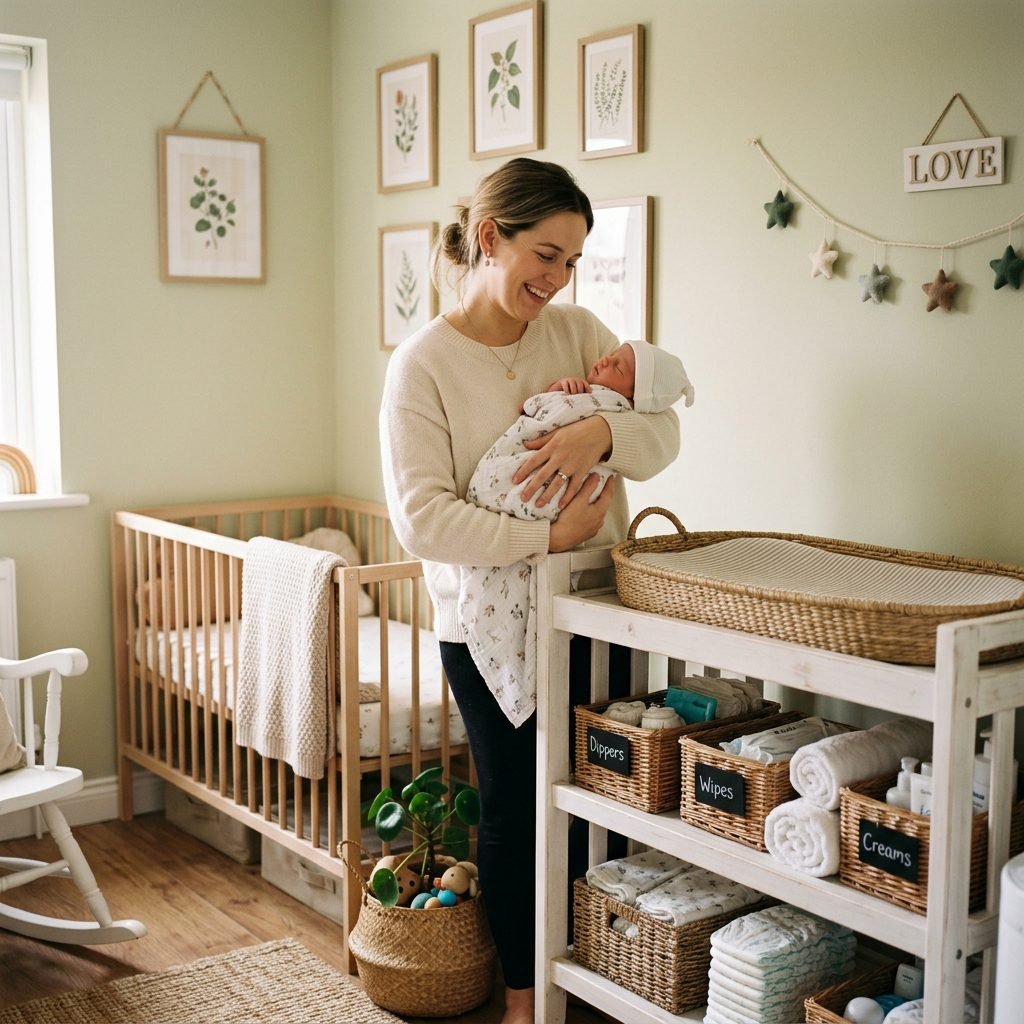
As you stand in your nursery, whether it is a sprawling room or a tiny corner of your apartment, I want you to remember this: your baby does not care about square footage. Your baby does not care if their changing table cost $40 or $4,000. All your baby cares about is the warmth of your hands, the sound of your voice, and the love that fills the space.
By choosing clever, budget-friendly hacks like the IKEA Baggebo station, you are doing more than just saving money and space. You are creating an environment that supports your physical recovery, reduces your mental load, and allows you to focus your energy on what truly matters—bonding with your beautiful new baby.
You are doing an incredible job, mama. Trust your instincts, give yourself grace during this transition, and enjoy the profound, messy, beautiful magic of the fourth trimester. You’ve got this.
Conclusion
Creating a functional, safe, and beautiful space for your baby doesn’t require a huge budget or endless square footage. With a little creativity, an understanding of postpartum ergonomics, and a $40 IKEA Baggebo unit, you can build a compact changing station that works perfectly for your family. Remember, the most important element in your baby’s nursery is you. Be gentle with yourself as you heal, celebrate the small victories of organization, and cherish these fleeting, beautiful early days.
Medical & Safety Disclaimer: The information provided in this article is for educational and organizational purposes only. Always ensure any furniture, especially shelving units, are securely anchored to wall studs using appropriate hardware to prevent tipping. Never leave a baby unattended on a changing surface, even for a moment. If you are experiencing severe physical pain during your postpartum recovery, please consult with your OBGYN, midwife, or a pelvic floor physical therapist.