10 Beautiful and Clever Ways to Organize Baby Bows and Headbands on Your Nursery Wall
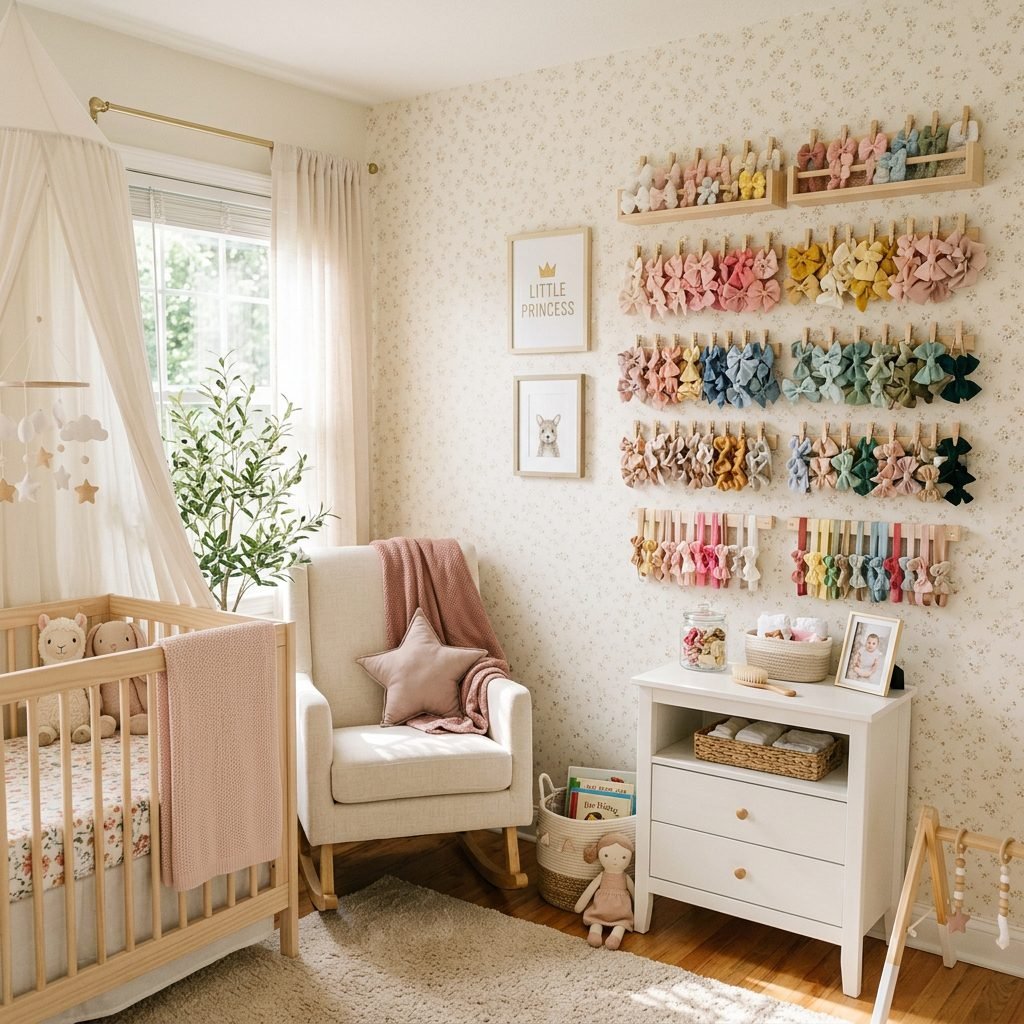
Hello, sweet mama! If you are reading this, you are likely in the beautiful, sometimes overwhelming, and incredibly exciting phase of nesting. As a doula and a fellow mother who has spent countless hours helping families prepare their homes for a new arrival, I see you. I know the intense urge to fold every tiny onesie, sanitize every bottle, and create a perfectly serene space for your little one. And if you are expecting a baby girl, or simply love accessorizing your sweet baby, you have probably realized one undeniable truth: baby bows and headbands multiply like magic.
One day you have three sweet little nylon bows, and the next, you have a overflowing drawer of oversized velvet bows, delicate floral headbands, and tiny alligator clips that seem to get tangled no matter what you do. When you are in the thick of postpartum recovery, functioning on very little sleep, the last thing you want to do is dig through a chaotic drawer to find a matching accessory for your baby’s outfit. Organization is not just about aesthetics; it is about creating functional, stress-free systems that support your mental health during the fourth trimester.
That is exactly why utilizing your nursery wall space is an absolute game-changer. Wall storage frees up precious dresser drawer real estate for essentials like diapers, burp cloths, and swaddles, while simultaneously turning your baby’s adorable accessories into a beautiful piece of custom room decor. Today, we are going to walk through 10 beautiful, clever, and practical ways to organize baby bows and headbands on your nursery wall. Take a deep breath, grab a cup of pregnancy-safe red raspberry leaf tea, and let’s design a system that works perfectly for your space, your budget, and your maternal peace of mind.
“Remember, mama: the goal of nursery organization is not Pinterest perfection. It is to create a peaceful environment that supports you, so you can focus on bonding with your beautiful baby.”
1. The Boho-Chic Macrame Bow Holder
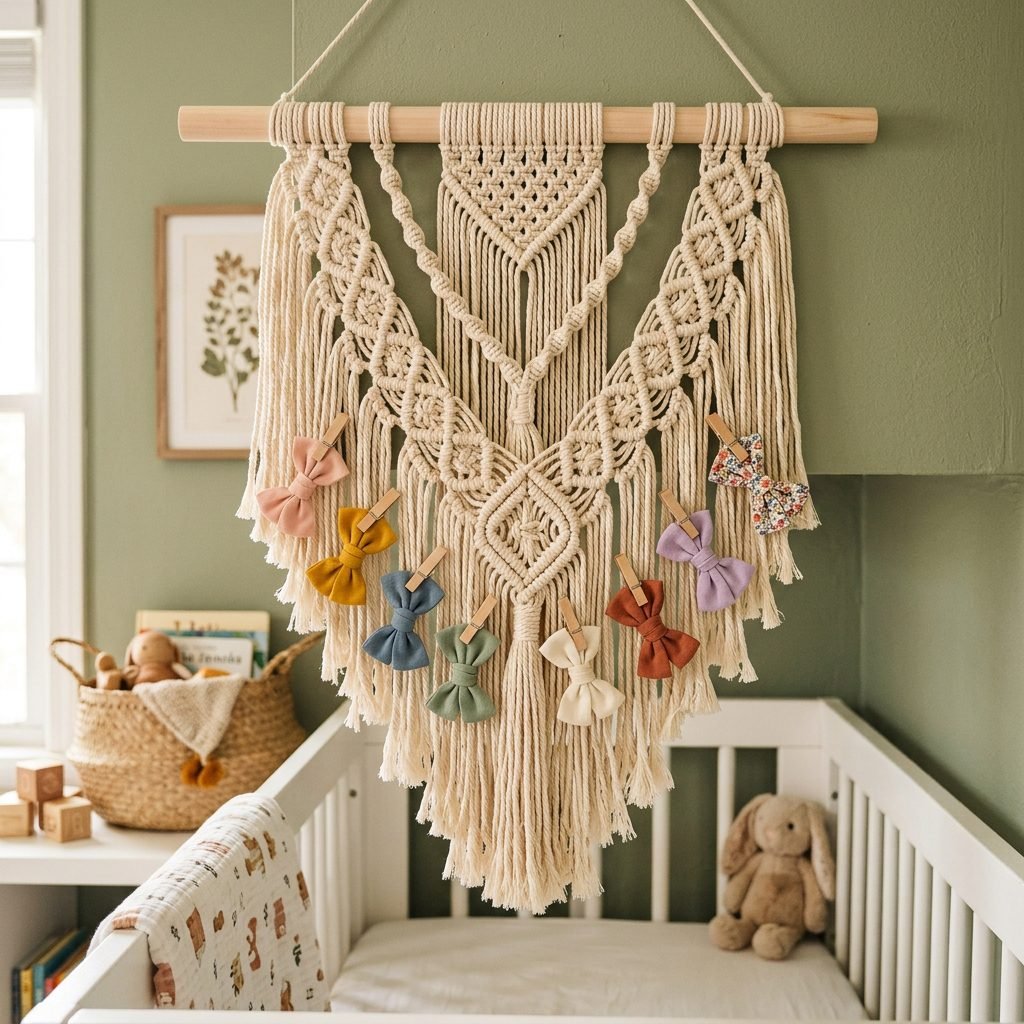
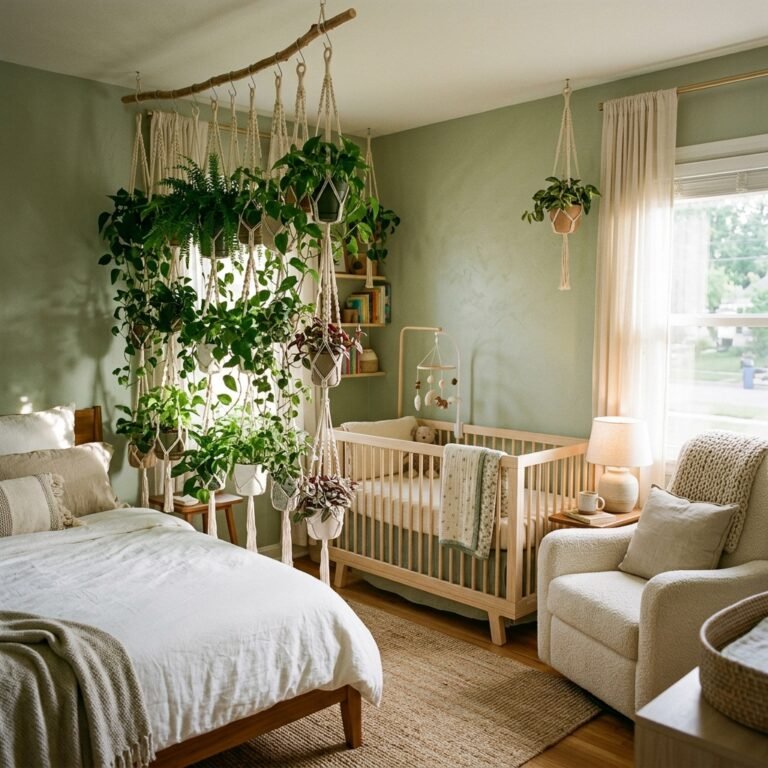
If you are designing a nursery with a bohemian, earthy, or neutral aesthetic, a macrame bow holder is an absolute dream. These beautiful woven pieces add incredible texture and warmth to a nursery wall while providing ample hanging space for both clips and nylon headbands. The long, cascading fringes of a macrame wall hanging serve as the perfect anchor points for alligator clips, while small “S” hooks can be added to the wooden dowel to hold stretchy headbands.
Why We Love It
Macrame brings a soft, tactile element to the room that is visually soothing. It is also incredibly versatile. As your baby grows and perhaps transitions out of wearing bows, the macrame piece can remain on the wall as a standalone piece of gorgeous art. It is a long-term investment in your room’s design.
Materials Needed
- 1 wooden dowel (approximately 12 to 18 inches long).
- 100% natural cotton macrame cord (3mm or 4mm thickness).
- Small wooden rings or “S” hooks.
- A wall hook for hanging.
Step-by-Step Installation
- Secure your wooden dowel to a flat workspace. If you are DIYing, cut 10 to 15 strands of macrame cord, each about 4 feet long.
- Fold each cord in half and attach it to the dowel using a simple lark’s head knot. Pull tight to secure.
- Leave the cords hanging straight down, or braid them slightly for added texture. Trim the bottoms straight across or in a gentle V-shape.
- Attach a hanging string to both ends of the dowel.
- Mount a secure hook on your nursery wall, ensuring it is anchored into a stud if possible, and hang your masterpiece. Simply clip the bows directly onto the cotton strands!
2. Invisible Acrylic Floating Bookshelves
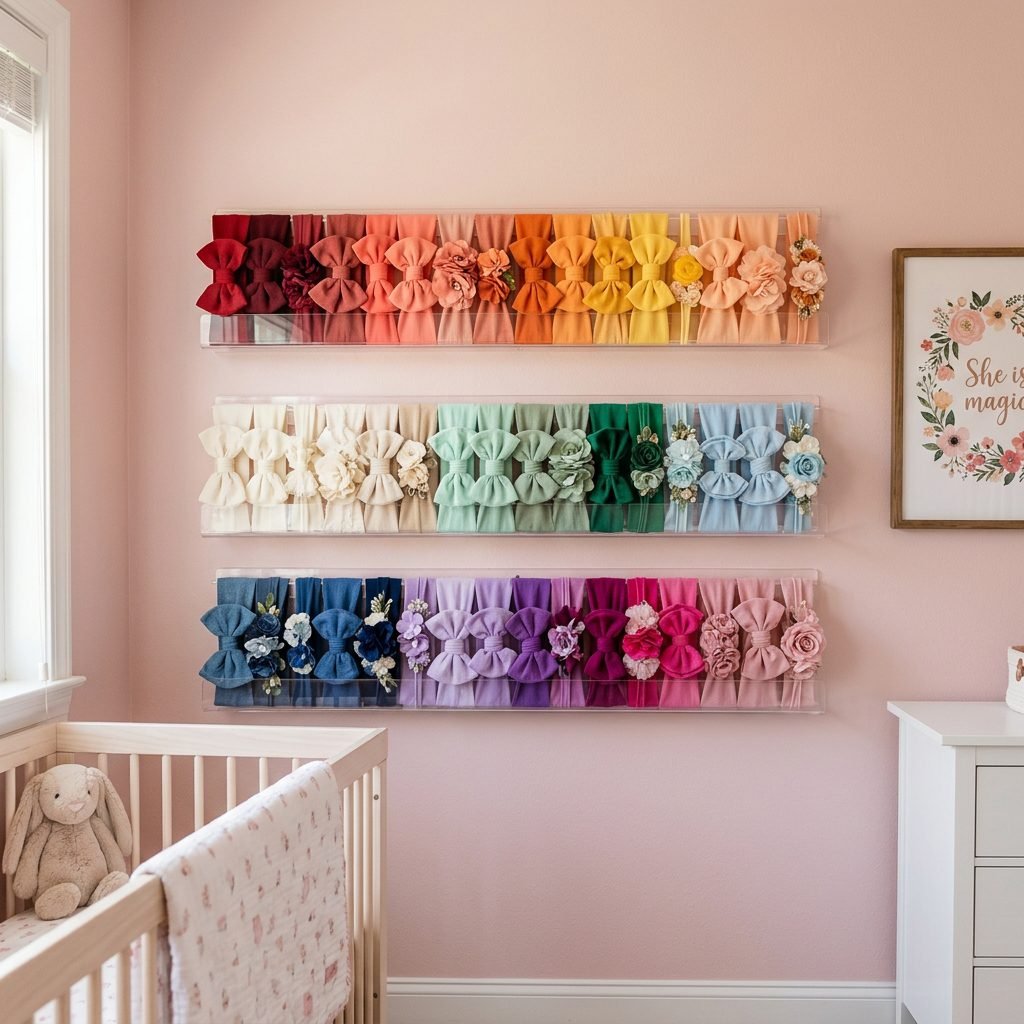
For the modern, minimalist mama, clear acrylic floating shelves are a brilliant, sleek solution. Originally designed to hold children’s books facing outward, these “invisible” shelves are the perfect depth for displaying thicker, structured headbands, floral crowns, and oversized bows that might lose their shape if hung or squished into a drawer. The transparent nature of the acrylic means the shelves visually disappear, making your baby’s beautiful accessories the true focal point of the wall.
Why We Love It
This method is incredibly easy to maintain. When you are holding a squirmy baby in one arm, you can easily grab a headband off the shelf with your free hand. There are no clips to pinch or strings to untangle. Plus, it keeps delicate, structured pieces completely safe from being crushed.
Styling Tip for the Minimalist Mama
Organize the headbands by color to create a stunning rainbow gradient effect on the wall. Not only is this visually pleasing, but it also makes finding the perfect color-coordinated accessory for an outfit an absolute breeze during those blurry, sleep-deprived postpartum mornings.
Installation Guide
- Purchase a set of 15-inch or 24-inch clear acrylic floating shelves.
- Use a level and a pencil to mark your drill holes on the wall. Ensure you leave at least 8 to 10 inches of vertical space between each shelf.
- Drill pilot holes and insert drywall anchors. Never skip the anchors—safety is our top priority in a nursery!
- Screw the shelves into place and arrange your headbands so they lean gently against the back lip of the shelf.
3. Upcycled Vintage Picture Frames with Chicken Wire or Ribbon
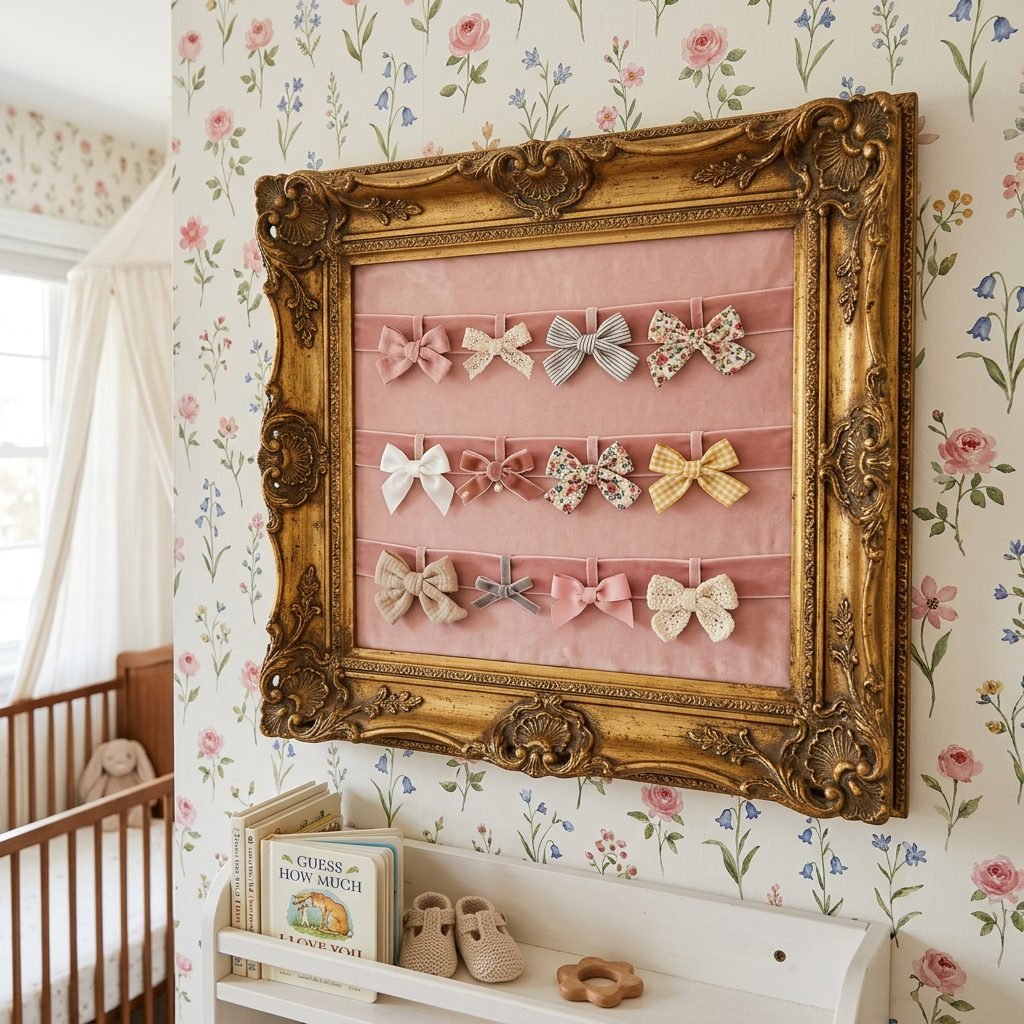
If you love a vintage, shabby-chic, or grandmillennial style, upcycling an ornate picture frame is a stunning and deeply personal way to organize bows. This DIY project is a wonderful way to spend an afternoon during your second trimester when your energy levels are peaking. By removing the glass from an old frame and replacing it with either painted chicken wire or horizontal strips of velvet ribbon, you create a beautiful, framed “art piece” made entirely of your baby’s accessories.
Why We Love It
This method adds a touch of historical charm and elegance to the nursery. It is also highly customizable. You can paint the frame to perfectly match your crib or rocking chair, and you can size it exactly to fit an awkward, empty wall space that needs filling.
Materials Needed
- 1 large, ornate wooden picture frame (thrifted or antique).
- Sandpaper and baby-safe, non-toxic chalk paint.
- A roll of chicken wire OR 3 to 5 yards of thick velvet ribbon.
- A heavy-duty staple gun.
- Wire cutters (if using chicken wire).
Step-by-Step DIY
- Remove the glass and backing from your vintage frame. Sand the wood lightly and apply 2 coats of non-toxic chalk paint. Let it dry completely for 24 hours.
- Turn the frame face down. If using chicken wire, cut a piece slightly larger than the opening. If using ribbon, cut strips that stretch horizontally across the opening.
- Pull the wire or ribbon taut across the back of the frame and use your staple gun to secure it to the wood every 2 inches.
- Trim any excess wire or ribbon so it doesn’t scratch the wall.
- Mount the frame securely to the wall using heavy-duty D-rings. Clip your bows directly to the wire or ribbon!
4. The Ultimate IKEA Skadis Pegboard Hack
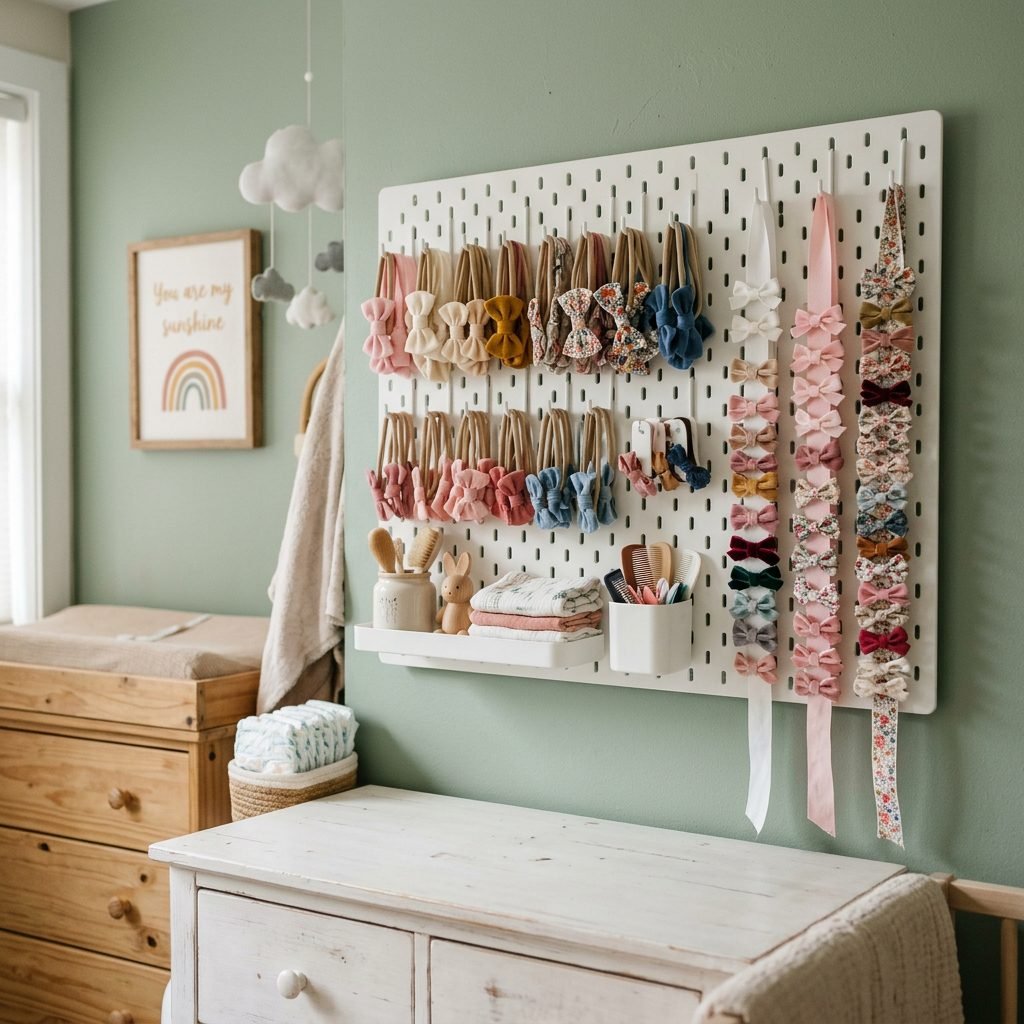
When it comes to ultimate nursery organization, the IKEA Skadis pegboard system is a legendary tool. As a professional organizer and doula, I constantly recommend this system to expecting parents because it can evolve with your child. A pegboard allows you to mix and match hooks, small bungee cords, and little acrylic cups. You can hang long ribbons for alligator clips, use small hooks for nylon headbands, and utilize the little cups for tiny hair elastics or pacifiers.
Why We Love It
The sheer adaptability is unmatched. As your baby’s accessory collection grows and changes, the pegboard changes with it. It is also incredibly space-efficient, making it perfect for smaller nurseries or for hanging on the back of a closet door if wall space is limited.
Maximizing Your Pegboard
To make the pegboard look less industrial and more “nursery-appropriate,” consider spray-painting the board in a soft pastel shade before mounting it. Soft blush, sage green, or warm terracotta can completely transform the look of the standard white board.
Installation Steps
- Wipe down the pegboard and apply 2 coats of baby-safe spray paint if desired. Allow to cure in a well-ventilated area for 48 hours.
- Use the included mounting rail to secure the system to your wall. Use a level to ensure perfection.
- Attach the Skadis hooks evenly across the board.
- Hang nylon headbands directly on the hooks. For clip-on bows, tie a 24-inch piece of yarn or ribbon to a top hook and let it dangle down, clipping the bows onto the ribbon.
5. Nature-Inspired Suspended Driftwood and Twine
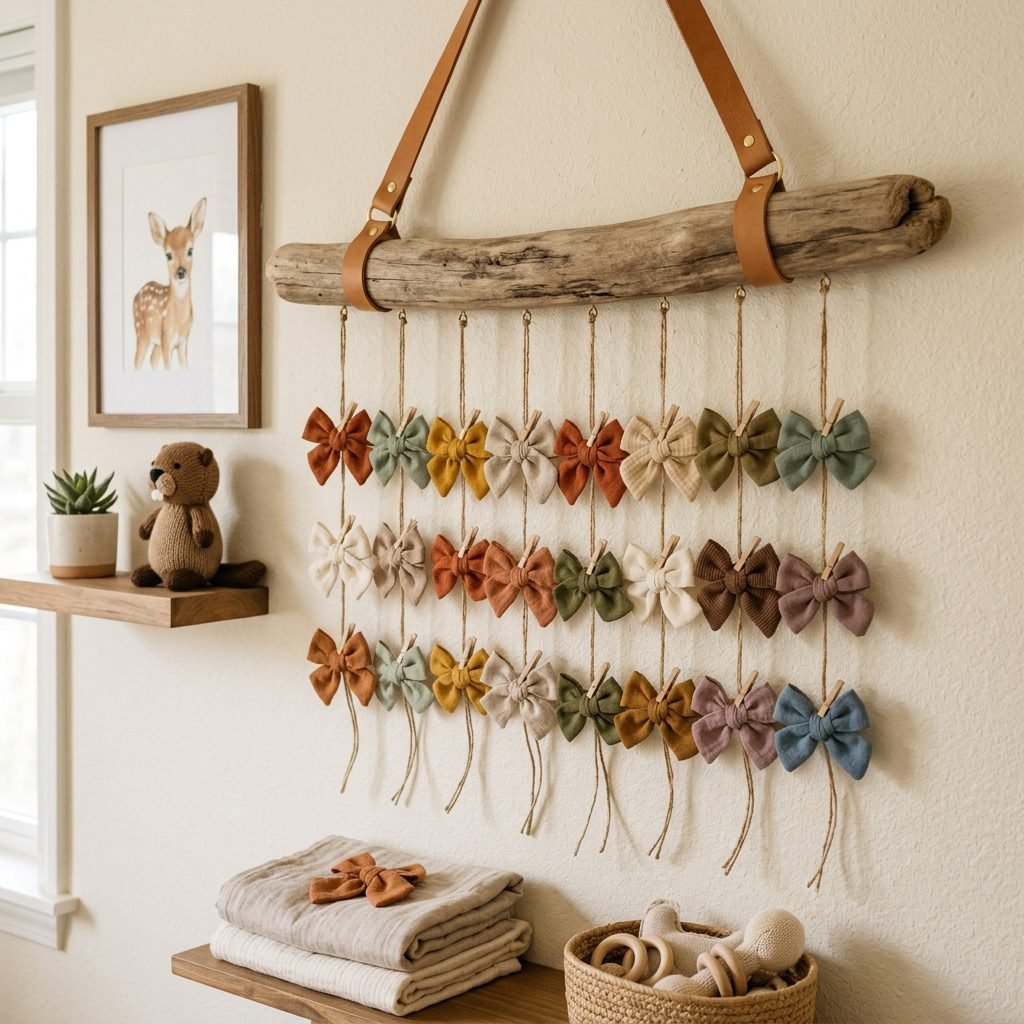
For families who feel most at peace in nature, bringing organic elements into the nursery is a wonderful way to promote a calming environment. A suspended driftwood organizer uses a beautiful, natural piece of found wood (or a store-bought branch) suspended by leather straps or thick twine. From the branch, you hang vertical strips of lace, twine, or thin leather, creating a rustic, woodland-inspired display for your little one’s bows.
Why We Love It
It is incredibly inexpensive, highly unique, and adds an organic, grounding element to the room. Postpartum anxiety can often be soothed by natural textures and elements that remind us of the outdoors. Plus, it is a wonderful way to incorporate a piece of wood found on a special babymoon beach trip or a meaningful hike.
Materials Needed
- 1 piece of cleaned, sanitized driftwood (approximately 20 inches long).
- Natural jute twine or faux leather cord.
- Scissors and a measuring tape.
- 2 wall hooks or leather mounting straps.
Step-by-Step DIY
- If you sourced the wood from nature, bake it in the oven at 200°F for 2 hours to ensure any pests or bacteria are eliminated. Let it cool completely.
- Cut 5 to 7 strands of twine or leather, each measuring about 36 inches long.
- Tie each strand securely around the driftwood, spacing them about 3 inches apart.
- Attach a hanging string to the top of the wood and mount it on the wall. Clip your bows down the vertical strands.
6. Vertical Velvet Scrunchie Towers for Nylon Headbands
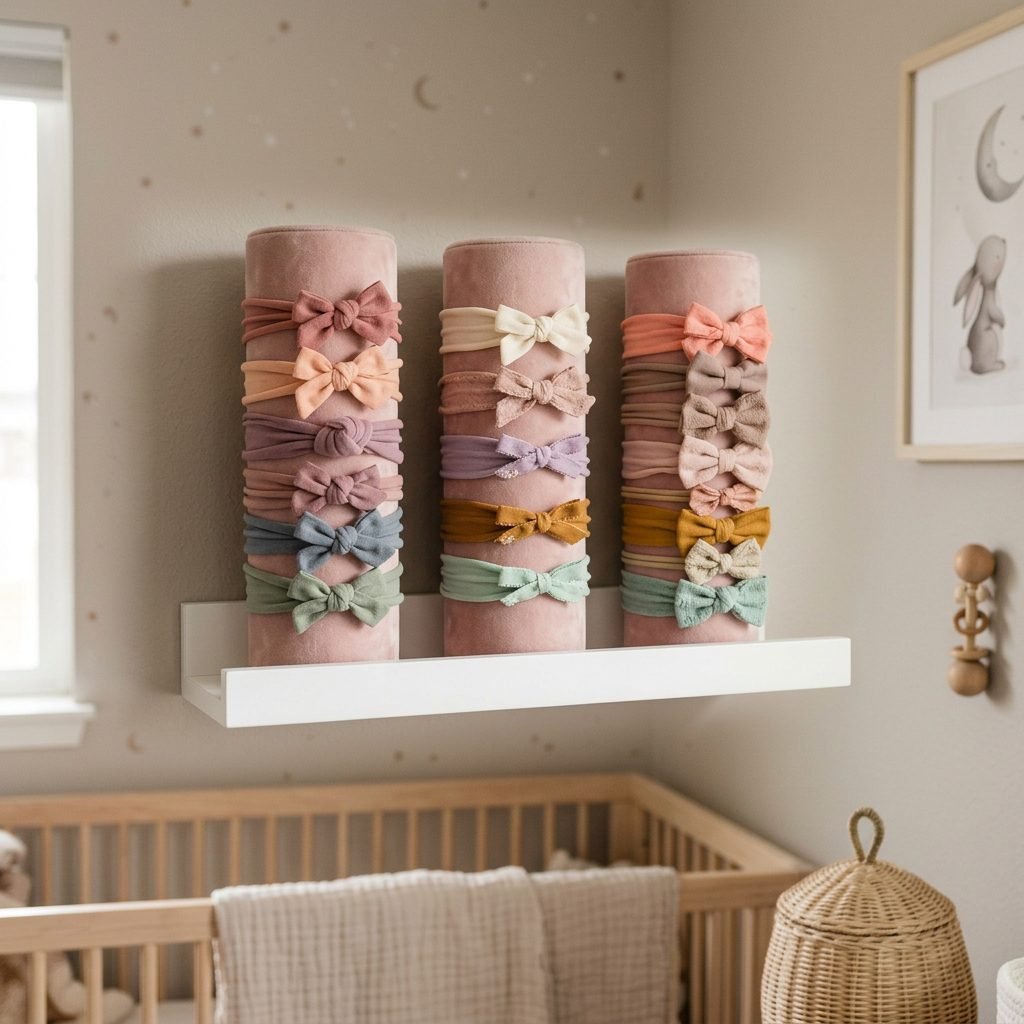
If your baby’s collection consists primarily of soft, stretchy nylon headbands rather than hard clips, you need a different type of storage solution. Enter the vertical velvet tower. Traditionally used by teens and adults to store scrunchies, these tall, cylindrical, velvet-covered stands can be cleverly adapted for nursery walls. By mounting a small, decorative floating shelf and placing two or three velvet towers on it, you create a luxurious, boutique-style display.
Why We Love It
Nylon headbands are notoriously difficult to store because they tangle easily and can lose their stretch if pulled too tightly. Slipping them over a soft, velvet cylinder keeps them perfectly shaped, untangled, and easily visible. The velvet material prevents them from sliding down, and it adds a touch of high-end elegance to the nursery decor.
Styling Tip
Group your headbands by season or style on different towers. Keep everyday solids on one tower, and special occasion florals or metallics on another. This makes dressing your baby in the morning a joyful, simple experience rather than a frustrating search.
Setup Guide
- Install a sturdy, narrow floating shelf (about 4 to 6 inches deep) securely on the wall using wall anchors.
- Purchase 2 to 3 velvet scrunchie holder towers (usually around 10 to 12 inches tall).
- Slide your baby’s nylon headbands gently over the top of the cylinders.
- Place the loaded towers onto the floating shelf. Ensure the shelf is mounted high enough to be out of reach of a crawling baby or toddler.
7. Tiered Ribbon Drop Organizers (The Wall Savior)
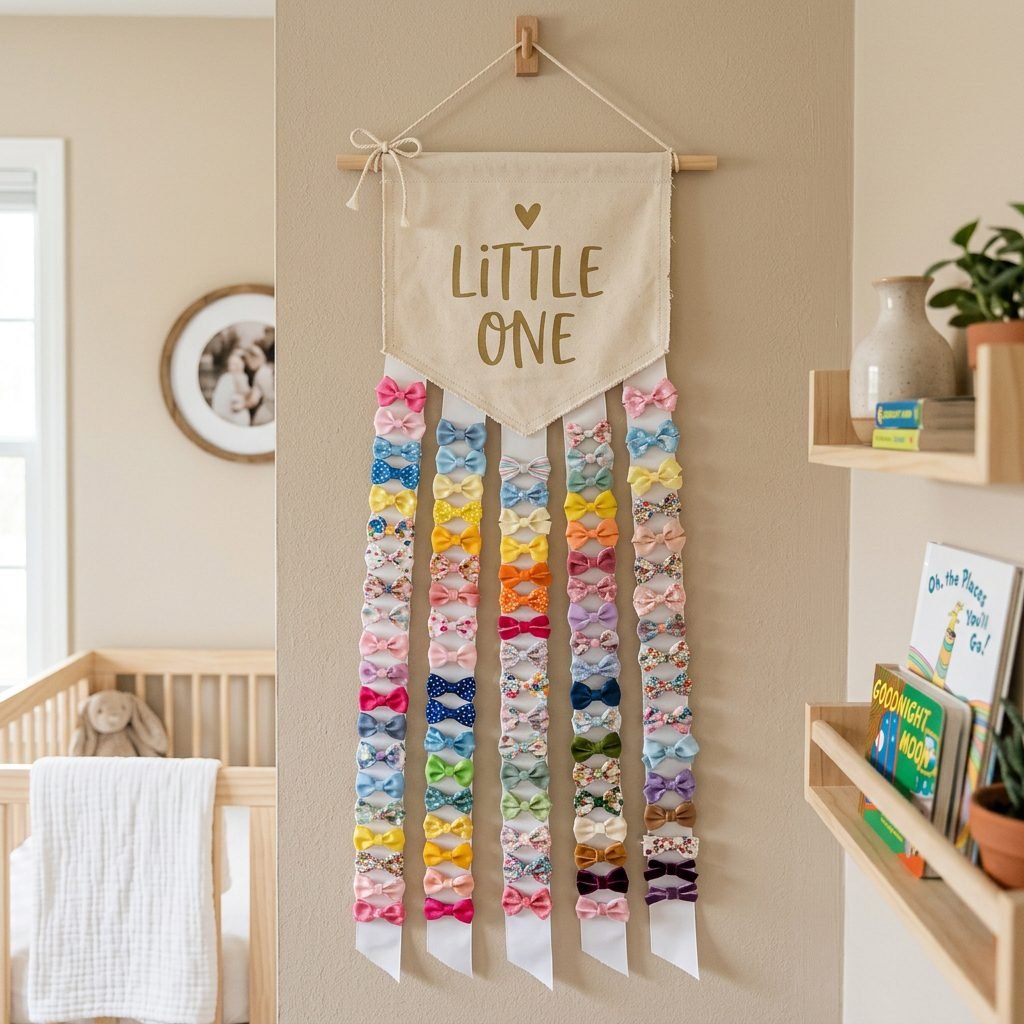
Sometimes, the simplest solutions are the most effective. A tiered ribbon drop organizer is essentially a horizontal piece of fabric, wood, or a canvas banner that features multiple long ribbons hanging vertically down the wall. This is arguably the most space-efficient method for storing hundreds of tiny alligator clip bows. It utilizes the vertical height of your walls, turning a narrow strip of empty wall space into a massive storage hub.
Why We Love It
Capacity! If you have been gifted an overwhelming number of bows at your baby shower, this is the solution for you. It is also incredibly lightweight, meaning it can be hung with a simple adhesive hook if you are renting your home or want to avoid drilling holes in the drywall.
Materials Needed
- 1 blank canvas pennant banner or a wooden embroidery hoop.
- 4 to 6 spools of high-quality grosgrain ribbon (1 inch thick).
- A hot glue gun or a sewing machine.
- Adhesive wall hooks (like Command hooks).
Step-by-Step DIY
- Take your canvas pennant and lay it flat. Cut 4 to 5 strips of grosgrain ribbon, each measuring 3 feet in length.
- Using a hot glue gun or a simple straight stitch on a sewing machine, attach the top of each ribbon strip to the bottom edge of the pennant, spacing them evenly.
- Allow the glue to dry completely. Heat-seal the bottom edges of the ribbons with a lighter to prevent fraying.
- Hang the pennant on the wall using an adhesive hook. Start clipping your bows from the top down!
8. Modern Gold Wire Grid Panels
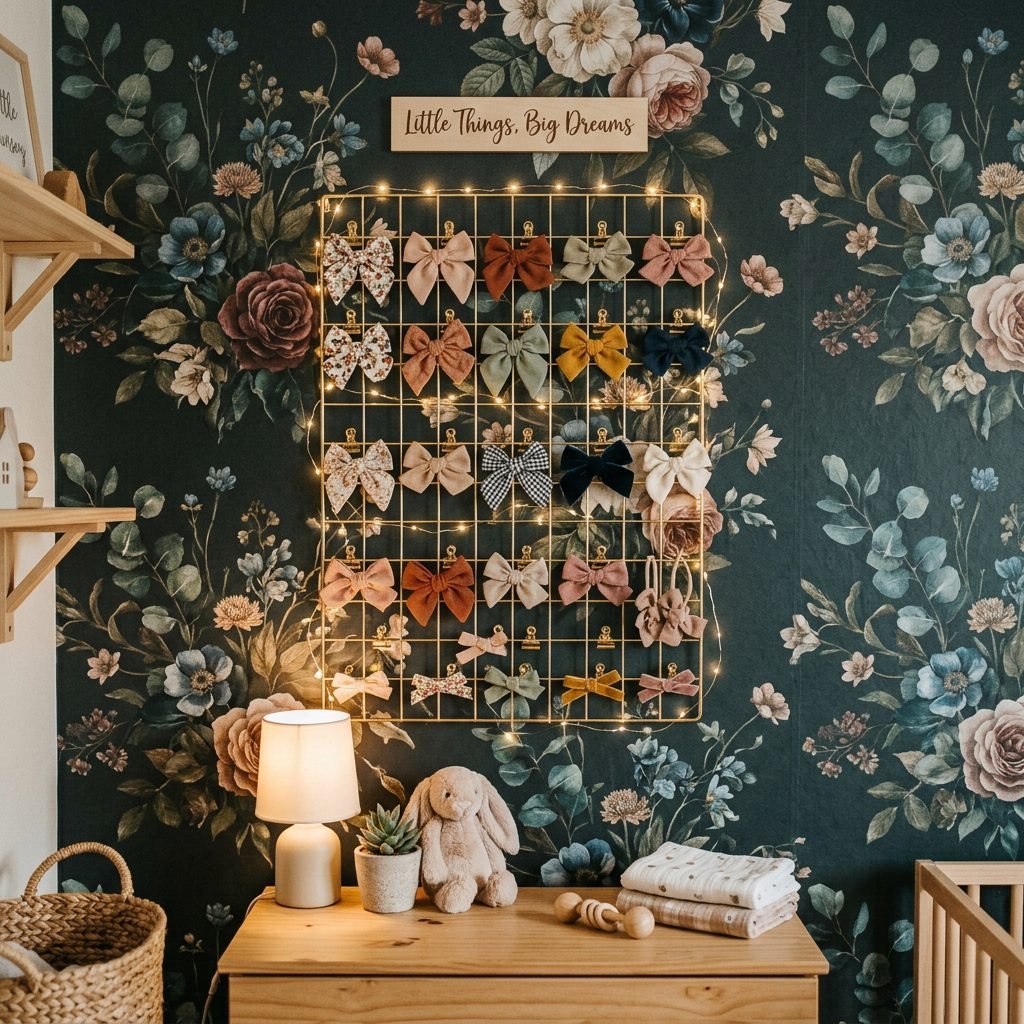
For a chic, contemporary nursery, a gold wire grid panel offers a brilliant blend of form and function. Originally popular in home offices as mood boards, these metal grids are perfect for baby accessories. You can clip alligator bows directly onto the metal wires, and use small gold binder clips or S-hooks to hang stretchy headbands. It gives the nursery a slightly industrial but highly glamorous touch.
Why We Love It
The grid system allows you to see absolutely everything at a glance. It is also incredibly easy to clean—just a quick wipe down with a microfiber cloth. Furthermore, as your baby grows into a toddler and school-aged child, this grid can easily transition into an art display board or a place to hang photos and schoolwork.
Installation and Styling
When styling a wire grid, balance is key. Don’t overcrowd it. Leave some “white space” between the bows so the gold metal can shine through. You can also weave some faux ivy or delicate fairy lights through the grid for an enchanting, magical nighttime glow during those late-night feeding sessions.
Installation Steps
- Purchase a gold wire wall grid (typically 24×24 inches or 15×30 inches).
- Use the specialized mounting hardware that comes with the grid. These usually hold the grid about a half-inch away from the wall, creating a cool shadow effect.
- Ensure the mounts are screwed directly into wall studs, as metal grids can be slightly heavier than fabric organizers.
- Attach your bows, balancing the colors evenly across the grid.
9. Personalized Wooden Name Signs with Built-In Hooks
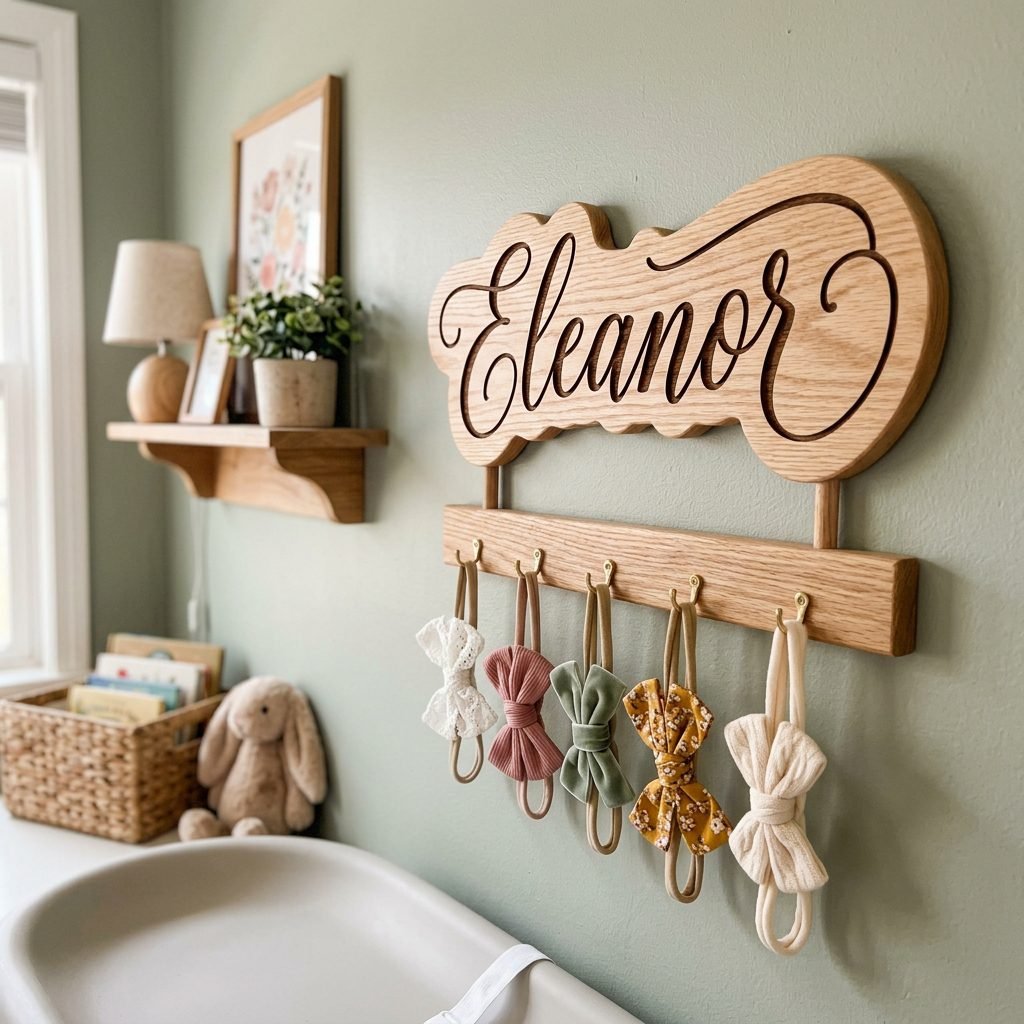
What is sweeter than seeing your new baby’s name beautifully displayed on their wall? Combining a custom wooden name sign with functional storage is a brilliant, two-in-one nursery hack. Many talented artisans on platforms like Etsy create gorgeous, laser-cut wooden name signs that feature a sturdy wooden bar or a row of polished brass hooks attached to the bottom edge specifically for hanging headbands and accessories.
Why We Love It
It deeply personalizes the space. During pregnancy, choosing a name is such a monumental, bonding experience. Seeing that name on the wall, serving a practical purpose, brings a sense of permanence and joy to the room. It also makes for a phenomenal baby shower gift if you are a friend or doula looking for a meaningful present.
Styling Tip
Choose a font that matches the overall vibe of the room—a sweeping, whimsical calligraphy for a romantic nursery, or a clean, bold sans-serif font for a modern space. Ensure the hooks are spaced at least 2 inches apart so the headbands do not overlap too much.
Installation Steps
- Order your custom sign well in advance (custom pieces often take 4 to 6 weeks to ship).
- When it arrives, use a stud finder to locate the safest mounting spots on your wall.
- Use heavy-duty drywall anchors and screws to mount the sign securely. Do not rely on adhesive strips for heavy wooden signs.
- Hang your baby’s prettiest, most special headbands on the hooks for a boutique display.
10. The Mini Curtain Rod and Ring System
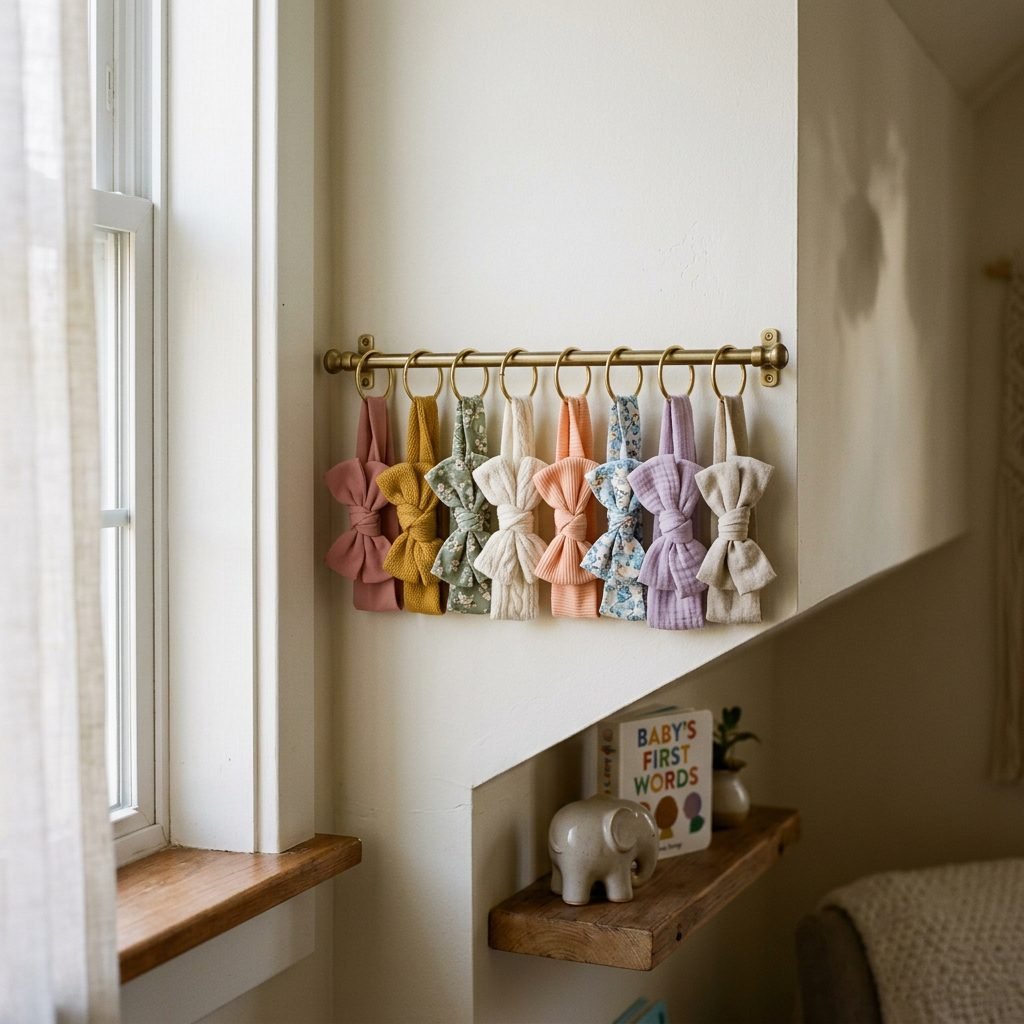
If you have a narrow, awkward wall space—perhaps between a window and a closet, or right next to the changing table—a mini curtain rod is a stroke of genius. By mounting a small, decorative curtain rod to the wall and using curtain clip rings or simple metal binder rings, you can create a sliding, highly accessible storage system for headbands and bows. It looks intentional, polished, and incredibly tidy.
Why We Love It
It is incredibly budget-friendly and utilizes “dead space” in the room. The sliding rings make it very easy to push headbands aside to find the exact one you are looking for. It is also very easy to install, requiring minimal tools and time.
Materials Needed
- 1 mini decorative curtain rod (12 to 24 inches wide).
- 1 pack of curtain clip rings or 2-inch metal binder rings.
- A drill and screwdriver.
Step-by-Step Installation
- Measure your narrow wall space and mark the placement for the curtain rod brackets.
- Drill pilot holes, insert anchors, and screw the brackets into the wall.
- Slide your curtain rings or binder rings onto the rod.
- Place the rod into the brackets and secure it.
- Clip your bows onto the curtain clips, or thread your stretchy headbands through the binder rings. Slide them back and forth with ease!
Choosing the Right System & Crucial Safety Guidelines
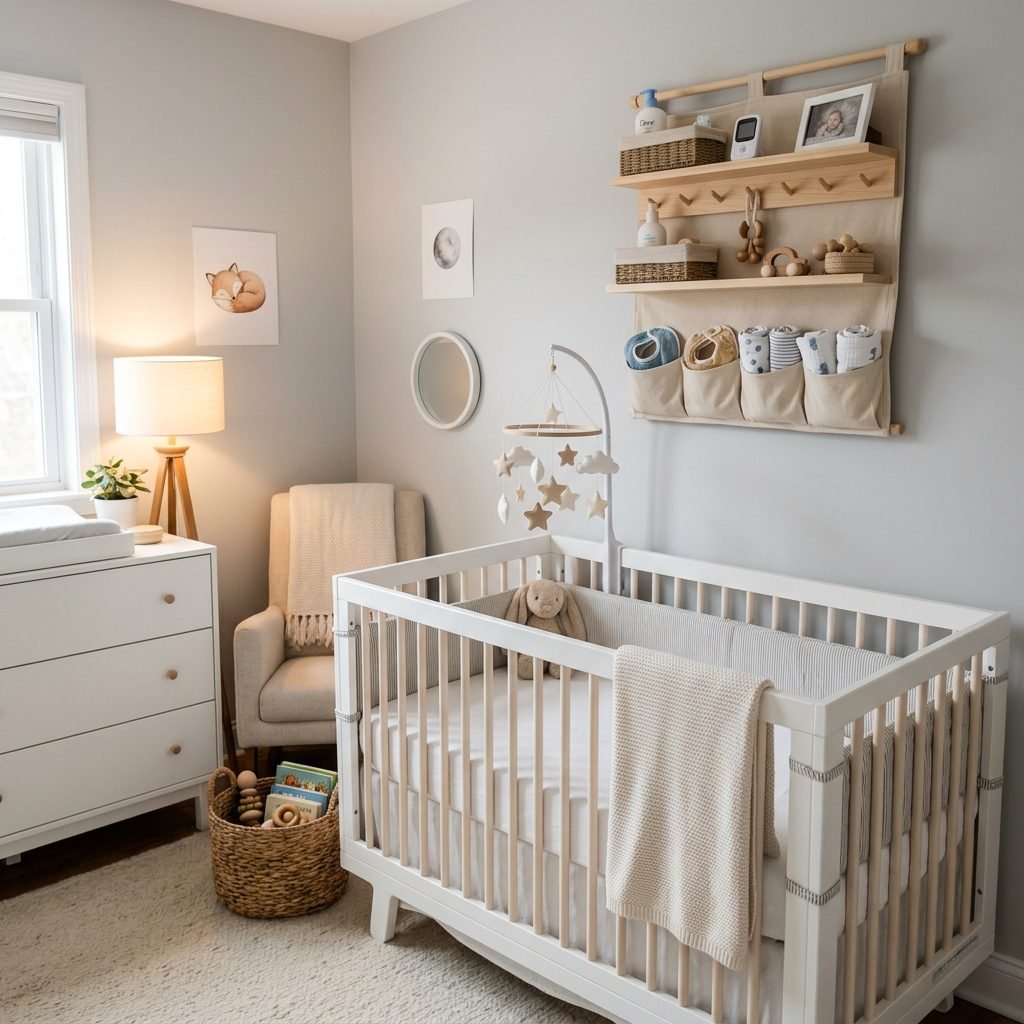
Mama, as a professional who has helped countless families transition into life with a newborn, I want to emphasize that the “best” system is simply the one that makes your life easier. When choosing which of these 10 methods to implement, consider the size of your collection, the types of accessories you have (clips vs. stretch headbands), and your DIY comfort level.
Below is a quick comparison to help you decide, followed by some incredibly important safety guidelines. Remember, a beautiful nursery must always, first and foremost, be a safe nursery.
| Organization Method | Best For… | Capacity Level | DIY Difficulty |
|---|---|---|---|
| 1. Macrame Holder | Clips & Nylon Bands | Medium | Moderate |
| 2. Acrylic Shelves | Thick/Structured Bands | Low | Easy |
| 3. Upcycled Frame | Alligator Clips | High | Moderate |
| 4. IKEA Pegboard | Mixed Collections | Very High | Easy |
| 5. Driftwood Twine | Earthy/Rustic Decor | Medium | Moderate |
| 6. Velvet Towers | Stretchy Nylon Bands | Medium | None |
| 7. Tiered Ribbon Drop | Massive Clip Collections | Very High | Easy |
| 8. Wire Grid Panel | Modern Aesthetics | High | Easy |
| 9. Custom Name Sign | Personalized Gifts | Medium | None (Pre-made) |
| 10. Mini Curtain Rod | Awkward/Narrow Spaces | Medium | Easy |
CRITICAL NURSERY SAFETY REMINDER: Never, under any circumstances, hang cords, ribbons, twine, or small alligator clips within reach of the crib, bassinet, or changing table. As your baby grows and begins to pull up, these items pose severe strangulation and choking hazards. Always mount your wall organizers high on the wall, completely out of your baby’s physical reach.
Conclusion
Sweet sister, preparing your nursery is such a profound rite of passage. As you stand in that room, hanging up tiny bows and folding miniature socks, you are doing so much more than just organizing—you are actively making physical space in your home and your heart for this new life. It is a beautiful, sacred act of motherly love.
Whether you choose the boho charm of a macrame wall hanging, the sleek invisibility of acrylic shelves, or the high-capacity brilliance of a tiered ribbon drop, the most important thing is that the system serves you. Postpartum life is a beautiful, messy, sleep-deprived journey, and having systems in place that make your daily routines just a little bit easier is a gift you are giving to your future self.
Take your time with these projects. Listen to your body. If you need to sit on the floor while you hot-glue ribbons, do it. If you need to ask your partner or a friend to drill the holes for the pegboard, ask them. You do not have to do this alone. Your baby is going to be so incredibly loved, and they won’t care if their bows are perfectly color-coordinated—they will only care that they are wrapped in your warm, loving arms. Happy nesting, mama. You are going to do amazing.