How to Build Extra Closet Space with an Adjustable Curtain Rod Nursery Hack
Welcome to the Nesting Phase, Mama
If you have suddenly found yourself standing in the middle of your nursery at 2:00 AM, holding a pile of impossibly tiny newborn onesies and wondering where on earth they are all going to fit, take a deep, cleansing breath. You are experiencing the beautiful, primal urge to nest. As a doula and fellow mama, I see this all the time. Your body is preparing for birth, and your mind is preparing your environment to be a safe, organized sanctuary for your little one.
But here is the reality check: baby clothes are incredibly small, yet they somehow take up an astonishing amount of space. Standard closets are built for adult-sized clothing, meaning a single hanging rod leaves literal feet of wasted, empty vertical air beneath those tiny zero-to-three-month sleepers. If you are working with a small nursery, sharing a closet with your baby, or living in an apartment where you cannot drill holes into the walls, that wasted space is prime real estate.
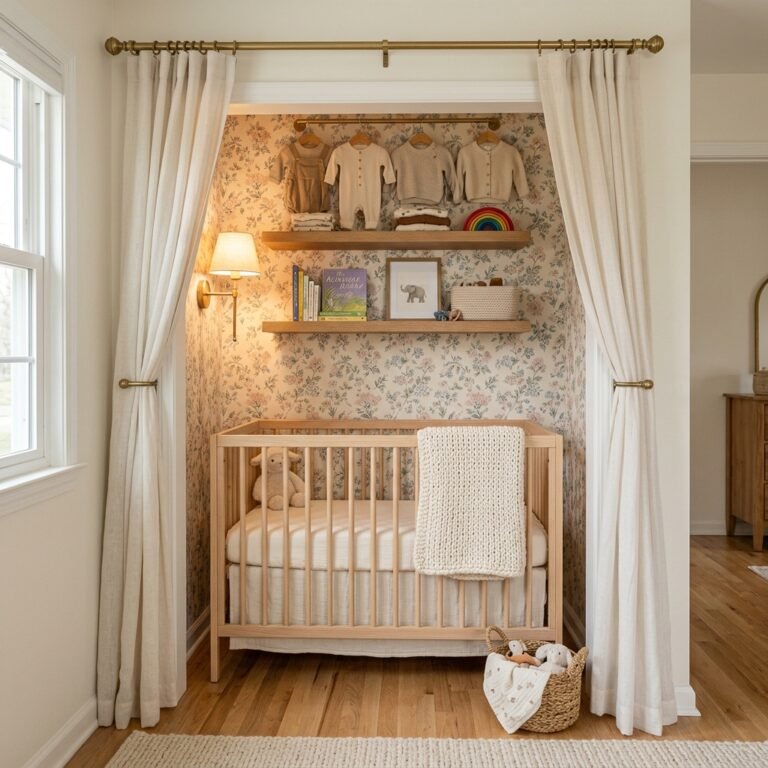
Enter my absolute favorite, doula-approved, stress-free organizational secret: the adjustable curtain rod nursery hack. This simple, budget-friendly, and completely renter-friendly DIY project will instantly double your nursery closet capacity without a single power tool. By the end of this guide, you will have a beautifully organized, double-decker closet that not only looks like a boutique but also functions perfectly for those sleep-deprived postpartum days when you just need to find a clean swaddle, fast.
“Nesting isn’t just about making things look pretty; it is about creating a soft, organized, and functional landing pad for your postpartum self. Do your future self a favor and make the clothes easy to reach.”
Let us dive into how you can transform your space safely, easily, and beautifully.
The Magic of Vertical Space: Why This Hack Works
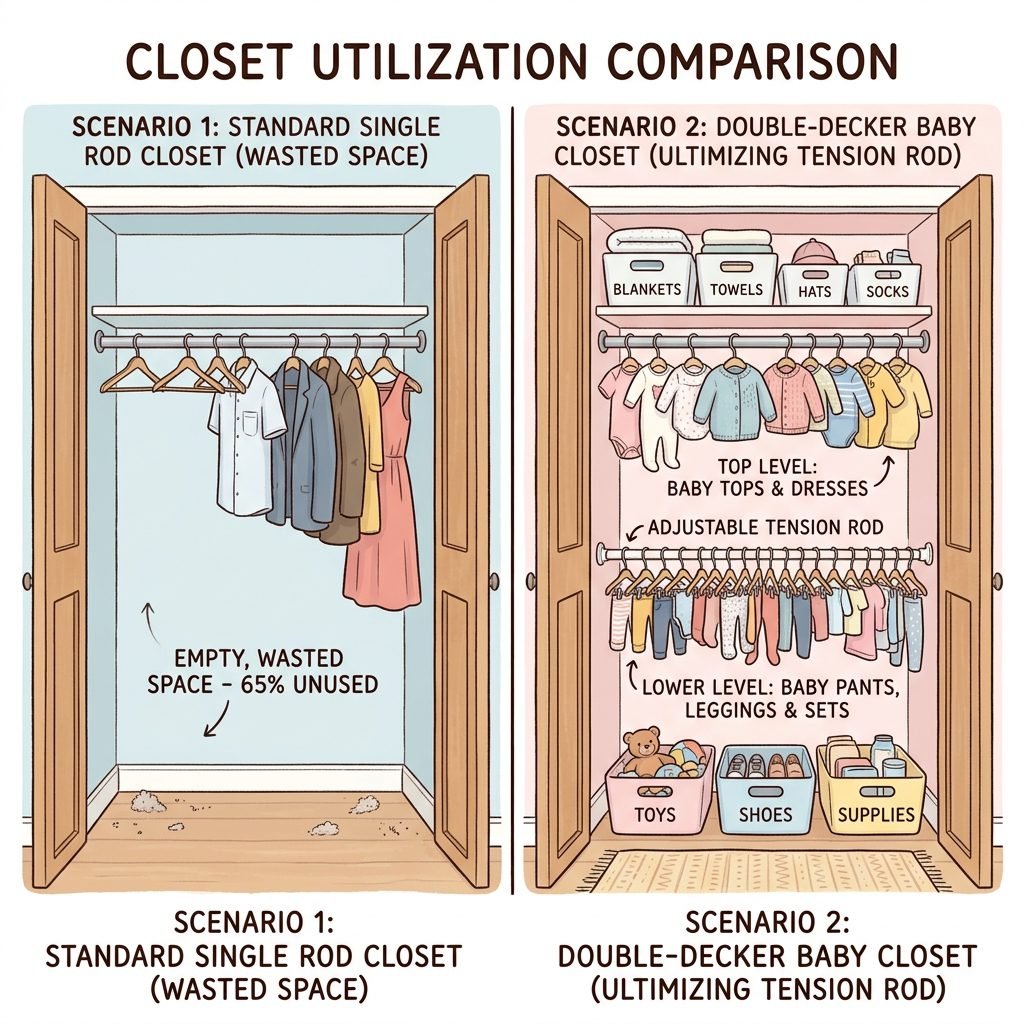
When we look at a standard closet, the hanging rod is typically installed around 66 inches from the floor. This is perfect for long adult dresses or winter coats. However, a newborn sleep sack or onesie only hangs down about 12 to 18 inches. This leaves a massive void of over 40 inches of empty air below the clothes.
During the postpartum period, efficiency is your best friend. You do not want to be digging through dark, deep bins on the floor while holding a fussy, gassy baby. Bringing the clothes up to eye level and utilizing that vertical space changes everything. By installing a heavy-duty adjustable curtain rod (or tension rod) halfway down the closet, you instantly create a second tier for hanging clothes.
Before and After: The Impact of the Second Rod
| Storage Metric | Standard Single-Rod Closet | Double-Decker Curtain Rod Hack |
|---|---|---|
| Hanging Space | Average 36 linear inches | Average 72+ linear inches |
| Wasted Vertical Space | Over 40 inches of empty air | Less than 10 inches of empty air |
| Accessibility | Requires bending for floor bins | Two easy-to-reach hanging tiers |
| Visual Clutter | High (clothes piled on floor) | Low (streamlined and boutique-like) |
| Installation Time | N/A | Under 10 minutes |
The beauty of this hack is that it grows with your baby. As your little one transitions from newborn onesies to toddler pants and eventually to bigger kid clothes, you can simply un-twist the tension rod and lower it to accommodate the longer garments. It is the ultimate flexible storage solution for a growing family.
Gathering Your Nesting Supplies: What You Will Need
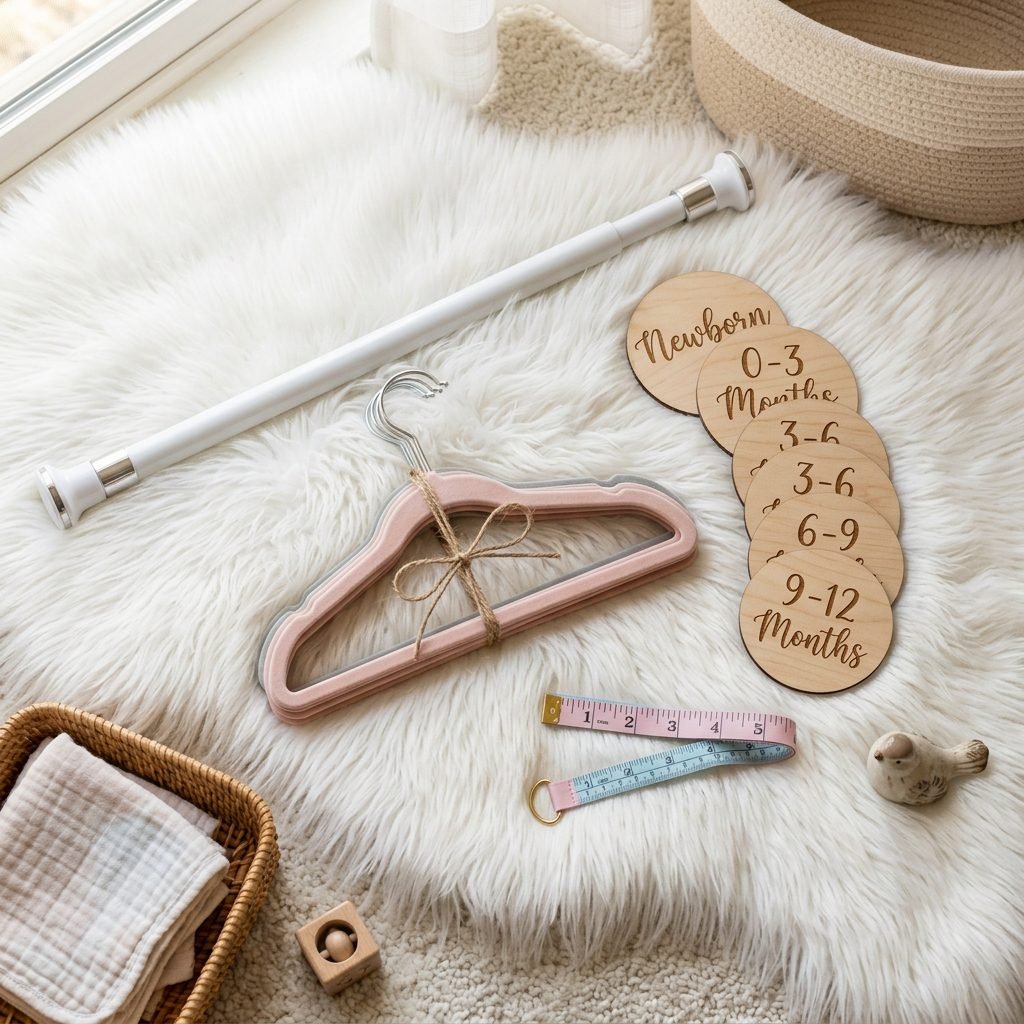
Before you start, we need to gather the right materials. Not all curtain rods are created equal, and because baby clothes can get heavy when packed tightly, choosing the right support is crucial for your safety and the longevity of your closet.
The Essential Supply List
- A Heavy-Duty Adjustable Tension Rod: Do not use a flimsy, decorative window rod. Look for a heavy-duty shower tension rod or a commercial-grade adjustable curtain rod with rubberized ends. It needs to support at least 20 to 30 pounds of weight.
- Measuring Tape: To ensure you place the rod evenly on both sides and measure the width of your closet accurately before purchasing your rod.
- Baby-Sized Velvet Hangers: This is a non-negotiable stylist tip! Velvet hangers are ultra-slim, saving you up to 30 percent more space on the rod compared to thick plastic hangers. Plus, they grip tiny, slippery fabrics so clothes do not fall off.
- Closet Size Dividers: These are little rings that pop onto the rod to separate clothes by age (e.g., Newborn, 0-3 Months, 3-6 Months).
- A Level (Optional but helpful): To make sure your new rod is perfectly straight.
“Mama reminder: As you gather your supplies, listen to your body. If you are in your third trimester, your center of gravity has shifted. Ask your partner, a friend, or your doula to help you with any reaching or stretching required for this project.”
When selecting your rod, measure the width of your closet from wall to wall. Tension rods usually come in size ranges (e.g., 28-48 inches, or 48-84 inches). Buy the rod where your closet’s width falls right in the middle of the range for maximum spring tension and stability.
Step-by-Step Installation: Building Your Double-Decker Closet
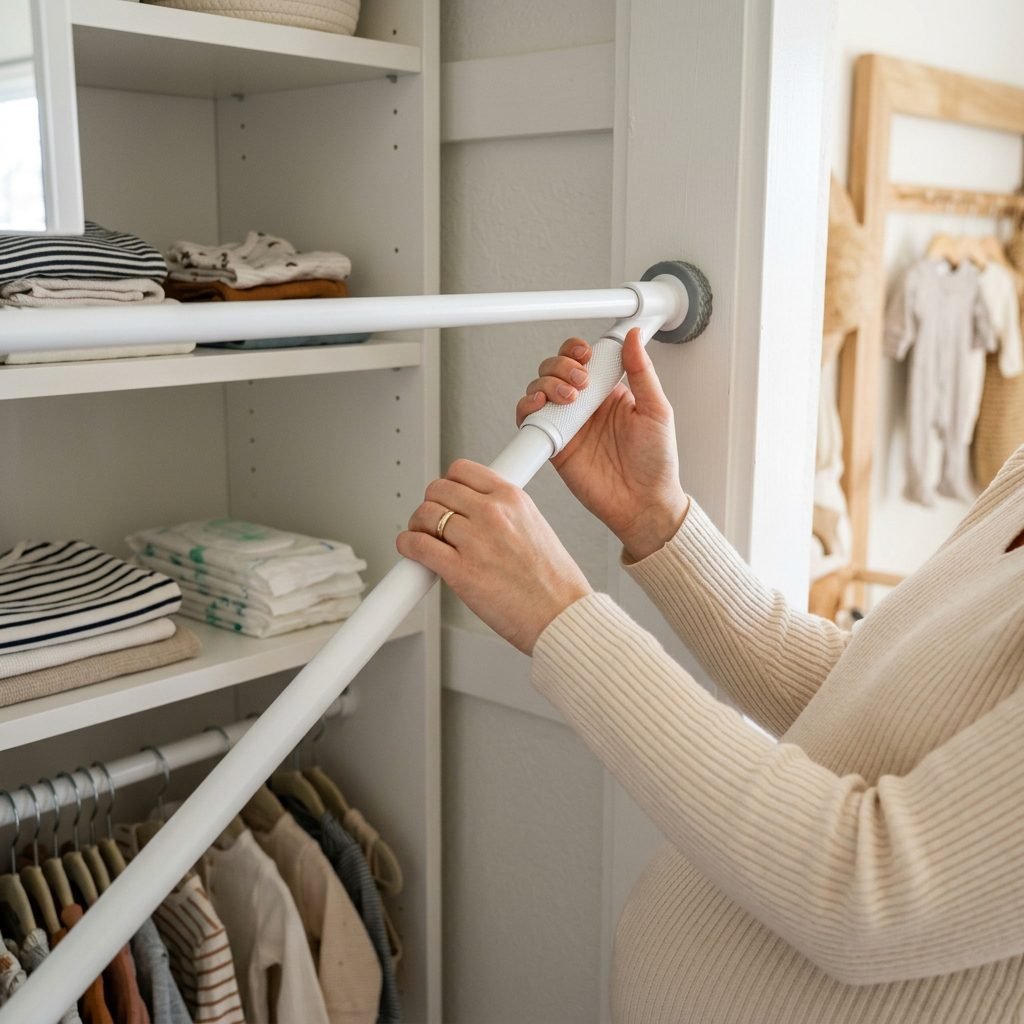
Now comes the fun part. Put on a relaxing playlist, pour yourself a large glass of ice water (hydration is key for amniotic fluid levels, mama!), and let us build this extra space. This process requires zero drilling, zero screws, and zero damage to your walls.
The Installation Process
- Measure the Drop: Hang one of your longest baby items (like a 6-9 month sleep sack or a winter coat) on the existing top rod. Measure about 2 to 3 inches below where that garment ends. This is where your new bottom rod will go.
- Mark the Spot: Using a pencil, make a tiny, faint mark on both the left and right walls of the closet at your chosen height. Use your measuring tape to ensure both marks are the exact same distance from the floor.
- Prepare the Tension Rod: Extend your heavy-duty tension rod until it is about 1 to 2 inches wider than the actual width of your closet. This ensures the internal spring will be tightly compressed when installed.
- Position and Compress: Place one end of the rod on your left pencil mark. Push the other end inward (compressing the spring) and slide it into place on the right pencil mark.
- Level and Tighten: Step back and look at the rod, or use your level. If it is crooked, tap one side up or down. Once level, twist the rod to tighten it further until it feels completely secure against the walls.
- The Tug Test: Give the center of the rod a firm, downward tug. It should not budge. If it slips, twist it tighter to increase the tension.
If your closet is exceptionally wide (over 60 inches), a standard tension rod might bow in the middle under the weight of the clothes. In this case, you can purchase a simple, adjustable vertical support pole that stands on the floor and props up the center of the tension rod.
Organizing the Closet Like a Postpartum Pro
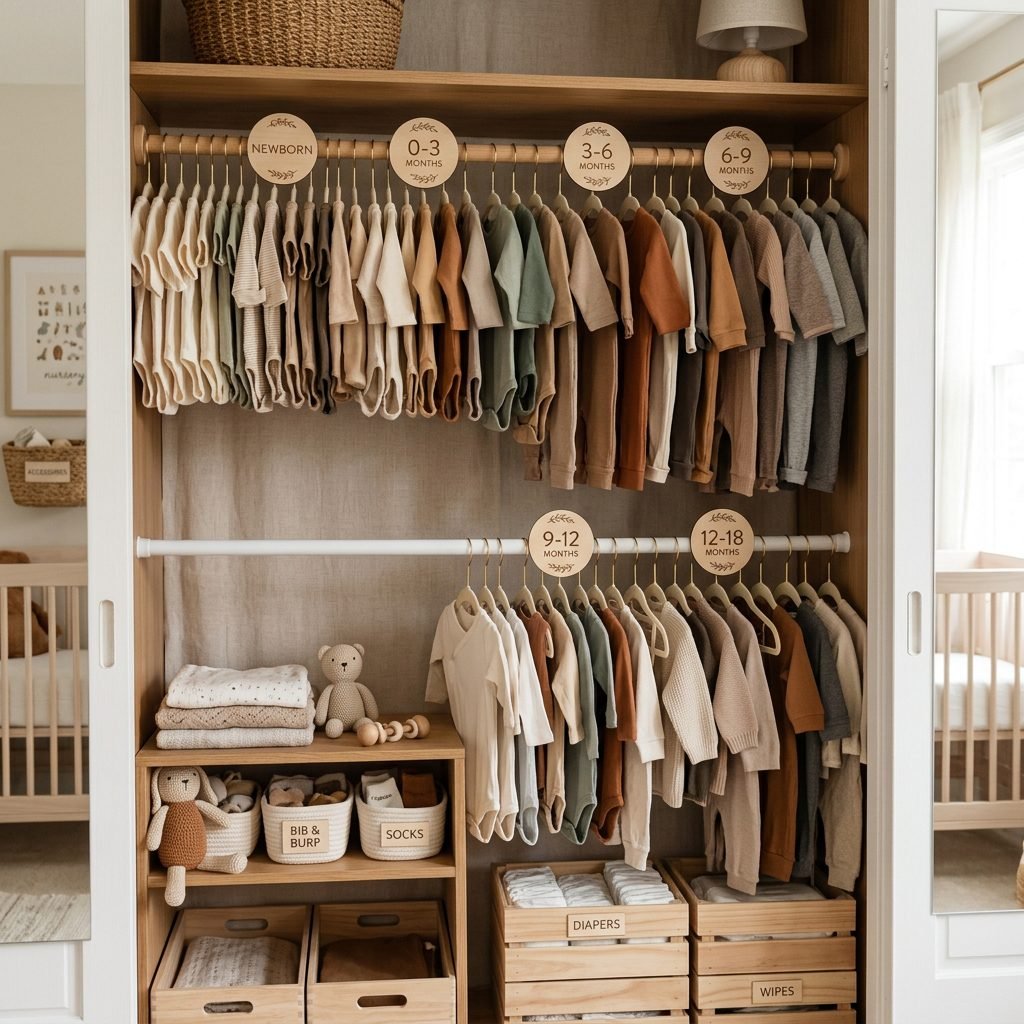
Now that your hardware is installed, we get to the most satisfying step: hanging the tiny clothes! How you organize this space can dramatically impact your postpartum mental health. When you are operating on two hours of sleep, you need your environment to do the thinking for you.
The Two-Tier Organization Strategy
With two rods, you now have distinct zones. Here is the doula-approved way to utilize them:
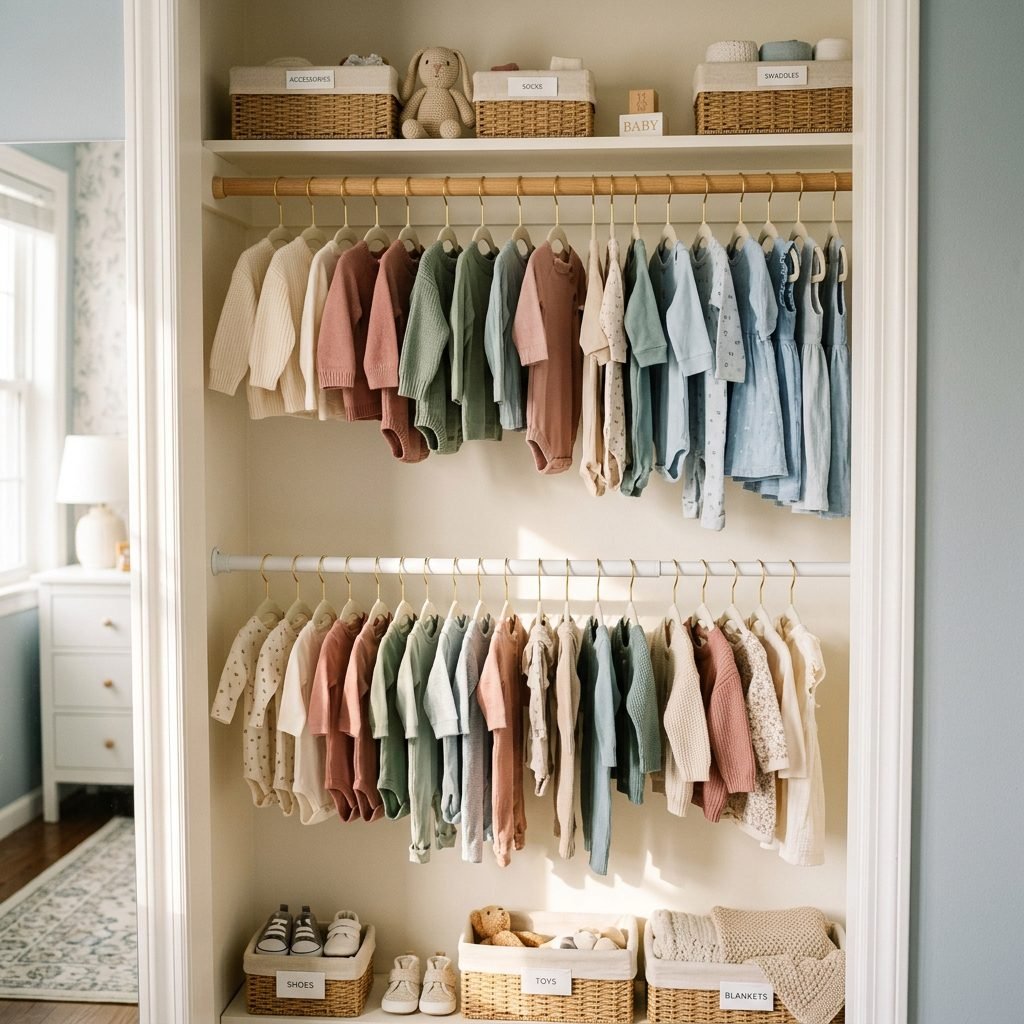
- The Top Rod (Current Sizes): Reserve the top rod for clothes that fit your baby right now. This is usually your Newborn and 0-3 Month clothing. Because this rod is at eye level, it is the easiest to reach without bending over, which is vital if you are recovering from a C-section or experiencing pelvic floor soreness.
- The Bottom Rod (Future Sizes): Use your new tension rod for the next sizes up. Babies grow at lightning speed, and having the 3-6 Month and 6-9 Month clothes pre-washed, hung, and ready to go means you won’t be caught off guard when your baby suddenly outgrows their newborn onesies overnight.
Sorting and Styling Tips
| Clothing Category | Best Storage Method | Why? |
|---|---|---|
| Onesies & Bodysuits | Folded in drawers OR hung on velvet hangers | Hanging makes it easier to see all patterns at a glance without messing up a folded pile. |
| Sleep Sacks & Swaddles | Hung by the shoulders on the top rod | These are long and take up vertical space; hanging keeps them wrinkle-free and easy to grab at bedtime. |
| Pants & Bloomers | Folded in bins or clipped to hangers | Baby pants are tiny and often slip off standard hangers. Use clips or dedicated drawer space. |
| Special Occasion Outfits | Hung with a clear garment bag protector | Keeps dust off delicate fabrics that won’t be worn frequently. |
“Pro-Tip: Group clothes first by size (using your wooden size dividers), and then by type (long sleeves, short sleeves, rompers). This makes dressing a squirmy, crying baby infinitely faster.”
Maximizing the Rest of the Closet Space
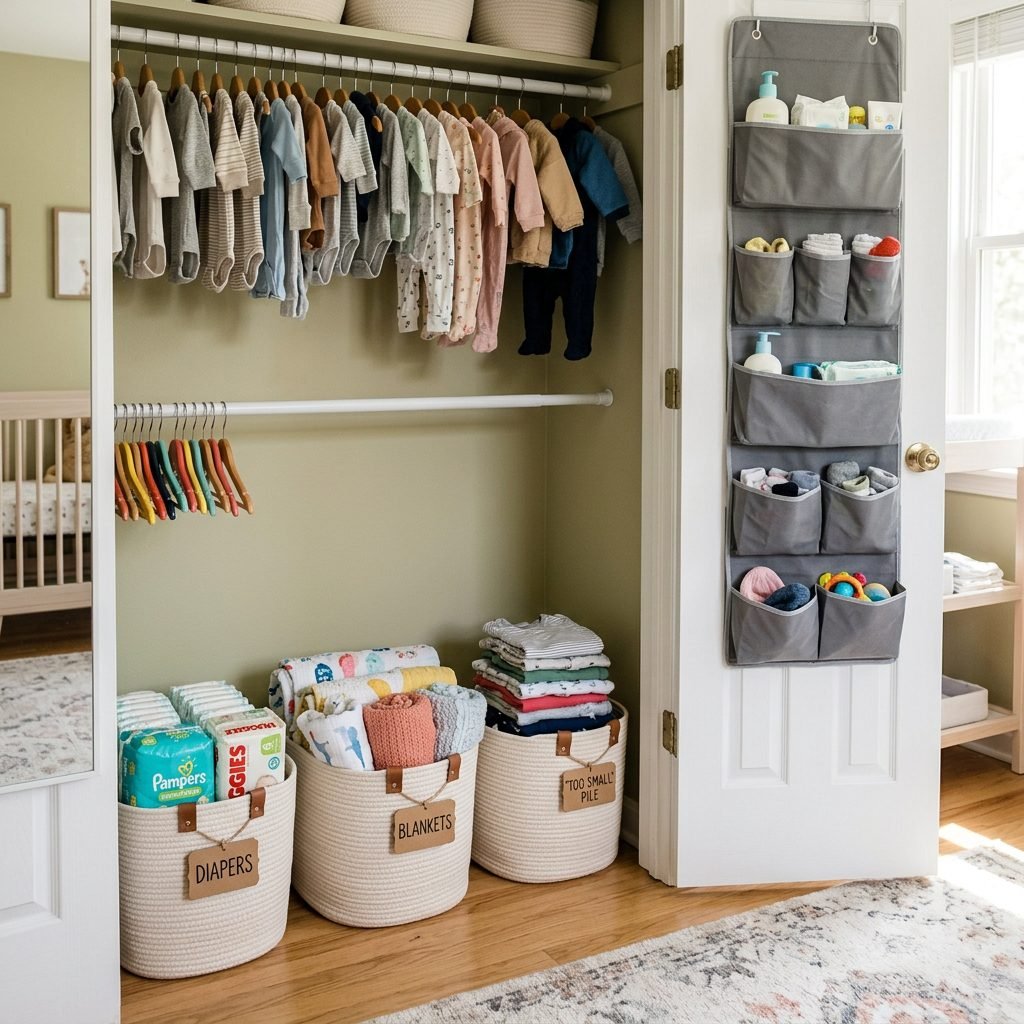
Your double-decker hanging space is complete, but true nursery organization looks at the closet as a whole ecosystem. Even with the new rod, you will likely have some floor space beneath the bottom tier, as well as space above the top shelf and on the back of the closet door.
Floor Space and Bins
Since baby clothes are so short, your new bottom rod will likely sit about 30 to 36 inches off the floor. This leaves ample room for storage bins. I recommend using soft-sided cotton rope baskets or clear acrylic bins. Use this floor space to store:
- Unopened boxes of diapers and wipes (you will need more than you think!).
- Out-of-season items, like heavy winter coats or summer swimsuits.
- A designated “Too Small” bin. This is crucial! When you try an outfit on your baby and realize it no longer fits, immediately toss it into this bin. Once the bin is full, box it up for storage or donation. This prevents tiny clothes from cluttering your active wardrobe.
The Back of the Door
Do not ignore the back of the closet door! Install an over-the-door shoe organizer with clear plastic or mesh pockets. These little pockets are the absolute perfect size for rolling up tiny baby socks, storing rolled burp cloths, organizing baby shoes, or holding tubes of diaper cream, lotions, and infant Tylenol. It turns a blank door into a high-functioning storage station.
The Top Shelf
The shelf above your main closet rod is usually hard to reach. Use this space for items you rarely need to access. Think: memory boxes, the breast pump box you are saving just in case, or extra nursery decor. Keep heavy items off the top shelf to ensure nothing can accidentally fall and cause injury.
Conclusion
You’ve Got This, Mama
Creating this extra closet space is about so much more than just organizing onesies. It is about taking back control during a time of immense transition. By using this simple adjustable curtain rod hack, you have doubled your nursery’s storage capacity, saved money for other baby essentials, and created a serene, functional space that will support you through the beautiful, messy, wonderful postpartum days ahead.
Remember, as you stand back and admire your perfectly organized, double-decker baby closet, that the most important thing going into that nursery is the love you already have for your baby. The perfectly spaced velvet hangers are just a wonderful bonus. Rest your feet, hydrate, and know that you are deeply prepared for this next chapter. You are going to be an incredible mother.