How to Style Wooden Picture Ledges as Cute Nursery Book Displays
Hello, beautiful mama! If you are deep in the nesting phase, folding tiny onesies, and dreaming about the quiet, magical moments you’ll soon share with your little one, you are in exactly the right place. As a doula and a fellow mama who has spent countless hours rocking babies in the wee hours of the morning, I can tell you this: the reading nook will become the heartbeat of your nursery.
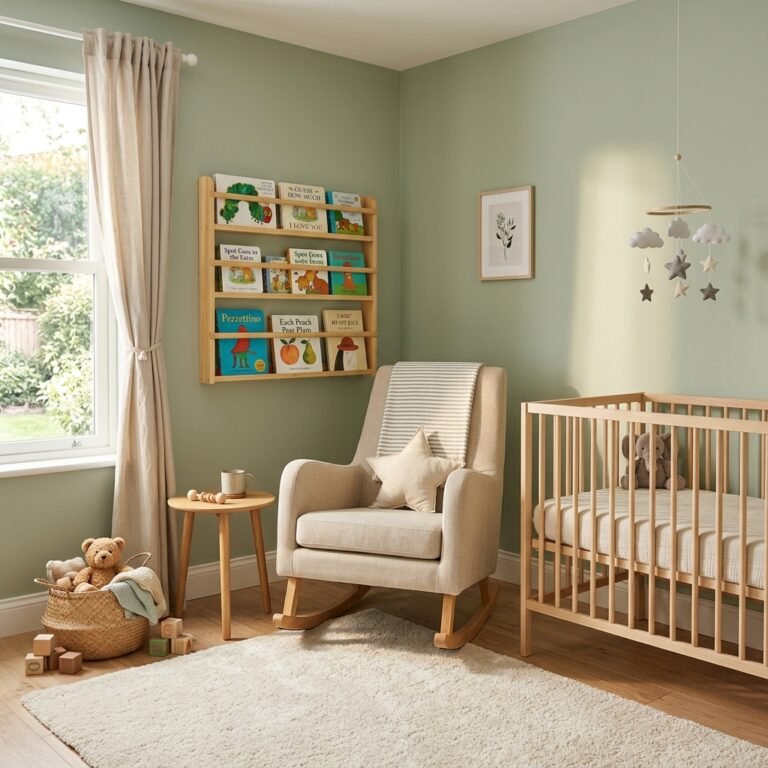
But what if your nursery is on the smaller side, or you simply want to avoid bulky, heavy furniture that takes up precious floor space? Enter the ultimate nursery design hack: wooden picture ledges. These simple, affordable pieces of wood can be transformed into the most adorable, space-saving, and developmentally beneficial book displays for your baby’s room.
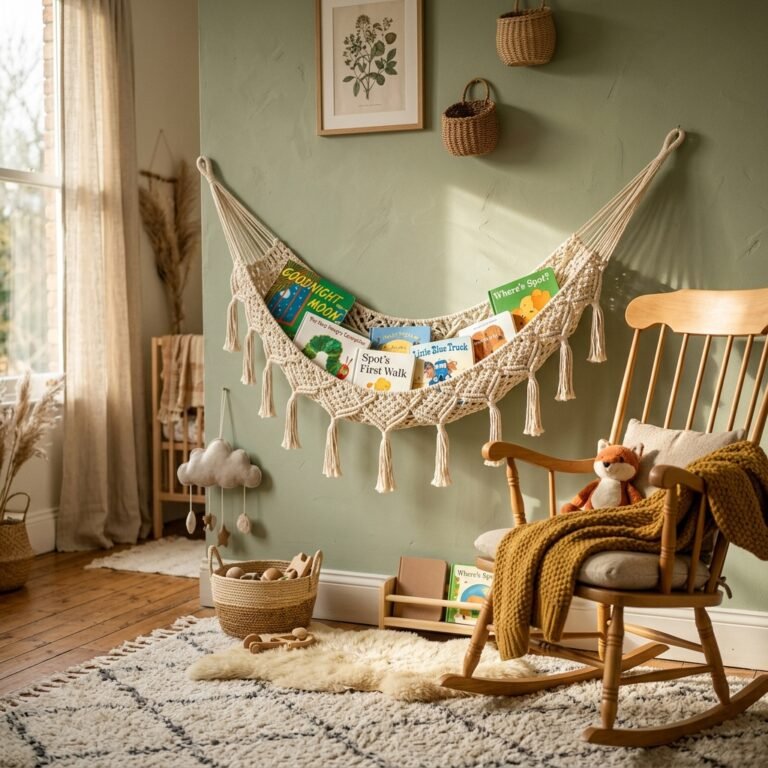
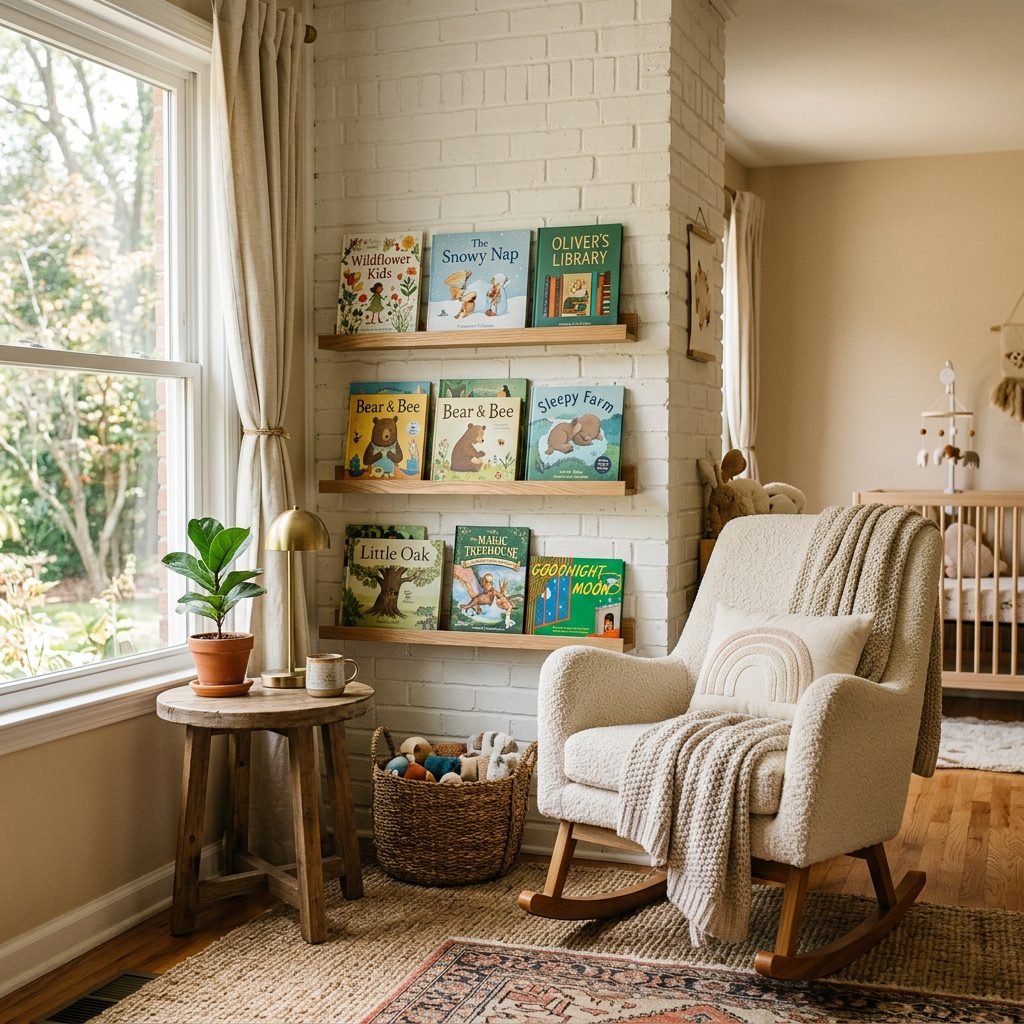
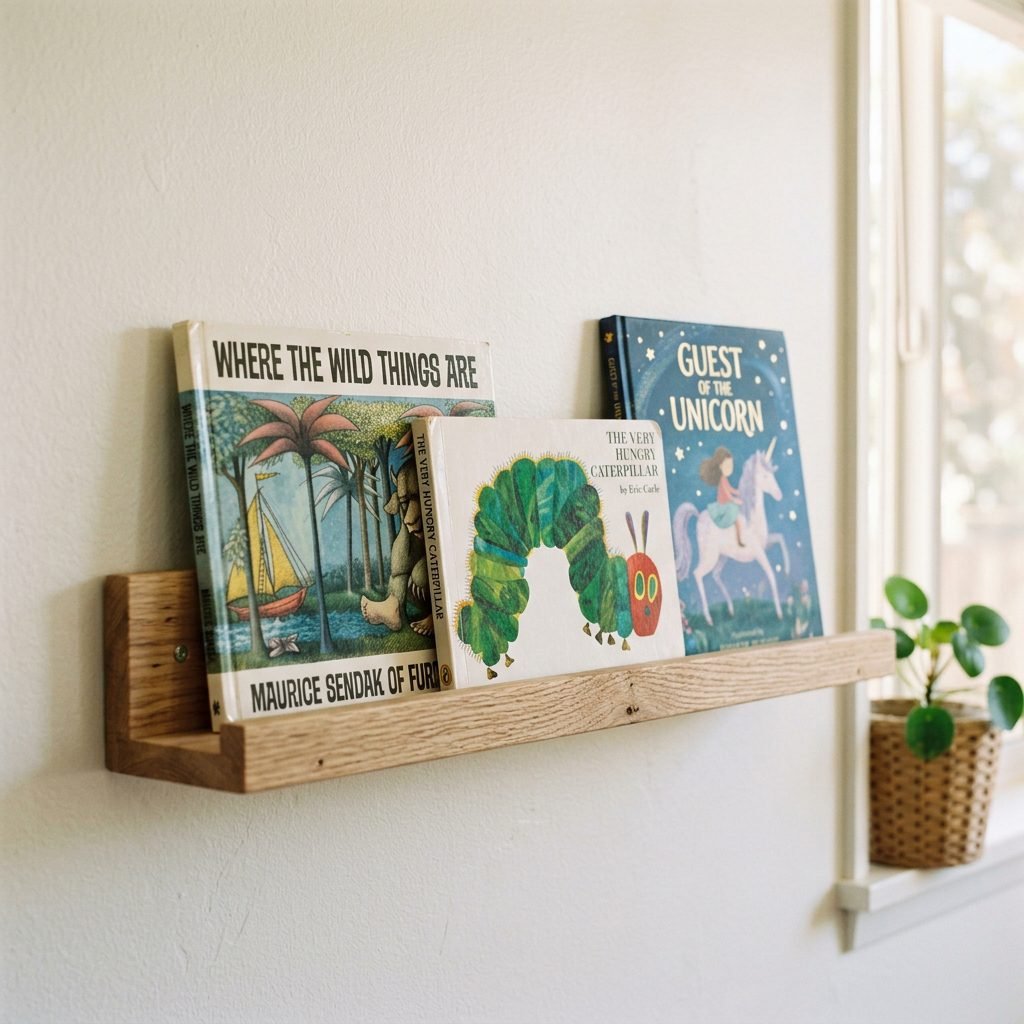
Using picture ledges (like the beloved IKEA MOSSLANDA or beautiful natural oak options from Etsy) isn’t just about aesthetics—though they do look incredibly chic. It is about creating a warm, inviting environment that encourages early literacy, independence, and sensory exploration. Traditional bookshelves hide the beautiful covers of children’s books, showing only the spines. Picture ledges, on the other hand, allow you to display those gorgeous illustrations forward-facing, instantly turning your books into interactive wall art.
In this comprehensive, sisterly guide, we are going to walk through everything you need to know. We will cover the developmental benefits of forward-facing books, the exact tools and measurements you need for a safe installation (because safety is always our number one priority!), and my absolute favorite styling secrets to make your nursery book wall look like it stepped right out of a magazine. Grab a cup of red raspberry leaf tea, get cozy, and let’s start designing your dream reading nook!
The Magic of Forward-Facing Books: A Montessori Approach
Before we dive into the drills and styling, let’s talk about why wooden picture ledges are such a brilliant choice for your baby’s development. As a pediatric sleep consultant and doula, I always encourage parents to look at the nursery from the baby’s perspective. When a baby or toddler looks at a traditional bookshelf, they just see a sea of uninspiring cardboard spines. But when books are displayed forward-facing, magic happens.
Encouraging Early Literacy
The Montessori method highly recommends forward-facing book displays. Why? Because infants and toddlers are highly visual creatures. They choose their activities based on what catches their eye. When they see the bright, high-contrast cover of a beloved storybook, they are naturally drawn to it. This visual invitation encourages them to independently reach for books, fostering a lifelong love of reading from the very beginning.
Saving Precious Floor Space
Let’s be honest, mama—babies come with a lot of gear. Between the crib, the changing table, the glider, and the tummy-time mats, floor space is premium real estate. Picture ledges utilize the vertical space on your walls, drawing the eye upward and making the room feel larger and more open. Plus, without a heavy bookcase on the floor, you have one less piece of large furniture to worry about baby-proofing later on.
| Feature | Traditional Bookshelf | Wooden Picture Ledges |
|---|---|---|
| Floor Space Required | High (Takes up significant room) | Zero (Wall-mounted) |
| Visual Appeal for Baby | Low (Spines only) | High (Engaging covers displayed) |
| Accessibility | Can be overwhelming/cluttered | Curated and easy to reach |
| Room Aesthetic | Heavy, bulky furniture | Light, airy, acts as wall art |
| Cost | Typically $100 – $500+ | Very budget-friendly ($15 – $50) |
Remember, mama: Your nursery doesn’t have to be massive to be magical. Utilizing vertical space is the secret weapon of clever nursery design!
Planning Your Layout: Heights, Spacing, and Crucial Safety Tips
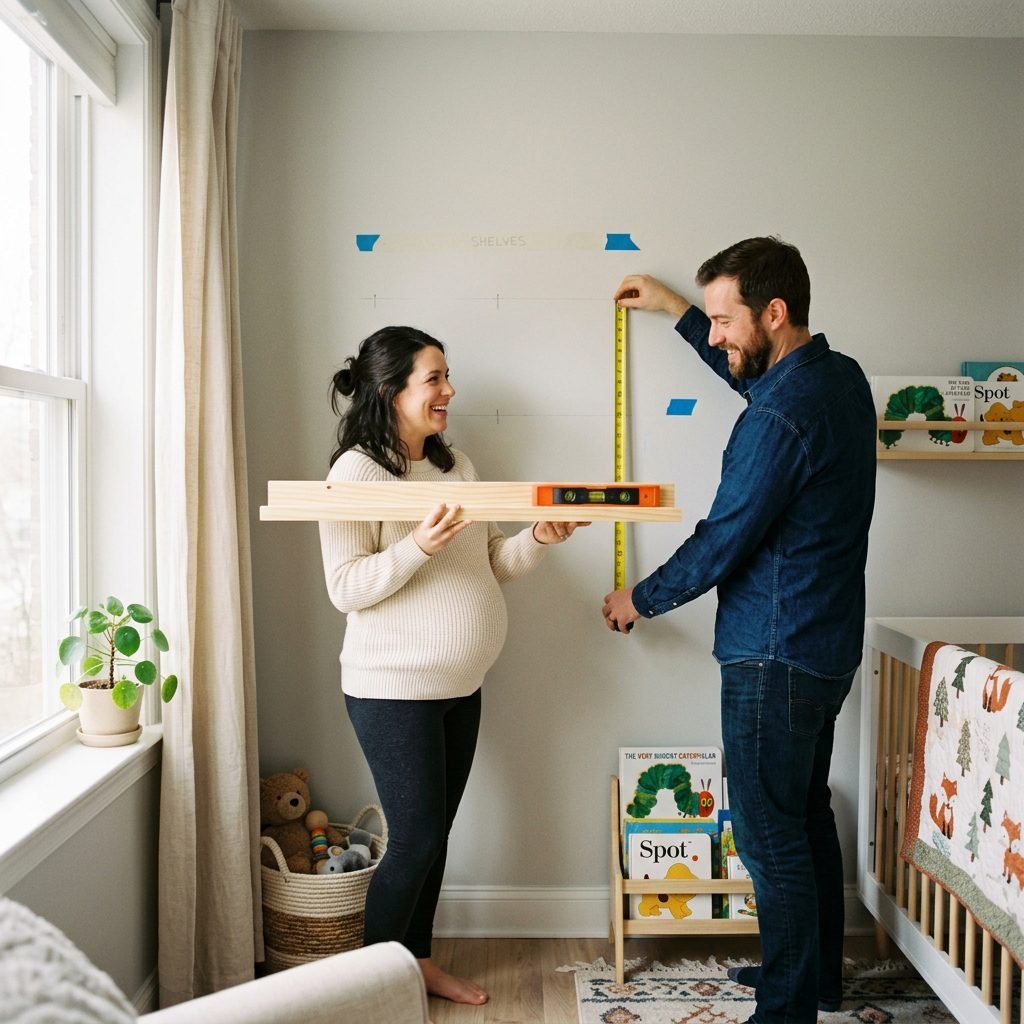
Now that we know why we love them, let’s talk about placement. The layout of your ledges will dictate the entire vibe of your reading nook. But more importantly, as an expert in postpartum and infant safety, I need to remind you that anything we put on the walls in a baby’s room requires careful, intentional planning.
Finding the Sweet Spot: Spacing Your Ledges
One of the most common mistakes I see parents make is hanging their ledges too close together. Children’s books come in wildly different sizes—from tiny, chunky board books to tall, oversized picture books. If your ledges are too close, those beautiful tall books simply won’t fit!
- The Golden Rule of Spacing: Leave at least 14 to 16 inches of vertical space between each ledge. This ensures you have plenty of clearance for taller books without them looking cramped.
- Staggered vs. Stacked: You can stack three ledges perfectly on top of one another for a clean, symmetrical look. Alternatively, if you have a wider wall, consider staggering them slightly for a more organic, playful gallery wall feel.
Safety First: The Mobile Baby Phase
Right now, you might be holding a tiny newborn (or a beautiful bump!), but in the blink of an eye, you will have a busy, curious toddler who wants to pull up on everything. We must plan for that toddler right now.
- Height from the Floor: If you want the bottom shelf to be accessible to a crawling or walking toddler (encouraging that Montessori independence!), hang the lowest ledge about 12 to 18 inches from the floor.
- The No-Climb Zone: If you place them low, you must ensure the ledges themselves are anchored securely into wall studs. A toddler will inevitably try to use the ledge to pull themselves up to standing.
- Strategic Crib Placement: Never, ever hang picture ledges (or any heavy wall decor) directly over the crib or the changing table. We want to completely eliminate the risk of a book or the ledge itself falling into baby’s safe sleep space.
Safety Check: Always assume your toddler will view your beautifully styled book ledges as a personal rock-climbing wall. Secure them accordingly!
Empowering DIY: How to Install Your Ledges Safely
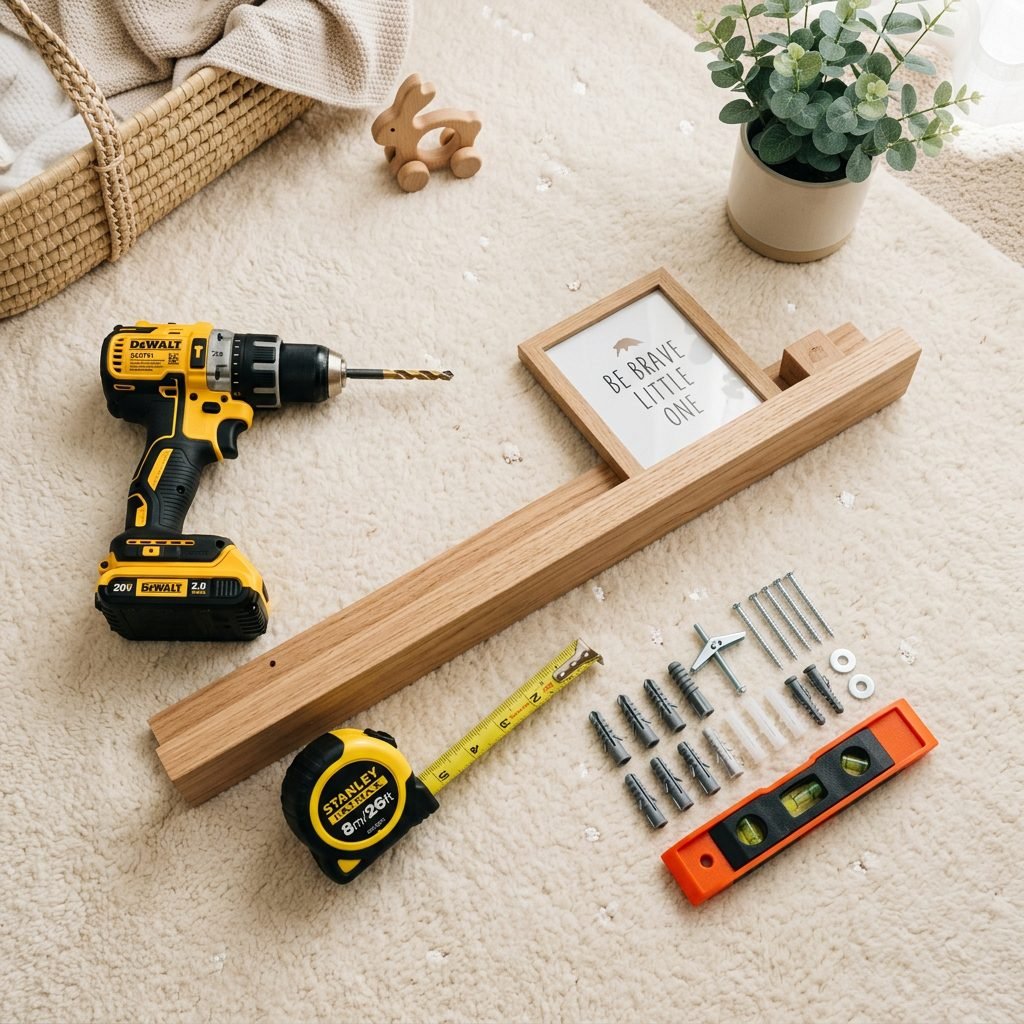
Alright, sister, it is time to channel your inner handy-woman! Installing these ledges might feel intimidating if you aren’t used to using power tools, but I promise you, it is a straightforward process. Whether you are tackling this yourself during a burst of second-trimester nesting energy, or directing your partner from the comfort of the glider, here is the foolproof, step-by-step installation guide.
The Tools You Will Need
- Your wooden picture ledges (e.g., IKEA MOSSLANDA, solid pine, or acrylic if you prefer)
- A stud finder (Absolutely non-negotiable for safety!)
- A pencil for marking
- A level (A long one is best, but a smartphone app works in a pinch)
- A power drill with drill bits
- Heavy-duty drywall anchors (if you cannot hit a stud) and screws
- A tape measure
Step-by-Step Installation
- Mark Your Vertical Spacing: Start by measuring from the floor up to where you want the bottom ledge. Lightly mark the wall with your pencil. Then, measure 15 inches up from that mark for the second ledge, and another 15 inches up for the third.
- Find the Studs: Run your stud finder along the wall at your marked heights. Mark the edges of the studs. Fastening your ledges directly into the wooden wall studs is the only way to guarantee they can withstand the weight of heavy books and a pulling toddler.
- Level and Mark the Holes: Hold the first ledge against the wall, aligning it with your height mark and the studs. Place your level on top of the ledge. Once the bubble is perfectly centered, use your pencil to poke through the pre-drilled holes in the ledge to mark the wall.
- Drill and Anchor: If your marks align with a stud, you can screw directly into the wood. If your marks hit empty drywall (which happens often due to pre-drilled hole spacing), you must install heavy-duty drywall anchors first. Drill a pilot hole, tap in the anchor, and then you are ready.
- Mount the Ledges: Hold the ledge back up to the wall and drive the screws through the ledge into the studs or anchors. Ensure they are completely flush and tight. Give the ledge a firm downward tug to test its strength.
Take a step back and admire your work! You have just created the foundation for your baby’s literary world.
Styling Secrets for a Pinterest-Worthy Display
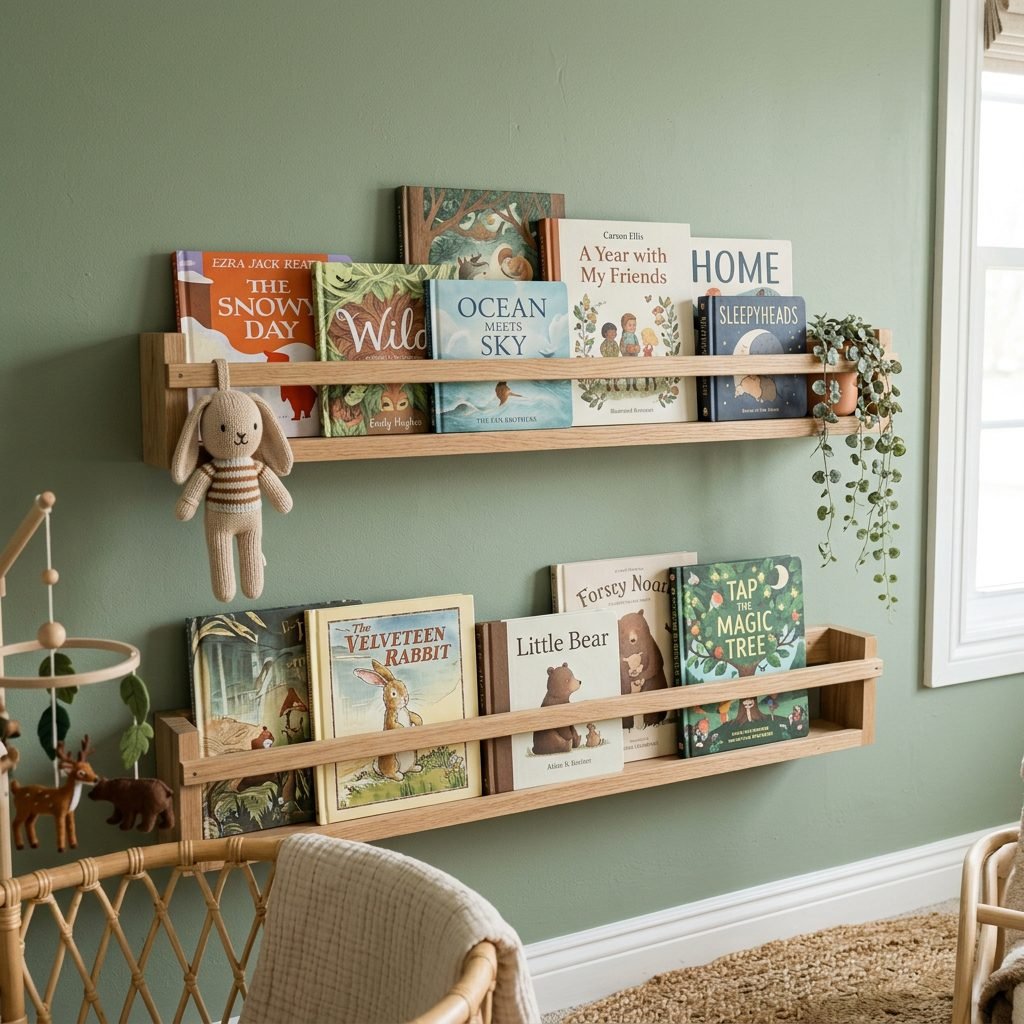
Now for the absolute best part—the styling! This is where you get to infuse the nursery with your unique personality, warmth, and love. Styling a picture ledge isn’t just about throwing books up there; it is about creating balance, visual interest, and a cohesive color palette that soothes the senses.
The Art of Layering
The secret to a beautifully styled ledge is depth. You don’t want all the books standing in a single, rigid line. Instead, practice the art of layering.
- Back Row: Place your tallest, largest picture books in the back. These act as the anchor and the backdrop.
- Front Row: Layer smaller, chunkier board books slightly in front, overlapping the larger books by just an inch or two.
- Vary the Heights: Avoid putting all the tall books on one side and the short ones on the other. Mix them up! Place a tall book next to a medium one, followed by another tall one to create a gentle, wave-like visual rhythm.
Choosing a Color Theme
Your books can actually serve as the primary artwork in the nursery. Depending on your overall nursery design, consider these popular styling themes:
| Styling Theme | Color Palette | Types of Books to Feature |
|---|---|---|
| The Rainbow Method | Red, Orange, Yellow, Green, Blue, Purple | Any books, arranged in a vibrant ROYGBIV gradient across the shelves. |
| Earthy & Neutral | Creams, Browns, Sage Greens, Terracotta | Nature-themed books, classic vintage covers, muted illustrations. |
| The Woodland Vibe | Deep Greens, Wood Tones, Mustard Yellow | Books about forests, bears, foxes, and outdoor adventures. |
| High-Contrast Newborn | Black, White, Bold Red | Specific newborn sensory board books (perfect for the first 3 months!). |
Adding Whimsical Touches
Don’t limit your ledges strictly to books! To break up the rectangular shapes and add a touch of nursery magic, intersperse small, meaningful objects among the stories. Here are some of my favorite additions:
- Soft Textures: A small, floppy Jellycat bunny or a soft knit doll sitting gently on the ledge with its legs dangling over the edge.
- Wooden Elements: A beautifully crafted wooden rainbow, a set of engraved alphabet blocks spelling baby’s name, or a small wooden camera toy.
- Greenery: A tiny faux trailing plant (like a string of pearls) placed on the top ledge, with the leaves cascading down the side, adds incredible life and freshness to the space.
- Framed Art: Mix in a small 5×7 framed ultrasound photo, a birth affirmation card, or a sweet watercolor print.
Styling Tip: Leave some negative space! Don’t pack the shelves so tightly that you can’t slide a book out. A little breathing room makes the display look intentional rather than cluttered.
Curating and Rotating Your Nursery Library
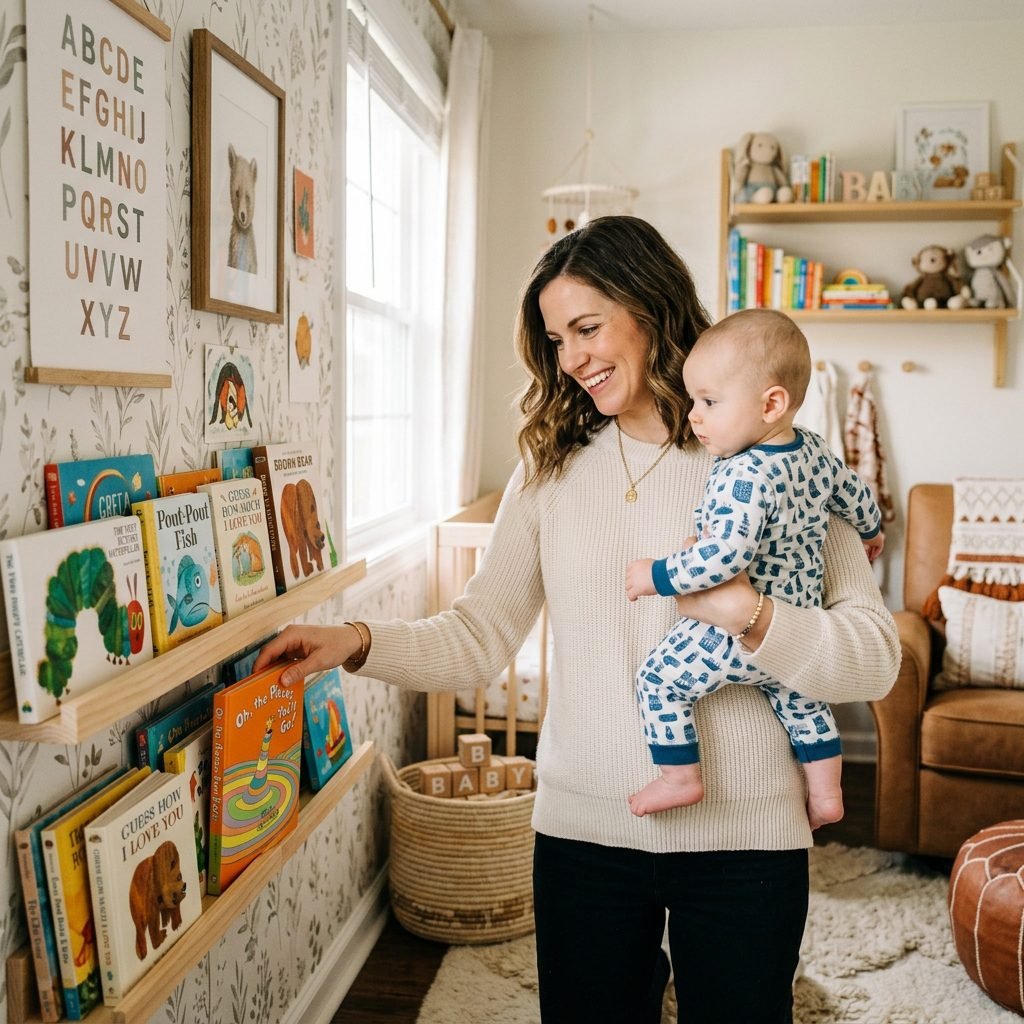
Mama, as your baby grows, their brain is going to develop at a breathtaking pace. What fascinates them at two months old will be completely different from what engages them at ten months. One of the greatest benefits of using picture ledges is how incredibly easy it is to rotate your books to match your baby’s developmental milestones and the changing seasons.
The Importance of Book Rotation
If you leave the exact same books on the shelf for a year, they become ‘wallpaper’ to your baby—they stop noticing them. By rotating the books every few weeks, you create a sense of novelty and excitement. When a toddler walks into their room and sees a ‘new’ selection of books on their level, their eyes light up, and they are immediately drawn to explore.
Developmental Curation Guide
Here is a sisterly cheat sheet on how to curate the bottom, most accessible ledge based on your baby’s current stage:
| Age Range | Developmental Focus | What to Display on the Bottom Ledge |
|---|---|---|
| 0 – 3 Months | Developing eyesight, focusing on high contrast. | Black and white board books, high-contrast pattern cards, mirror books. |
| 4 – 8 Months | Grasping, tactile exploration, chewing! | Indestructible books, soft cloth books with crinkle paper, chunky touch-and-feel books. |
| 9 – 18 Months | Fine motor skills, object permanence, pointing. | Lift-the-flap books, finger-puppet books, books with photographs of real babies’ faces. |
| 18+ Months | Language burst, emotional recognition, routines. | Simple storylines, books about big feelings, bedtime routine books, alphabet/counting books. |
Celebrating Seasons and Holidays
Another joyful way to utilize your picture ledges is by creating seasonal displays! As October rolls around, swap out the everyday books for stories about pumpkins, autumn leaves, and gentle, friendly ghosts. In December, fill the ledges with snowy adventures and holiday classics. In the Spring, bring out the books about blooming flowers, baby animals, and rain puddles.
Not only does this keep the nursery feeling fresh and festive, but it also helps your growing toddler learn about the rhythms of the year, the changing weather, and family traditions. Keep your off-season books stored in a bin in the closet, and rotate them out as the calendar turns.
Conclusion: Creating a Haven of Connection
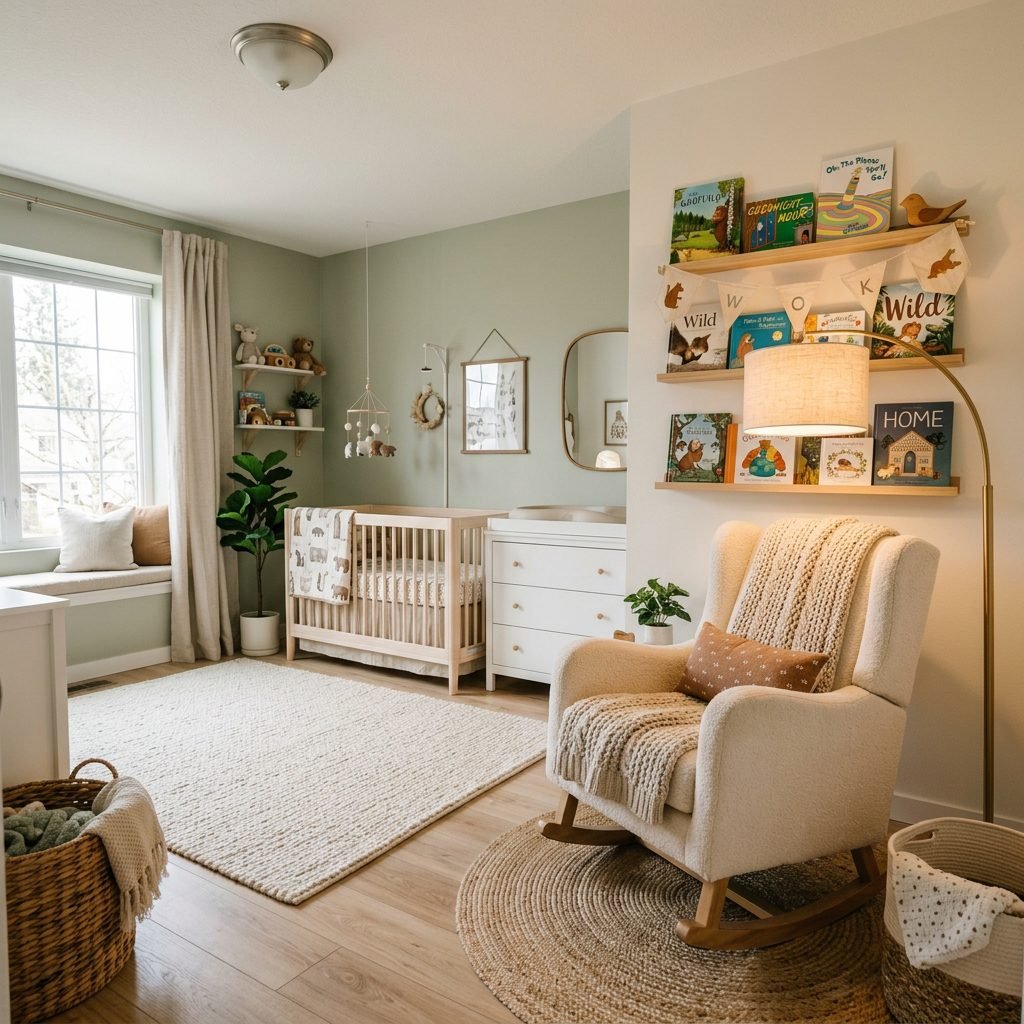
As you stand back and look at your newly installed, beautifully styled wooden picture ledges, I hope you feel a deep sense of pride and anticipation. You haven’t just hung shelves on a wall, mama. You have crafted a sanctuary for connection, imagination, and quiet bonding.
In the weeks and months to come, that little reading nook is going to witness some of your most precious memories. It is where you will pace and read softly during a 3 AM sleep regression. It is where your toddler will eventually toddle over, pull a book from the bottom ledge, and climb into your lap, demanding to hear their favorite story for the hundredth time. It is a space built purely out of your love and excitement for their arrival.
Take your time curating those books. Run your hands over the smooth wood. Arrange the little stuffed animals just right. Nesting is a beautiful, sacred part of the transition into motherhood, and this project is a wonderful way to channel that energy. You are doing a beautiful job preparing for this baby, and they are so incredibly lucky to have you.
Happy styling, sweet mama, and enjoy every single page of the story you are about to write together.
Conclusion
As you stand back and look at your newly installed, beautifully styled wooden picture ledges, I hope you feel a deep sense of pride and anticipation. You haven’t just hung shelves on a wall, mama. You have crafted a sanctuary for connection, imagination, and quiet bonding.
In the weeks and months to come, that little reading nook is going to witness some of your most precious memories. It is where you will pace and read softly during a 3 AM sleep regression. It is where your toddler will eventually toddle over, pull a book from the bottom ledge, and climb into your lap, demanding to hear their favorite story for the hundredth time. It is a space built purely out of your love and excitement for their arrival.
Take your time curating those books. Run your hands over the smooth wood. Arrange the little stuffed animals just right. Nesting is a beautiful, sacred part of the transition into motherhood, and this project is a wonderful way to channel that energy. You are doing a beautiful job preparing for this baby, and they are so incredibly lucky to have you.
Happy styling, sweet mama, and enjoy every single page of the story you are about to write together.