
How the Side Lying Release Technique Can Ease Back Labor and Speed Up Delivery
Oh, mama, if you are reading this while navigating the intense waves of back labor, take a deep, grounding breath. You are doing incredible work. Back labor—that relentless pressure in your lower spine—often happens when your little one is positioned ‘sunny-side up’ (occiput posterior) or is trying to find the perfect angle to engage with your pelvis. It is exhausting, but I want you to know there is a powerful, evidence-based tool that can help. The Side Lying Release (SLR) is more than just a resting position; it is a sophisticated technique used by doulas and midwives worldwide to soften the pelvic floor and create the ‘room at the inn’ your baby needs to rotate and descend. By temporarily stretching the ligaments and muscles around the sacrum, we can often see labor progress speed up and that sharp back pain begin to fade into a manageable rhythm.
In this guide, we are going to walk through exactly why this technique works, how your partner can support you, and the step-by-step instructions to perform it safely. Whether you are prepping your birth plan or currently in the thick of it, consider this your sisterly doula-expert advice for a smoother, more comfortable delivery.
The Science of Space: Why Back Labor Happens and How SLR Helps
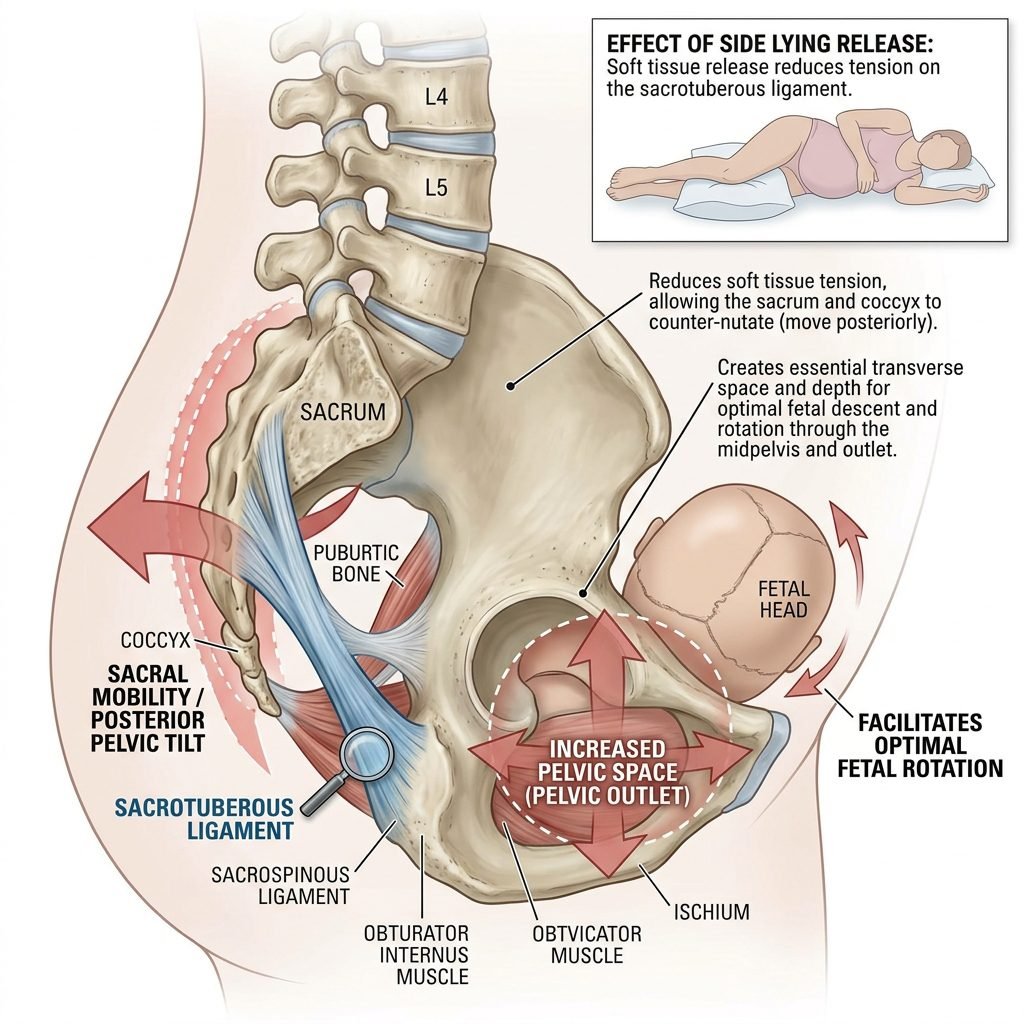
To understand why the Side Lying Release is so effective, we first have to look at the anatomy of your amazing birthing body. Back labor is frequently caused by a baby whose head is pressing against your sacrum (the bony plate at the base of your spine). This often occurs when the baby is in a posterior position. However, sometimes the issue isn’t just the baby’s position, but the tension in the pelvic floor muscles and the ligaments that support the uterus.
The Side Lying Release works by using gravity and a gentle, static stretch to ‘release’ the pelvic floor. When you lie on the edge of a bed and let your top leg hang, you are actually creating a slight opening in the mid-pelvis and pelvic outlet. This subtle shift allows the sacrum to move more freely and gives the baby the space they need to tuck their chin, rotate, and move past any ‘speed bumps’ in your pelvic architecture.
| Feature | Traditional Labor Positions | Side Lying Release (SLR) |
|---|---|---|
| Primary Focus | Gravity-assisted descent | Softening pelvic ligaments/muscles |
| Pelvic Space | Static or compressed | Maximizes pelvic diameter |
| Back Labor Relief | Moderate (via counterpressure) | High (by encouraging baby rotation) |
| Energy Level | Can be physically demanding | Allows for rest and relaxation |
Step-by-Step Instructions for the Perfect Side Lying Release
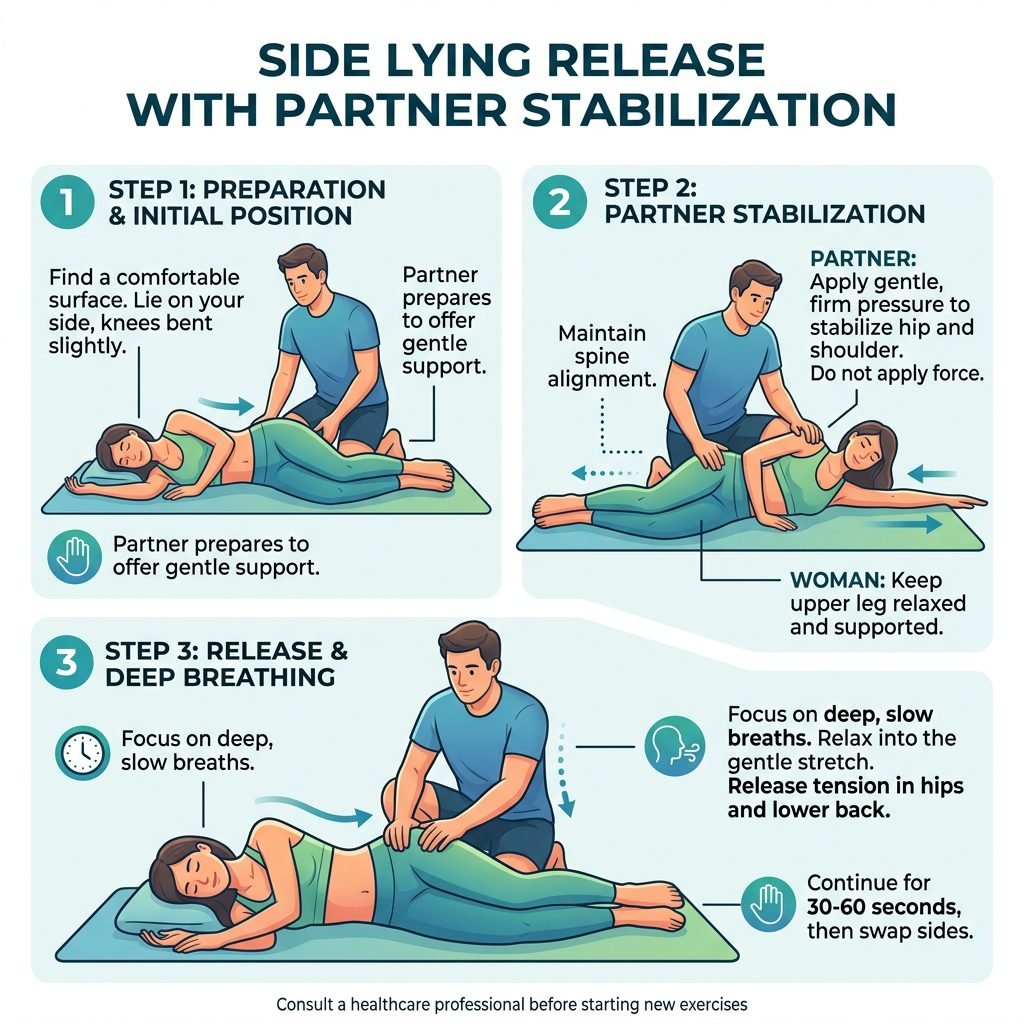
Performing the Side Lying Release requires a bit of setup, a firm surface, and a supportive partner. This is not a move you should try solo, as your safety and balance are the top priorities. Follow these steps carefully to ensure you are getting the full benefit of the stretch.
Preparation and Alignment
- Find a firm surface: A massage table is ideal, but a firm bed or even a couch (if it’s not too soft) works well. You need to be close to the edge.
- Stack your hips: Lie on your side, ensuring your shoulders and hips are perfectly vertical (stacked one on top of the other). Do not lean forward or backward.
- Partner positioning: Your partner should stand in front of you, placing their hands on your hip and shoulder to keep you from rolling off the bed.
The Execution
- The ‘Hang’: Slowly move your hips toward the edge of the bed until your top leg can hang freely over the side.
- Straighten and Shift: Keep the bottom leg straight. The top leg should hang down toward the floor, slightly in front of the bottom leg.
- The Release: Let the weight of the hanging leg do the work. You should feel a gentle pulling sensation in your hip and lower back. This is the pelvic floor muscles lengthening.
- Duration: Stay in this position for at least 2 to 3 full contractions, or about 5 to 10 minutes.
- Switch Sides: This is vital! Always perform the SLR on both sides to maintain pelvic balance, even if you feel relief after the first side.
“Remember, mama: the goal isn’t to push or strain. The goal is to let go. Imagine your pelvic muscles softening like melting butter as your leg hangs heavy.”
Timing the Technique: When to Use SLR for Maximum Benefit

Not every labor position is right for every moment. The Side Lying Release is a specialized tool that is most effective during specific scenarios. Knowing when to pull this tool out of your ‘birth bag’ can save you hours of unnecessary discomfort.
Early Labor Stalls
If you have been in early labor for a long time and contractions are irregular or ‘pokey’ in your back, the SLR can help settle the baby into a better position to start dilating the cervix more efficiently. It’s a great way to ‘reset’ the rhythm of labor.
The ‘Active Labor’ Plateau
Sometimes, labor progresses beautifully until 6 or 7 centimeters, and then everything seems to stop. This is often because the baby has hit a narrow part of the pelvis. Using the SLR during this plateau can provide the extra millimeter of space needed for the baby to slide through.
| Labor Scenario | Why Use SLR? | Expected Outcome |
|---|---|---|
| Back Labor | Relieves sacral pressure | Reduced pain, baby rotation |
| Asymmetrical Contractions | Balances pelvic tension | Consistent contraction pattern |
| High Baby (Not Engaged) | Opens the pelvic inlet | Baby drops into the pelvis |
| Stalled Dilation | Removes soft tissue resistance | Progress in cervical opening |
Partner Support: How to Be the Ultimate Birth Companion

Partners, this is your time to shine! During a Side Lying Release, the birthing person is essentially trusting you with their balance while they are in a vulnerable, often painful state. Your role is to be their ‘anchor.’ Here is how to provide the best support:
- Check the Alignment: From your vantage point, make sure her hips aren’t tilting. If her top hip is leaning forward, gently guide it back so her hips are stacked like two bricks.
- Physical Stability: Use your body weight to keep her secure. You can lean your thighs against the bed or table to provide a ‘bumper’ so she feels safe letting her leg hang.
- Verbal Affirmations: Remind her to relax her jaw and her shoulders. Tension in the face often translates to tension in the pelvic floor.
- Monitor the Breath: Encourage long, slow exhales. If you see her holding her breath during a contraction, breathe loudly with her to help her find the rhythm again.
“You are her safe harbor. Your steady hands and calm voice are just as important as the technique itself. You’ve got this, team!”
The Doula’s Secret Toolkit: Combining SLR with Other Methods

While the Side Lying Release is powerful on its own, it works even better when paired with other comfort measures. As a doula, I often layer these techniques to create a ‘cocktail’ of relief for back labor.
The Peanut Ball
After performing the SLR on both sides, resting with a peanut ball between the ankles and knees can help maintain the space you just created. It keeps the pelvis open while allowing the birthing person to rest and recover their energy.
Counterpressure
While in the SLR position, the partner can also apply double hip squeezes or firm pressure on the sacrum with the palm of their hand. This ‘sandwich’ approach—stretching the front and pressing the back—is often the only thing that makes back labor bearable during the transition phase.
The Rebozo Sifting
If the baby is very high, doing a gentle Rebozo sifting (belly jiggling with a long scarf) before the SLR can help relax the abdominal muscles, making the subsequent release even more effective.
| Technique Pair | Best For… | Pro Tip |
|---|---|---|
| SLR + Counterpressure | Intense back pain | Apply pressure during the peak of the wave. |
| SLR + Peanut Ball | Resting between sets | Keep the ‘opening’ active even while sleeping. |
| SLR + Warm Compress | Muscle tension | Place heat on the lower back during the stretch. |
Safety First: When to Check with Your Provider
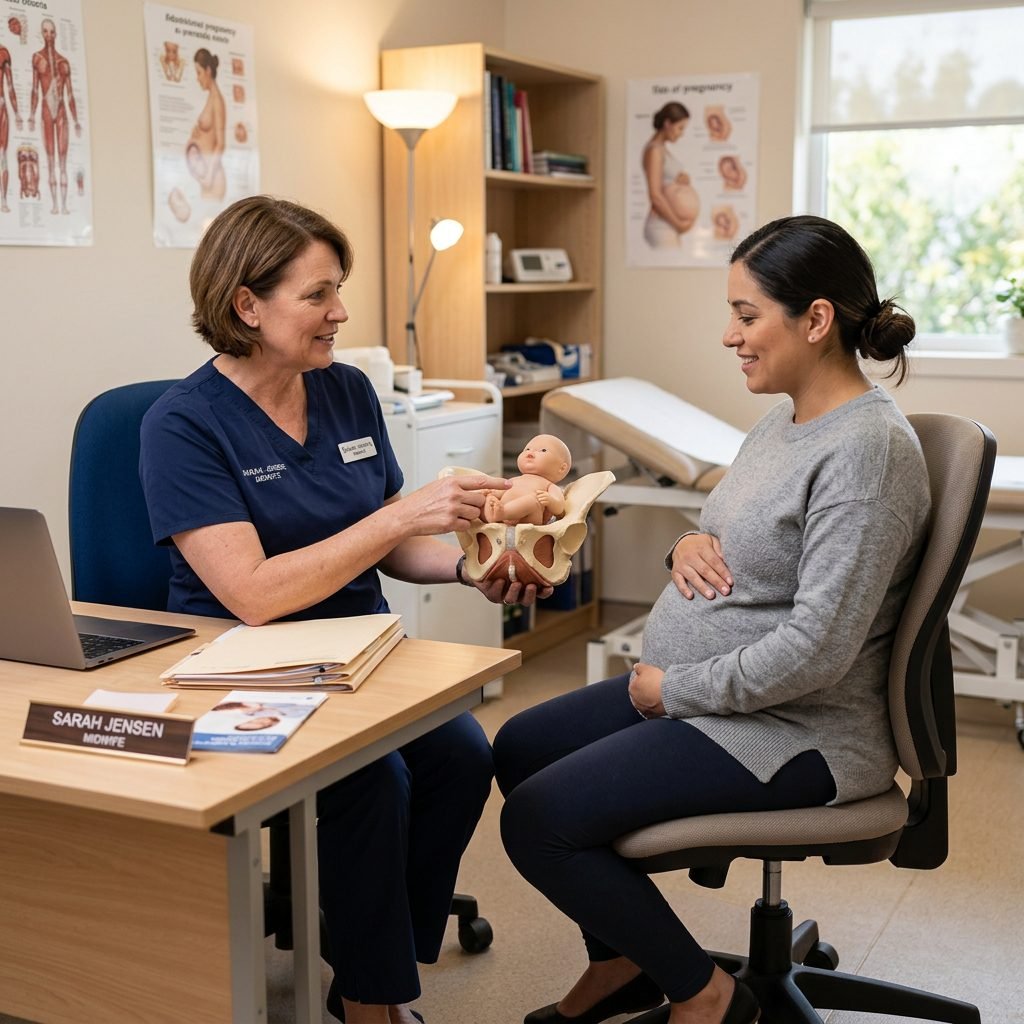
While the Side Lying Release is generally very safe, there are a few situations where you should exercise caution or consult your midwife or OB-GYN before attempting it. Safety is our top priority for both you and your sweet baby.
- Joint Hypermobility: If you have Ehlers-Danlos Syndrome or extreme joint laxity, the SLR should be done very gently, as your ligaments are already quite loose.
- History of Hip Dislocation: If you have had hip surgery or a history of dysplasia, check with your doctor first.
- Severe Pubic Symphysis Pain (SPD): For some mamas with SPD, the ‘hang’ can feel too intense. If it causes sharp, localized pain in the pubic bone, stop immediately.
- High Blood Pressure: Ensure you aren’t lying flat on your back; stay strictly on your side to maintain optimal blood flow to the placenta.
Common Mistakes to Avoid:
- Don’t let the leg touch the floor: If the leg touches the floor, the stretch stops. You may need to move higher up on a bed or use a taller surface.
- Don’t rush: It takes time for the fascia to release. Give it at least 2 full contractions per side.
- Don’t skip the second side: Even if the baby moves, you want a balanced pelvis for the final push!
Conclusion
The journey of birth is a profound transformation, and while back labor can feel like a mountain that is too high to climb, tools like the Side Lying Release are there to help you find your path. By understanding the anatomy of your pelvis and working with your partner to create space, you are taking an active, empowered role in your delivery. Remember, mama, your body was designed for this. Sometimes it just needs a little bit of ‘room’ to do what it knows best. Trust the process, lean into the support around you, and know that each contraction—and each release—is bringing you one step closer to holding your baby in your arms. You are strong, you are capable, and you are almost there.