How to Make a Non-Toxic Rainbow Rice Sensory Bin Your Baby Will Play With for Hours
Mama, let’s have a real talk. You are exhausted. You’ve read all the books, you’ve bought all the flashing, singing, plastic toys, and yet, your sweet baby is only interested in playing with your keys, the remote control, or the dog’s water bowl. You are desperately craving just twenty minutes to drink your coffee while it is actually still hot, or perhaps just a moment to sit and breathe without someone needing to be entertained. I see you, I have been there, and I am here to share one of my absolute favorite doula and mom-approved secrets: the sensory bin.
But not just any sensory bin. We are talking about a beautiful, engaging, and entirely taste-safe, non-toxic rainbow rice sensory bin. If you are an expectant mother building your registry, a postpartum mama looking for gentle ways to engage your older baby, or a nursery designer wanting to incorporate Montessori principles into your home, this is for you.
The biggest fear we have when introducing sensory play to babies and young toddlers is the inevitable moment everything goes straight into their mouths. It is a completely normal, developmental milestone! Babies explore the world through their oral senses. That is exactly why this tutorial skips the harsh chemicals, rubbing alcohol, and synthetic paints found in many online tutorials. Instead, we are using pantry staples to create a vibrant, magical play experience that is safe even if a few grains end up being taste-tested.
Remember: You are doing an incredible job. Creating enriching experiences for your baby doesn’t have to cost a fortune or require a teaching degree. Sometimes, the most profound developmental leaps happen in a simple bin of colored rice.
Why Sensory Play is Pure Magic for Developing Brains
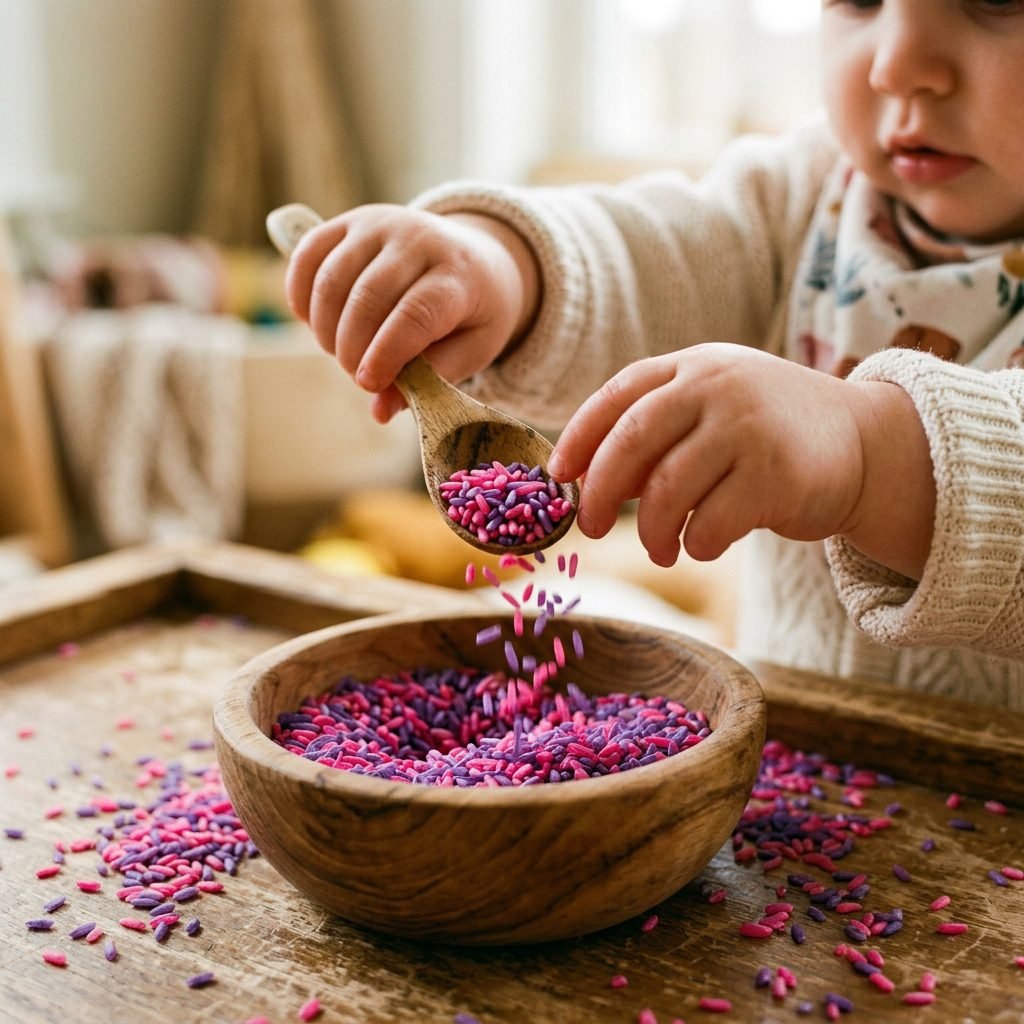
Before we dive into the recipe, let’s talk about why we are doing this. As a maternal wellness expert and pediatric sleep consultant, I can tell you that sensory play is not just a trendy Pinterest aesthetic—it is foundational for your baby’s cognitive and physical development. When your baby runs their hands through a bin of rice, they aren’t just making a mess; they are building crucial neural pathways.
The Developmental Benefits of Rice Bins
- Fine Motor Skill Development: When your baby pinches a single grain of rice or grasps a small wooden scoop, they are refining their pincer grasp. This is the exact same muscle memory they will eventually use to hold a pencil, button a shirt, or tie their shoes.
- Proprioceptive Feedback: Burying their hands and arms deep into the heavy rice provides deep pressure input to their joints. This is incredibly calming for their nervous system and can actually help them sleep better at night by regulating their sensory needs during the day.
- Language Acquisition: Sensory play is a goldmine for vocabulary. As you play alongside them, you can introduce words like pour, scoop, empty, full, rough, smooth, red, blue, and yellow.
- Independent Play Stamina: This is the holy grail for moms. Sensory bins naturally encourage flow-state play. It teaches your baby how to entertain themselves, building their attention span and giving you a moment of peace.
By providing a safe, contained environment for them to explore texture, sound (the rice makes a beautiful rain sound when poured!), and color, you are essentially giving them a masterclass in early childhood development right in your living room.
The Ultimate Non-Toxic, Taste-Safe Recipe (No Rubbing Alcohol!)
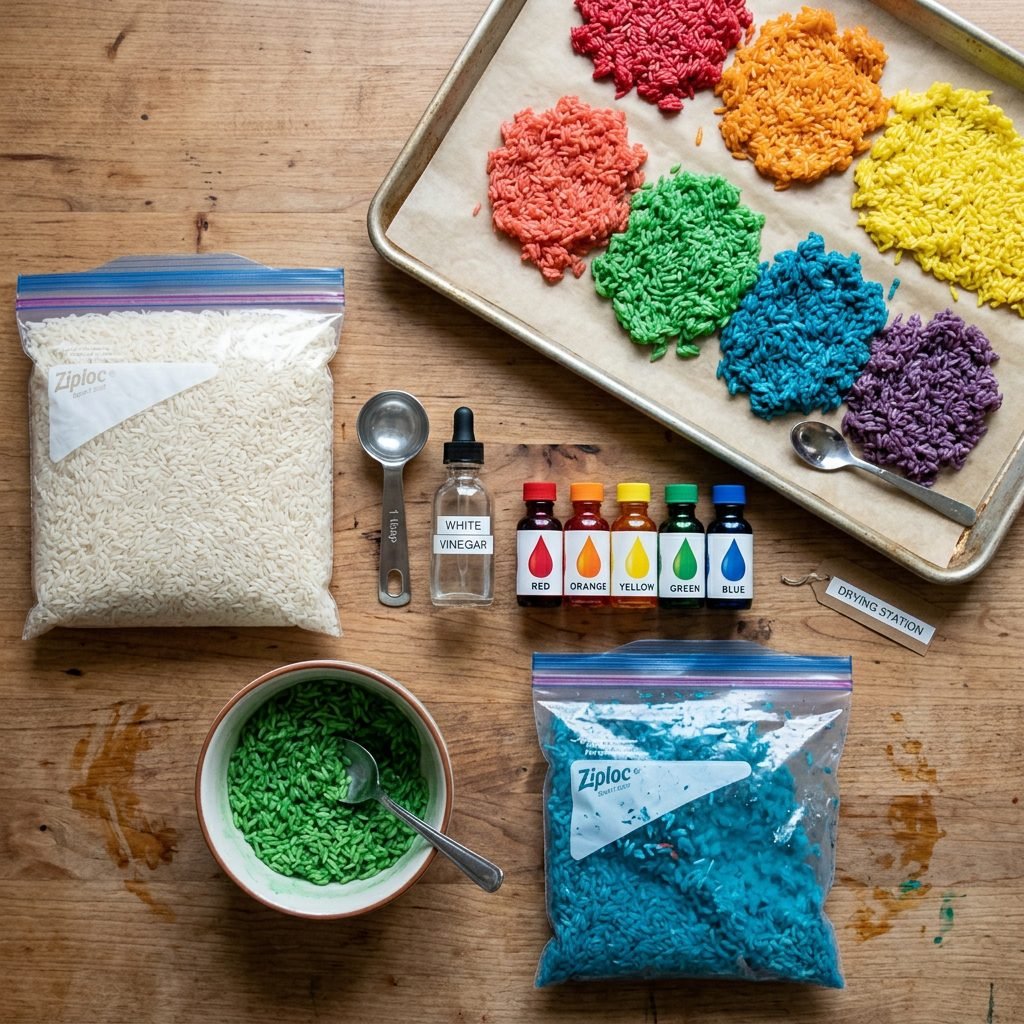
Many traditional rainbow rice recipes call for rubbing alcohol or hand sanitizer to help the food coloring dry quickly and set into the rice. While that is fine for older children who know not to eat their play materials, it is a hard no for our babies and toddlers. Our recipe uses a natural acid—white vinegar or lemon juice—to set the color safely. Don’t worry about the smell; it dissipates completely once the rice is dry!
What You Need for Each Color Batch
- 1 Cup of plain white rice (Long grain or standard white rice works best. Avoid sticky or arborio rice).
- 1 Tablespoon of white vinegar OR lemon juice.
- 10-15 Drops of liquid food coloring or a small scoop of natural food gel (depending on how vibrant you want the color).
- A reusable silicone bag or a Ziploc bag.
- Parchment paper and a baking sheet for drying.
Step-by-Step Instructions
- Prep Your Station: Lay out a baking sheet lined with parchment paper for each color you plan to make. If you are making a traditional rainbow (Red, Orange, Yellow, Green, Blue, Purple), you will need six small sections.
- Mix the Liquid: In your sealable bag, add the 1 Tablespoon of vinegar and your chosen food coloring. Squish the bag around to mix the color into the vinegar.
- Add the Rice: Pour 1 Cup of white rice into the bag.
- Shake It Up: Seal the bag tightly (double-check the seal, mama!) and let your toddler help with this part if they are old enough. Shake, massage, and squish the bag until every single grain of rice is coated in the vibrant color.
- Spread and Dry: Open the bag and spread the wet rice in a thin, even layer onto your parchment-lined baking sheet.
- The Drying Process: You have two options here. You can let it air dry in a sunny spot for about 4 to 6 hours. Or, if you are in a rush to play, you can bake it in the oven at 200 Degrees Fahrenheit for 15-20 minutes, giving it a stir halfway through.
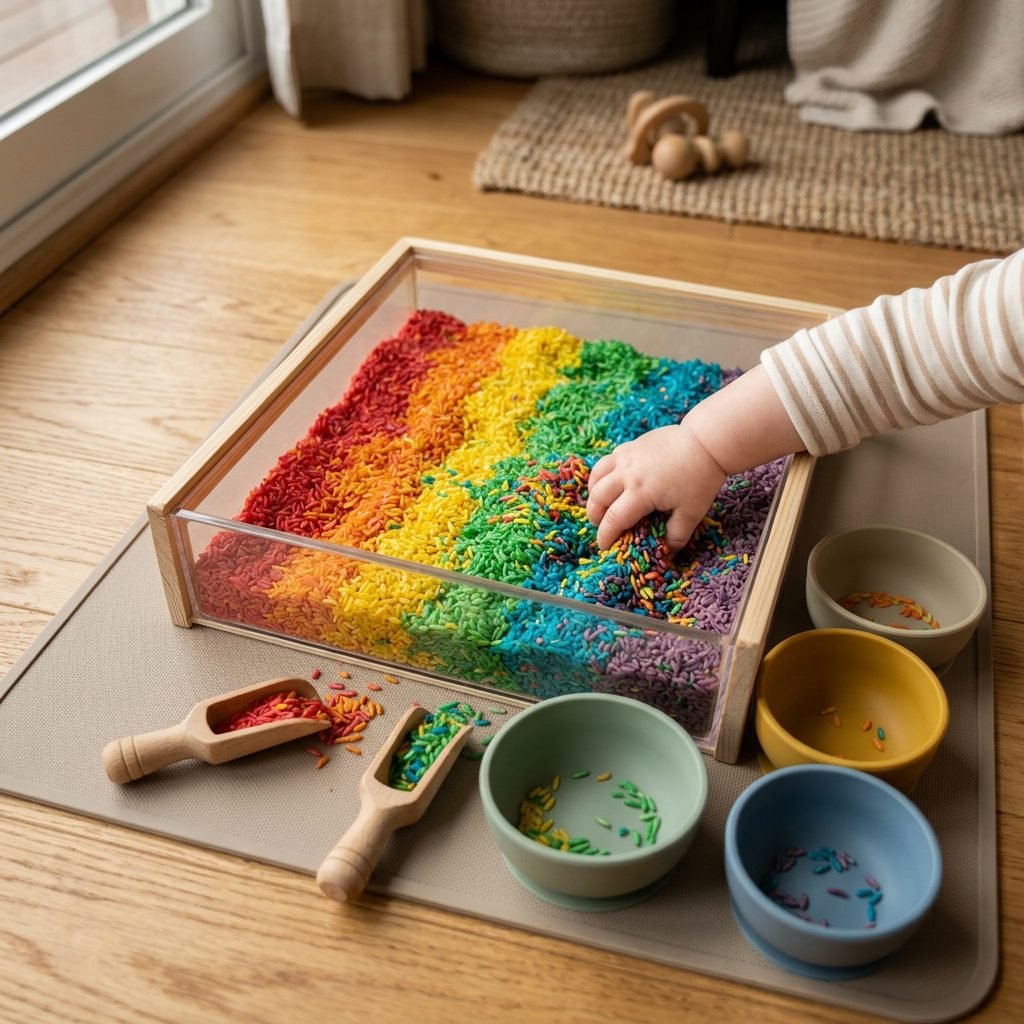
- Cool and Combine: Once the rice is completely dry and cool to the touch, pour all the colors side-by-side into your sensory bin for that stunning, Instagram-worthy rainbow effect!
Pro-Tip: If you want to make the sensory experience even more calming, add two drops of baby-safe, pure Lavender essential oil to the vinegar mixture before adding the rice. It creates a soothing aromatherapy experience perfect for pre-naptime play.
Budget Breakdown & Essential Supply List
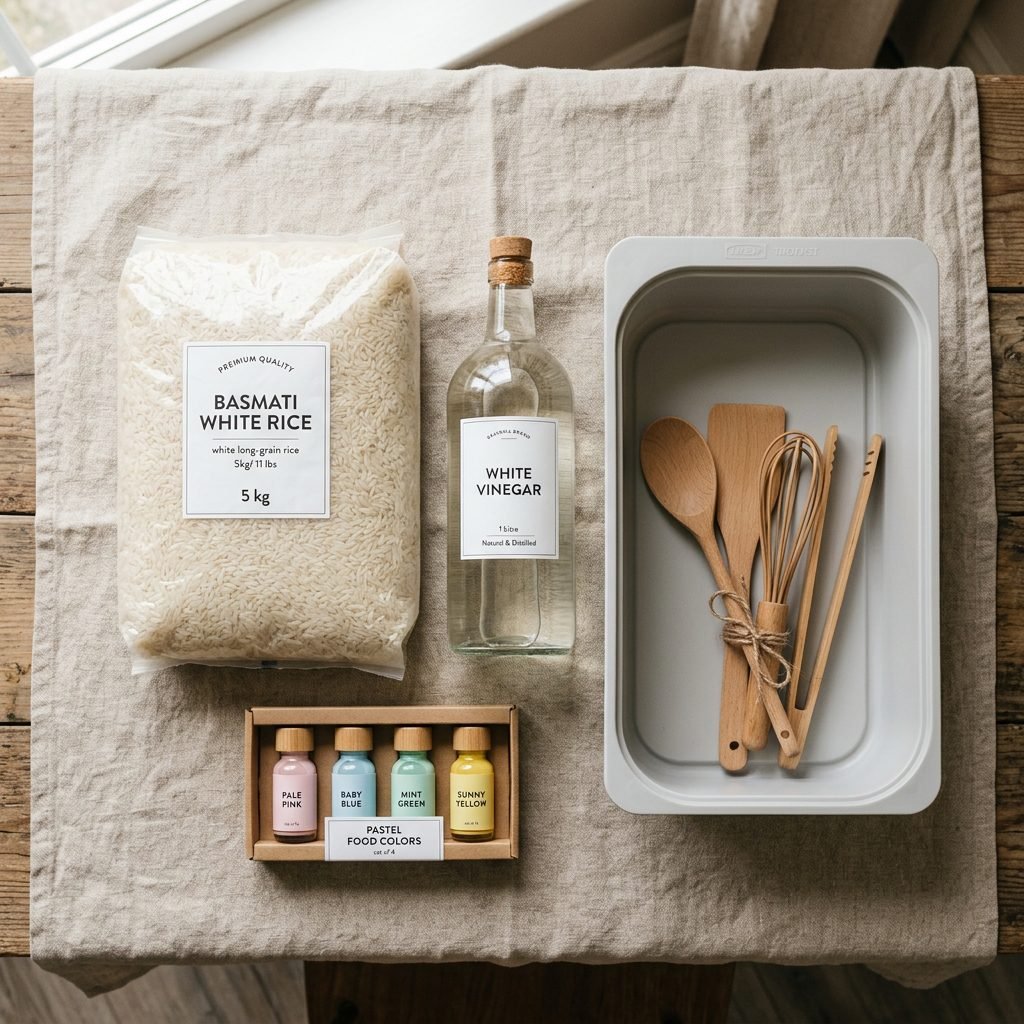
As moms, we know how quickly baby gear and activities can add up. One of the reasons I absolutely adore this project is because it is incredibly budget-friendly. You likely already have most of these items in your pantry. If you are a hostess planning a baby shower, setting up a sensory station for the older kids in attendance is a brilliant, low-cost way to keep them entertained while the adults celebrate the mom-to-be.
Here is a breakdown of what you will need, the estimated cost, and how to source the safest materials for your little one.
| Item / Supply | Estimated Cost | Notes & Sourcing Tips |
|---|---|---|
| Plain White Rice (5 lb bag) | $3.00 – $5.00 | Buy the cheapest bulk white rice you can find. Avoid brown rice as it doesn’t take the dye as vibrantly. |
| White Vinegar (1 Bottle) | $1.50 – $2.00 | Acts as the natural, taste-safe setting agent. Lemon juice is a great alternative if you prefer the citrus scent. |
| Natural Food Coloring | $5.00 – $12.00 | Look for plant-based or standard grocery store liquid dyes. Gel food coloring works but requires more aggressive mixing. |
| Plastic or Acrylic Bin | $4.00 – $15.00 | Under-bed storage boxes with lids work perfectly. IKEA Trofast bins are the gold standard for nursery design integration. |
| Tools (Scoops, Bowls, Tongs) | $0.00 – $10.00 | Raid your kitchen! Measuring cups, silicone muffin liners, and wooden spoons are free and perfect for play. |
| Splat Mat or Old Sheet | $0.00 – $20.00 | Crucial for mess management. A washable, neutral-toned splat mat protects floors and makes cleanup a breeze. |
For less than $20.00, you are creating an educational tool that will last for months, if not years, provided it is stored properly in an airtight container away from moisture.
How to Set Up the Sensory Bin for Maximum Engagement (and Minimal Mess!)
I can hear the collective sigh of Type-A moms everywhere: “But what about the mess?!” Trust me, I completely understand. As an interior organizer and a mom who loves a clean house, the thought of thousands of tiny rice grains scattered across the living room rug is enough to induce palpitations. But with the right setup, the mess is completely manageable, and the benefits far outweigh the five minutes of cleanup.
The “Containment” Strategy
- The Splat Mat is Non-Negotiable: Always place your sensory bin on top of a large splat mat, a wipeable tablecloth, or an old flat bedsheet. When playtime is over, simply gather the corners of the sheet and funnel the spilled rice right back into the bin.
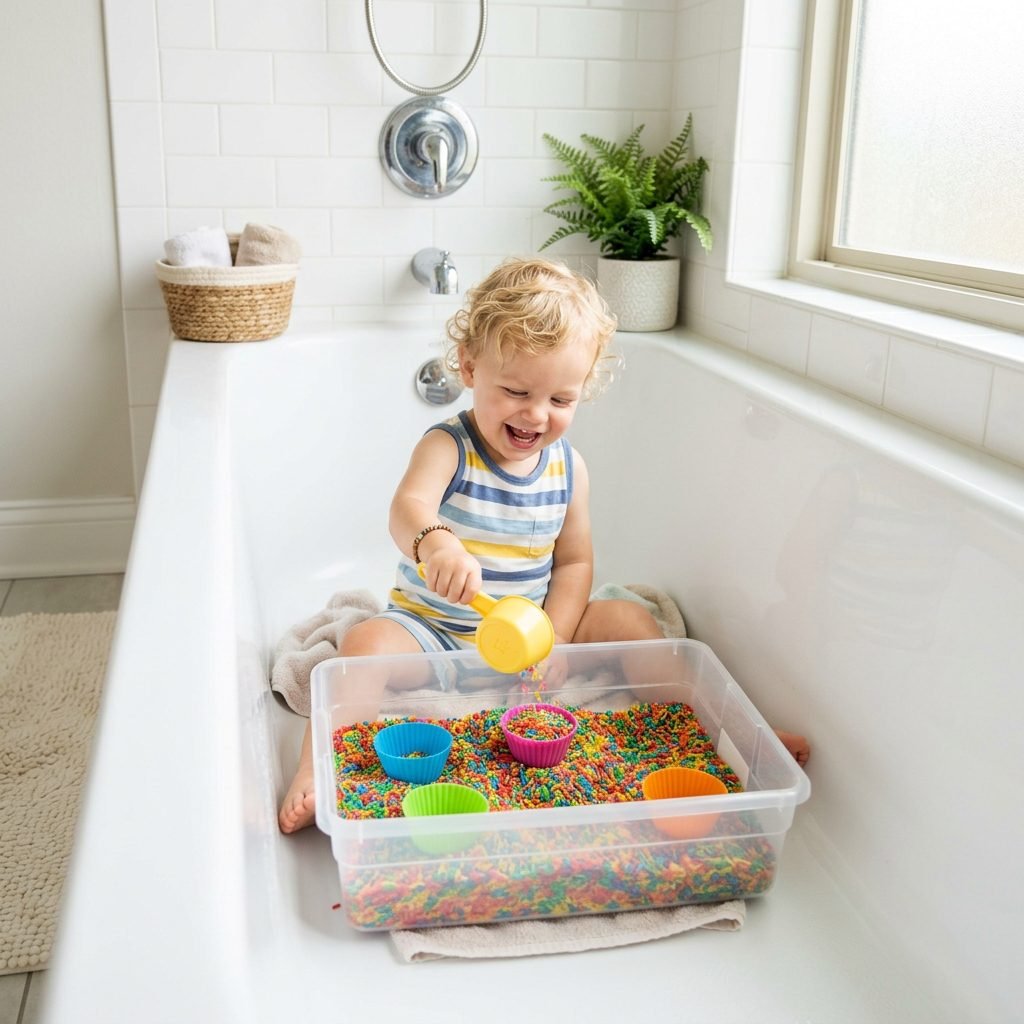
- Choose the Right Bin: A shallow, wide bin is better than a deep, narrow one. The wider surface area allows your baby to reach in with both hands without knocking the sides over. An under-bed storage container is perfect for this.
- Establish the “One Rule”: Even from a young age (around 12-15 months), you can gently enforce the rule: “The rice stays in the bin.” If they start intentionally throwing rice outside the bin, calmly say, “I see you want to throw. We don’t throw rice. Playtime is all done.” Put the bin away for a few hours. They will learn the boundary very quickly!
- Take it Outside: If it’s a beautiful day, take the bin to the patio, the grass, or even place it inside an empty, dry bathtub! The bathtub is a brilliant mom-hack because any spills are instantly contained, and you can just sweep them up or wash them down the drain if it’s a small amount.
What to Put Inside the Bin
The rice is the base, but the accessories are where the magic happens. To keep your baby engaged for hours, rotate the tools you provide. Do not give them everything at once. Start with just their hands. Then, after ten minutes, introduce a small wooden scoop. Later, introduce a silicone cupcake liner. By slowly introducing new elements, you continuously refresh their attention span.
Great tools to include: Clean makeup brushes (for sweeping the rice), small metal whisks, measuring spoons, empty spice jars, and small animal figurines.
Age-Appropriate Play Ideas & Milestones
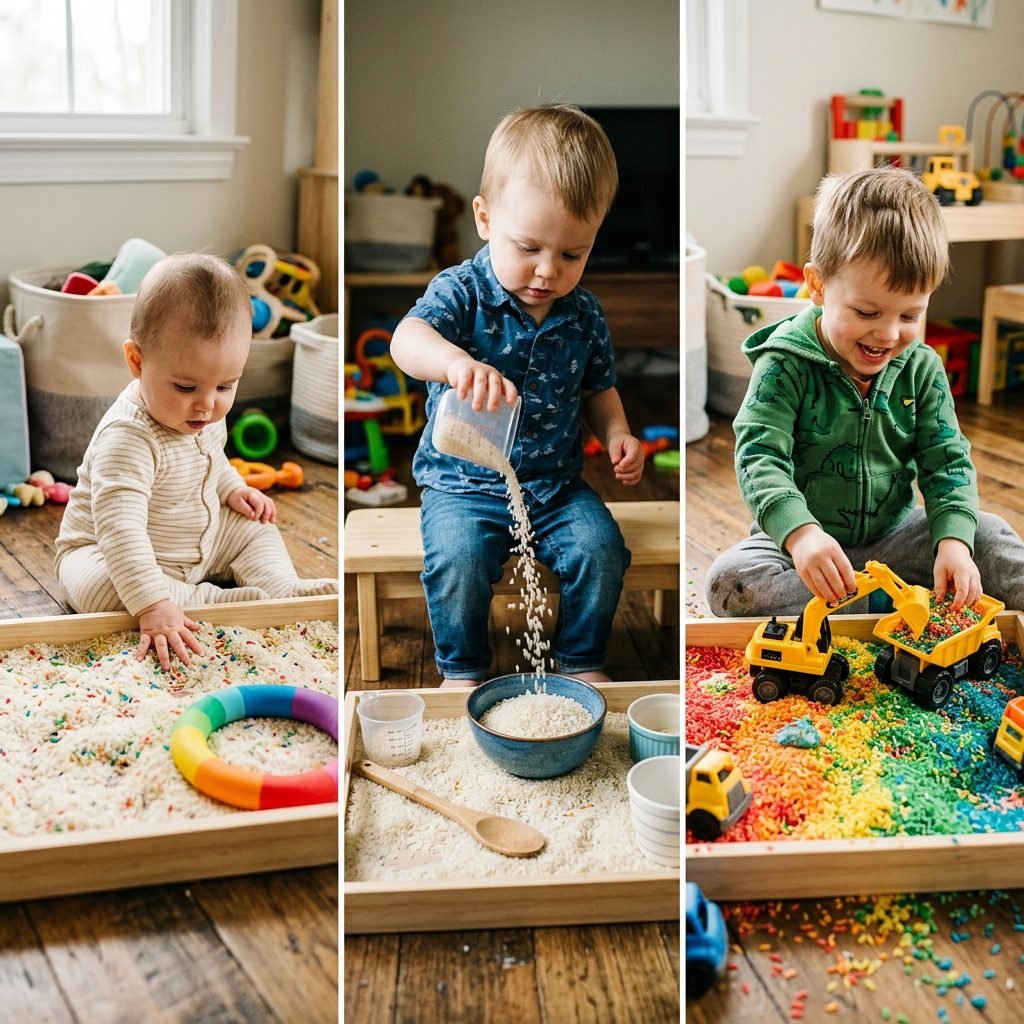
The beauty of a sensory bin is that it grows with your child. How a 7-month-old interacts with rainbow rice is vastly different from how a 2-and-a-half-year-old will play with it. Here is a breakdown of how to guide their play based on their developmental stage.
6 to 12 Months: Tactile Exploration
- The Goal: Sensory exposure and cause-and-effect.
- How to Play: At this age, your baby is just discovering textures. Sit them in your lap or in a supported seated position on the floor. Let them plunge their hands into the rice. Show them how to grab a handful and let it fall through your fingers like rain.
- Safety Note: Close supervision is mandatory. If they try to eat a handful, gently redirect their hands. Because the recipe is taste-safe, a stray grain won’t hurt them, but it is not meant to be a snack!
12 to 18 Months: The “Transfer” Schema
- The Goal: Fine motor refinement and spatial awareness.
- How to Play: Toddlers at this age are obsessed with moving things from one container to another. Provide two small bowls and a scoop. Watch as they painstakingly move the rice from the bin, to the bowl, and back again. This is deeply satisfying for their developing brains.
- Activity Idea: Hide large, chunky wooden puzzle pieces in the rice and have them “dig” to find them and place them on the puzzle board.
18 to 24+ Months: Imaginative & Thematic Play
- The Goal: Imaginative play, color recognition, and language development.
- How to Play: Now you can introduce themes! Create a “Construction Site” by adding small toy dump trucks and bulldozers to scoop the rice. Create an “Ocean Rescue” by burying plastic sea creatures in the blue and green sections of the rice.
- Activity Idea: Give them a pair of toddler-friendly tongs (great for pre-writing hand strength) and ask them to pick out specific items you’ve hidden, like large colorful pom-poms, sorting them by color.
Conclusion
Creating a non-toxic rainbow rice sensory bin is truly a rite of passage in modern motherhood. It is a beautiful, inexpensive, and deeply beneficial way to support your baby’s development while giving yourself a moment of grace and quiet. Whether you are setting this up in a meticulously designed nursery, on a splat mat in the middle of your living room, or as a fun activity station at a baby shower, the joy and intense concentration on your little one’s face will be worth every single second of prep time.
So go ahead, mama. Mix up those beautiful colors, lay out the splat mat, and pour yourself a hot cup of coffee. You have created a safe, enriching environment for your baby to learn and grow, and that is something to be incredibly proud of. You’ve got this!
Medical Disclaimer: The content provided in this article is for informational and educational purposes only. While this rainbow rice recipe uses non-toxic, food-grade ingredients intended to be “taste-safe,” sensory materials should never replace food. Rice poses a mild choking hazard for infants. Always closely and actively supervise your baby or toddler during any sensory play activities. If you have concerns about your child’s fine motor development, oral fixations, or sensory processing, please consult your pediatrician or a certified occupational therapist.