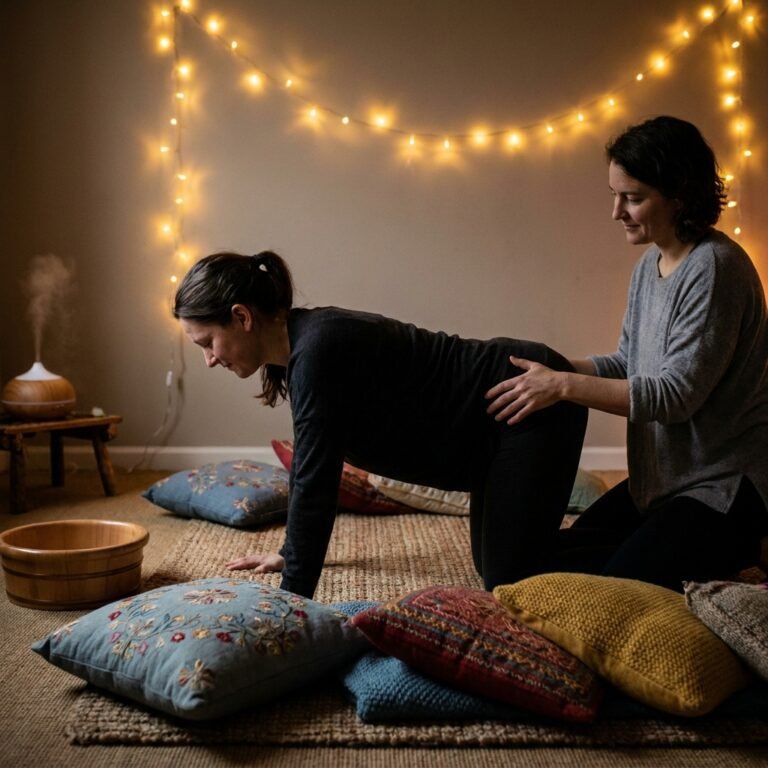
7 Gravity-Assisted Positions to Speed Up Labor and Reduce Pain Naturally
Embracing the Power of Gravity in Your Birth Journey
Hello, beautiful mama. If you are reading this, you are likely preparing for one of the most transformative experiences of your life. As a doula, I want you to take a deep breath and remember: your body was built for this. However, just because our bodies are capable doesn’t mean we can’t use a little help from the laws of physics. In the world of birth, gravity is your best friend.
For decades, the standard image of birth has been a woman lying on her back in a hospital bed. While this might be convenient for medical staff, it is often the most challenging position for the laboring mother. Why? Because it forces you to push your baby uphill. When we transition to upright, gravity-assisted positions, we allow the weight of the baby to press against the cervix, encouraging dilation and helping the baby navigate the pelvic bones more efficiently. In this guide, we are going to walk through seven powerful positions that can shorten your labor and provide significant natural pain relief.
Remember, sweet friend: You are not just ‘waiting’ for labor to happen; you are an active participant in the dance of birth. Move your hips, trust your instincts, and let gravity do the heavy lifting.
The Science of Upright Birthing: Why Physics Matters
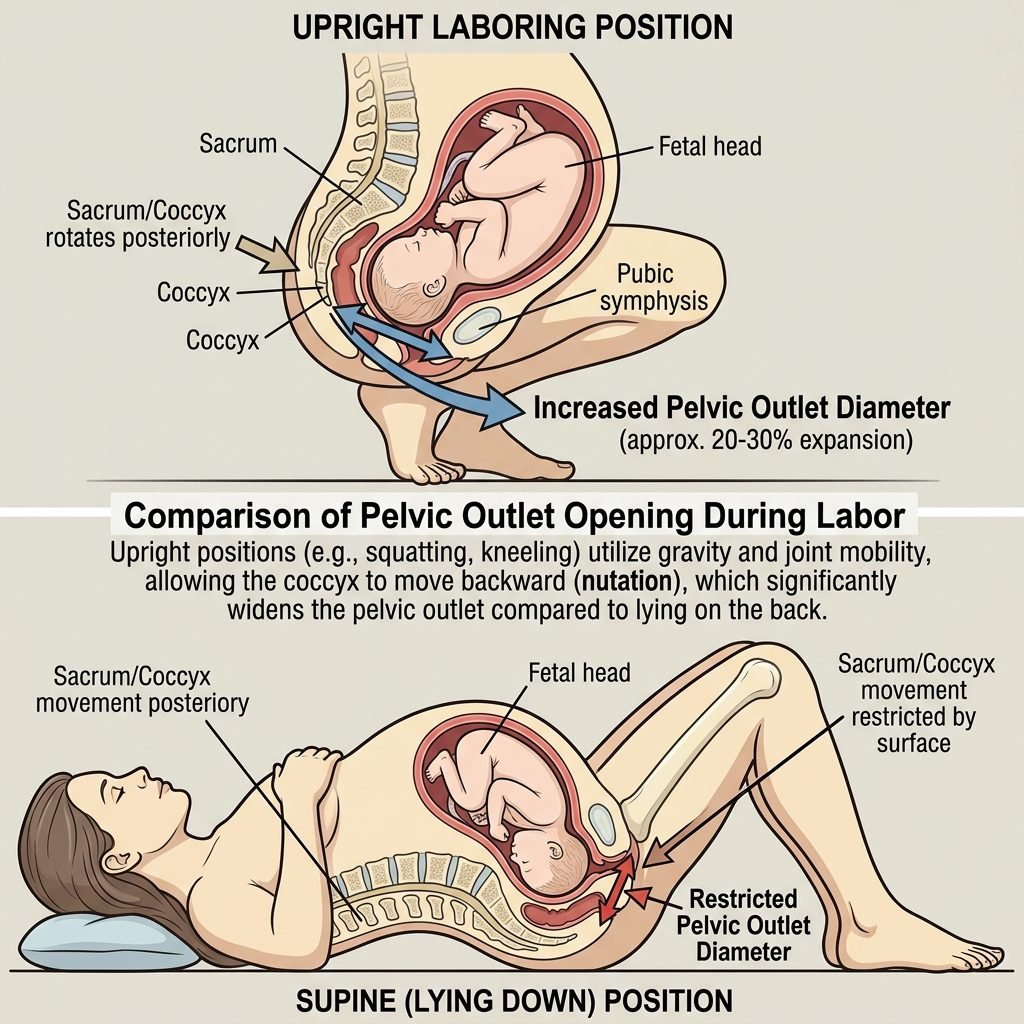
Before we dive into the specific moves, let’s talk about the ‘why.’ When you remain upright and mobile during labor, you are utilizing the natural downward pull of gravity. This weight helps the baby’s head apply consistent, even pressure to the cervix, which triggers the release of oxytocin—the hormone responsible for contractions.
The Benefits of Moving with Gravity
- Increased Pelvic Diameter: Certain positions, like squatting or lunging, can increase the pelvic opening by up to 20-30%.
- Fetal Oxygenation: Being upright prevents the heavy uterus from compressing the vena cava, ensuring a better oxygen supply for both you and your baby.
- Shortened Labor: Studies suggest that upright positions can shorten the first stage of labor by over an hour on average.
- Natural Pain Management: Movement helps distract the brain from pain signals and allows the baby to find the path of least resistance.
| Labor Phase | Focus Goal | Recommended Gravity Move |
|---|---|---|
| Early Labor | Rest & Conservation | Slow Swaying / Walking |
| Active Labor | Cervical Dilation | Standing Lean / Birth Ball |
| Transition | Baby Descent | Deep Squat / Asymmetrical Lunge |
| Pushing | Expulsion | Birth Stool / Supported Squat |
1. The Standing Lean: Stability and Mobility

The standing lean is a classic for a reason. It allows you to stay on your feet while resting your upper body, making it perfect for the Active Labor phase when contractions become more intense.
How to Perform the Standing Lean:
- Stand facing a wall, your partner, or a high piece of furniture (like a dresser or a raised hospital bed).
- Place your forearms on the surface and lean your head forward.
- Spread your feet wider than hip-width apart and keep your knees soft (never locked).
- During a contraction, sway your hips from side to side like a slow pendulum.
Doula Tip: If you are using your partner for support, wrap your arms around their neck and let them take your weight. This ‘slow dance’ creates a beautiful emotional connection and allows your partner to apply counter-pressure to your lower back, which is a lifesaver for back labor.
2. The Deep Supported Squat: Opening the Gates
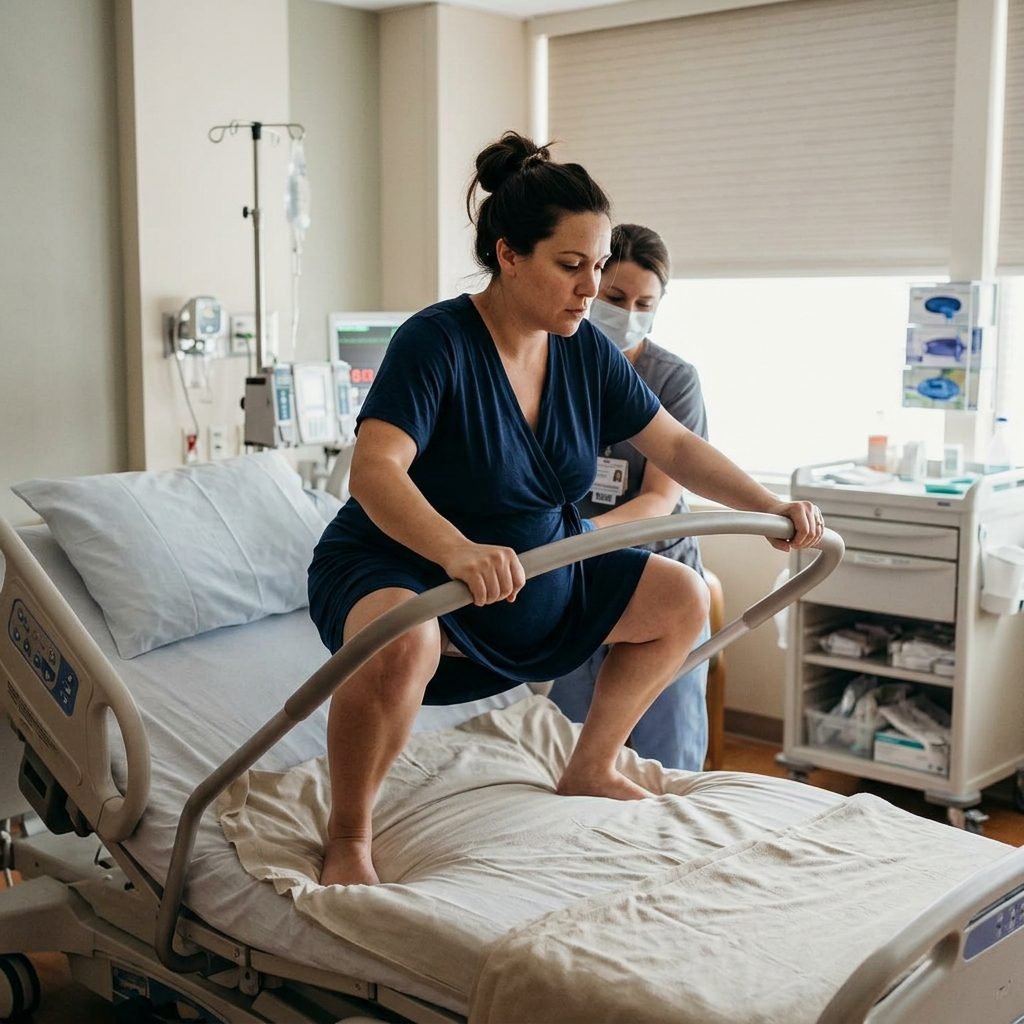
Squatting is perhaps the most effective gravity-assisted position for the final stages of labor. It uses the full weight of the baby to press downward and opens the pelvic outlet to its maximum width.
Step-by-Step Instructions:
- Use a squat bar on a hospital bed, a sturdy chair, or your partner’s lap for support.
- Lower your hips toward the floor while keeping your heels flat if possible (this helps tilt the pelvis correctly).
- Hold the position during a contraction to let the baby descend.
- Rise or sit back on a chair between contractions to prevent leg fatigue.
Warning: Squatting is very intense! If you haven’t been practicing squats during pregnancy, don’t overdo it. Ensure you have strong support so you don’t lose your balance. 30-60 seconds of squatting during a contraction is often enough to make significant progress.
3. The Asymmetrical Lunge: Creating Space for Rotation
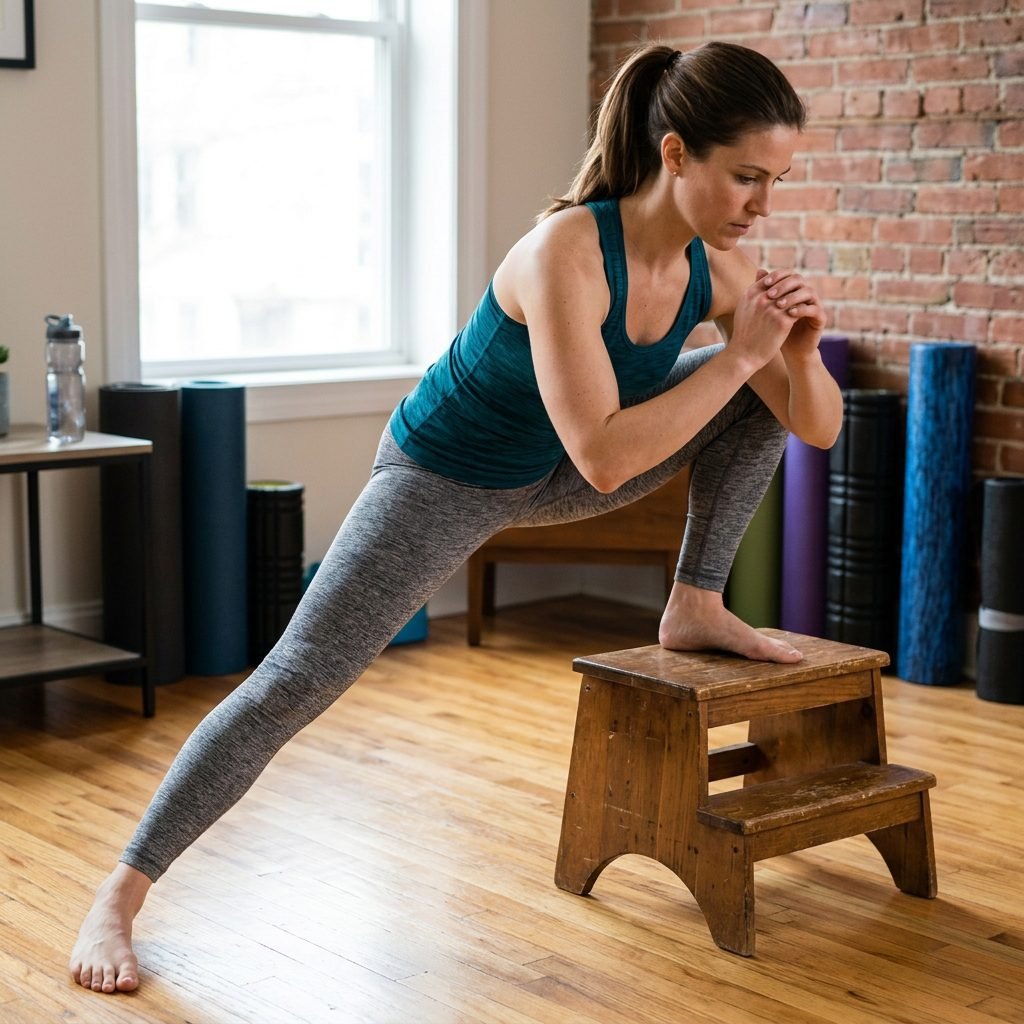
Sometimes, labor stalls because the baby’s head is slightly tilted or stuck against a pelvic bone. The asymmetrical lunge is the ‘key’ that unlocks the pelvis by creating an uneven space that encourages the baby to rotate into the optimal position.
How to Lunge for Labor Progress:
- Place one foot up on a sturdy chair, a stool, or even a step.
- Keep your other foot firmly on the floor, pointing forward.
- During a contraction, lean your weight into the raised leg, lunging forward and outward.
- Ensure your knee stays over your ankle to protect your joints.
- Repeat on the other side after 3-5 contractions.
If you feel ‘stuck’ at 7cm or 8cm, the lunge is your secret weapon. It shifts the pelvic bones just enough to let the baby’s head slip into the perfect spot.
4. Hands and Knees (All Fours): Relieving Back Labor

While not strictly ‘upright’ in the vertical sense, the hands-and-knees position uses gravity to pull the baby’s weight away from your spine. This is the gold standard for mothers experiencing ‘back labor’ caused by a baby in the OP (occiput posterior) or ‘sunny-side up’ position.
Optimizing the All-Fours Position:
- Use a yoga mat or plenty of pillows to cushion your knees.
- If your wrists feel tired, lean your upper body onto a birth ball or a pile of pillows.
- Rock your pelvis back and forth (cat-cow stretch) to encourage baby movement.
- The ‘Open Knee-Chest’ Variation: If the baby needs to move out of the pelvis slightly to rotate, keep your hips high and your chest low to the floor.
| Benefit | Description |
|---|---|
| Pain Relief | Reduces pressure on the sacrum and lower back nerves. |
| Baby Rotation | Allows the heavy back of the baby’s head to swing to the front. |
| Perineal Care | Reduces the risk of severe tearing by evening out pressure. |
5. The Toilet Sit: The ‘Dilate-O-Matic’

It might not sound glamorous, but doulas jokingly call the toilet the ‘Dilate-O-Matic.’ There is a powerful psychological connection between being on the toilet and the body’s ability to release its pelvic floor muscles.
Why the Toilet Works:
- Muscle Memory: Your brain is conditioned to relax the pelvic floor when sitting on a toilet.
- Gravity: You are in a supported, upright seated position.
- Privacy: The small, private space of a bathroom often helps a mother’s Adrenaline levels drop and Oxytocin levels rise.
How to do it: Sit facing the back of the toilet (straddling it) and lean against a pillow placed on the tank. This allows you to rest your head while gravity works on your cervix. Try this for 15-20 minutes to jumpstart a slow labor.
6. The Birth Ball Sway and Bounce
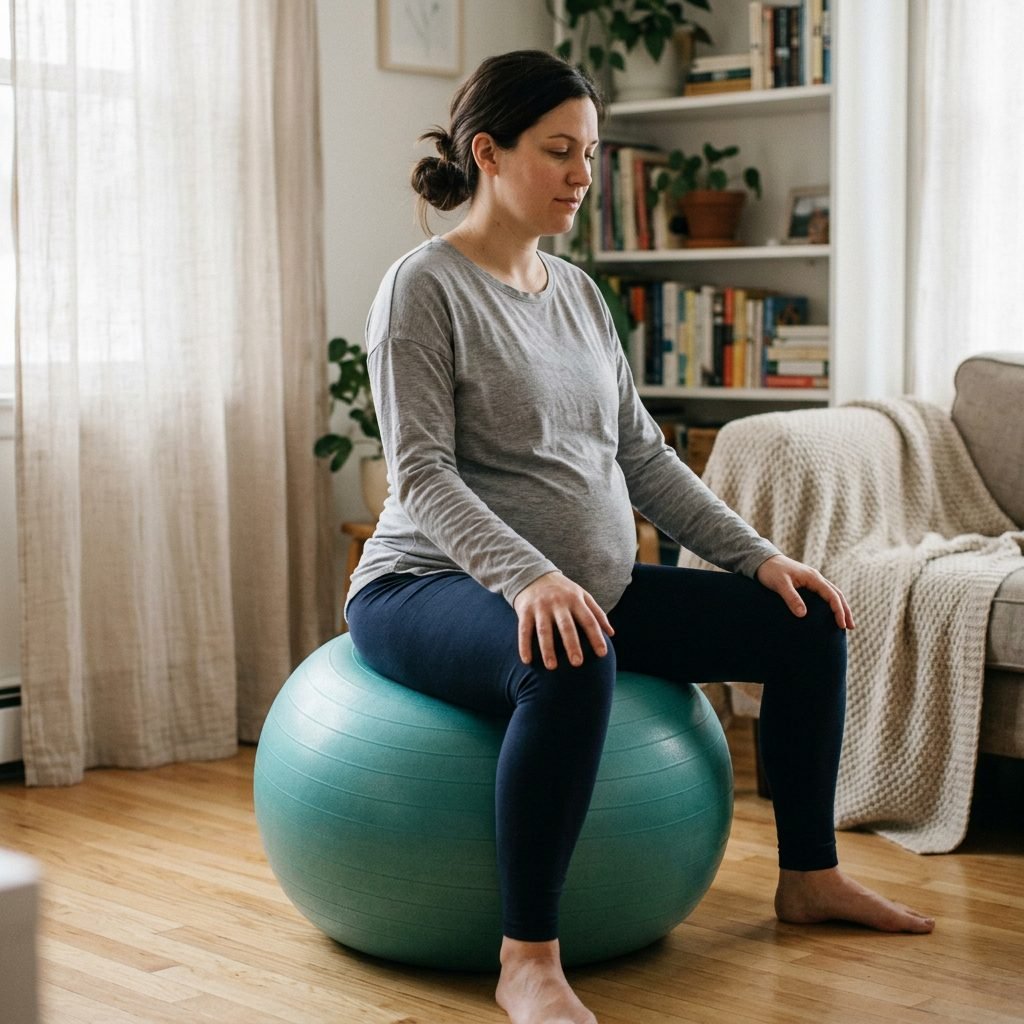
A birth ball (exercise ball) is an essential tool for any gravity-assisted birth. It provides a soft but firm surface that supports your weight while allowing your pelvis to remain active and mobile.
Ball Techniques for Labor:
- The Figure-8: While sitting on the ball, move your hips in a figure-8 motion. This helps the baby spiral down through the birth canal.
- Gentle Bouncing: A soft, rhythmic bounce can help ‘tap’ the baby’s head against the cervix, encouraging dilation.
- The Hula Hoop: Large, circular grinds of the hips help loosen the ligaments in the lower back.
Safety Check: Make sure your ball is the correct size. When sitting, your hips should be slightly higher than your knees. Have your partner stand behind you for stability if you feel unsteady.
7. The Upright Kneel: Resting Without Reclining

When you are exhausted but want to keep labor moving, the upright kneel is the perfect compromise. It keeps your torso vertical but allows your legs to rest.
How to Set Up the Upright Kneel:
- Raise the head of the hospital bed to its highest vertical position.
- Kneel on the bed facing the raised backrest.
- Wrap your arms around the top of the bed and rest your head on a pillow.
- This position is excellent if you have an epidural (depending on your hospital’s policy and the strength of the block), as it can often be achieved with assistance even when legs are heavy.
Mama, even in your rest, you are powerful. Let the earth pull your baby down while you find your rhythm in the quiet moments between waves.
Conclusion
You Are Ready for This Dance
Harnessing gravity isn’t just about making labor faster; it’s about reclaiming your autonomy in the birthing room. By moving, swaying, and staying upright, you are listening to the ancient wisdom of your body. Remember that no single position is ‘right’ for the entire labor. The best position is the one that feels right in this moment.
As you prepare your birth plan, share these positions with your partner or doula. Practice them now, while you are still pregnant, so they feel like second nature when the big day arrives. You are strong, you are capable, and you have the entire force of the earth’s gravity on your side. You’ve got this, mama!
Medical Disclaimer: This content is for informational and educational purposes only and does not constitute medical advice. Always consult with your OB-GYN, midwife, or healthcare provider before attempting specific physical positions during labor, especially if you have high-risk factors, placenta previa, or other medical complications. If you experience sudden sharp pain, heavy bleeding, or decreased fetal movement, seek medical attention immediately.