5 Low Impact Pelvic Floor Exercises for Safe Third Trimester Prep
Embracing Your Inner Strength in the Final Stretch
Hello, sweet mama. As you navigate these final weeks of pregnancy, your body is performing a miraculous feat every single second. You might be feeling the weight of your growing little one—quite literally—as your center of gravity shifts and your pelvic floor takes on the heroic task of supporting not just your organs, but your baby, the placenta, and the amniotic fluid. It is a lot of heavy lifting for such a delicate group of muscles! As a doula, I often tell my clients that the third trimester isn’t about pushing your physical limits; it is about honoring your body’s wisdom and preparing the ‘exit path’ for your baby with gentleness and intention.
The pelvic floor is often described as a hammock. In these final months, that hammock is stretched to its capacity. Many mamas think they need to ‘strengthen’ it through intense squeezing, but in the third trimester, the goal is actually a beautiful balance of functional strength and the ability to fully release. You want a pelvic floor that is resilient enough to support you, yet flexible enough to open during birth. These five low-impact exercises are designed to help you achieve exactly that, without putting unnecessary strain on your joints or your heart rate.
“Your body is not a lemon. It is a powerful, intuitive vessel designed to open and bring life into the world. Trust the process, and breathe into the space you are creating.”
In this guide, we are going to walk through why these movements matter, how to perform them safely with your growing bump, and how to integrate them into your daily rhythm so you feel empowered, stable, and ready for the big day. Let’s take a deep breath together and begin.
The Anatomy of Support: Understanding Your Pelvic Hammock

Before we dive into the movements, let’s talk about what is happening ‘down there.’ Your pelvic floor is a complex layer of muscles and ligaments that stretch from your pubic bone at the front to your tailbone at the back. During the third trimester, the hormone relaxin is surging through your system, softening these tissues to allow your pelvis to expand for delivery. While this is necessary, it can also lead to that ‘heavy’ feeling or the dreaded ‘lightning crotch’ (those sharp, sudden zaps of nerve pain).
To help you visualize what is safe and what to avoid during this delicate phase, I’ve put together this quick-reference table:
| What’s Safe & Encouraged | What to Avoid/Modify |
|---|---|
| Diaphragmatic Breathing (360-degree expansion) | Holding your breath during movement (Valsalva maneuver) |
| Gentle Lengthening (Deep squats with support) | High-impact jumping or running |
| Functional Stability (Pelvic tilts) | Heavy weightlifting without core engagement |
| Release Work (Child’s pose) | Excessive ‘Kegel-only’ routines without relaxation |
The goal is to maintain pelvic alignment. When your pelvis is aligned, the muscles can work at their optimal length, reducing the risk of incontinence and pelvic organ prolapse later on. Think of these exercises as a daily love letter to your body, ensuring you stay comfortable as your baby drops into position.
1. The Foundation: 360-Degree Diaphragmatic Breathing

The most important pelvic floor exercise isn’t a squeeze—it’s a breath. Your diaphragm and your pelvic floor work like a piston system. When you inhale, both should drop and relax; when you exhale, both should gently lift. This is the 360-degree breath.
How to Perform the 360 Breath:
- Sit comfortably on a birth ball or a firm chair with your feet flat on the floor.
- Place your hands around your lower ribcage, fingers pointing toward your belly button.
- Inhale deeply through your nose, feeling your ribs expand into your hands—not just in the front, but into your sides and back.
- As you inhale, imagine your pelvic floor ‘blossoming’ or opening like a flower.
- Exhale through pursed lips (like you’re blowing through a straw), feeling a natural, gentle lift of the pelvic floor and a slight drawing in of the lower abdominals.
Doula Tip: Do not force the lift. The ‘up’ should feel like a soft whisper, not a shout. Practice this for 5 to 10 minutes every morning to set your core for the day.
2. The Mobilizer: Modified Cat-Cow for Pelvic Tilts
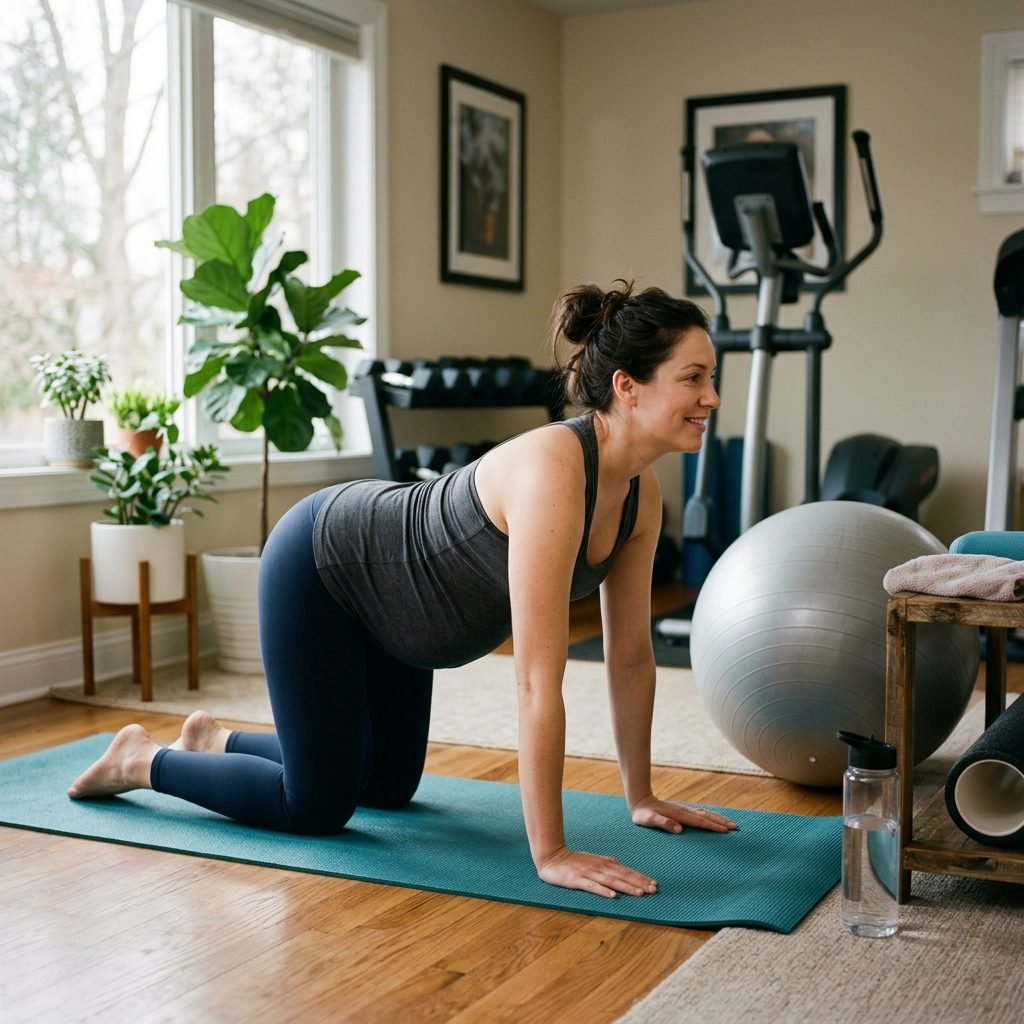
As your belly grows, your lower back often arches excessively (lordosis), which can ‘lock’ the pelvic floor. Modified cat-cow movements help tilt the pelvis and keep the muscles supple. This is also a fantastic way to encourage your baby into an optimal fetal position (head down, back to your front).
Step-by-Step Instructions:
- Get onto all fours (quadruped position) on a padded mat. Ensure your wrists are under your shoulders and knees are under your hips.
- Inhale: Let your belly drop slightly (don’t over-arch!) and look forward, feeling the sit-bones widen.
- Exhale: Press through your hands and gently round your back toward the ceiling. Think about tucking your tailbone slightly and ‘hugging’ your baby with your deep abs.
- Repeat for 12 to 15 slow repetitions.
“Movement is medicine. Each tilt of your pelvis is a way of creating more space for your baby to navigate the journey downward.”
If your wrists feel sore, you can do this while leaning over a birth ball or standing and leaning against a kitchen counter.
3. The Opener: Supported Deep Squats (Malasana)
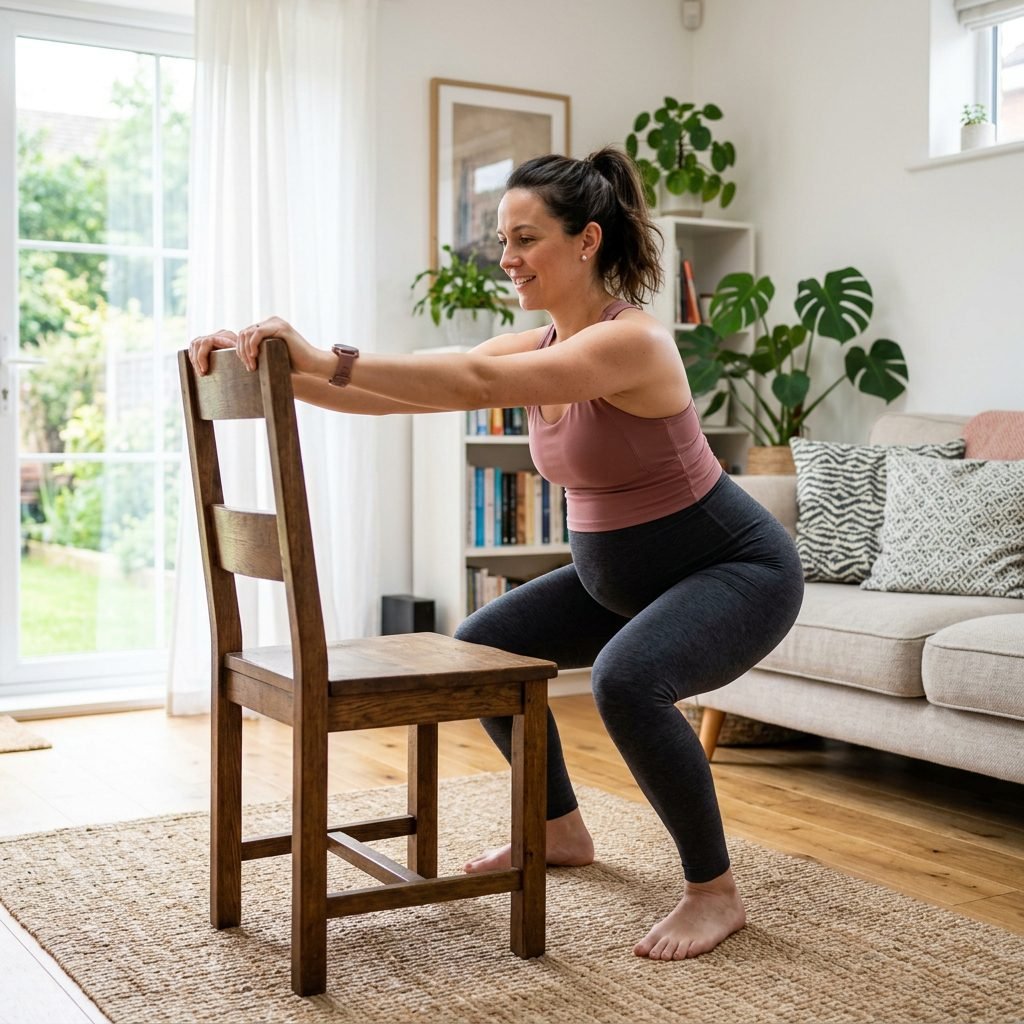
Squatting is the ultimate birth preparation move. It helps to widen the pelvic outlet by up to 20-30%. However, in the third trimester, your balance might be off, so we always use support.
How to Squat Safely:
- Stand with your feet wider than hip-width apart, toes slightly turned out.
- Hold onto a sturdy piece of furniture, a doorframe, or have your partner stand in front of you for balance.
- Slowly lower your hips toward the floor. Only go as low as feels comfortable—you don’t need your ‘butt to the floor’ if it causes pain.
- Keep your heels on the ground. If they lift, place a rolled-up towel under them.
- While at the bottom, take 3 deep 360-breaths, focusing on the complete relaxation of the perineum.
| Labor Phase | Squatting Benefit |
|---|---|
| Early Labor | Helps baby engage into the pelvis |
| Active Labor | Uses gravity to speed up dilation |
| Pushing Stage | Maximizes the space in the birth canal |
Warning: If you have been told you have a ‘low-lying placenta’ or have been diagnosed with Symphysis Pubis Dysfunction (SPD), keep your squats very shallow or skip this move in favor of the side-lying exercises below.
4. The Stabilizer: Side-Lying Clamshells

The pelvic floor doesn’t work in isolation; it works with your glutes and hips. Strengthening the lateral hip muscles helps stabilize the pelvis, which reduces ‘waddling’ and hip pain. Clamshells are low-impact and keep you off your back (which is safer for blood flow in the third trimester).
The Technique:
- Lie on your side with your knees bent at a 45-degree angle. Use a pillow under your head and another between your knees if needed for comfort.
- Stack your hips directly on top of each other.
- Keeping your feet touching, slowly lift your top knee as high as you can without tilting your pelvis backward.
- Lower back down with control.
- Perform 10 to 15 reps on each side.
Focus on exhaling as you lift the knee, engaging that gentle pelvic floor lift we practiced with the 360 breath. This ‘co-contraction’ builds the functional strength you’ll need for various labor positions.
5. The Release: Butterfly Stretch with Intentional Melt

By the time you reach 36 or 37 weeks, your focus should shift heavily toward release. A tight pelvic floor can actually act like a ‘speed bump’ during delivery. The butterfly stretch is a classic for a reason—it opens the adductors (inner thighs) which are directly linked to the pelvic floor.
How to Melt:
- Sit on the floor with the soles of your feet together and knees dropped out to the sides.
- Sit up tall—if you feel like you’re slouching, sit on the edge of a firm pillow or yoga block to tilt your pelvis forward.
- Gently hold your ankles. Do not ‘bounce’ your knees.
- Close your eyes and visualize your pelvic floor softening, spreading, and becoming like warm butter.
- Hold for 1 to 2 minutes while practicing your 360 breathing.
This is a great time to practice your birth affirmations. Repeat to yourself: ‘My body is open. My baby is safe. I am relaxed.’ This mental preparation is just as important as the physical movement.
Integrating Pelvic Health into Your Stylish Daily Life

You don’t need a 60-minute workout to see results. Pelvic floor health is about the small, consistent habits. Whether you are organizing the nursery or picking out the perfect ‘coming home’ outfit, keep these doula-approved lifestyle tips in mind:
- The ‘Exhale on Exertion’ Rule: Whenever you lift something (even a laundry basket or a toddler), exhale and lift your pelvic floor. Never hold your breath.
- Sit on Your Sit-Bones: Avoid slouching back onto your tailbone while on the couch. This puts immense pressure on the pelvic floor. Sit upright or lean forward.
- Hydration is Key: It sounds simple, but hydrated tissues are more elastic. Aim for 80-100 ounces of water a day, perhaps infused with red raspberry leaf tea (after 32 weeks, with midwife approval).
- The Toilet Posture: Use a small stool (like a Squatty Potty) to elevate your knees above your hips when using the bathroom. This straightens the anorectal angle and prevents straining, which is the enemy of a healthy pelvic floor.
Remember, mama, you are doing a great job. These exercises aren’t about ‘fixing’ yourself; they are about supporting the incredible work your body is already doing.
Safety First: When to Listen and When to Stop

While these exercises are low-impact and generally safe for most third-trimester mamas, your body’s signals are the ultimate authority. If something feels ‘off,’ it probably is. Stop any movement immediately if you experience:
- Sharp, stabbing pain in the pelvis or lower back.
- Any vaginal bleeding or leaking of fluid.
- Dizziness or shortness of breath that doesn’t resolve with rest.
- Increased ‘heaviness’ or a bulging sensation in the perineum.
- Contractions that become regular and increase in intensity.
Always consult with your pelvic floor physical therapist or your OB/GYN before starting a new routine, especially if you have a high-risk pregnancy. You are the expert on your own body!
Conclusion
You Are Ready, Mama
Preparing your pelvic floor for birth is one of the most empowering things you can do in your third trimester. By focusing on these 5 low-impact exercises—the 360 breath, cat-cow tilts, supported squats, clamshells, and butterfly releases—you are building a foundation of strength and flexibility that will serve you through labor and into your postpartum recovery. These movements are more than just ‘exercise’; they are a way to connect with your baby and your body’s innate power. Take it one breath at a time, listen to your intuition, and know that you have everything you need within you to bring your baby into the world. You’ve got this, sister!