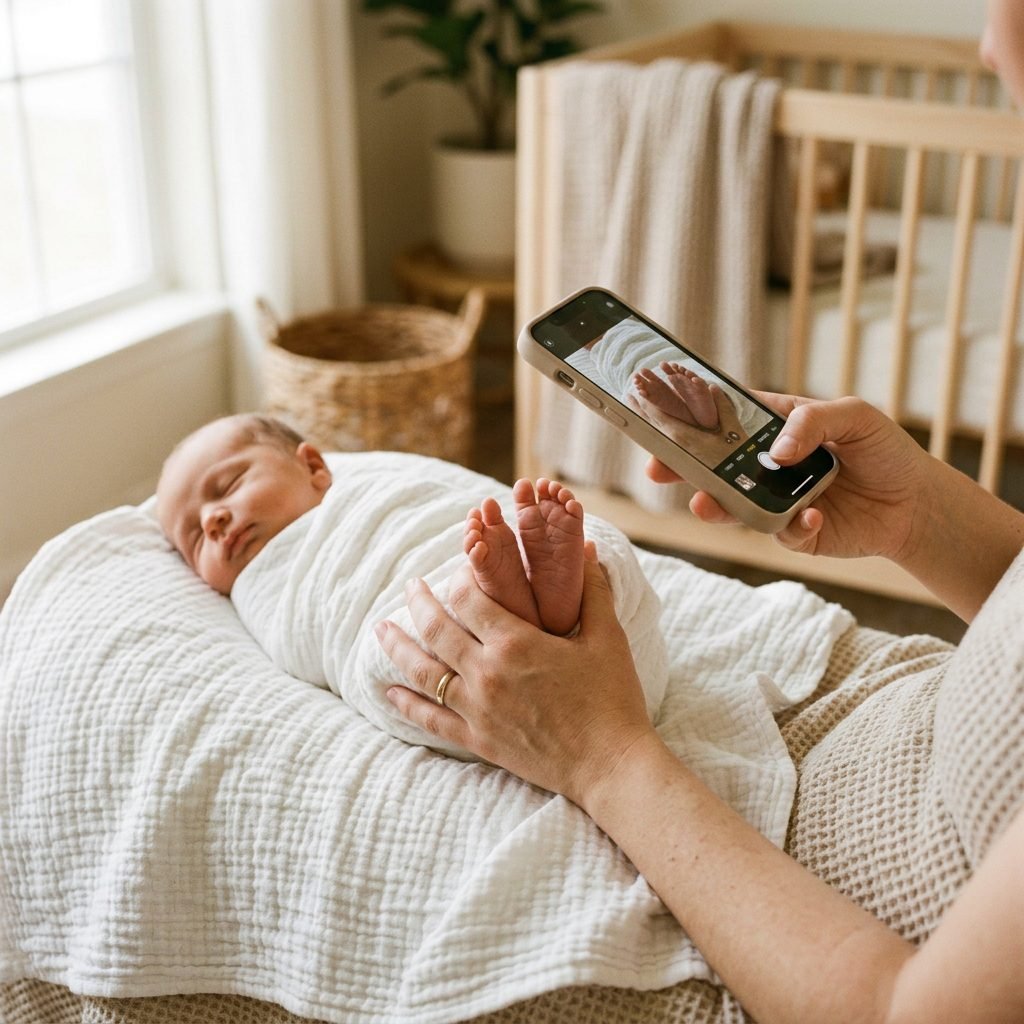
How to Cleanly Photograph Newborn Eyelashes and Toes Using an iPhone
Welcome to the Newborn Bubble, Mama
Oh, sweet friend, first of all—congratulations. Whether you are reading this with a sleeping baby on your chest, or you are nesting in those final weeks of pregnancy, take a deep breath. You are doing beautiful, holy work. As a doula and fellow mama, I know exactly how fleeting these early days are. You blink, and suddenly that tiny, curled-up newborn who fits perfectly in the crook of your arm is stretching out, outgrowing their newborn onesies, and losing that delicate newborn peach fuzz.
We all want to bottle up the newborn scent, the little grunts, and the impossibly tiny details: those long, delicate eyelashes resting on soft cheeks, and those ten wrinkly, flaky little toes. But here is a secret from the postpartum trenches: you do not need to hire an expensive professional photographer or buy a $2,000 DSLR camera to capture these details. Your iPhone is an incredibly powerful tool, and because it is always in your pocket, it is the perfect, non-intrusive way to document your baby’s earliest days.
“Take a breath, mama. The beauty of taking your own newborn photos is that there is no rush, no ticking clock, and no pressure. If baby fusses, the photos can wait. Your peace is more important than a picture.”
In this guide, we are going to combine a doula’s knowledge of baby soothing with practical, step-by-step iPhone photography hacks. We will walk through how to prep your baby, master your camera settings, find the best light in your home, and cleanly edit those macro shots so you can print them for your nursery or baby book. Let’s create some magic together.
Prepping Your Tiny Subject: The Doula’s Guide to a Sleepy Baby
Setting the Stage for Success
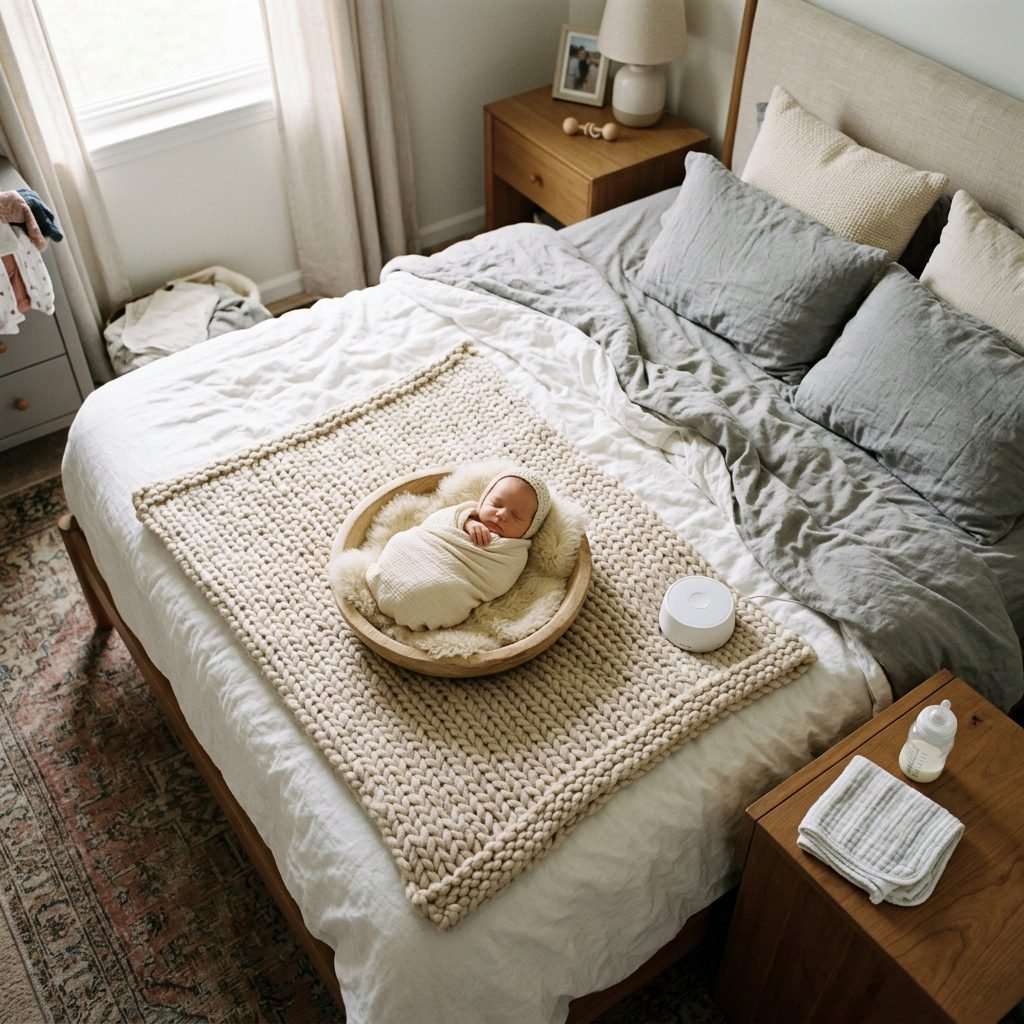
Before we even touch the camera app, we need to talk about the subject: your beautiful, unpredictable newborn. The secret to getting crisp, clear macro shots of eyelashes and toes is a completely still, relaxed baby. In the doula world, we call this the ‘deep sleep’ or ‘milk-drunk’ state.
Timing is Everything
Newborns sleep a lot, but they aren’t always in a deep sleep. The best time to attempt detail photos is immediately after a full feeding and a good burp. When their belly is full and their needs are met, they enter a state of milk-drunk bliss. Aim for the first 14 days of life if you want those classic, curled-up, sleepy shots, as babies tend to become more alert and stretch out more after the two-week mark.
Creating a Womb-Like Environment
Babies are highly sensitive to their environment. To keep them asleep while you adjust their toes or get close to their face, recreate the comfort of the womb:
- Warmth: Keep the room temperature between 72 and 74 degrees Fahrenheit. If you are undressing their feet, a cold draft will wake them instantly.
- Sound: Use a sound machine playing continuous white noise or a heartbeat sound. Place it about 3 to 4 feet away from the baby to mask the sound of you moving around.
- Texture: Lay baby on a soft, textured surface. A muslin swaddle, a chunky knit blanket, or a smooth linen sheet in neutral colors (white, cream, oatmeal) will bounce clean light back onto their skin and provide a beautiful, timeless background.
| Baby State | Best Features to Photograph |
|---|---|
| Deep Sleep (Milk Drunk) | Eyelashes, relaxed hands, uncurled toes, lips |
| Active Sleep (Twitching/Smiling) | Sleep smiles, stretching fingers |
| Quiet Alert (Calm & Awake) | Open eyes, full face, bonding with parents |
| Fussy/Crying | Put the phone away. Time for cuddles and soothing! |
Mastering Your iPhone Camera Settings for Macro Details
Unlocking the Power of Your Pocket Camera
Now that your sweet baby is snoozing, let’s talk tech. Modern iPhones are equipped with incredible computational photography, but to get those crystal-clear, clean shots of tiny hairs and skin flakes, you need to take manual control of a few settings.
Activating Macro Mode (iPhone 13 Pro and newer)
If you have an iPhone Pro model from the 13 series or newer, you have a dedicated Macro mode. This utilizes the Ultra Wide (0.5x) lens to focus on subjects as close as 2 centimeters away.
- Open your Settings app, scroll down to Camera, and toggle on Macro Control. This puts a little yellow flower icon on your screen when you get close to an object.
- Open your Camera app and slowly move your phone toward your baby’s eye or foot.
- When you get within a few inches, the camera will automatically switch lenses (you’ll see a slight shift on the screen), and the yellow flower icon will appear.
- If the image looks distorted, tap the yellow flower to turn it off, step back slightly, and use the 2x or 3x optical zoom instead.
The Secret Weapon: AE/AF Lock
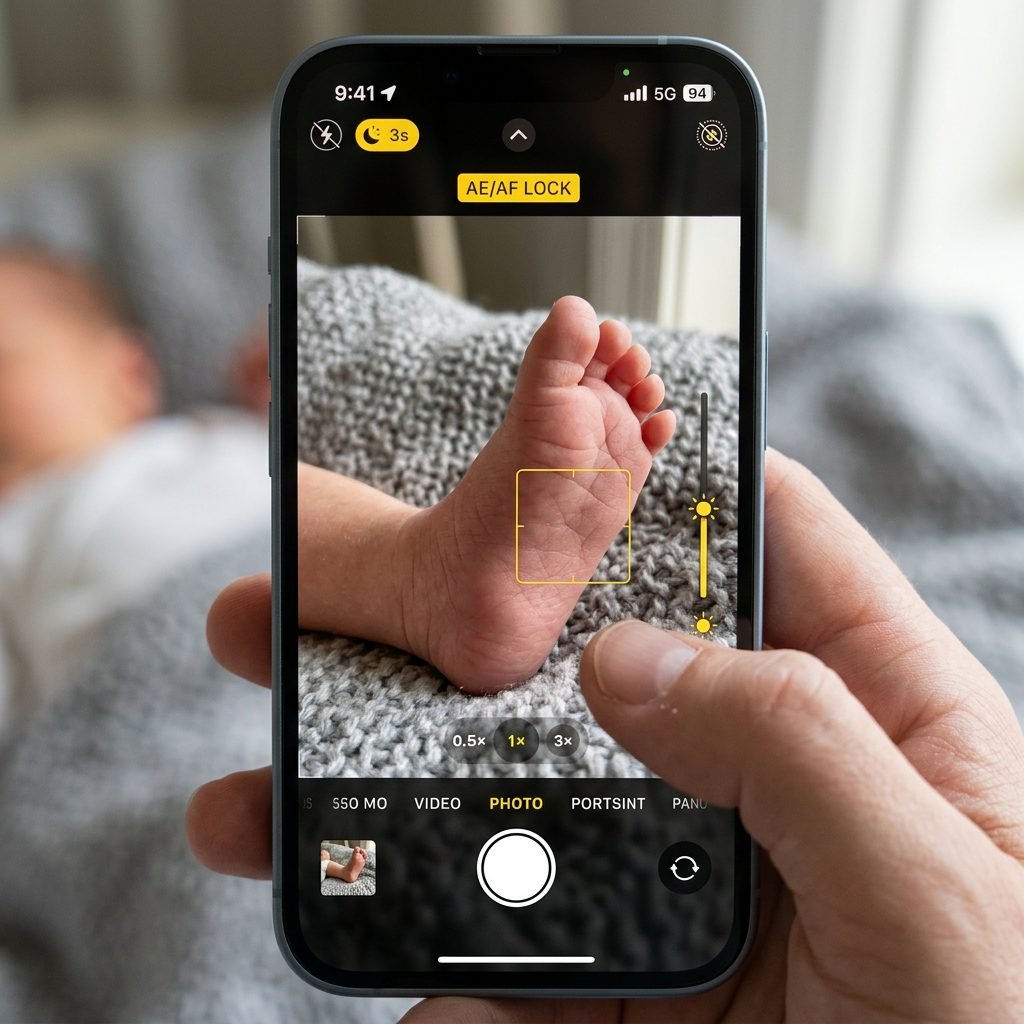
Nothing is more frustrating than lining up the perfect eyelash shot, only for the camera to suddenly focus on the blanket in the background. To prevent this, use Auto Exposure/Auto Focus Lock.
- Tap and hold your finger on the exact spot you want to be in focus (e.g., the tips of the eyelashes) for about 3 seconds.
- A yellow box will pulse, and the words AE/AF LOCK will appear at the top of your screen.
- Now, even if your hand shakes slightly, the focus will remain locked on those tiny lashes.
Adjusting Exposure for Clean Skin Tones
iPhones tend to overexpose (make too bright) images, which can wash out the delicate details of newborn skin. Once your focus is locked, you will see a small yellow sun icon next to the focus box. Gently drag that sun down just a millimeter or two to darken the image slightly. This preserves the highlights and makes the details pop.
Chasing the Light: Natural Illumination for Tiny Details

Why Window Light is Your Best Friend
As a doula, I always tell my clients that nature provides exactly what we need—and that applies to photography, too! You do not need artificial ring lights or flashes. In fact, a camera flash can startle a sleeping newborn and create harsh, unflattering shadows. Natural window light is the key to soft, angelic newborn photos.
Finding the Sweet Spot
Look around your home for a large window, preferably one that is North or South-facing, as these provide consistent, indirect light throughout the day. If you only have East or West-facing windows, avoid shooting during the times when the sun is beaming directly through the glass (usually early morning or late afternoon). The ideal time to shoot is typically around 10:00 AM or 2:00 PM.
Diffusing the Light
If the light coming through the window is too bright or creates hard lines of shadow on the floor, you need to diffuse it. Simply pull a sheer white curtain across the window. If you don’t have a sheer curtain, you can literally tape a white muslin swaddle or a piece of parchment paper over the glass. This scatters the light, making it wrap beautifully around your baby’s features.
| Direction of Light | Effect on the Photo | Best Used For |
|---|---|---|
| Front Lighting (Light hits baby’s face directly) | Flattens features, minimizes shadows, brightens skin | General portraits, minimizing baby acne |
| Side Lighting (Light hits baby from a 45-90 degree angle) | Creates depth, highlights textures and contours | Eyelashes, toes, flaky skin details |
| Backlighting (Light is behind the baby) | Creates a halo effect, can make the subject dark (silhouette) | Artistic shots, capturing peach fuzz halos |
“Pro-Tip from the Nursery: Always position your baby so the light flows from the top of their head down their body, at about a 45-degree angle. Never light a baby from the chin up—this creates ‘monster lighting’ and casts unnatural shadows on their sweet faces.”
The Eyelash Masterclass: Angles and Execution

Capturing the Fringes of Heaven
Newborn eyelashes are incredibly fine and often light in color, which makes them tricky to photograph. The key to making them stand out is contrast and angle.
Step-by-Step Eyelash Photography
- Position the Baby: Lay your sleeping baby on their back or slightly on their side. Ensure the window light is coming from the top/side of their head, casting a gentle shadow under the lashes to make them pop.
- Find the Angle: Do not shoot directly down from above. Instead, move your body so you are shooting from a profile angle (from the side of their head) or slightly behind the crown of their head, looking down their forehead toward their nose.
- Lock Your Focus: Bring your iPhone close (about 3 to 5 inches away). Tap and hold on the very tips of the eyelashes to engage the AE/AF Lock.
- Watch the Background: Ensure the background behind the eyelashes (usually the baby’s cheek or the blanket) is smooth and not distracting. A darker blanket can provide beautiful contrast for blonde eyelashes.
- Take the Shot: Hold your breath to steady your hands, gently lower the exposure slider a touch, and tap the shutter button. Take several shots, adjusting your angle by just a millimeter each time.
A Note on Baby Acne and Flaky Skin
Around week two or three, your baby might develop baby acne, or their skin might start peeling. Mama, hear me on this: do not stress. This is a completely normal, beautiful part of their transition to the outside world. While we will discuss editing later, I encourage you to embrace the flakes. It is proof of how new they are. Never pick at or peel your baby’s skin for a photo.
Ten Perfect Toes: Composition and Focus
Documenting the Tiniest Details
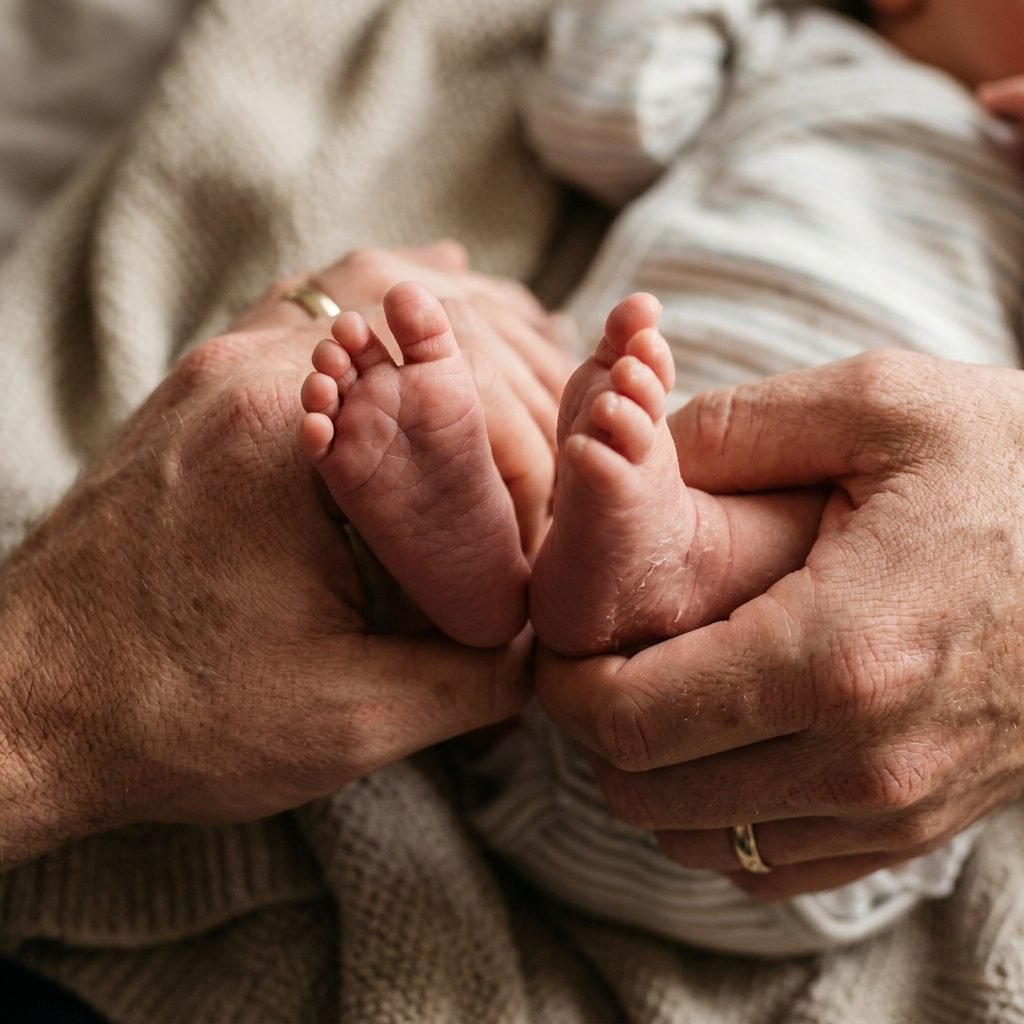
There is nothing quite like newborn feet. They are wrinkly, often a little purple or red when they are brand new, and the skin around the ankles is deliciously flaky. Capturing them requires a gentle touch and a bit of patience, as babies have a strong plantar reflex and love to curl their toes tightly.
Step-by-Step Toe Photography
- The Gentle Uncurl: If your baby’s toes are tightly clenched, gently stroke the top of their foot or the back of their ankle. Avoid stroking the sole of the foot, as this triggers the Babinski reflex and causes the toes to splay and the foot to turn inward. Warm hands are a must here!
- The Setup: Gently pull the blanket up around their ankles to frame the feet. This hides the diaper and creates a cozy, cocooned look. You can also have your partner gently hold the baby’s feet in their hands—the size contrast between an adult hand and a newborn foot is breathtaking.
- The Angle: Shoot from the bottom of the feet looking up toward the baby, or from a top-down angle focusing on the toenails and the wrinkles at the joints.
- Lock Focus on the Wrinkles: Bring your iPhone in close. Tap and hold to lock focus on the deepest wrinkle or the tiny thumbnail.
- Burst Mode for Kicks: If your baby is a kicker, slide the shutter button to the left to activate Burst Mode. This takes rapidly successive photos, ensuring you catch a split second of stillness.
“Doula Reminder: If your baby is squirming, crying, or showing signs of overstimulation (hiccups, yawning, turning away), wrap those little feet back up and try again tomorrow. Photography should never compromise your baby’s comfort.”
The “Clean” Edit: Enhancing Details Without Losing the Natural Look
Polishing Your Masterpieces
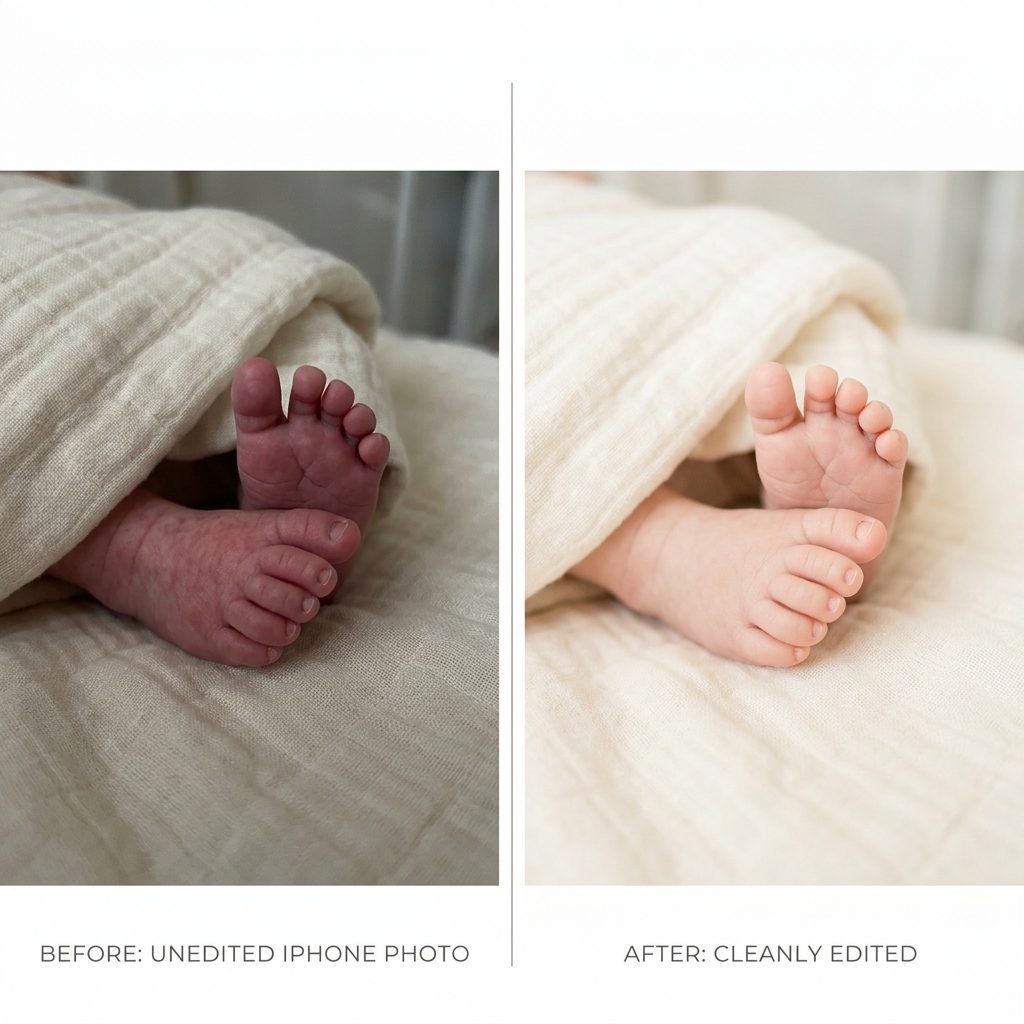
You have captured the raw beauty; now it is time to polish it. The goal of editing newborn photos is not to make them look like plastic dolls with heavy filters. The goal is a “clean” edit—enhancing the natural light, softening redness, and making the details crisp. You can do all of this right inside the native iPhone Photos app.
Step-by-Step Editing Formula
Open your photo, tap Edit in the top right corner, and swipe through the adjustment dials at the bottom. Apply these gentle tweaks:
| Adjustment Tool | Recommended Value | What It Does for Newborns |
|---|---|---|
| Exposure | +5 to +10 | Gently brightens the overall image without blowing out the whites. |
| Brilliance | +10 to +15 | Lifts shadows and softens highlights, creating a dreamy, creamy look. |
| Highlights | -10 to -20 | Brings back detail in the bright areas, especially on shiny newborn skin. |
| Shadows | +10 to +15 | Softens the dark creases around the eyes and toes. |
| Contrast | -5 to -10 | Lowers harshness, making the baby’s skin look much softer. |
| Warmth | +5 | Adds a cozy, inviting tone (skip this if baby looks too yellow/jaundiced). |
| Sharpness | +15 to +20 | Crucial for macro! Makes the eyelashes and skin flakes incredibly crisp. |
Dealing with Redness and Jaundice
Newborns often have uneven skin tones. If your baby’s feet look very purple/red, go to the Saturation dial and lower it slightly (around -5 to -10). If your baby has a slight yellow tint from mild jaundice, lower the Warmth dial slightly (-5) and increase the Tint dial toward the magenta side (+5) to balance the greens/yellows.
Remember, less is more. Save your edits, and if you want to apply the exact same look to all your photos, tap the three dots in the top right, select Copy Edits, go to your next photo, and select Paste Edits. Magic!
Conclusion
Preserving the Fleeting Moments
Mama, you now have all the tools you need to capture the breathtaking, microscopic details of your beautiful baby. By understanding your baby’s sleep cycles, harnessing the soft power of window light, and utilizing the hidden macro features of your iPhone, you are preserving memories that will bring tears to your eyes years from now when those tiny feet are running through the house.
As a final piece of sisterly advice: while it is wonderful to capture these details, do not forget to hand the phone to your partner, your mother, or your doula. Get in the frame. You don’t need makeup, you don’t need your hair done, and you don’t need the perfect outfit. Your baby will one day look for you in these photos. The way your hands held those tiny feet is a detail just as worthy of capturing as the eyelashes themselves.
Take your time, enjoy the sweet newborn scent, and happy clicking!