How to Use Walcher’s Position to Rotate a Posterior Baby Fast
Welcome to Your Empowered Labor, Mama
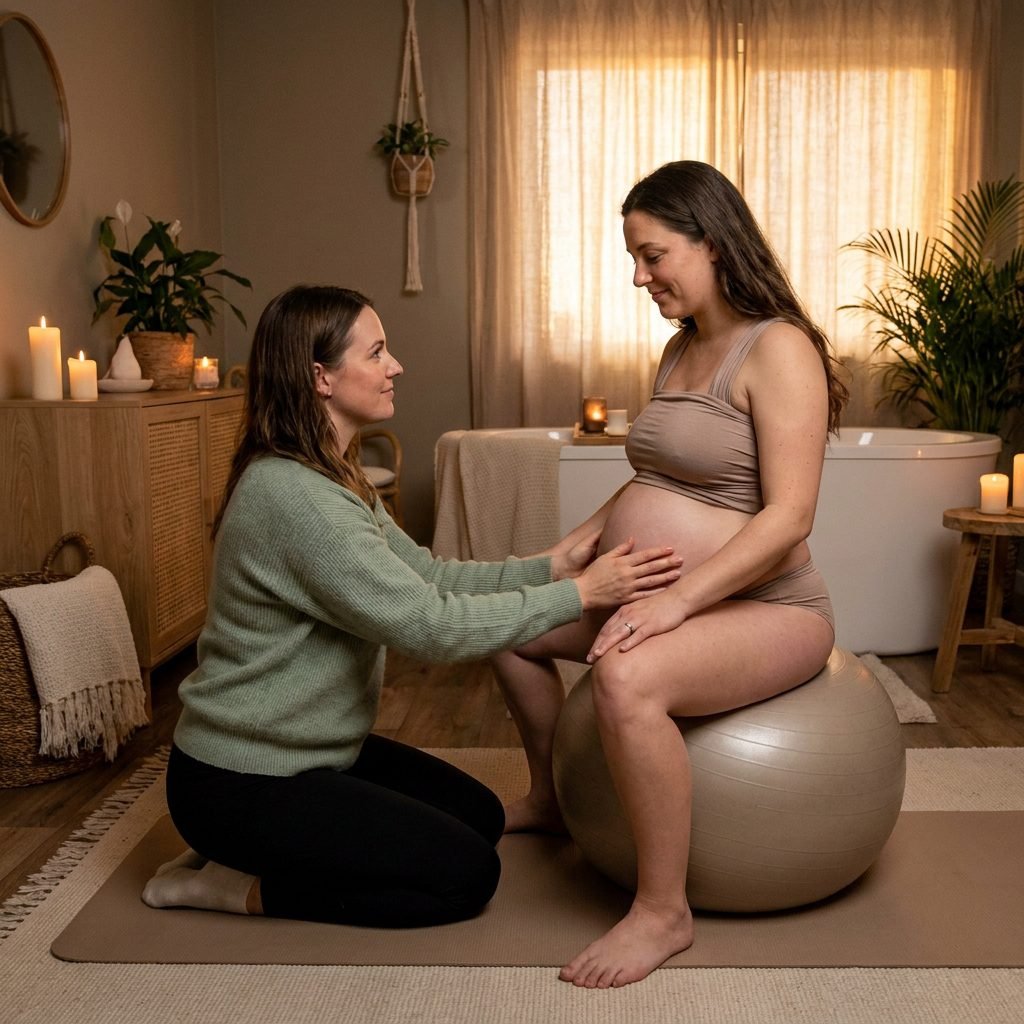
If you are reading this, you might be in the thick of it—feeling the rhythmic, intense pressure of labor—or perhaps you are preparing your toolkit for the big day. Either way, I am so glad you’re here. As a doula, I have sat by the bedside of many mothers experiencing what we call back labor. It is that deep, relentless ache in the lower back that often signals a ‘sunny-side up’ or Occiput Posterior (OP) baby. While every birth is a beautiful journey, a posterior baby can sometimes make the process feel a bit longer and more intense. But here is the secret: your body is an architectural masterpiece, and we have a ‘magic’ key to help your baby find the best path out. That key is Walcher’s Position.
Walcher’s is not just a position; it is a physiological intervention designed to open the pelvic inlet (the top of your pelvis) to its maximum capacity. By using gravity and the weight of your own legs, we can create the space your baby needs to tuck their chin, rotate, and move into the optimal position for birth. In this guide, we are going to walk through exactly how to perform this move safely, why it works, and how to stay comfortable while doing it. You’ve got this, mama. Let’s get that baby moving!
The Posterior Puzzle: Understanding the ‘Sunny-Side Up’ Baby
Why the Position of Your Baby Matters
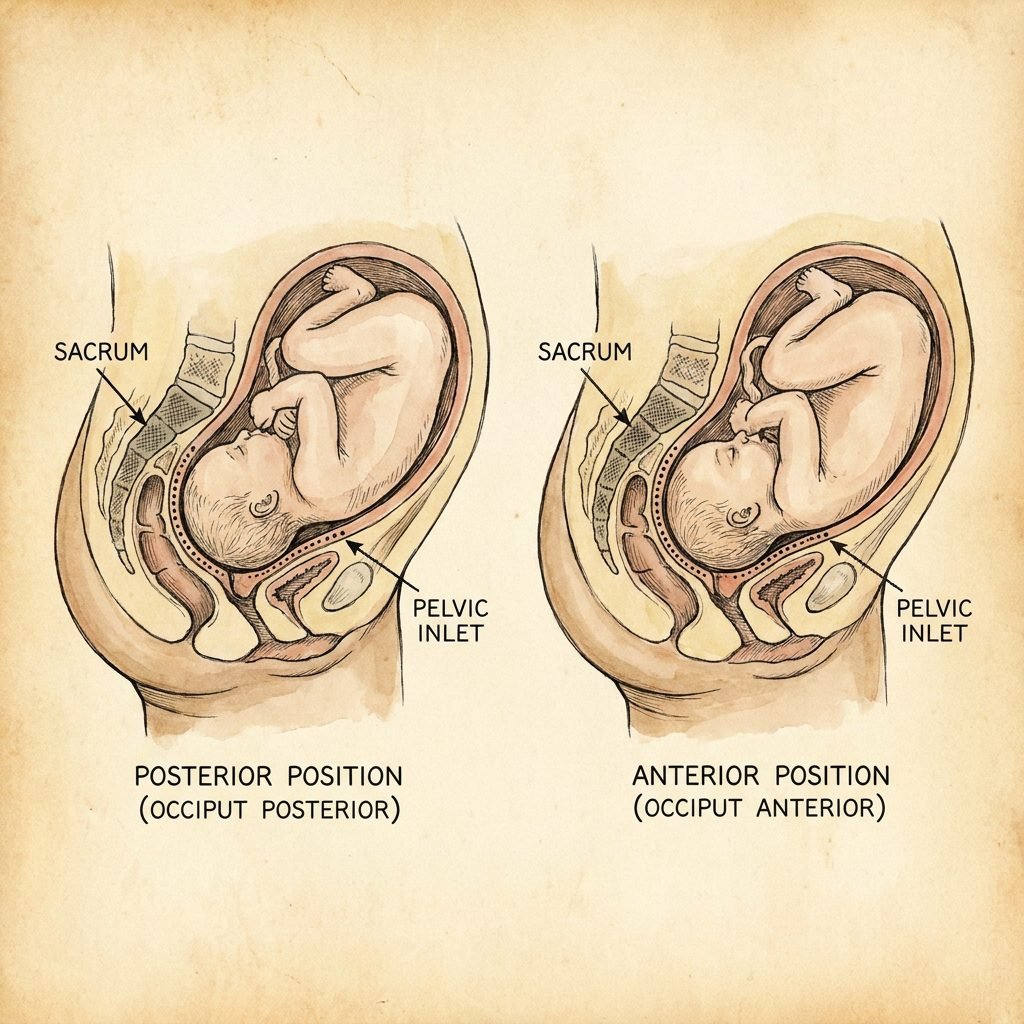
In an ideal world, most babies prefer to be Occiput Anterior (OA), meaning their back is toward your belly and their face is toward your spine. However, about 15% to 25% of babies start labor in the Occiput Posterior (OP) position. When a baby is posterior, the hardest part of their head—the back of the skull—is pressing against your sacrum (your tailbone area). This is what causes that signature back labor.
The Mechanics of the Pelvic Inlet
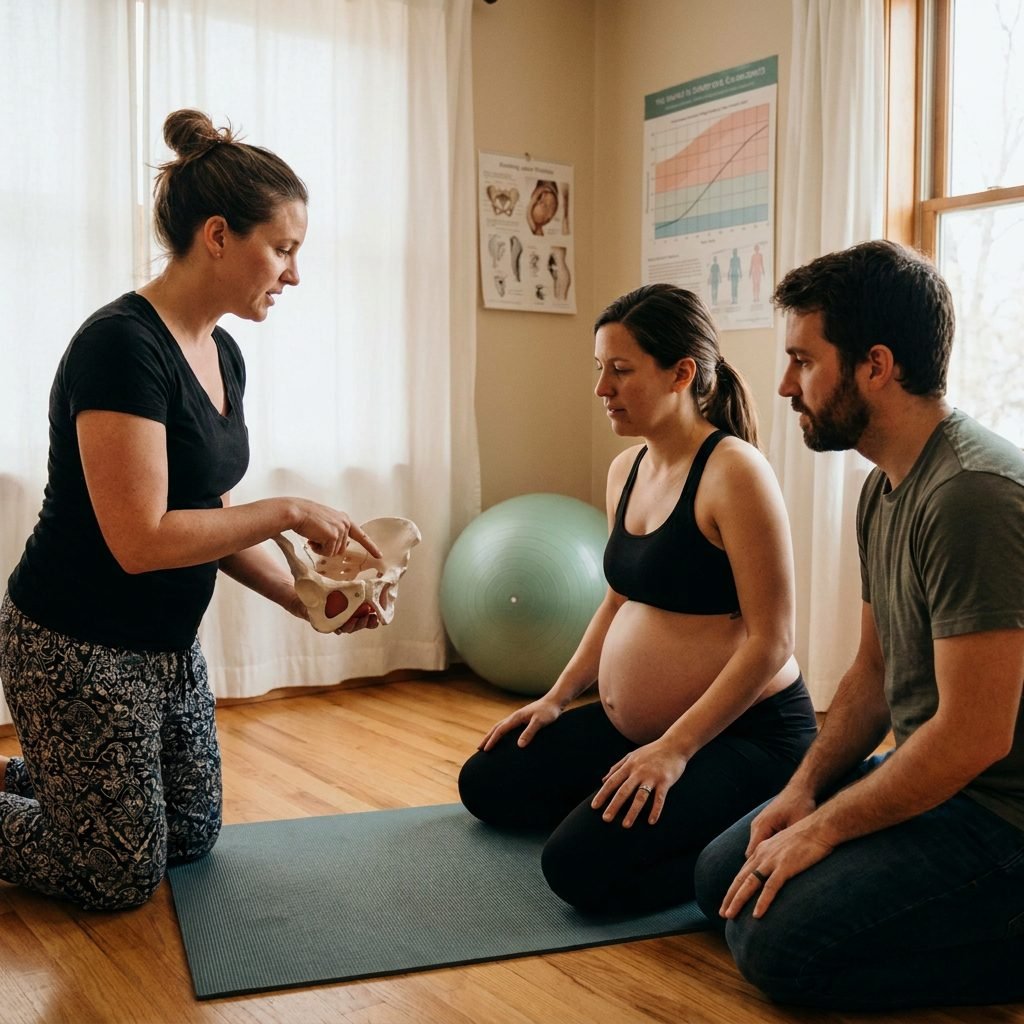
The pelvis is not a static ring of bone; it is a dynamic system of joints and ligaments that can shift and expand. The pelvic inlet is the ‘front door’ the baby must enter to start their descent. If the baby is posterior, their head might be ‘hung up’ on the pubic bone or simply unable to find the right angle to rotate. Walcher’s Position specifically targets this upper rim of the pelvis, increasing the front-to-back diameter by as much as 1 to 2 centimeters. In the world of birth, two centimeters is a massive amount of space!
“Your body is a masterpiece of design, and your baby is a clever navigator. Sometimes, we just need to shift the terrain to help them find the right path home.”
What is Walcher’s Position? The ‘Gold Standard’ for Rotation
The History and Science of the Move
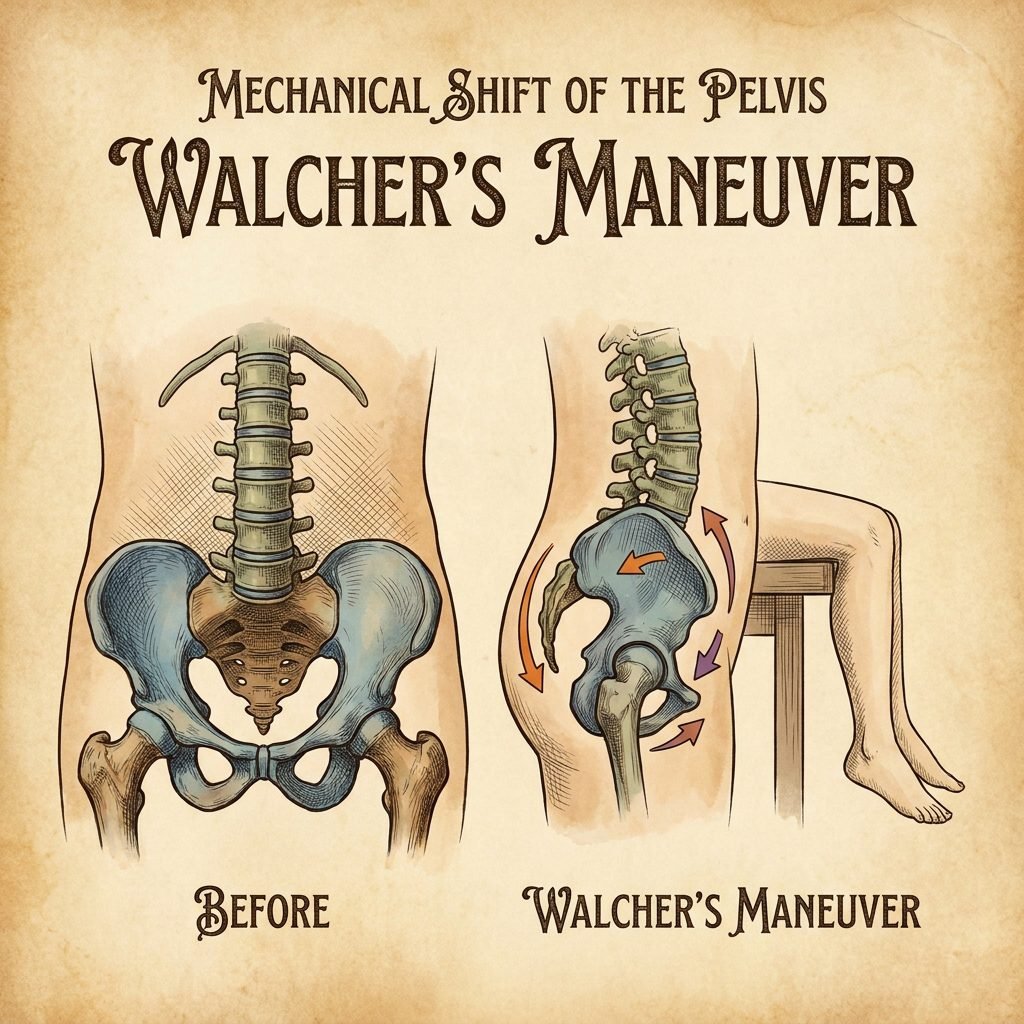
Named after the German physician Gustav Walcher in the late 19th century, this position has been a staple in the ‘midwife’s bag of tricks’ for generations. The science is simple but profound: when you hang your legs off a high surface, the weight of your legs pulls your pelvis forward and down. This tension pulls on the sacroiliac joints, tilting the top of the sacrum backward. This movement ‘un-tucks’ the pelvis, creating a wider opening at the top.
When to Use Walcher’s
Walcher’s is most effective when the baby is still ‘high’—meaning they haven’t quite engaged deep into the pelvis yet. If your provider tells you the baby is at a -2 or -3 station and is posterior, this is your green light. It is also a fantastic tool if your labor has stalled or if you are experiencing ‘stop-and-go’ contractions that aren’t leading to cervical change. We use it to rotate the baby fast so that labor can progress efficiently.
| Labor Phase | Recommended Position | Goal of Position |
|---|---|---|
| Early Labor (Posterior) | Miles Circuit | Gentle rotation and rest |
| Active Labor (High Station) | Walcher’s Position | Opening the pelvic inlet (the brim) |
| Mid-Labor (Mid-Station) | Side-Lying Release | Softening pelvic floor muscles |
| Transition (Low Station) | Deep Squat / Peanut Ball | Opening the pelvic outlet |
Step-by-Step: How to Perform Walcher’s Position Safely
Setting the Stage for Success
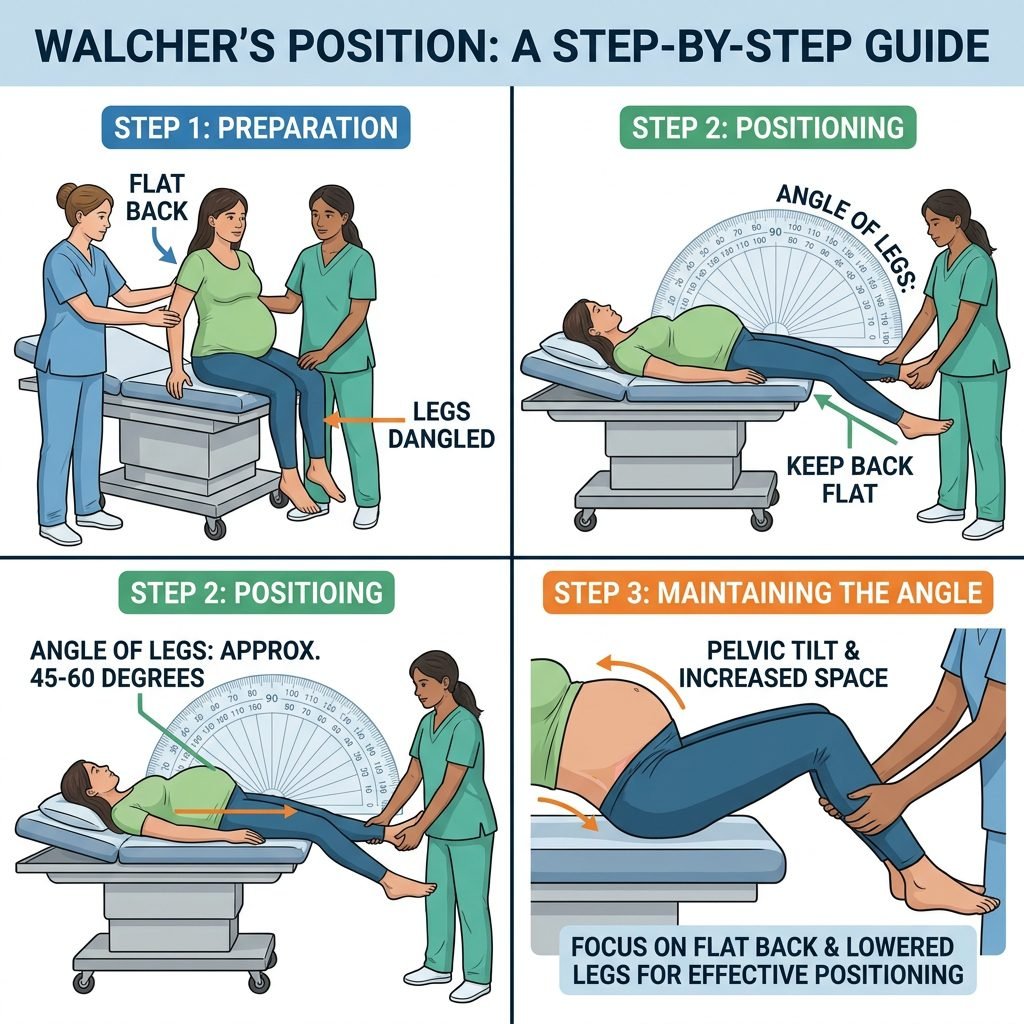
Before you begin, you will need a high surface. In a hospital, the birthing bed is perfect because it can be raised. At home, a high bed or even a sturdy kitchen table (with plenty of padding!) can work. You will also need two support people—one to hold your shoulders and one to help guide your legs and keep you steady. This is a team effort!
The Physical Instructions
- Raise the Surface: Ensure the bed or table is at the height of your hips.
- Sit on the Edge: Scoot your bottom right to the very edge of the surface.
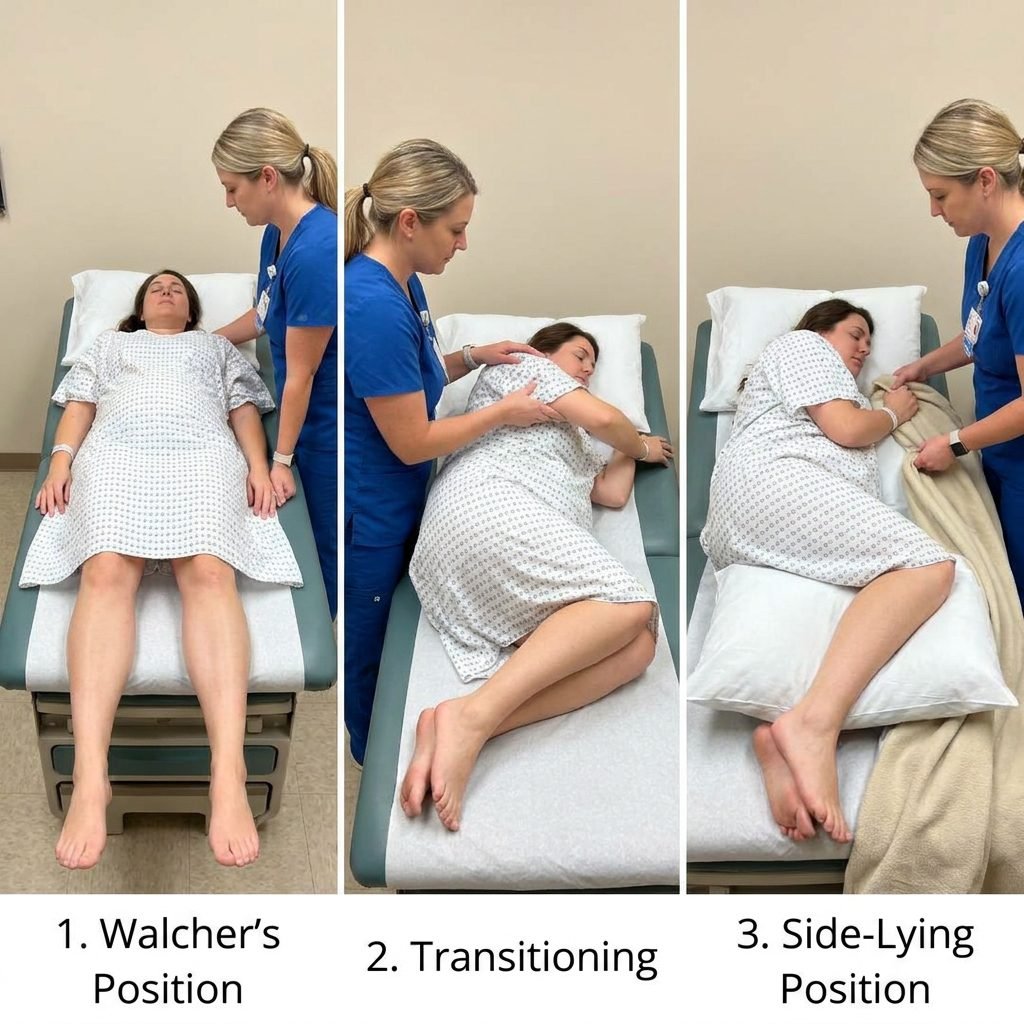
- Lay Back Slowly: With your partner or doula supporting your upper body, lay back until your torso is flat on the bed. Your legs should be hanging off the edge.
- Let Gravity Work: Allow your legs to hang freely. Do not try to touch the floor with your feet. The weight of your legs is what creates the pelvic stretch.
- Breathe and Relax: Your knees should be slightly apart, and your toes should point inward slightly to further open the back of the pelvis.
- The Duration: Stay in this position for 3 contractions. This usually takes about 10 to 15 minutes. Between contractions, your partner can gently lift your knees to your chest to give you a momentary break from the intensity.
Pro Tip: This position is intense. It is not meant to be comfortable, but it is meant to be effective. Focus on deep, ‘low’ breaths and visualize your pelvic bones widening like the petals of a flower.
The 3-Contraction Rule and What Comes Next
Why We Limit the Time
Because Walcher’s Position is so physically demanding and puts significant tension on the pelvic ligaments, we don’t stay in it for long. The 3-contraction rule is the industry standard. This is usually enough time for the baby’s head to hit the widened inlet, find the space, and begin that crucial rotation. If you feel a ‘pop’ or a sudden shift in where you feel the pressure, that is a wonderful sign that the baby has moved!
The ‘After-Move’
Once you have completed your three contractions, don’t just jump up! Have your support team help you roll to your side and slowly sit up. To ‘lock in’ the progress the baby has made, it is often helpful to move into an asymmetrical position next, such as:
- The Captain Morgan: Standing with one foot up on a chair.
- Side-Lying Release: Lying on your side with your top leg hanging off the bed.
- A Low Lunge: Opening the mid-pelvis to help the baby continue their descent.
Partner Support: How to Be the Ultimate Labor Anchor

Your Role is Vital
Partner, your job during Walcher’s is to be the steady ground. The mother is going to feel a lot of stretching and perhaps some vulnerability hanging off the bed. Your physical presence provides the safety she needs to let go of her muscles and allow the position to work.
What to Say and Do
- Physical Support: Stand at the head of the bed. Let her hold your hands or wrap her arms around your neck. Keep her shoulders grounded.
- Verbal Encouragement: Use a low, calm voice. Say things like, “You are making so much room for our baby,” or “Just three more breaths through this contraction, you are doing it.”
- The ‘Leg Lift’: If she needs a break between contractions, gently lift her thighs toward her belly. This relieves the tension on the SI joints instantly.
Safety Check: If the mother feels dizzy, lightheaded, or experiences sharp, non-contraction pain, help her sit up immediately. Always communicate with your medical provider before attempting physical maneuvers in active labor.
Safety, Comfort, and Epidural Considerations
Can You Use Walcher’s with an Epidural?
The short answer is yes, but it requires more ‘manpower.’ Since the mother cannot feel or move her legs effectively with an epidural, the support team (nurses and doulas) must hold her legs in the hanging position and ensure she does not slide off the bed. It is highly effective for ‘fixing’ a posterior baby even when the mother is resting with pain management.
When to Avoid Walcher’s
While Walcher’s is a fantastic tool, it isn’t for everyone. Avoid this position if:
- You have a history of severe pelvic girdle pain (PGP) or SPD.
- You have high blood pressure (preeclampsia) and need to stay in a specific resting position.
- You feel extreme distress or panic while in the position.
- Your baby is already very low (at a +2 or +3 station), as Walcher’s opens the top, not the bottom, of the pelvis.
Conclusion
You are the Architect of Your Birth
Mama, labor is a dance, and sometimes the baby just needs a different song to find their rhythm. Using Walcher’s Position is one of the most powerful ways you can take an active role in your labor progression. By understanding your anatomy and being willing to try these ‘expert’ moves, you are shortening your labor and helping your baby enter the world with ease. Remember, you are strong, you are capable, and you are never alone in this journey. Whether you use Walcher’s for three contractions or thirty minutes of movement, every shift brings you one step closer to holding your little one in your arms. Trust your body, trust the process, and breathe through the stretch. You’ve got this!