3 Simple Swaddle Wrapping Styles for Gorgeous DIY Newborn Photography
Welcome to those precious, hazy first weeks of motherhood, sweet mama. I know you are likely operating on beautiful, milk-scented adrenaline and perhaps a little less sleep than you’d like. As a doula and a fellow mom, I also know how desperately we want to freeze time. Those tiny toes, the way their eyelashes cast long shadows on their cheeks, and that specific, fleeting ‘newborn curl’—it all passes so quickly. You don’t need a thousand-dollar studio session to capture the magic of your little one. With a bit of soft natural light, a stretchy wrap, and a few expert techniques, you can create gorgeous, boutique-quality portraits right in the comfort of your own nursery. In this guide, we are going to walk through three simple, stunning swaddle styles that are the bread and butter of professional newborn photographers. We will focus on safety, comfort, and that perfect, snug aesthetic that makes your baby look like a cozy little work of art. Grab a cup of warm tea, wait for that perfect ‘sleepy window’ after a feeding, and let’s dive into the art of the swaddle.
Remember, mama: you are the world’s leading expert on your baby. If they aren’t feeling the wrap today, take a breath, give a cuddle, and try again tomorrow. The best photos are the ones where baby feels safe and loved.
The Essential DIY Photography Kit: Fabric, Light, and Prep

Before we start wrapping, we need to set the stage. The secret to those smooth, wrinkle-free ‘pro’ looks isn’t just the technique; it’s the fabric. For photography, you want to move away from the traditional stiff muslin squares and toward stretchy jersey or rayon knits. These fabrics hug the baby’s curves and allow you to pull the wrap tight enough to eliminate messy folds without being restrictive. You’ll also want a ‘posing surface’—a firm nursing pillow or a beanbag covered with a thick, textured blanket works perfectly.
Choosing Your Materials
When selecting your wraps, think about color palettes. Soft neutrals like cream, oatmeal, sage, or dusty rose are timeless and keep the focus entirely on your baby’s delicate features. Avoid busy patterns that can distract the eye or create ‘moiré’ patterns in your digital photos.
| Material Type | Best Use | Pros/Cons |
|---|---|---|
| Jersey Knit | All Wrapping Styles | Pro: Stretchy and smooth. Con: Can be slippery. |
| Open-Weave Muslin | Base Layer/Traditional | Pro: Breathable. Con: Wrinkles easily in photos. |
| Textured Mohair/Wool | Outer Decorative Layer | Pro: High-end look. Con: Can be itchy; use as a top layer only. |
Preparation Checklist
- Feed and Burp: A ‘milk drunk’ baby is a cooperative model. Aim to start your session about 20-30 minutes after a full feeding.
- Warm the Room: Since baby will be wrapped up, ensure the room is a cozy 72-75 degrees Fahrenheit to keep them sleepy and content.
- White Noise: Keep a sound machine running nearby to mimic the womb and drown out the click of your camera.
Style 1: The ‘Egg’ Wrap (The Full Potato)
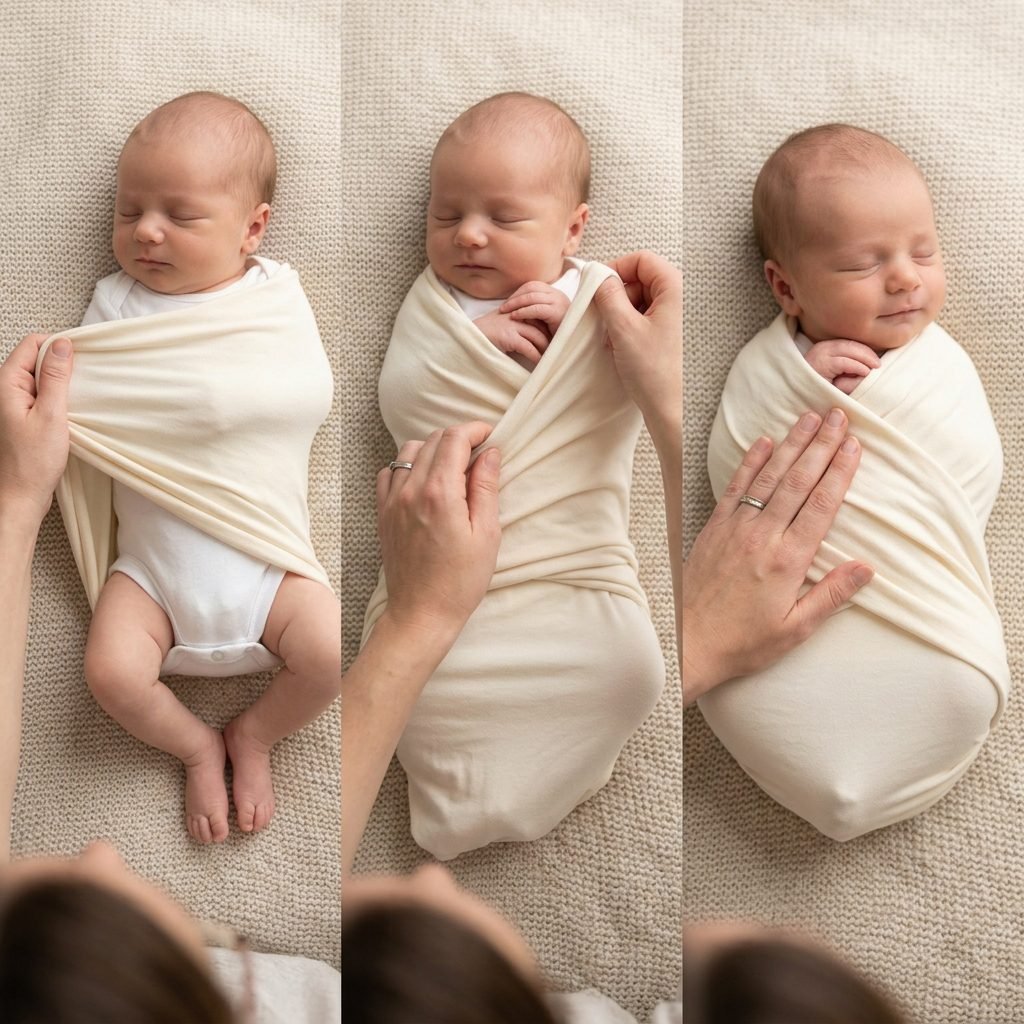
The ‘Egg’ wrap, often called the ‘Full Potato’ in the photography world, is the most iconic newborn pose. It creates a perfectly round, snug little bundle that highlights the baby’s face. This style is particularly effective for babies who are a bit wiggly or ‘startly,’ as it keeps their arms and legs completely secure.
Step-by-Step Instructions
- The Base: Lay your jersey wrap out horizontally. Fold it down about one-third of the way to create a clean top edge.
- Positioning: Place baby in the center, with the top of the wrap aligned with their shoulders.
- The Arm Tuck: Gently tuck baby’s hands together over their chest. Bring one side of the wrap across the body, tucking it snugly under the opposite side of the baby’s back.
- The Bottom Fold: Bring the bottom of the wrap up over baby’s feet and toward their chest. This creates the ‘bottom’ of the egg.
- The Final Pass: Take the remaining long tail of the wrap and guide it around the baby’s entire body, pulling slightly to create tension. This smooths out any lumps. Secure the end by tucking it into a fold at the back.
Pro Tip: If the wrap looks lumpy, it’s usually because the baby’s legs are kicking. Gently guide their knees up toward their chest in a natural ‘fetal’ position before you do the final pass. This is not only more comfortable for them but creates that perfect round shape.
Style 2: The ‘Hands-to-Face’ Prayer Wrap

This is arguably the most ’boutique’ look you can achieve at home. It features the baby’s tiny hands tucked up under their chin, looking like they are peacefully dreaming. It’s incredibly sweet but requires a bit more patience and a very stretchy wrap to hold the hands in place.
How to Achieve the Look
- The Hand Placement: While baby is sleepy, gently bring their hands up near their chin. You may need to hold them there for a moment until the baby relaxes.
- The Anchor: Using a long, narrow strip of fabric (or your main wrap), start by securing the hands. Wrap the fabric over the wrists and under the chin, then around the back of the neck very gently.
- The Body Wrap: Once the hands are anchored, continue wrapping the rest of the fabric around the torso and legs, similar to the Egg wrap, but leaving the hands visible at the top.
- Refining: Use your fingers to gently pose the fingers so they aren’t clenched in a fist. A relaxed hand looks much more ‘dreamy’ in portraits.
Affirmation for Mama: ‘I am patient. I am creating a beautiful memory. My baby feels my calm energy.’
This style works best when shooting from a 45-degree angle above the baby, focusing the camera lens directly on the eyes and the tiny interlaced fingers.
Style 3: The ‘Knotted Bottom’ Boho Wrap
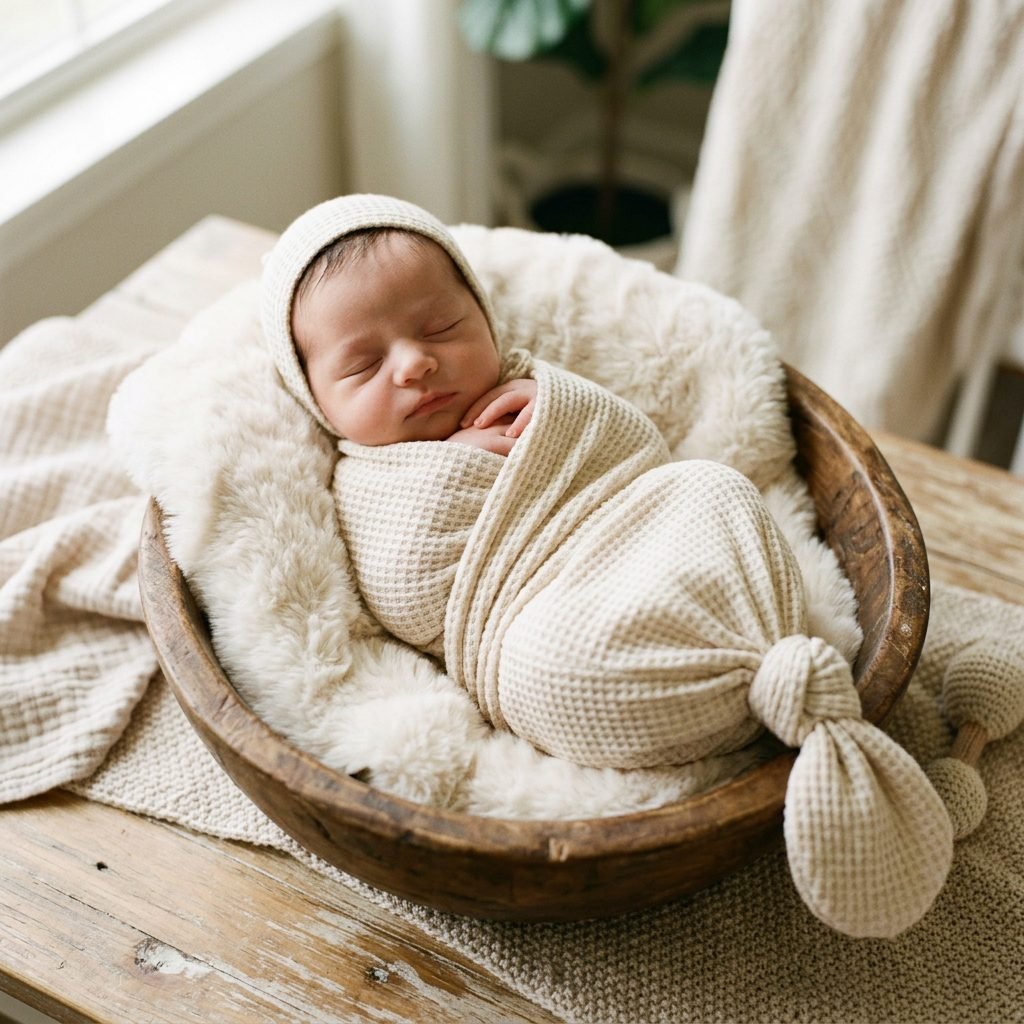
For a more modern, relaxed, and ‘Boho’ vibe, the Knotted Bottom wrap is a fantastic choice. It’s less restrictive than the Egg wrap and looks beautiful when baby is placed in a prop like a shallow basket or a wooden bowl.
The Technique
- The Long Wrap: You will need a very long rectangular wrap for this style (at least 60-70 inches).
- The Center: Place baby in the middle of the wrap. Bring the top edges over the shoulders and arms, leaving the arms either inside or outside depending on baby’s preference.
- The Twist: Take the two long ends hanging below the feet and twist them together once or twice.
- The Knot: Tie a simple, loose overhand knot just below the baby’s feet. Let the remaining fabric drape naturally.
| Feature | Egg Wrap | Boho Knot Wrap |
|---|---|---|
| Difficulty | Moderate | Easy |
| Best Prop | Flat Blanket/Rug | Basket or Bowl |
| Vibe | Classic/Studio | Organic/Lifestyle |
Styling Tip: Pair this wrap with a simple knotted beanie or a dainty floral headband to complete the look. Because the bottom is knotted, it adds visual length to the photo, which is very flattering in vertical shots.
Safety First: The Doula’s Guide to Newborn Comfort
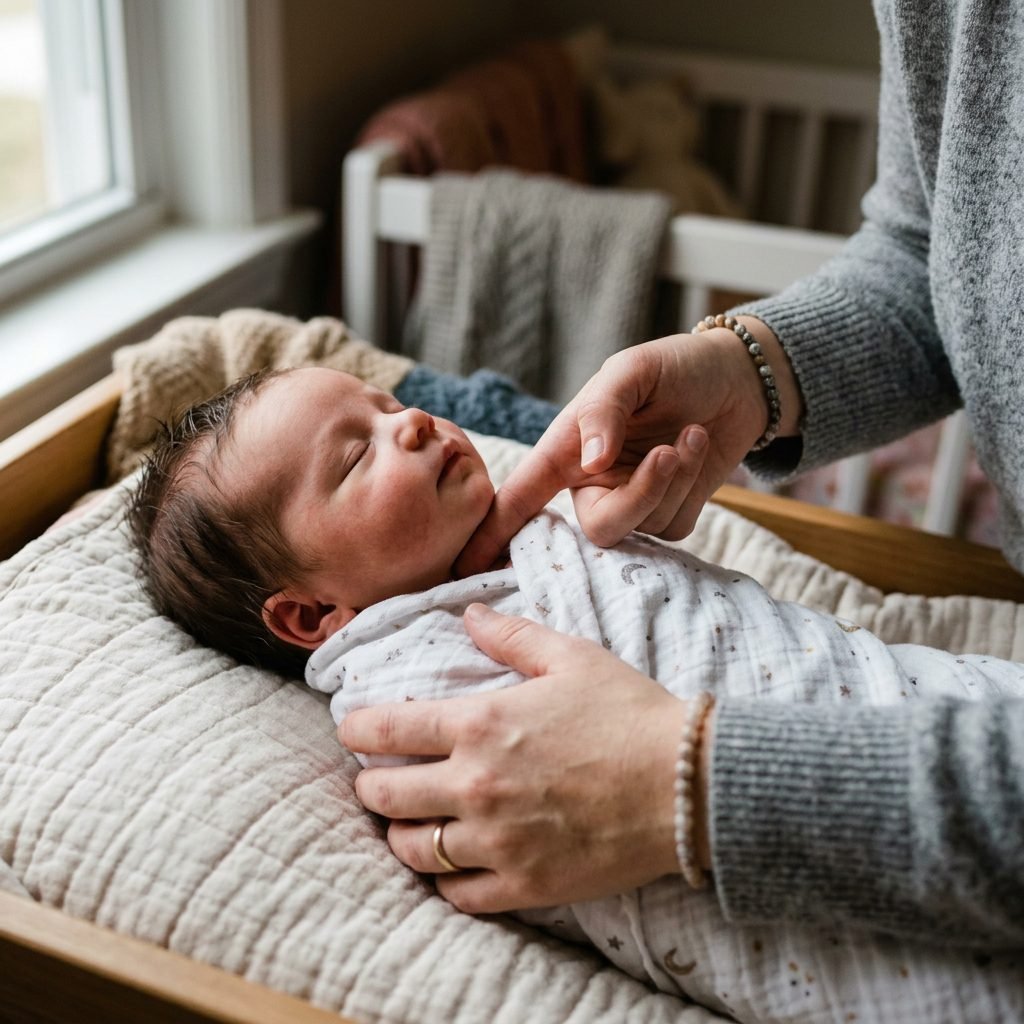
As much as we want the perfect photo, baby’s safety is non-negotiable. Newborns cannot regulate their temperature as well as adults, and their joints are still very soft. When wrapping for photography, always keep these three pillars of safety in mind:
- Airway Clearance: Ensure there is always at least two fingers’ width of space between the wrap and baby’s chin. Never cover the nose or mouth, and always keep the face visible.
- Hip Health: While we want the wrap to look snug, the legs should never be forced straight. Always allow for the ‘M-position’ or ‘froggy’ legs where the hips can fall open naturally. This prevents hip dysplasia.
- Circulation Check: Periodically check baby’s fingers and toes. They should be pink and warm. If they look dusky or feel cold, the wrap is too tight.
If baby starts to fuss, cry, or root, stop the session. A hungry or uncomfortable baby will not give you the ‘sleepy’ shots you want, and their needs always come before the ‘gram.
Mom-tographer Tips: Angles and Lighting
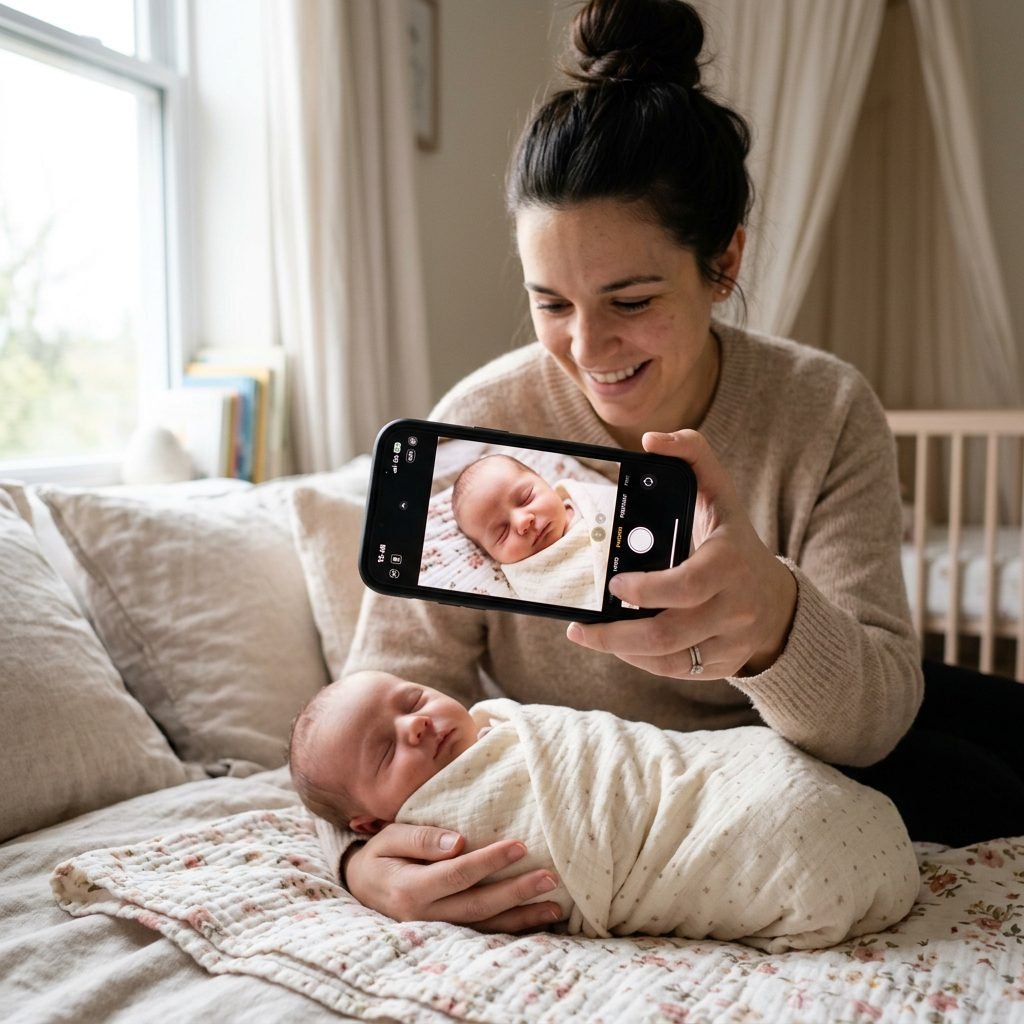
You’ve mastered the wraps; now let’s talk about the ‘shot.’ You don’t need a fancy DSLR; a modern smartphone is more than enough. The key is Natural Light. Find a large window, but avoid direct sunlight which creates harsh shadows. North or South-facing windows provide the softest, most flattering light.
The Golden Rules of DIY Angles
- Never Shoot Up the Nose: Always position yourself so you are shooting ‘down’ the bridge of the nose or from the side. Shooting from the chin up is rarely a flattering angle for anyone, especially babies!
- Focus on the Eyelashes: If using a smartphone, tap the screen where the baby’s eyelashes are to set the focus and exposure.
- Turn Off Overhead Lights: Mix-matching light sources (yellow lightbulbs vs. blue daylight) creates strange skin tones. Stick to 100% window light for that clean, airy look.
Don’t forget to capture the ‘macro’ details—the tiny ears, the swirl of hair on the crown of their head, and those miniature fingernails. These are the details you will cherish most in twenty years.
Conclusion
Capturing these moments doesn’t have to be stressful or expensive, mama. By using these three simple swaddle styles—the Egg, the Hands-to-Face, and the Knotted Boho—you are well on your way to creating a stunning gallery of your baby’s first days. Remember that the imperfections are part of the story; a little stray curl or a tiny yawn only adds to the magic. You are doing an incredible job, and these photos will be a testament to the love and care you poured into your little one from the very beginning. Happy snapping, and enjoy those newborn snuggles!