How to Edit Newborn Skin Tones on Lightroom Mobile for Flawless iPhone Photos
The Magic of Capturing Those Fleeting First Days
Mama, I see you. You are in that beautiful, hazy, exhausting ‘fourth trimester’ bubble. Your phone is likely already filled with hundreds of photos of your new little love—every tiny yawn, every curled toe, and every peaceful sleep. But sometimes, when you look back at those iPhone shots, they don’t quite capture the ethereal, soft glow you see with your own eyes. Instead, the lighting might look a bit muddy, or your sweet baby’s skin might appear a little more red, purple, or yellow than it does in person.
As a doula and a mama who has been exactly where you are, I want to tell you: those photos are treasures exactly as they are. However, I also know the joy of having a ‘flawless’ portrait that feels like a piece of art. You don’t need a professional DSLR camera or a studio setup to achieve that look. With the Lightroom Mobile app (which has a fantastic free version!), you can transform your everyday iPhone snaps into professional-grade keepsakes.
In this guide, we are going to walk through the gentle art of editing newborn skin tones. We’ll focus on preserving the natural beauty of your baby while correcting common issues like ‘newborn acne,’ redness from crying, or the slight yellow tint of mild jaundice. Let’s turn those quick snaps into heirloom-quality memories, all while you’re snuggled on the couch during a nap.
The Foundation: Capturing the Best Light on Your iPhone
Start with Soft, Natural Light
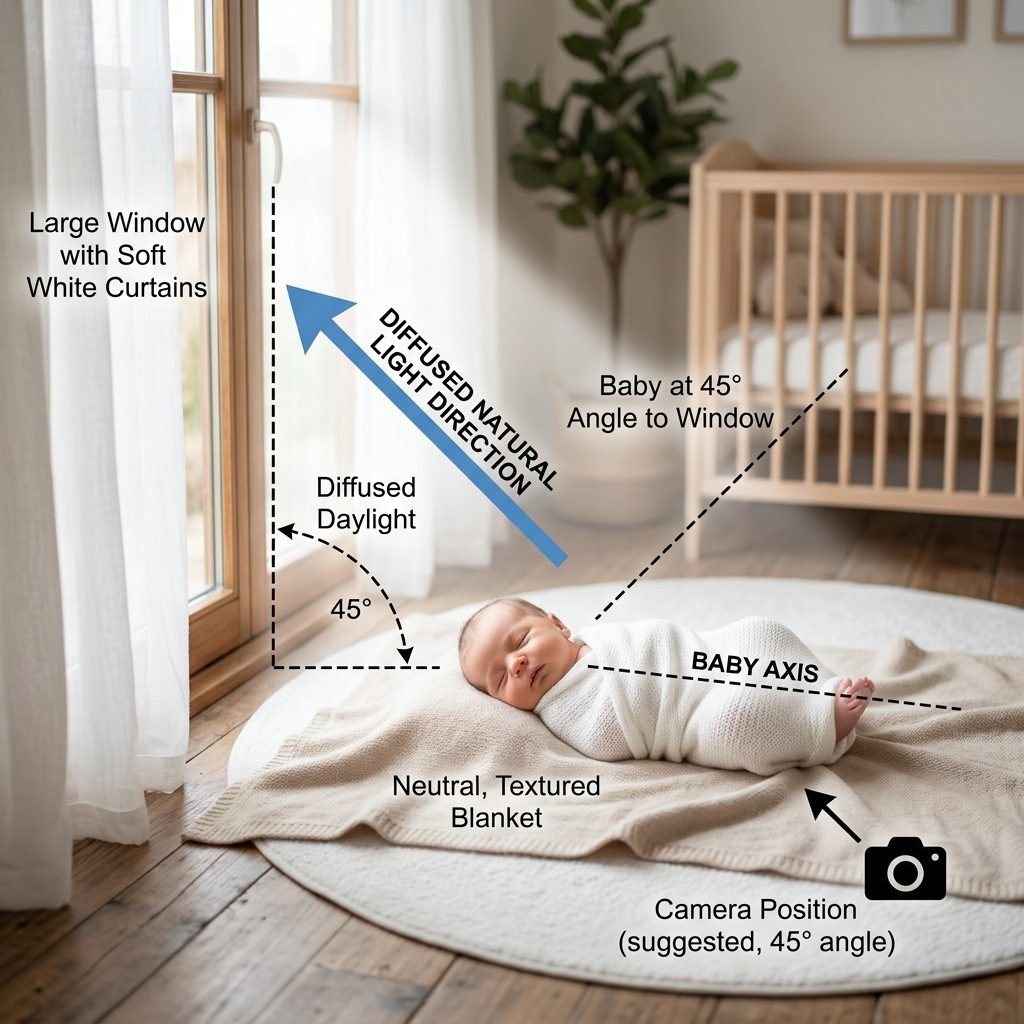
Before we even open an app, the secret to a ‘flawless’ edit actually starts with the light. Newborn skin is incredibly delicate and translucent. To capture it best, natural light is your absolute best friend. Find a large window, but avoid direct, harsh sunlight which creates deep shadows and ‘hot spots’ on the skin. A north-facing window or a window with a sheer white curtain is the gold standard for that soft, doula-approved glow.
Positioning for the ‘Newborn Glow’
Position your baby so the light flows from the top of their head down toward their feet, or at a 45-degree angle to their face. This creates soft shadows that define those chubby cheeks without making the skin look flat. Avoid ‘up-lighting’ (where the light comes from the chin up), as this can look unnatural and create harsh shadows under the nose and eyes.
| Lighting Type | Effect on Newborn Skin | Pro Tip |
|---|---|---|
| Direct Sunlight | Creates harsh red tones and squinting | Use a sheer curtain to diffuse. |
| Overhead Room Lights | Causes yellow/orange color casts | Turn them OFF; use window light only. |
| Cloudy Day Window Light | Soft, even, and cool tones | The perfect time for a photoshoot! |
Understanding the Lightroom Mobile ‘Color Mix’ Tool
The Power of HSL
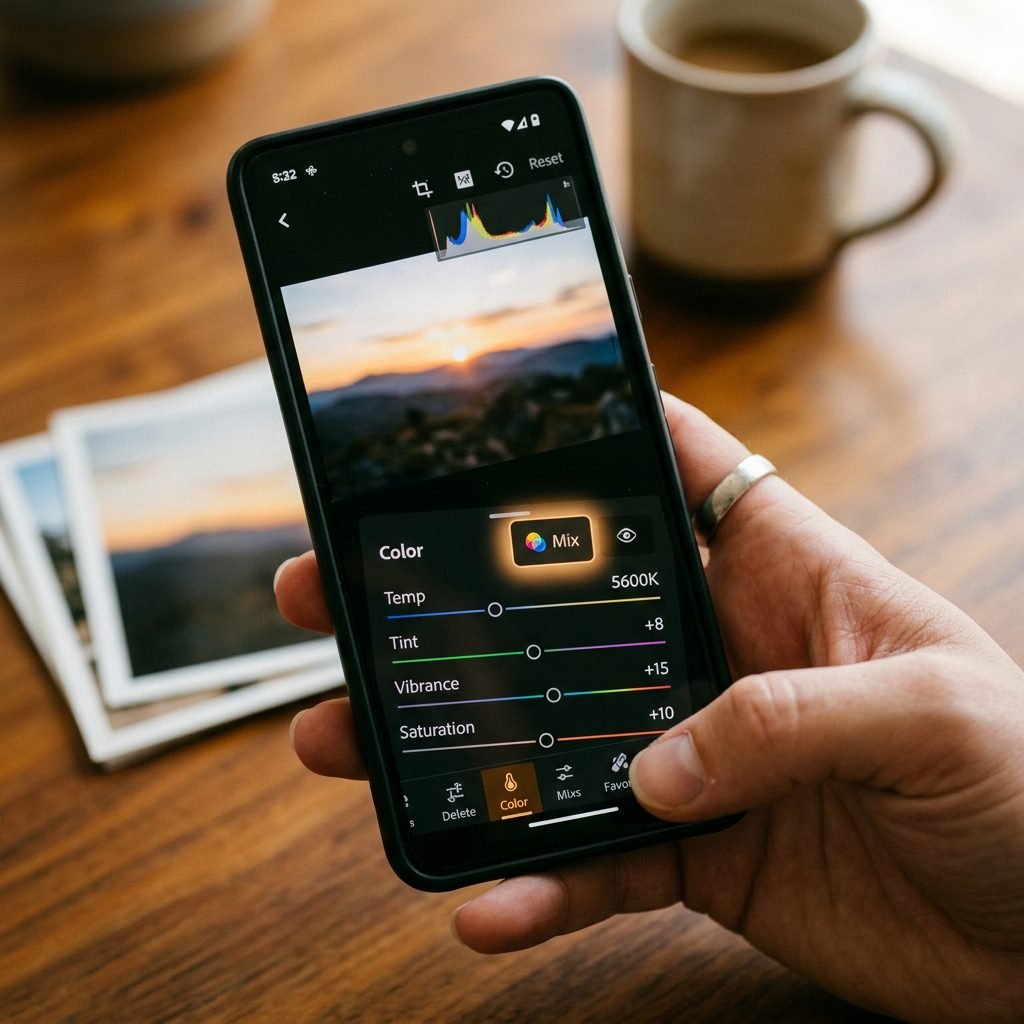
Once you’ve imported your photo into the Lightroom Mobile app, the most important tool for skin tones is the Color Mix (or HSL—Hue, Saturation, Luminance) panel. This is where the magic happens. Unlike a standard filter that changes the whole photo, the Color Mix tool allows you to target specific colors without affecting the rest of the image.
- Hue: Changes the actual color (e.g., making a red tone more orange or a yellow tone more green).
- Saturation: Controls the intensity of the color.
- Luminance: Controls the brightness of that specific color. This is the ‘secret sauce’ for making skin look creamy and bright.
“Mama, don’t be intimidated by these sliders. Think of them as gentle adjustments to bring out the light that is already there. You are just helping the camera see what your heart sees.”
Step-by-Step: Correcting Redness and Mottling
The Red and Orange Sliders
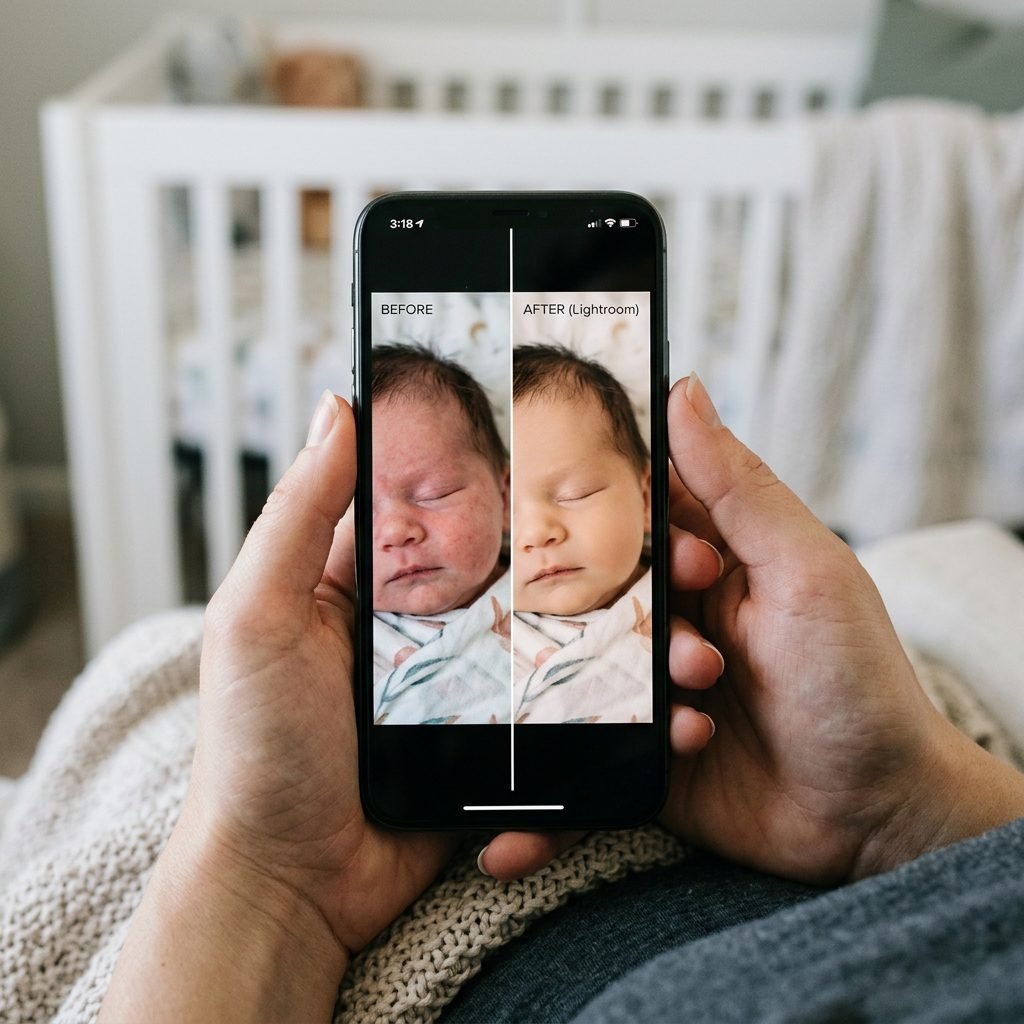
Newborns often have ‘mottled’ skin or a reddish/purple tint because their circulatory systems are still maturing. This is totally normal, but it can look a bit ‘busy’ in photos. To fix this, we focus on the Red and Orange circles in the Color Mix tool.
- Select the Orange Circle: Most skin tones live in the orange channel. To brighten the skin, increase the Luminance (move it to the right). This creates that airy, ‘lit-from-within’ look.
- Adjust Orange Saturation: If the baby looks a bit too ‘sun-kissed’ or orange, gently decrease the Saturation (move it to the left). Be careful not to go too far, or they will look gray!
- Select the Red Circle: If your baby has red patches or ‘stork bites,’ increase the Hue (move it toward the right/orange side). This turns the angry reds into softer peach tones.
- Decrease Red Saturation: Lowering the saturation of the reds will help take the ‘heat’ out of the skin.
Pro Tip: Always zoom in on the baby’s face while making these adjustments so you can see the subtle shifts in the skin texture.
Managing Jaundice and Yellow Undertones

The Yellow and Green Balance
Many babies experience a touch of jaundice in the first week, which can make them look quite yellow or even slightly greenish in photos. We can balance this using the Yellow slider.
To neutralize yellow tones, go to the Yellow Circle in Color Mix. Move the Hue slider slightly toward the right (toward the green/orange balance) and decrease the Saturation. Just like with the orange slider, increasing the Luminance of the yellows can help ‘wash out’ the sallowness and replace it with a bright, clean look.
| Skin Issue | Target Color | Action |
|---|---|---|
| Redness/Rashes | Red | Increase Hue, Decrease Saturation |
| Dull/Dark Skin | Orange | Increase Luminance |
| Jaundice/Yellowing | Yellow | Decrease Saturation, Increase Luminance |
| Purple Hands/Feet | Purple/Magenta | Decrease Saturation significantly |
Softening Texture Without Losing Detail

Texture vs. Clarity
We want our babies to look soft, but we don’t want them to look like plastic dolls. The Effects panel in Lightroom is where we handle skin texture. For newborns, I recommend a ‘less is more’ approach.
- Texture: Pulling the Texture slider slightly to the left (-5 to -15) will gently smooth out minor skin flaking or tiny bumps without losing the ‘realness’ of the photo.
- Clarity: Be very careful here! Increasing clarity makes skin look harsh and emphasizes every wrinkle. For a dreamy newborn look, I often decrease Clarity slightly (-5).
- Dehaze: If your photo looks a bit ‘foggy’ because of the window light, a tiny bit of Dehaze (to the right) can bring back the depth.
The Healing Brush (Premium Feature)
If your baby has a specific scratch from their tiny sharp nails or a very prominent pimple that you’d like to remove, the Healing Brush is a lifesaver. Simply tap the spot, and Lightroom will blend it away. If you are using the free version, don’t worry—the ‘Texture’ adjustment usually does enough to soften these features naturally.
Final Flourishes: White Balance and Presets

Temperature and Tint
Sometimes the whole photo feels too blue (cold) or too pink. Head to the Light and Color panels. Use the Temperature slider to add a little warmth (move to the right) if the baby looks cold. Use the Tint slider to add a tiny bit of green if the baby looks too pink, or a bit of magenta if they look too ‘ghastly’ or green.
Creating Your Own ‘Newborn Glow’ Preset
Once you find a combination of settings that works for your nursery’s lighting, you don’t have to redo it every time!
- Tap the three dots (…) in the top right corner.
- Select ‘Create Preset.’
- Name it something like ‘My Sweet Baby Glow.’
- Next time you take a photo in that same spot, just go to Presets > User Presets and tap it!
“Mama, remember: these edits are just a tool. The real beauty is the baby in your arms. You are doing an amazing job capturing this season of life.”
You Are Not Alone: The Reality of Newborn Skin

Before we finish, I want to give you a big sisterly hug. If you are looking at your baby’s skin and feeling worried about the peeling, the ‘baby acne,’ or the redness—please know this is all so normal. A newborn’s skin is their largest organ, and it is working incredibly hard to adapt to life outside the womb.
Editing these photos isn’t about hiding ‘flaws’ because your baby is perfect. It’s about creating a visual representation of the softness and peace you feel when you hold them. Don’t spend hours editing; spend minutes. These tools are meant to give you back a little bit of that ‘professional’ magic while you stay present in the moment.
| Normal Newborn Skin Trait | What It Is | How to Handle in Photos |
|---|---|---|
| Milia | Tiny white bumps on nose | Leave them! They are a ‘newborn classic.’ |
| Peeling Skin | Dryness from birth fluid | Use ‘Texture’ slider to soften slightly. |
| Stork Bites | Red birthmarks on neck/eyes | Use ‘Red Hue’ slider to blend. |
Conclusion
Preserving Your Most Precious Memories
Learning how to edit newborn skin tones on Lightroom Mobile is a skill that will serve you throughout your child’s entire life. From those first wrinkled days to the toddler scrapes and the ‘big kid’ glow, you now have the tools to make your iPhone photos shine. Remember, the best photo is the one that gets taken. Don’t wait for the ‘perfect’ moment or the ‘perfect’ outfit. Capture the mess, the milk snuggles, and the sleepy yawns.
With a few gentle swipes of the Orange Luminance and a touch of Texture softening, you’ve turned a quick snap into a masterpiece. You’ve got this, Mama! Keep clicking, keep editing, and most importantly, keep soaking in every single second of this beautiful journey.