How to Make DIY Copper Pipe Hanging Bookshelves for a Modern Nursery
Hello, beautiful mama. If you are reading this, chances are you are deep in the magical, sometimes overwhelming, and highly productive phase of pregnancy known as nesting. You are looking around your home, imagining where your sweet baby will sleep, play, and learn. As a doula and a fellow mama who has spent countless hours organizing and reorganizing nurseries, I know exactly how you feel. You want a space that is not only functional and safe but also profoundly beautiful and calming.
When it comes to nursery design, especially if you are working with a smaller room or a cozy apartment, vertical storage is your absolute best friend. Traditional bulky bookshelves can take up precious floor space—space that your little one will soon need for tummy time, crawling, and eventually, building spectacular block towers. That is where the magic of wall-mounted, front-facing bookshelves comes in. And today, we are going to elevate that concept by learning How to Make DIY Copper Pipe Hanging Bookshelves for a Modern Nursery.
Copper brings an incredible warmth, a touch of modern industrial chic, and a timeless elegance to any nursery. It pairs beautifully with soft sage greens, warm terracotta, crisp whites, and gentle blush tones. Best of all? This DIY project is surprisingly simple, deeply satisfying, and completely customizable to your unique space. Grab a cup of red raspberry leaf tea, prop up those beautiful swollen feet, and let’s walk through this creative journey together, step by step.
The Magic of Front-Facing Bookshelves (A Developmental Perspective)
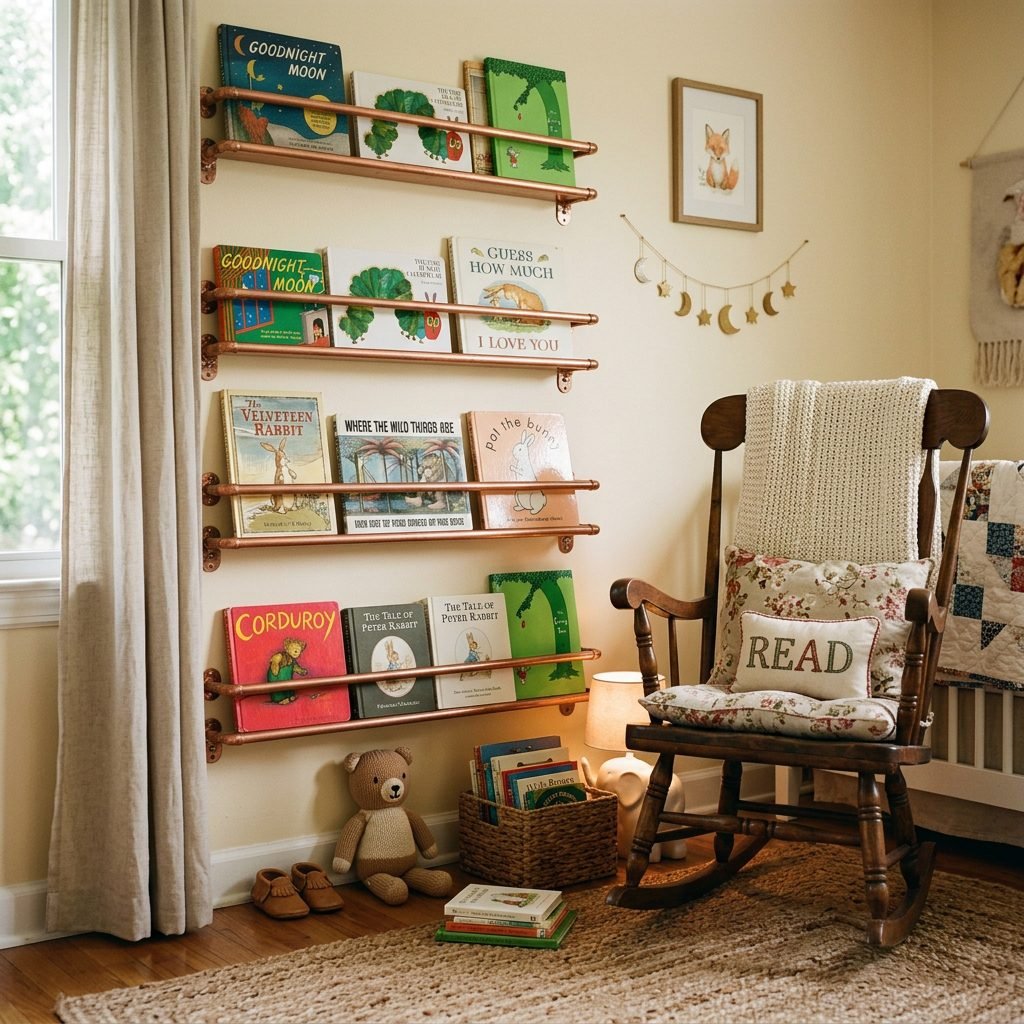
Before we dive into the hardware store shopping list, let us talk about why this specific style of bookshelf is such a brilliant choice for your baby’s development. As a pediatric sleep consultant and early childhood advocate, I always encourage parents to think about the nursery from the baby’s eye level.
The Montessori Approach to Reading
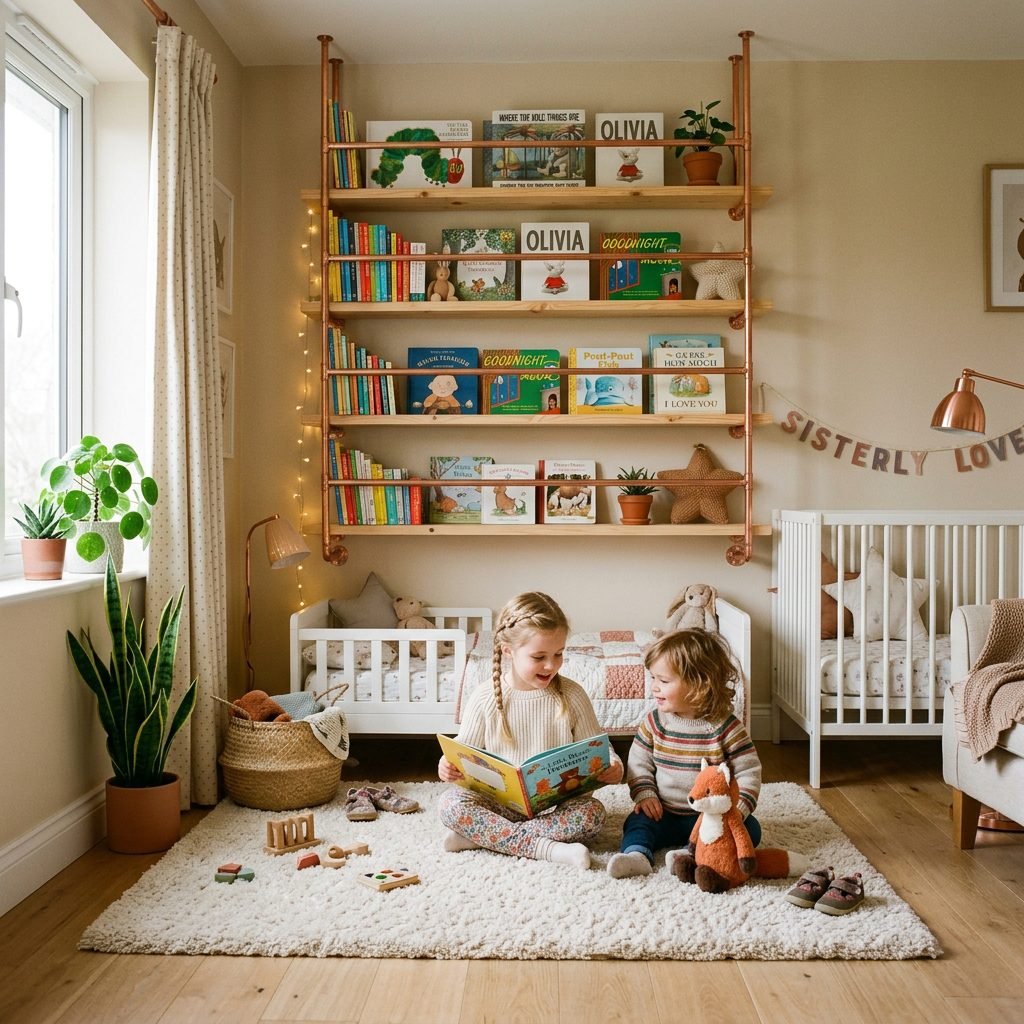
Traditional bookshelves expose only the spine of the book. For a pre-literate toddler, a wall of spines is uninspiring and difficult to navigate. Front-facing shelves, like the copper pipe ones we are building, display the vibrant, engaging covers of the books. This is a core principle of the Montessori method. By allowing your child to see the artwork, you are empowering them to make independent choices about what they want to read, fostering an early and organic love for literature.
Space-Saving Brilliance
If you are designing a nursery in a small room, a closet nook, or even a shared master bedroom, floor space is premium real estate. Wall-mounted copper shelves project only a few inches from the wall. They utilize the vertical space behind the rocking chair, over the changing table, or tucked into an unused corner, keeping the floor clear for sensory play and tummy time mats.
Remember, mama: Your nursery does not need to look like a sprawling magazine spread to be perfect. The most beautiful spaces are the ones thoughtfully curated with love, safety, and your baby’s unique needs in mind. You are doing a wonderful job creating a haven for your little one.
The Nesting Mama’s Supply List & Budget Breakdown
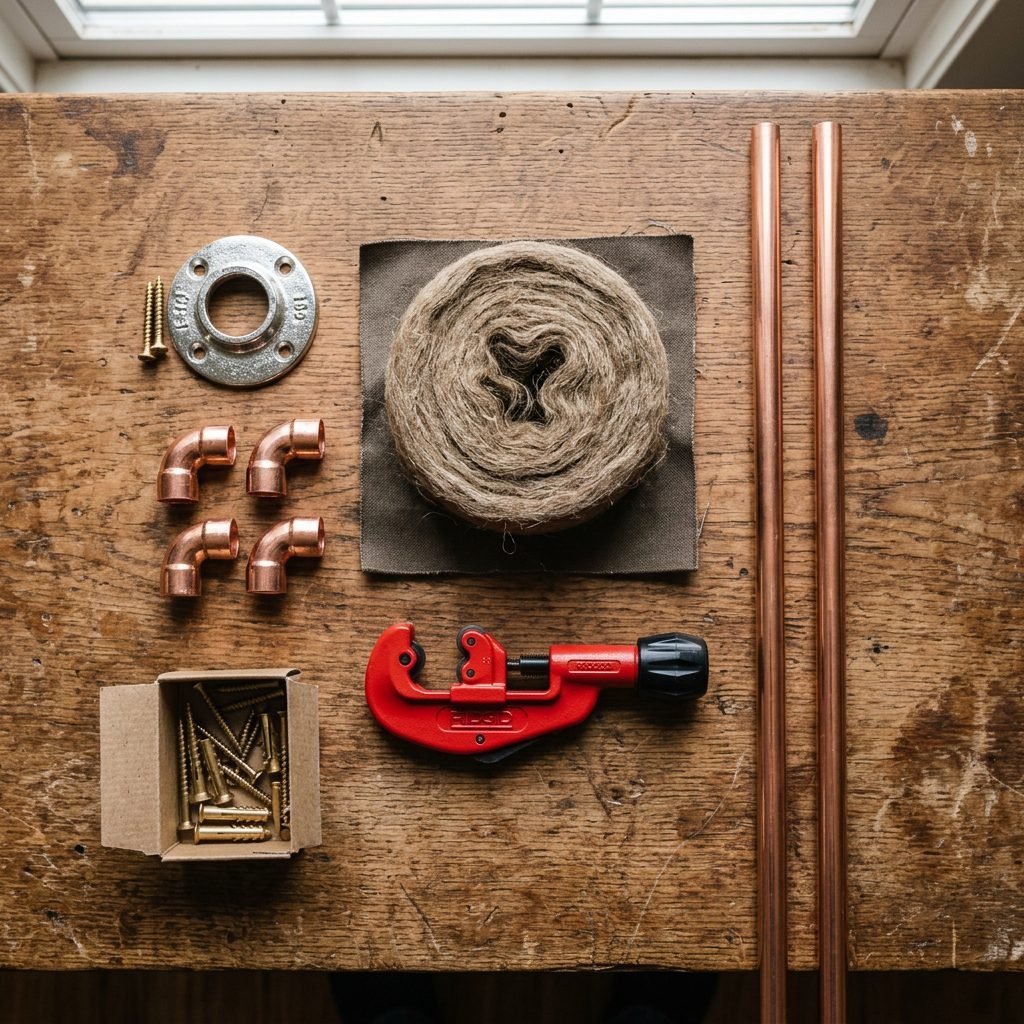
One of the best parts about this DIY is that it looks incredibly high-end but is quite gentle on your nesting budget. You will need to take a quick trip to your local hardware store (or send your partner with this exact list!). When shopping for copper pipes, you will typically find them in the plumbing section. We are looking for 1/2-inch copper piping, which is the perfect thickness—sturdy enough to hold heavy board books but delicate enough to look elegant.
Materials and Tools Needed
- 1/2-inch Copper Pipe: Usually sold in 5-foot or 10-foot lengths.
- 1/2-inch Copper 90-Degree Elbows: Two for each shelf.
- 1/2-inch Copper Floor Flanges: Two for each shelf (these attach the shelf to the wall).
- Copper Tube Cutter: A small, inexpensive hand tool that cleanly slices through copper.
- Steel Wool (Grade 0000): For polishing the pipes to a brilliant shine.
- Heavy-Duty Drywall Anchors & Screws: Critical for baby safety!
- Power Drill & Stud Finder: For safe, secure wall mounting.
Let’s break down the estimated costs and who should tackle which task. Pregnancy is a time for teamwork!
| Material / Tool | Estimated Cost (per 3ft shelf) | Nesting Task Delegation |
|---|---|---|
| 1/2-inch Copper Pipe | $10 – $15 | Partner/Support Person (Heavy carrying) |
| Copper Elbows & Flanges | $15 – $20 | Mama (Fun hardware picking!) |
| Tube Cutter & Steel Wool | $12 – $18 | Shared (Toolbox staple) |
| Anchors & Screws | $5 – $8 | Partner/Support Person |
| Total Estimated Budget | $42 – $61 | A fraction of retail cost! |
Step-by-Step: Cutting and Polishing Your Copper
Now comes the fun part—transforming raw plumbing materials into custom nursery decor. If you are heavily pregnant, I want you to sit comfortably on a sturdy chair at a worktable for this part. Do not hunch over on the floor! Protect your lower back and your growing bump.
Step 1: Measure and Mark
Determine how wide you want your shelves to be. A standard, aesthetically pleasing width is between 24 and 36 inches. Using a permanent marker, make a small dot on the copper pipe where you need to cut. Pro Tip: Ensure you account for the extra inch that the elbow joints will add to the overall width.
Step 2: Use the Tube Cutter
If you have never used a copper tube cutter, do not be intimidated! It is much easier than using a saw and requires very little physical strength. Simply clamp the cutter onto the pipe at your mark. Tighten the knob, and rotate the cutter entirely around the pipe. Tighten the knob a little more, and rotate again. Repeat this process until the pipe cleanly snaps in two. It is incredibly satisfying!
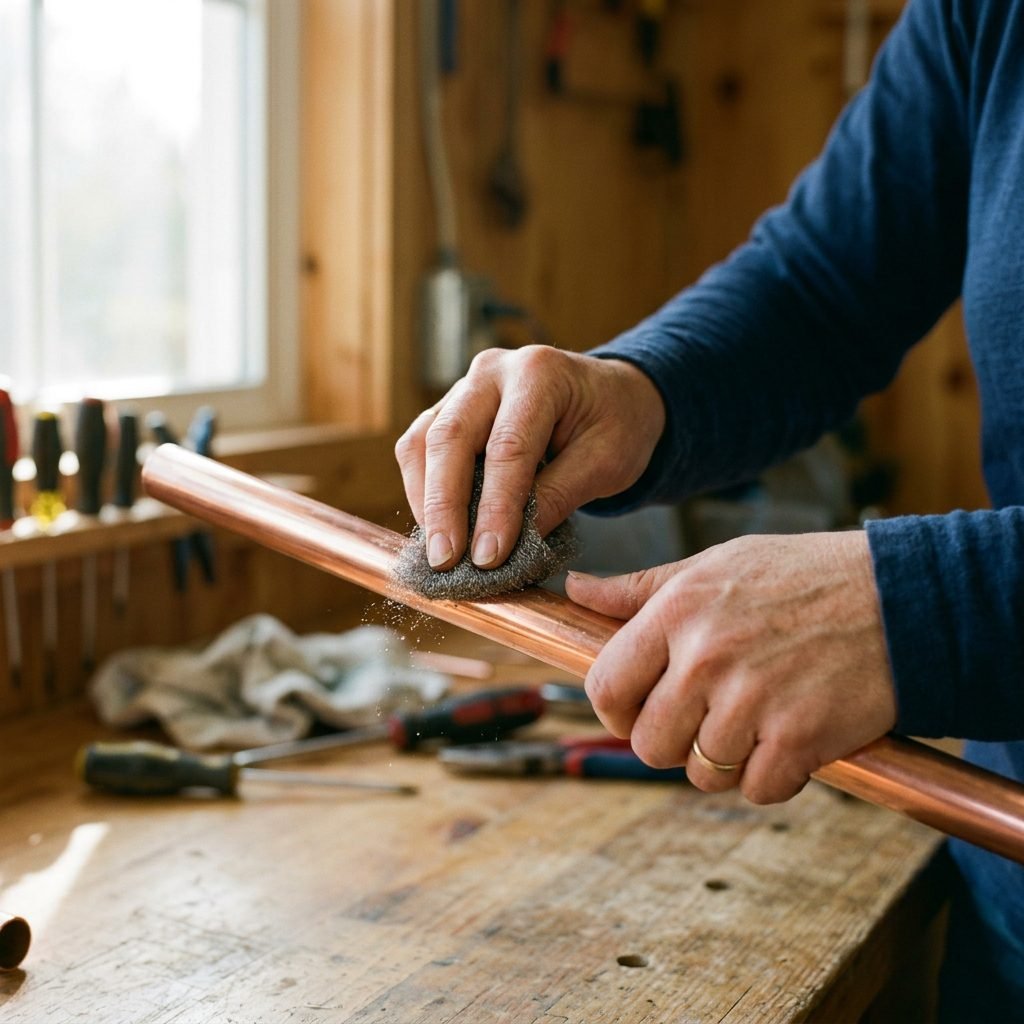
Step 3: Polish to Perfection
Hardware store copper often comes with printed barcodes, red or blue lettering, and a bit of industrial grime. Take your 0000 grade steel wool and gently rub the pipes. The ink and tarnish will melt away, revealing a stunning, warm, rose-gold shine.
Safety Reminder: Polishing copper with steel wool can create tiny metal dust particles. Wear a simple paper mask while doing this, and wipe the pipes down with a damp cloth afterward to ensure no metal dust makes its way into your baby’s environment.
Assembling and Mounting: Safety First for Your Little One

As a doula and newborn care specialist, I cannot stress this next point enough: Nursery safety is non-negotiable. Babies grow into toddlers faster than you can imagine, and toddlers love to pull, hang, and climb. Securing these shelves properly is the most important step of this entire project.
Step 1: Dry Fit the Assembly
Before putting anything on the wall, assemble your shelf. Push a 90-degree elbow onto each end of your long copper pipe. Then, insert a small 2-inch piece of copper pipe into the other end of each elbow. Finally, attach the floor flanges to the ends of those short pipes. You can use strong epoxy glue inside the joints if you want them permanently fused, but a tight dry-fit is usually sufficient since the wall will hold the tension.
Step 2: Locate the Studs
Use a high-quality stud finder to locate the wooden studs behind your nursery drywall. If you can screw the flanges directly into a stud, that is the gold standard for safety. If the placement you want does not align with the studs, you must use heavy-duty toggle bolts or drywall anchors rated for at least 50 pounds. Books get heavy quickly!
Step 3: Level and Drill
- Hold the assembled shelf against the wall at your desired height.
- Place a bubble level on top of the long copper pipe to ensure it is perfectly straight.
- Use a pencil to mark the screw holes through the floor flanges.
- Set the shelf down. Drill pilot holes at your pencil marks.
- Insert your drywall anchors (if not drilling into a stud).
- Hold the shelf back up and drive the screws through the flanges firmly into the wall.
If you are installing multiple shelves, space them about 12 to 14 inches apart vertically to allow room for taller picture books.
Styling Your Modern Nursery Library
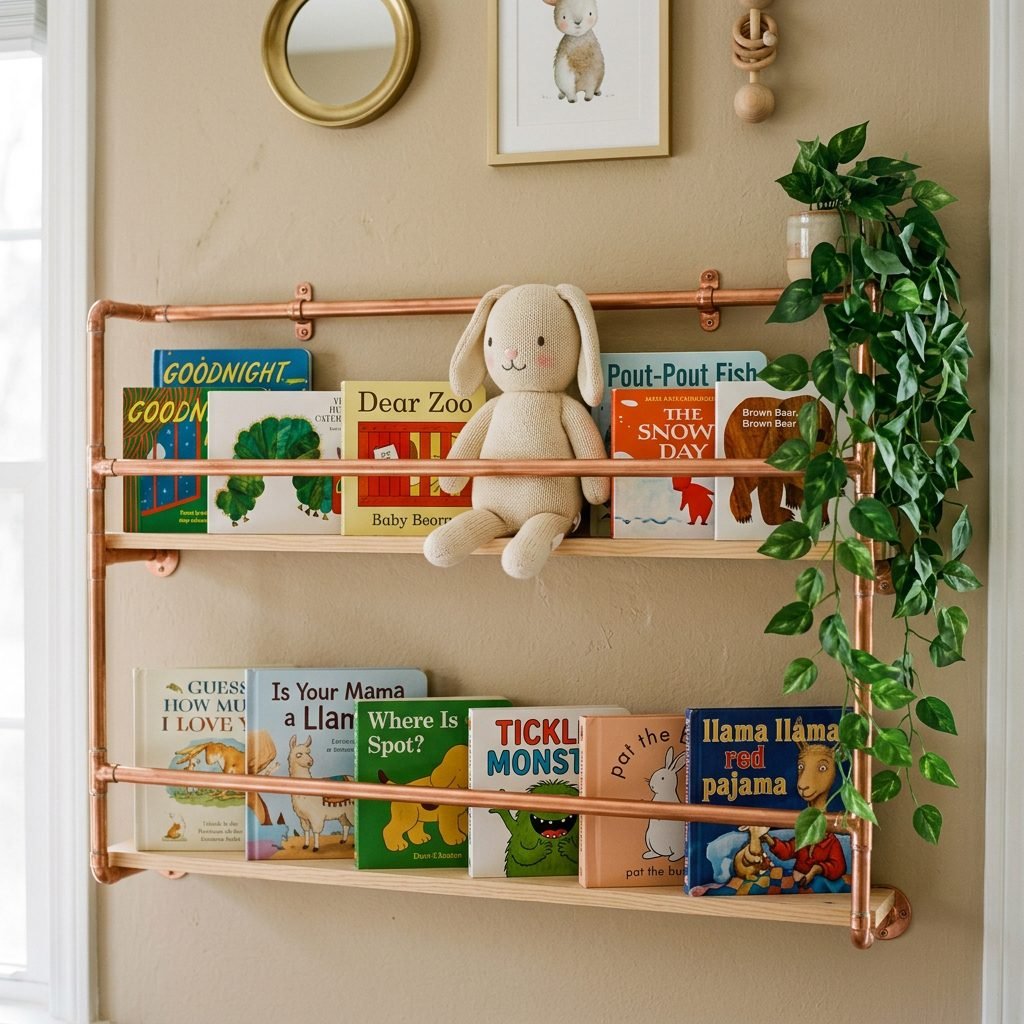
You did it! The shelves are up, securely fastened, and gleaming beautifully on the wall. Now we get to the most joyful part of nesting: styling. Curating your baby’s library is a deeply emotional and wonderful experience. You are selecting the stories that will shape their early understanding of the world.
Color Coordination vs. Accessibility
While the “rainbow bookshelf” trend (organizing books by spine color) looks incredible on Instagram, remember our Montessori principles. When your baby is old enough to choose books, they will look for the cover art, not the spine color. I recommend organizing by theme or simply mixing them up to create a vibrant, inviting display. Place the heaviest, thickest board books on the lowest shelf, and the paper-page picture books on the higher shelves out of reach of tiny, tearing hands.
Adding Whimsy and Texture
Your copper pipe shelves don’t have to hold only books! To soften the industrial look of the metal, intersperse the books with sweet, texturally rich nursery items. Here are a few ideas:
- A small, trailing faux plant (like a string of pearls or pothos) draped over the edge.
- A soft, neutral-colored jellycat plush bunny tucked between two larger books.
- A wooden milestone block or a beautifully carved wooden teething ring.
- A framed ultrasound photo or a small piece of custom name art.
The contrast between the cool, hard copper and the soft, plush textures of toys and books creates a perfectly balanced, modern aesthetic that feels incredibly warm and inviting.
Navigating DIY Projects During Pregnancy: A Doula’s Advice

My sweet friend, as we wrap up this project, I want to take a moment to talk about you. Nesting is a powerful, primal urge. It is your mind and body’s way of preparing a safe harbor for the new life you are bringing into the world. However, it is so easy to overdo it.
When tackling DIY nursery projects, please keep these maternal wellness tips in mind:
- Listen to Your Pelvis: If you are experiencing pelvic girdle pain (PGP) or lightning crotch, avoid standing on hard floors for long periods. Sit on a birth ball or a padded chair while doing the copper polishing.
- Hydration is Key: Keep a massive tumbler of ice water next to your tools. Building a human is hard work; building a bookshelf on top of it requires extra fluids!
- Ask for Help: There is no award for doing it all yourself. Let your partner, a family member, or a friend handle the heavy lifting, the reaching, and the power tools. Your job is the creative direction!
- Watch for Fumes: If you decide to spray your copper with a clear sealant to prevent future tarnishing (which is optional), do not do this yourself. Have someone else spray it outdoors, and let it off-gas completely before bringing it into the nursery. Pregnant mamas should avoid aerosol sealants.
You are creating a beautiful, intentional space for your baby, but your baby’s favorite place will always be in your arms. Take a deep breath, step back, and admire your incredible work. You are going to be an amazing mother.
Conclusion
Creating a DIY copper pipe hanging bookshelf is more than just a weekend project; it is an act of love and preparation for the beautiful journey ahead. You have taken simple, raw materials and transformed them into a functional piece of art that will hold the stories, giggles, and bedtime memories of your child’s early years. By prioritizing safety, incorporating Montessori principles, and leaning into the modern warmth of copper, you have elevated your nursery design brilliantly.
As you fill these shelves with classic tales and new adventures, remember to give yourself grace during this nesting period. Rest when you need to, ask for support, and soak in the quiet anticipation of the weeks to come. Your nursery is ready, your heart is ready, and you are going to do beautifully.