How to Crochet a Safe and Cute Organic Cotton Bunny Teething Ring
Welcome to Your Nesting Era, Mama
There is something profoundly magical about the nesting phase of pregnancy. As your belly grows and you prepare to welcome your little one into the world, the urge to create, organize, and build a safe haven becomes overwhelming in the most beautiful way. Whether you are a first-time mom eagerly awaiting your due date, a crafty host planning a vintage storybook baby shower, or a postpartum mama looking for a mindful, grounding activity while baby naps, you are in exactly the right place.
As a doula and pediatric sleep consultant, I spend a lot of time talking with parents about the inevitable teething phase. Teething can disrupt sleep, cause fussiness, and leave you feeling helpless as your baby navigates sore gums. But having a safe, textured, and comforting tool on hand can make a world of difference. That is where this sweet, handmade project comes in.
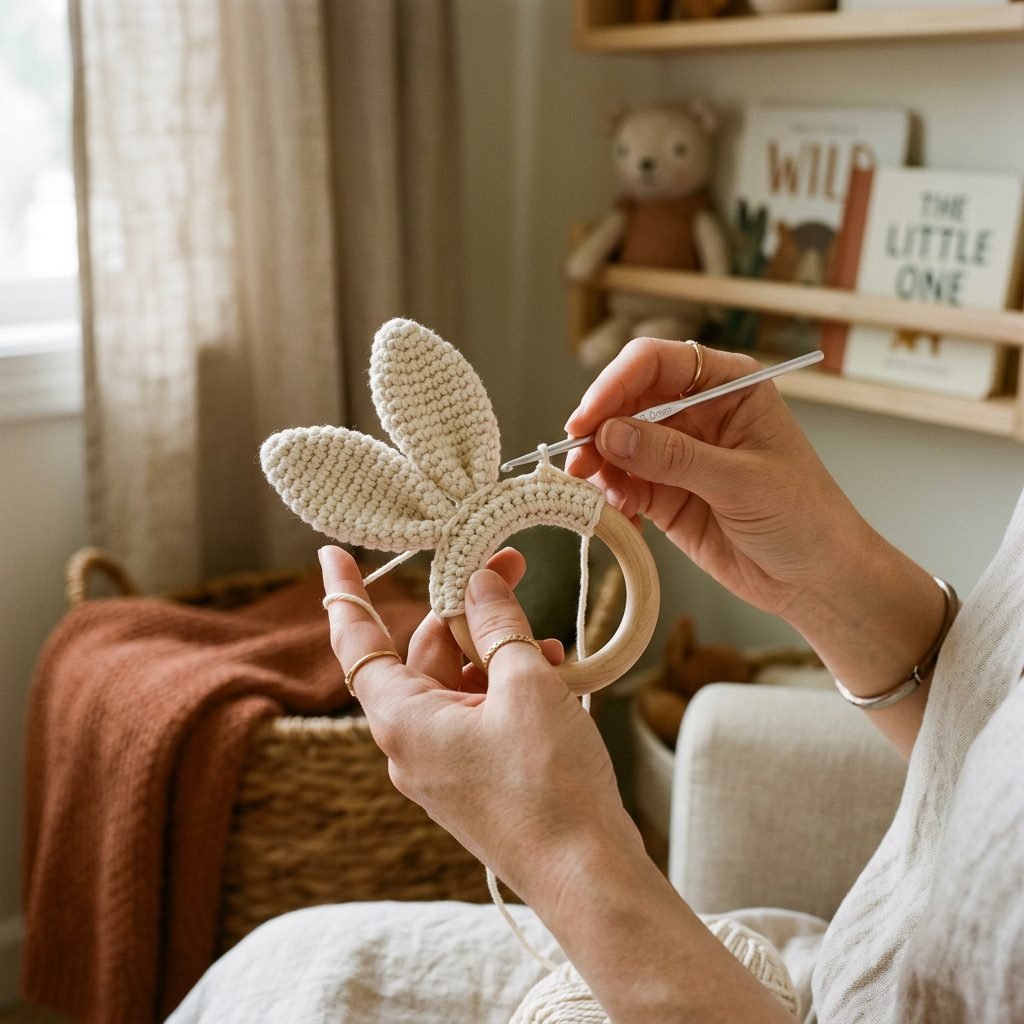
Today, we are going to learn how to crochet a safe and cute organic cotton bunny teething ring. This isn’t just any craft; it is a labor of love that combines the sensory benefits of ribbed crochet textures with the firm, soothing counter-pressure of natural wood. Best of all, by making it yourself, you have complete control over the materials, ensuring your baby is chewing on something 100% non-toxic and safe.
“Remember, mama, your baby will not judge your yarn tension or a missed stitch. They will only feel the love, warmth, and comfort woven into every loop of this heirloom keepsake.”
Grab a cup of red raspberry leaf tea (or a massive tumbler of ice water!), settle into your coziest nursing chair, and let’s craft something beautiful and functional for your little one’s teething journey.
Safety First: Why Organic Cotton and Untreated Wood Matter

The Science of Safe Chewing Materials
Before we even pick up a crochet hook, we need to have a serious sister-to-sister chat about materials. When your baby is teething, whatever they put in their mouth is interacting directly with their gums, saliva, and developing digestive system. As a maternal wellness expert, I cannot stress enough how vital it is to avoid synthetic yarns (like acrylic or polyester) and chemically treated woods.
The Magic of GOTS Certified Organic Cotton
Conventional cotton is often heavily treated with pesticides, and synthetic yarns are essentially spun plastics that can shed microplastics when vigorously chewed. For this project, you must use GOTS (Global Organic Textile Standard) certified organic cotton yarn. Organic cotton is naturally absorbent, breathable, and completely free of harmful chemicals, heavy metals, and toxic dyes. It also washes beautifully, which is essential for an item covered in baby drool!
Selecting the Perfect Wooden Ring
The wooden ring provides the hard counter-pressure babies crave when teeth are pushing through the gum line. You want to look for untreated, CPSIA-compliant hardwood rings. Maple and beech wood are the gold standards because they are hardwoods that will not splinter. The ring should be at least 2.5 to 3 inches in diameter to ensure it cannot be swallowed or become a choking hazard. Never use rings purchased from generic craft aisles unless they explicitly state they are food-grade and baby-safe.
| Material / Tool Needed | Estimated Cost & Safety Purpose |
|---|---|
| Organic Cotton Yarn (Worsted Weight / Size 4) | $6 – $12. Provides a safe, non-toxic, and absorbent texture for chewing. Look for GOTS certification. |
| Untreated Beech or Maple Wood Ring (2.5″ – 3″) | $4 – $8 (for a multi-pack). Offers safe, splinter-free counter-pressure for sore gums. Must be CPSIA compliant. |
| Crochet Hook (Size G / 4.0mm) | $3 – $5. A slightly smaller hook ensures tight, secure stitches so baby fingers can’t get caught. |
| Tapestry Needle & Scissors | $5. Used for securely weaving in ends so the piece cannot unravel. |
| Organic Coconut Oil or Beeswax (Optional) | $8 – $10. Used to naturally condition and seal the wooden ring before use, preventing the wood from drying out. |
Gathering Your Tools & Crochet Abbreviations
Preparing Your Workspace
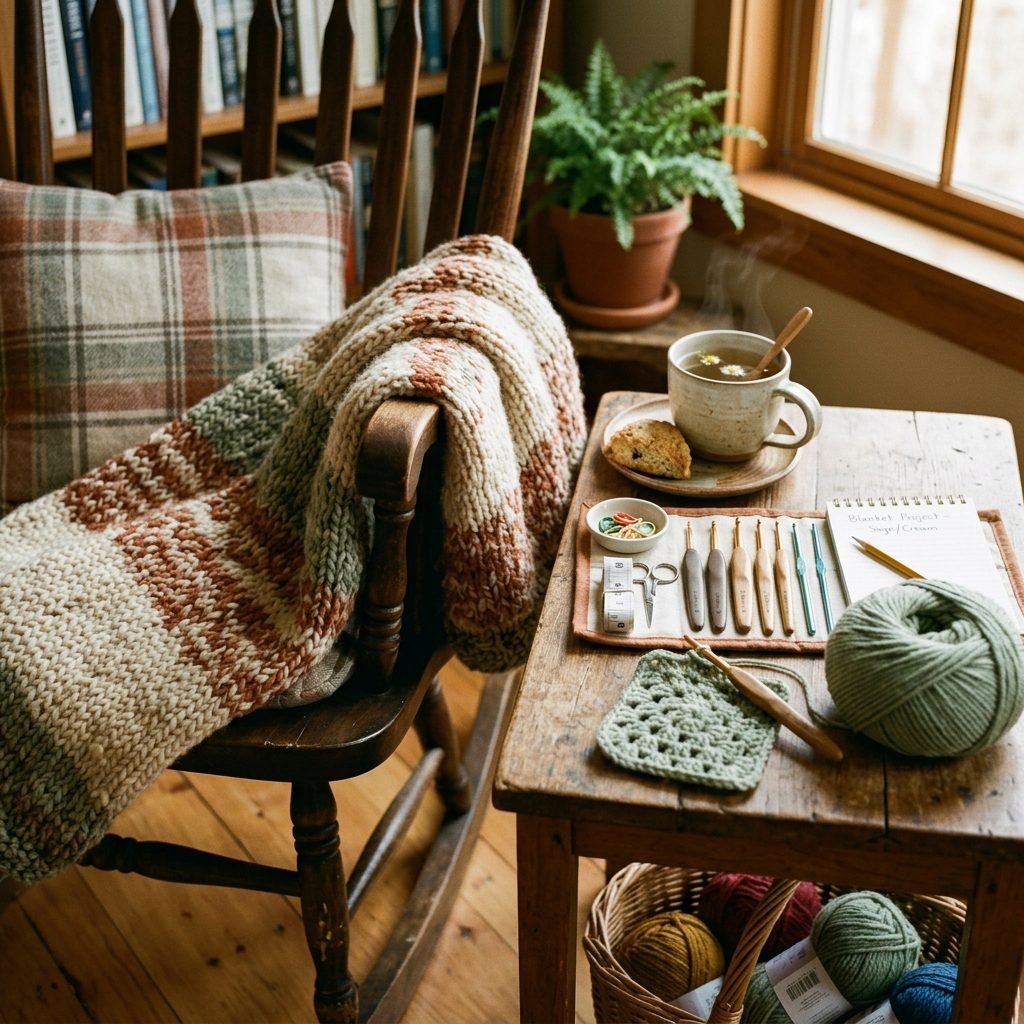
Now that we have our safe materials sourced, let’s set up our workspace. If you are currently pregnant, make sure you are sitting with good lumbar support—grab a pregnancy pillow if you need it! If you are in your postpartum recovery phase, keep your feet elevated and ensure you have a water bottle within arm’s reach. Crafting should be a relaxing, restorative process, not something that causes backache.
Understanding the Pattern Language
If you are a beginner, do not panic. This pattern is incredibly forgiving and uses only basic stitches. Here is a quick reference guide for the US crochet terms we will be using:
- CH: Chain
- SC: Single Crochet
- INC: Increase (Place two single crochets into the same stitch)
- DEC: Decrease (Crochet two stitches together to make one)
- ST: Stitch
- SL ST: Slip Stitch
A Quick Note on Gauge: For clothing, gauge (how tight or loose you crochet) is critical for sizing. For a teething ring, gauge doesn’t matter for the final size, but tension matters for safety. You want your stitches to be tight and dense. If your stitches look loose or have large gaps, switch to a smaller crochet hook. We do not want little baby fingers getting caught in loose yarn loops, nor do we want the stuffing (if we were using any, which we aren’t here for safety and drying purposes) to fall out. The bunny ears will be crocheted in the round, creating a flat, double-layered fabric that is perfectly safe and highly textured.
The Step-by-Step Bunny Ear Crochet Pattern
Creating the Bunny Ears
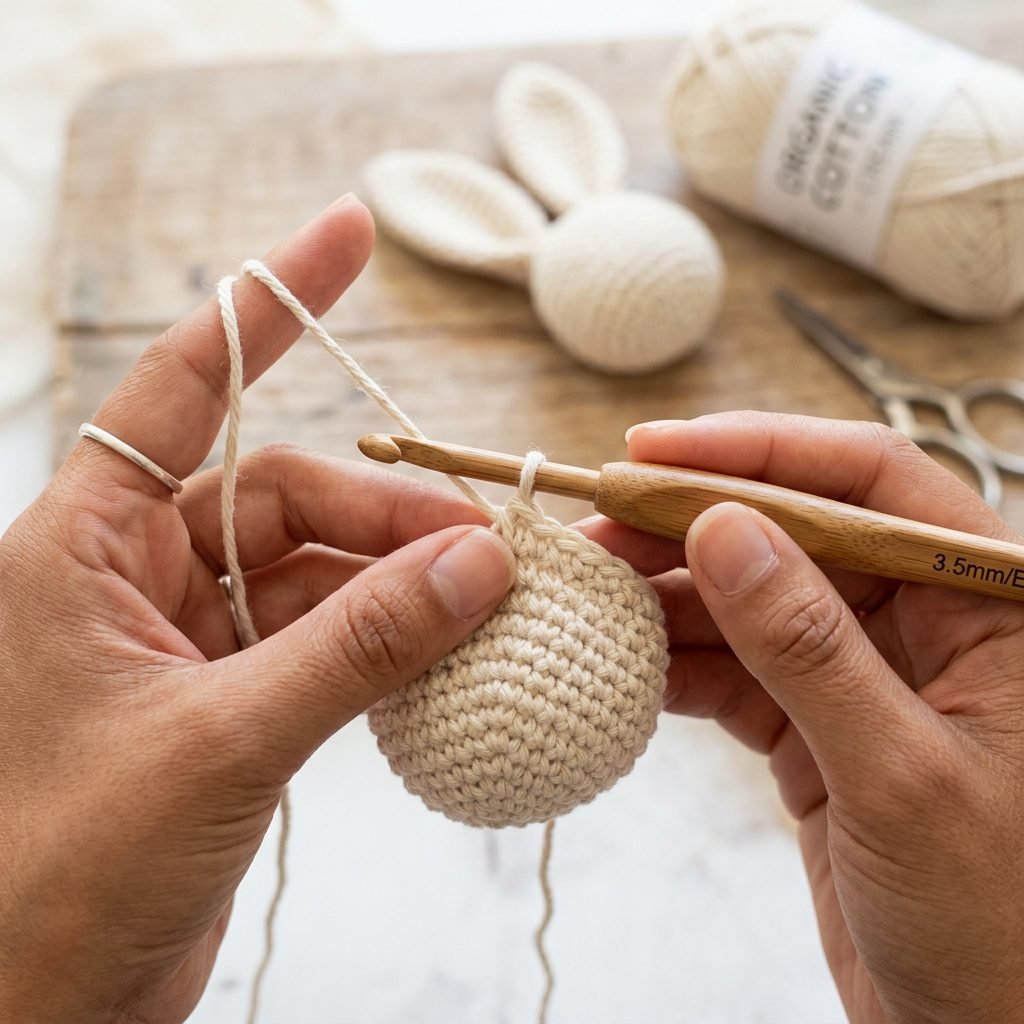
This pattern creates a single, long piece that tapers at both ends, forming two bunny ears when tied around the wooden ring. We are working in continuous rounds, so using a stitch marker to keep track of your first stitch is highly recommended.
- Round 1: Create a magic ring (or chain 2 and work into the second chain from the hook). Work 6 SC into the ring. Pull tight to close. (6 stitches total)
- Round 2: SC in each stitch around. (6 stitches total)
- Round 3: *1 SC in the first stitch, INC in the next stitch.* Repeat from * to * around. (9 stitches total)
- Round 4: SC in each stitch around. (9 stitches total)
- Round 5: *1 SC in the next 2 stitches, INC in the next stitch.* Repeat from * to * around. (12 stitches total)
- Round 6: SC in each stitch around. (12 stitches total)
- Round 7: *1 SC in the next 3 stitches, INC in the next stitch.* Repeat from * to * around. (15 stitches total)
- Rounds 8 – 14: SC in each stitch around for 7 rounds. This creates the length of the first ear. (15 stitches total)
- Round 15: *1 SC in the next 3 stitches, DEC.* Repeat from * to * around. (12 stitches total)
- Round 16: SC in each stitch around. (12 stitches total)
- Round 17: *1 SC in the next 2 stitches, DEC.* Repeat from * to * around. (9 stitches total)
- Rounds 18 – 40: SC in each stitch around for 23 rounds. This long, narrow middle section is what will wrap securely around the wooden ring. (9 stitches total)
- Round 41: *1 SC in the next 2 stitches, INC.* Repeat from * to * around. (12 stitches total)
- Round 42: SC in each stitch around. (12 stitches total)
- Round 43: *1 SC in the next 3 stitches, INC.* Repeat from * to * around. (15 stitches total)
- Rounds 44 – 50: SC in each stitch around for 7 rounds. This forms the second ear. (15 stitches total)
- Round 51: *1 SC in the next 3 stitches, DEC.* Repeat from * to * around. (12 stitches total)
- Round 52: SC in each stitch around. (12 stitches total)
- Round 53: *1 SC in the next 2 stitches, DEC.* Repeat from * to * around. (9 stitches total)
- Round 54: SC in each stitch around. (9 stitches total)
- Round 55: *1 SC in the next stitch, DEC.* Repeat from * to * around. (6 stitches total)
- Round 56: SC in each stitch around. (6 stitches total)
- Finishing: Fasten off, leaving a short tail. Use your tapestry needle to weave the tail through the remaining 6 stitches, pull tight to close the hole, and securely weave the end back and forth through the inside of the ear several times so it absolutely cannot come undone. Snip the excess yarn.
“Take your time, mama. If your hands cramp, take a break. Crafting is about the joy of the process. Your little one is going to love the texture of these stitches!”
Assembly & The Crucial Safety Pull-Test
Attaching the Ears Securely
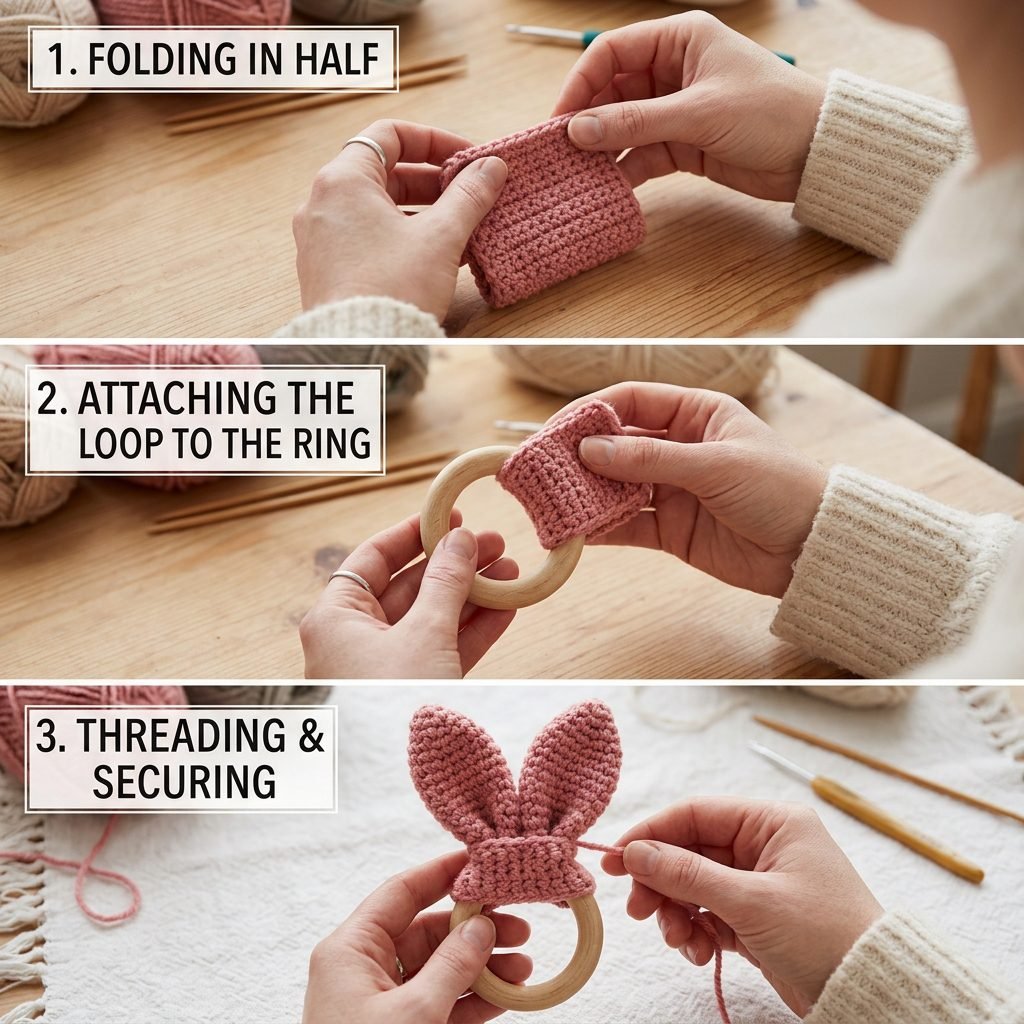
Now that you have your long, double-tapered crochet piece, it is time to attach it to the wooden ring. We use a specific slip-knot folding method that ensures the fabric is locked onto the ring and cannot be easily pulled off by a surprisingly strong baby.
The Slip-Knot Method
- Lay the crocheted piece flat on a table. Fold it exactly in half so the two ear tips are touching.
- Take the folded middle section (the loop) and push it through the center of your wooden ring, letting it peek out about two inches.
- Take the two ear tips and fold them over the top of the wooden ring, passing them completely through the loop you just created.
- Pull the ears firmly to tighten the loop around the wooden ring. Keep pulling and adjusting until the knot is incredibly snug against the wood.
The Safety Pull-Test
As a postpartum nurse and doula, safety is always my top priority. Before you ever hand a handmade toy to your baby, you must perform the pull test. Grasp the wooden ring firmly in one hand and the bunny ears in the other. Pull as hard as you can. The knot should simply tighten further. If there is any slipping, untie it and re-tie it tighter. You should regularly check the security of this knot and inspect the wooden ring for any hairline cracks before each use.
Doula Tips: Teething Relief & Protecting Infant Sleep
Navigating the Teething Sleep Regression
You have crafted a gorgeous, safe teething ring—now, how do we best use it? Teething is one of the most common culprits for sudden sleep disruptions and regressions. As a pediatric sleep consultant, I see parents panic when their previously great sleeper suddenly starts waking up every two hours crying. Here is the truth: teething pain is real, it peaks at night because there are fewer distractions, and your baby needs your comfort.
How to Maximize Your Teething Ring
- The Chilling Effect: Run the crocheted ears (not the wood) under clean water and place the entire ring in the refrigerator for 30 minutes before offering it to your baby. The cold, damp fabric will safely numb inflamed gums. Never put wooden teething rings in the freezer, as extreme freezing temperatures can cause the wood to expand and splinter, and frozen items can cause ice burns on delicate baby gums.
- Texture Exploration: The ribbed texture of the single crochet stitches acts like a gentle toothbrush, massaging the gums as the baby chews. Encourage them to gnaw on both the soft ears and the hard wood to see which provides more relief.
- Gum Massage: If your baby is struggling to self-soothe, wash your hands thoroughly, let them chew on the ring, and gently rub your clean index finger along their gum line with light pressure.
Washing and Caring for Your Teether
Because this item will be covered in saliva, keeping it clean is essential to prevent bacterial growth.
- To Wash: Untie the fabric ears from the wooden ring. The organic cotton ears can be placed in a mesh laundry bag and washed on a gentle, cold cycle with baby-safe detergent. Lay flat to dry thoroughly to prevent mildew.
- To Clean the Wood: Never submerge the wooden ring in water, as it will warp and crack. Instead, wipe it down with a damp cloth and mild soap. Let it air dry completely.
- Conditioning the Wood: Once a month, rub a tiny amount of organic, food-grade coconut oil or beeswax into the wooden ring to keep it sealed, smooth, and protected from drying out.
When it comes to sleep, offer extra cuddles, utilize your teething ring during the bedtime routine to alleviate pressure before sleep, and remember that this phase is temporary. You are doing a wonderful job, mama.
Conclusion
An Heirloom Made with Love
Creating something by hand for your baby is a beautiful way to channel your nesting energy and prepare your heart for their arrival. This organic cotton bunny teething ring is more than just a craft; it is a safe, functional tool that will bring genuine comfort to your little one during a challenging developmental milestone. Whether you made this for your own baby, as a thoughtful baby shower gift, or as a postpartum grounding exercise, you should be incredibly proud of the love woven into those stitches.
Embrace the textures, celebrate the milestones, and remember to give yourself grace as you navigate the beautiful, messy journey of motherhood. You’ve got this, and we are cheering you on every step of the way!