How to Capture Dramatic Window Light Maternity Portraits on Your iPhone
Embracing Your Glow: The Magic of Home Portraits
Mama, your body is doing something absolutely miraculous. I know some days you might feel more ‘heavy’ than ‘heavenly,’ but as a doula and a fellow mama, I can tell you: that silhouette of yours is a masterpiece. You don’t need a $3,000 camera or a professional studio to capture the sacred weight of this season. Your iPhone, a single window, and a little bit of sisterly guidance are all you need to create ‘Dark and Moody’ portraits that look like they belong in a high-end gallery.
In this guide, we are going to dive deep into the art of chiaroscuro—the play of light and shadow. We’ll talk about how to find the right light, how to pose your changing body with love, and how to use those hidden iPhone settings to make your photos pop. This isn’t just about a picture; it’s about honoring the home you’ve built for your little one. Let’s get started on your DIY maternity masterpiece.
Finding Your North Star: The Physics of Window Light
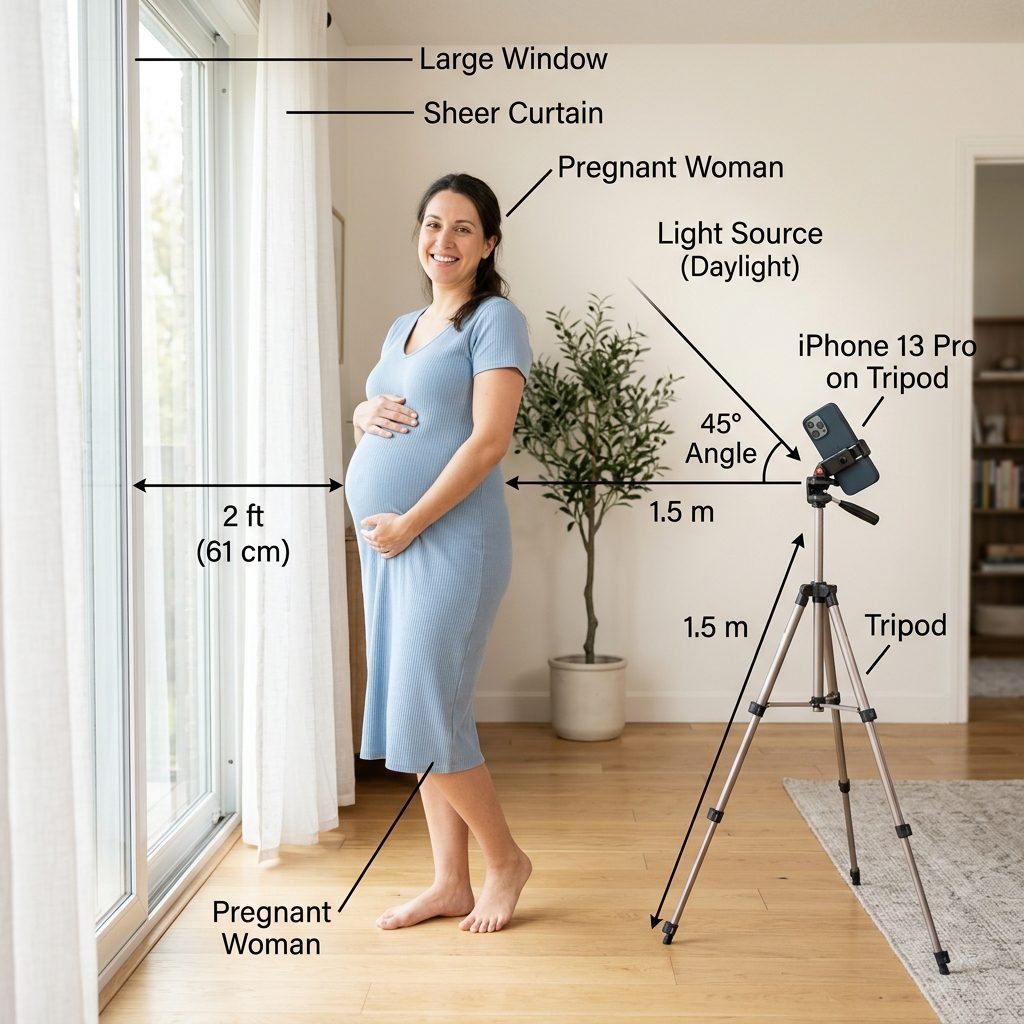
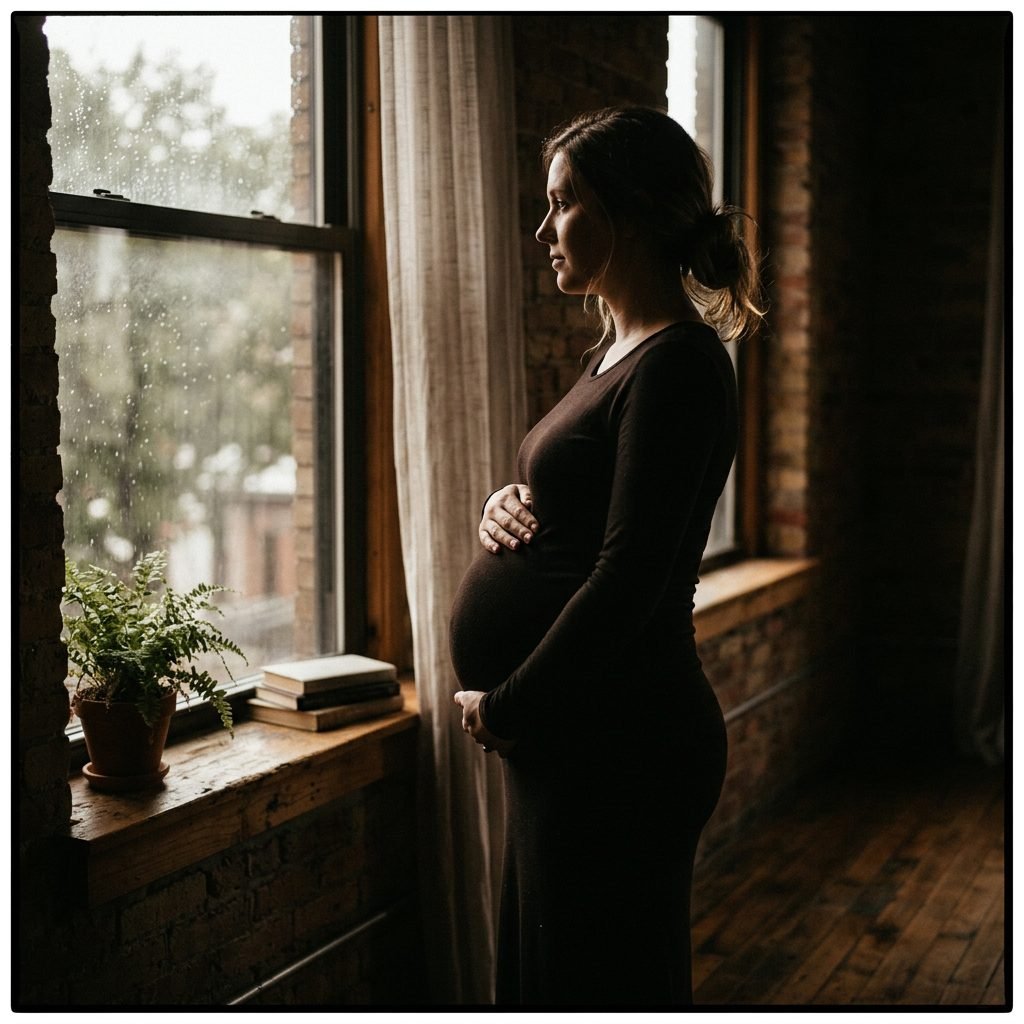
The secret to dramatic photography isn’t having more light; it’s having controlled light. For that moody, emotional look, we want a single light source. This creates the highlights on your bump and the deep shadows on your back that define your shape. Look for a window that doesn’t have direct, harsh sunlight streaming in—north-facing windows are the gold standard for soft, even light.
The Best Time of Day
Timing is everything. You want ‘directional’ light. If the sun is directly overhead, the light is too flat. Aim for mid-morning or late afternoon when the sun is at an angle. If your window is too bright, you can ‘scrim’ the light using a sheer white curtain or even a white bedsheet. This softens the shadows on your skin, making them look creamy rather than harsh.
Remember, Mama: Shadow is what gives your bump its shape. Don’t be afraid of the dark parts of the photo; they are what make the light parts shine.
| Material | Purpose | Estimated Cost |
|---|---|---|
| iPhone (6S or newer) | Your primary camera tool | Owned |
| Sheer White Curtain | To diffuse harsh sunlight | $15 – $25 |
| Black Bed Sheet | To create a dark background | $10 – $20 |
| Tripod with Phone Mount | To prevent blur in low light | $20 – $35 |
| Bluetooth Shutter Remote | To take photos from a distance | $8 – $12 |
Posing with Purpose: Celebrating the S-Curve

Posing while pregnant can feel awkward, but the goal is to emphasize the beautiful S-curve of your spine and the roundness of the baby. The most classic dramatic shot is the profile view. Stand perpendicular to the window so the light hits the front of your belly and your face, while your back fades into the shadows.
Step-by-Step Posing Guide
- The Kickstand: Always bend the knee closest to the camera. This ‘breaks’ the line of your leg and creates a more flattering, feminine shape.
- Hand Placement: Place one hand on top of your bump and one underneath. This ‘frames’ the baby and draws the eye exactly where it should go. Keep your fingers soft and relaxed—think ‘ballet hands.’
- The Chin Lift: To avoid shadows under the eyes, slightly lift your chin toward the light source. It creates a beautiful jawline and captures the light in your eyes (known as ‘catchlights’).
- The Shoulder Drop: We tend to hold tension in our shoulders. Take a deep breath, exhale, and drop your shoulders away from your ears.
If you want a more intimate ‘top-down’ look, sit on the floor in a patch of light, looking down at your belly. This angle is incredibly soulful and emphasizes the connection between you and your little one.
iPhone Masterclass: Technical Hacks for High Drama
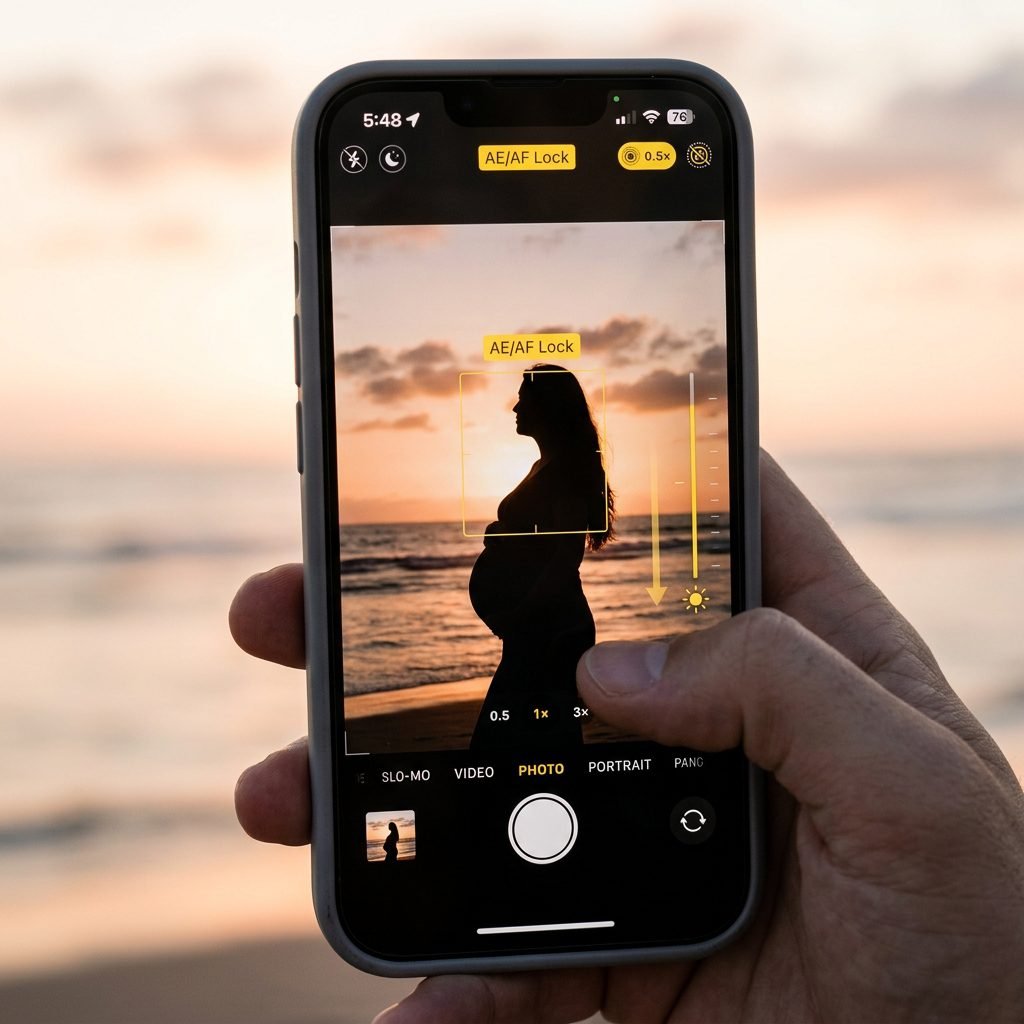
Your iPhone is smarter than you think, but for dramatic photos, we need to take away its ‘auto’ brain. The iPhone naturally tries to make everything bright, but for ‘moody’ shots, we want to embrace the dark. The most important tool you have is the Exposure Slider.
How to Lock and Lower Exposure
- AE/AF Lock: Tap and hold on the brightest part of your skin (usually your forehead or the top of the bump) until you see ‘AE/AF LOCK’ in yellow. This stops the phone from refocusing or changing light levels while you move.
- The Sun Slider: Once locked, you’ll see a small sun icon next to the yellow box. Slide it down. Watch as the background disappears into darkness and your bump becomes the focal point.
- Portrait Mode: Use Portrait Mode to create a ‘bokeh’ effect (blurred background). This is especially helpful if your living room isn’t perfectly tidy!
| Setting | Action | Result |
|---|---|---|
| Live Photo | Turn ON | Allows you to pick the ‘Key Photo’ if you moved slightly. |
| Grid Lines | Turn ON (Settings > Camera) | Helps you keep the horizon straight and follow the Rule of Thirds. |
| Smart HDR | Turn OFF (for dramatic shots) | Prevents the phone from ‘fixing’ the beautiful shadows you want. |
| Timer | Set to 10 Seconds | Gives you time to get into position and relax your face. |
Styling the Soul: Textures and Fabrics
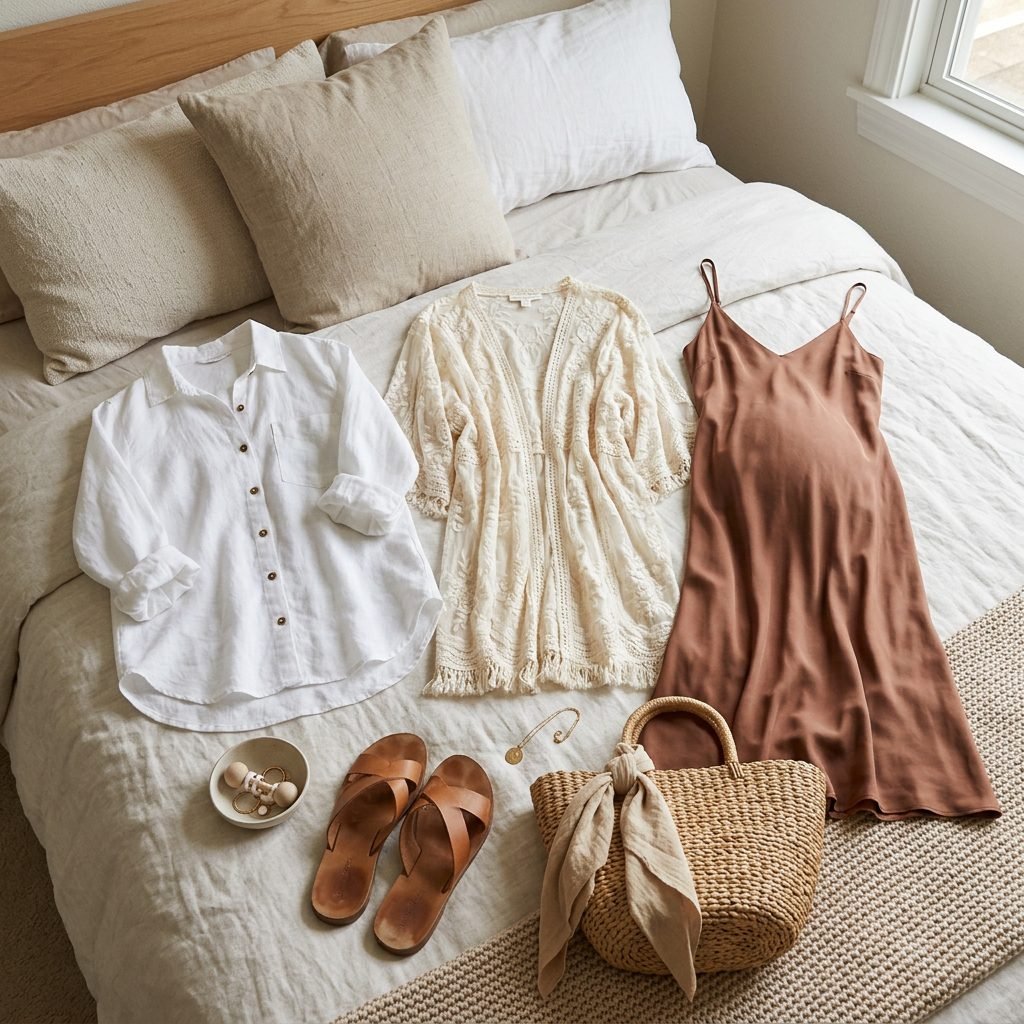
When you’re aiming for dramatic window light, texture is your best friend. Flat, matte fabrics can look a bit dull in shadows, but textures like lace, silk, or chunky knits catch the light and add depth to the image. You don’t need a specific ‘maternity gown’—often, the most beautiful shots are the most simple ones.
Wardrobe Ideas for Drama
- The Open Button-Down: An oversized white linen shirt, unbuttoned to show the bump, creates a timeless, ‘undone’ look.
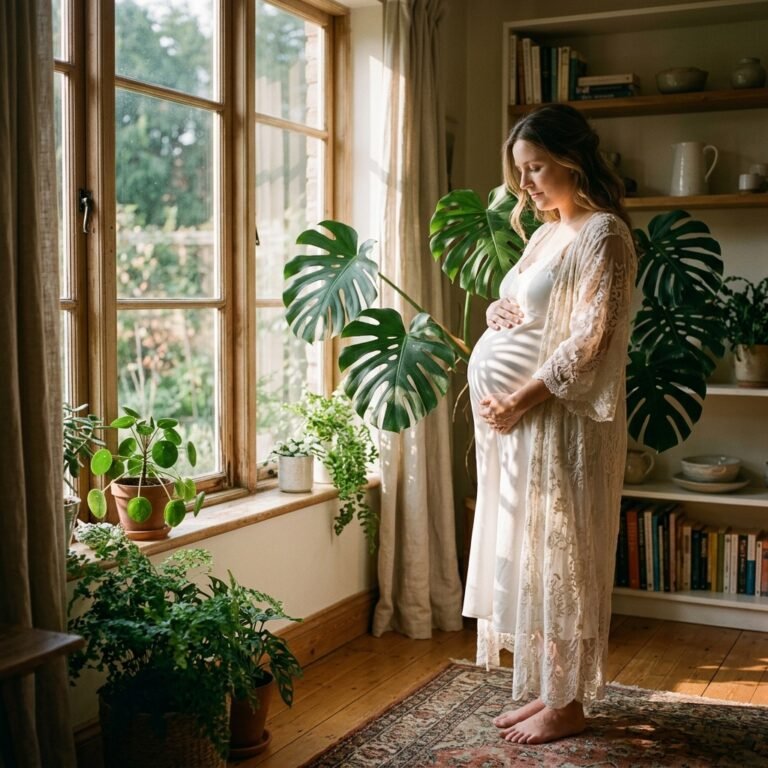
- Lace Robes: The light will filter through the holes in the lace, creating stunning patterns on your skin.
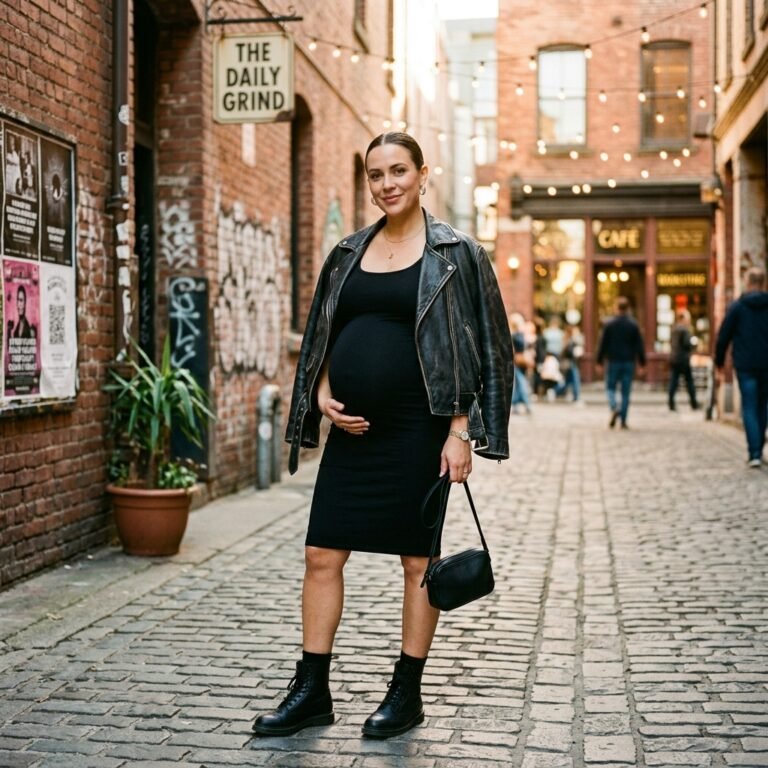
- The Bodycon Dress: A simple, solid black or earth-toned stretchy dress emphasizes the silhouette perfectly.
- Bare is Beautiful: Don’t be afraid of skin! A semi-nude shot with a piece of fabric draped strategically is the epitome of high-art maternity photography.
Pro-Tip: Remove any tight clothing (like leggings or bras) at least 30 minutes before your shoot to ensure you don’t have ‘elastic marks’ on your skin. We want that beautiful, smooth bump to be the star!
The Dark & Moody Edit: Finishing Touches
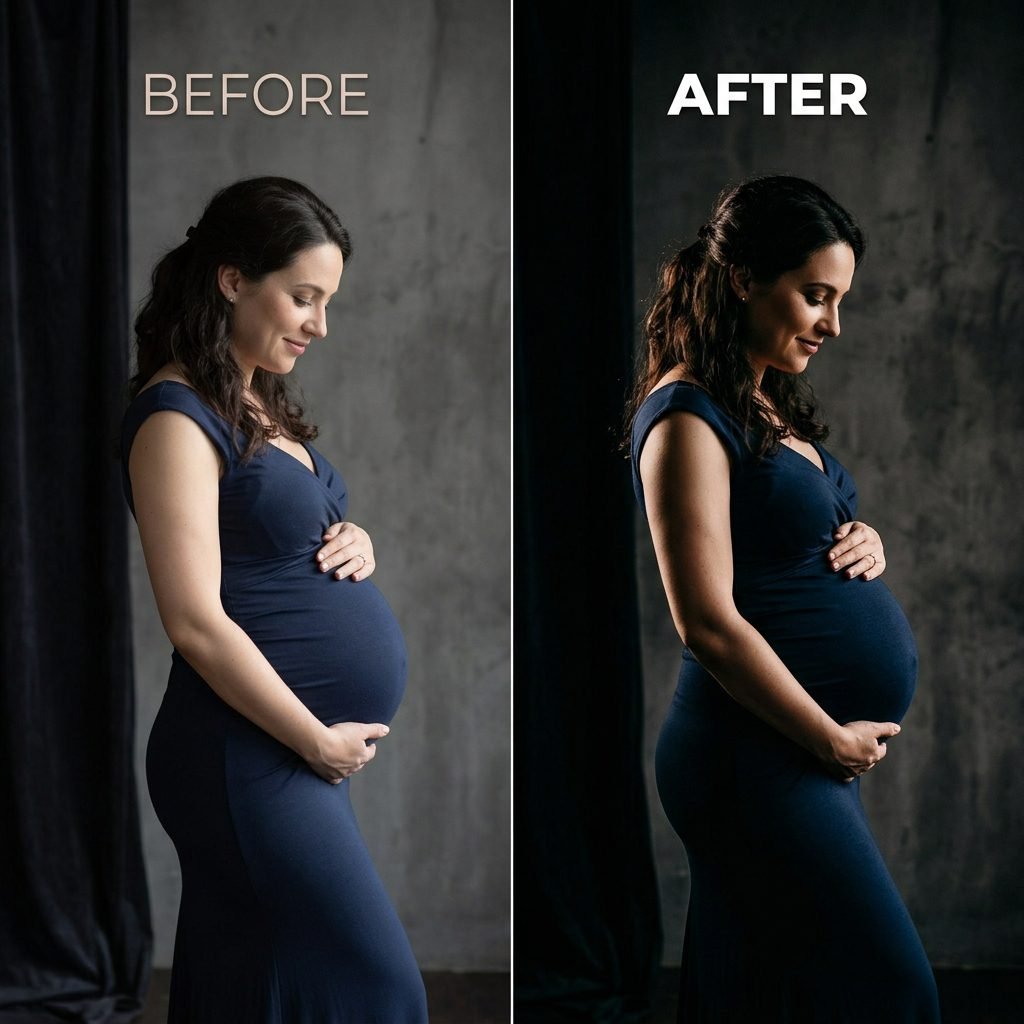
The photo you take is just the raw material; the ‘magic’ happens in the edit. You don’t need Photoshop; the free Lightroom Mobile app or even the built-in iPhone editor is plenty. For a dramatic look, we want to focus on ‘Crushing the Blacks’ and ‘Popping the Highlights.’
The ‘Moody’ Editing Formula
- Contrast: Increase this significantly. It makes the gap between light and dark wider.
- Shadows: Pull these down. We want the corners of the room to disappear.
- Blacks: Slide this to the left until the darkest parts of the photo look deep and rich.
- Saturation: Lower the saturation slightly. Moody photos often look better with ‘muted’ colors or in classic Black and White.
- Vignette: Add a subtle vignette to draw the eye toward the center of the frame (your bump!).
Birth Affirmation: My body is a vessel of strength and beauty. Every curve tells the story of my baby’s first home.
Conclusion
Your Legacy in Pixels
Mama, I hope you look at these photos and see what I see: a warrior, a creator, and a woman in her most powerful form. These iPhone portraits are more than just social media fodder; they are the first pages of your child’s history book. You’ve captured the light, the shadows, and the quiet moments before the great ‘after’ begins.
Don’t worry if the first few shots feel stiff. Keep breathing, keep moving toward the light, and keep celebrating that incredible body of yours. You are doing a wonderful job, and these images will be a treasure for decades to come. You’ve got this, Mama!