Total Chaos To Organized: The Ultimate IKEA Nursery Dresser Hack
The nesting instinct is a powerful force. As you prepare for your baby’s arrival, the urge to create a perfect, serene, and organized space can feel all-consuming. But between assembling furniture, washing tiny clothes, and navigating the endless advice from well-meaning relatives, the process can quickly shift from joyful preparation to overwhelming chaos. This is especially true when it comes to the nursery’s command center: the dresser and changing station. This single piece of furniture will be the site of countless diaper changes, late-night outfit swaps, and morning cuddles. Keeping it organized isn’t just about aesthetics; it’s about survival.
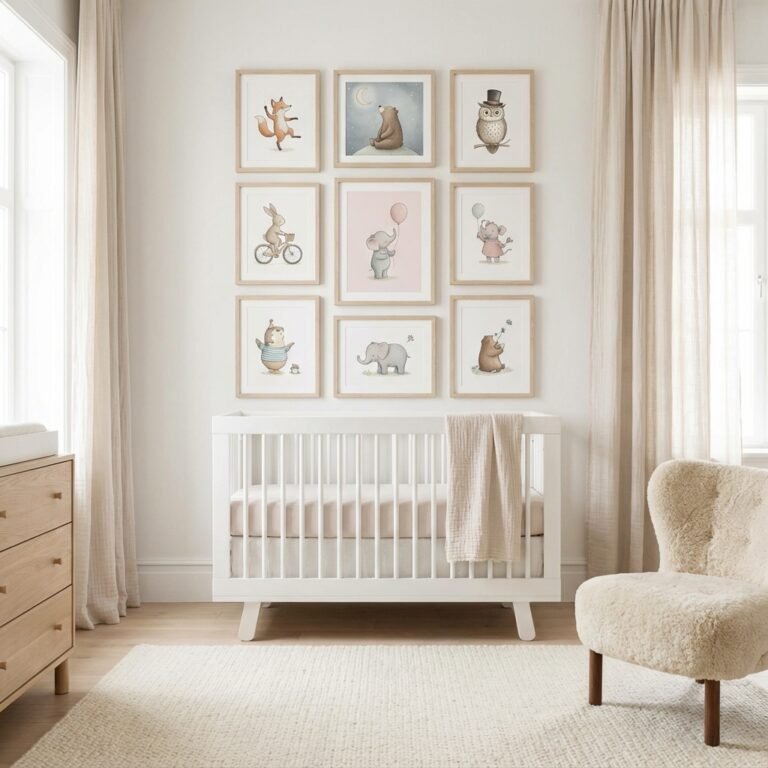
Enter the humble IKEA dresser. Affordable, versatile, and a blank canvas for customization, models like the HEMNES or MALM are staples in homes everywhere. But with a few simple, strategic additions—our ultimate nursery hack—you can elevate it from a basic set of drawers into a pinnacle of parental efficiency. This guide will walk you through, step-by-step, how to transform total chaos into calming order. We’re here to help you create a system that works so seamlessly, you can navigate it with your eyes closed during a 3 AM feeding. Consider this your roadmap to a more peaceful, organized start to parenthood. You’ve got this.
Why an Organized Dresser is a New Parent’s Best Friend

Before we dive into the ‘how,’ let’s talk about the ‘why.’ In the fog of new parenthood, where sleep is a precious commodity and time seems to warp, simplicity is your greatest ally. An organized nursery dresser isn’t a luxury; it’s a foundational tool for your sanity and well-being. Think of it as a gift you’re giving to your future, sleep-deprived self.
Reduces Decision Fatigue
When your baby is crying, the last thing you want to do is rummage through a messy drawer searching for a clean onesie or the diaper cream. Having a designated spot for everything eliminates guesswork. You don’t have to think; you just have to reach. This conservation of mental energy is invaluable when you’re running on empty.
Empowers Your Partner and Support System
A clear, intuitive organization system means anyone can step in to help. Your partner, a grandparent, or a friend can confidently handle a diaper change or find an outfit without needing to ask you where everything is. This fosters teamwork and allows you to accept help more easily, which is crucial for postpartum recovery and a healthy partnership. It empowers new dads to be fully hands-on from day one, building their confidence and bond with the baby.
Creates a Calm and Predictable Environment
Babies may not appreciate the file-folded socks, but they are incredibly attuned to the emotional state of their caregivers. When you feel calm and in control, your baby feels it too. An organized space reduces your stress, creating a more peaceful atmosphere for both of you during what can be a hectic time. The ritual of a diaper change at a clean, orderly station can become a moment of quiet connection rather than a frantic scramble.
Creating systems of order in your home is an act of self-care. It’s about giving yourself the gift of time and peace of mind when you need it most.
Gathering Your Supplies: The IKEA Hack Shopping List

The beauty of this hack is its simplicity and affordability. You don’t need a custom closet system or expensive gadgets. A quick trip or online order from IKEA (and maybe one other store) is all it takes to get everything you need. Here is your complete shopping list to build the ultimate organized nursery dresser.
- The Foundation: An IKEA Dresser: The 8-drawer HEMNES dresser is a popular choice for its height and ample storage. The MALM is another sleek, modern option. Choose one that is a comfortable height for you and your partner to use as a changing table. Crucially, ensure it comes with a wall anchor kit.
- The Organizers: Drawer Dividers: This is the secret weapon. IKEA’s SKUBB box set of 6 is perfectly designed for this. They are fabric, collapsible, and come in various sizes that fit neatly within the drawers to create compartments. You will likely need 2-3 sets.
- The Top: A Changing Pad: Select a standard contoured changing pad. Look for one with a non-slip base to prevent it from sliding around on the dresser top. A safety strap is also a key feature.
- The Caddy: Top-of-Dresser Storage: You’ll want a basket, caddy, or tray to hold immediate essentials like diapers, wipes, and creams. This keeps the dresser surface from becoming cluttered. The IKEA ÖNSKLIG storage basket set is a great option.
- The Personal Touch (Optional): New drawer knobs or pulls can instantly elevate the look of a basic IKEA dresser, making it feel more custom and integrated with your nursery decor.
- The Label Maker (Highly Recommended): While optional, a simple label maker can be a game-changer for maintaining the system, especially for drawers containing different sizes of clothing.
The Step-by-Step Guide to Nursery Dresser Domination

With your supplies in hand, it’s time to build your organization station. Follow these steps methodically, and you’ll have a functional and beautiful system in no time.
- Build and Secure the Dresser: If you haven’t already, assemble your IKEA dresser according to the instructions. The single most important step in this entire process is to secure the dresser to the wall using the anti-tip kit provided. This is a non-negotiable safety measure to prevent a serious accident as your child grows and begins to pull up on furniture.
- Plan Your Drawer Strategy: Before you start filling drawers, make a plan. The golden rule is to store items based on frequency of use. High-frequency items go in top drawers, and low-frequency items go in the bottom. We will detail this in the next section.
- Install Your Drawer Dividers: Unfold your SKUBB boxes or other dividers and arrange them within the drawers. Play around with the configuration to see what works best for the items you plan to store in each one. The mix of small, medium, and large boxes is perfect for separating everything from tiny socks to bulky swaddles.
- Master the File Fold: This technique is revolutionary for baby clothes. Instead of stacking items on top of each other, fold them into small, compact rectangles and ‘file’ them vertically in the drawer dividers. This allows you to see every single item at a glance, so you’re not digging through piles. To do this, lay a onesie flat, fold in the sides, and then fold it into thirds from the bottom up.
- Sort and Load the Clothes: Wash all baby clothes and sort them by size (Newborn, 0-3 months, 3-6 months) and then by type (onesies, sleepers, pants, socks). File-fold each item and place it in its designated divider. Only put the current size and the next size up in the dresser. Store larger sizes elsewhere to avoid clutter.
- Set Up the Changing Station Top: Place the non-slip changing pad on top of the dresser, pushing it towards the back. Arrange your caddy or basket next to it with a stack of diapers, a container of wipes, diaper cream, and hand sanitizer. Everything you need for a change should be within arm’s reach. Never leave your baby unattended on the changing table, not even for a second.
Zone Your Drawers: A Strategic Layout for Maximum Efficiency

A little strategic planning goes a long way. By creating dedicated ‘zones’ for different categories of items, you build muscle memory and make the entire system function on autopilot. Here is a proven layout for an 8-drawer dresser, which you can adapt for any size.
Top Drawers: The Diapering & Essentials Command Center
These are your most frequently accessed drawers. They should contain everything you need for diaper changes and daily care, minimizing how much you have to bend over or search.
Middle Drawers: The Daily Wardrobe
This is where you’ll store the clothes your baby is currently wearing. Separating by type makes getting them dressed quick and easy.
Bottom Drawers: The Back-Stock & Future Finds
The bottom drawers are perfect for less-frequently used items, extra supplies, and the next size of clothing, so you’re ready for that inevitable growth spurt.
| Drawer Location | Primary Contents | Organization Tip |
|---|---|---|
| Top Left Drawer | Diapers, Wipes, Diaper Cream, Hand Sanitizer | Use small dividers to separate creams and ointments. Keep the current pack of diapers loose for easy grabbing. |
| Top Right Drawer | Health & Grooming: Nail clippers, thermometer, nasal aspirator, burp cloths, pacifiers, socks, hats | Use the smallest SKUBB boxes to contain tiny items like socks and pacifiers so they don’t get lost. |
| Middle Left Drawer | Pajamas & Sleepers | File-fold sleepers to easily see different patterns and materials (fleece vs. cotton). |
| Middle Right Drawer | Onesies & Bodysuits (Short and Long-Sleeved) | Separate short-sleeved from long-sleeved to make dressing for the weather a breeze. |
| Second Middle Left Drawer | Pants & Leggings | These fold up small and can be filed neatly, often with room to spare for other clothing items. |
| Second Middle Right Drawer | Outfits & Sweaters | Keep two-piece outfits together. Fold sweaters or bulkier items and place them in larger dividers. |
| Bottom Left Drawer | Swaddles, Sleep Sacks, and Receiving Blankets | Rolling these items can often be more space-efficient than folding. |
| Bottom Right Drawer | Back-Stock & Next Size Up: Extra blankets, crib sheets, and clothes for the next growth spurt. | Use a large divider or label to clearly mark this section as ‘3-6 Months’ so you know exactly what’s inside. |
Beyond the Basics: Pro-Tips to Maintain Your Organized Oasis

You’ve done the hard work and created a beautifully organized system. Now, how do you keep it that way amidst the beautiful chaos of daily life with a baby? Here are a few pro-tips to maintain your hard-won order.
- Label Everything: A label maker is your best friend. Put a small, discreet label on the inside or outside of the drawers. When you’re exhausted, you won’t have to remember if pajamas are in the left or right drawer. This also makes it foolproof for partners and helpers.
- The ‘Too Small’ Bin: Keep a designated basket or bin in the nursery closet. As soon as you notice an outfit is getting snug, toss it directly into the bin. Don’t put it back in the drawer. Once the bin is full, you can wash, sort, and store the clothes for a future baby or pass them on.
- One-In, One-Out Laundry Routine: Try to put away clean laundry as soon as it’s done. It only takes a few minutes to file-fold a small load of baby clothes. Letting it pile up is how drawers descend back into chaos. Involve your partner in this process; it’s a shared task.
- Conduct a Quick Weekly Reset: Spend five minutes once a week tidying the top of the dresser and refolding any items that have been rummaged through. This small habit prevents clutter from building up and keeps the system running smoothly.
- Rotate Sizes Proactively: When you notice your baby is starting to fit into the ‘next size up’ clothes, take 20 minutes to completely swap the drawers. Move the ‘too small’ clothes to the bin, move the ‘next size’ into the primary drawers, and bring the size after that into the bottom ‘back-stock’ drawer. This prevents the morning panic of realizing nothing fits.
Conclusion
Preparing for a baby is a profound act of love, and creating a calm, organized nursery is a significant part of that journey. By implementing this IKEA dresser hack, you are doing more than just organizing tiny clothes; you are building a system that will support you through one of the most challenging and rewarding periods of your life. You are giving yourself the gift of efficiency, which translates into more time for what truly matters: soaking in newborn snuggles, connecting with your partner, and navigating your new role with confidence.
Remember that this is a foundation, not a rigid set of rules. Adjust the system as your baby grows and your needs change. But by starting with a framework of order, you can more easily weather the inevitable moments of chaos. You are capable, you are prepared, and you are about to embark on an incredible adventure. Take a deep breath, admire your beautifully organized dresser, and know that you’ve already taken a huge step toward a more peaceful postpartum experience. You’ve got this.