Tiny Kitchen? How to Organize Baby Bottles Without Losing Your Mind
Welcome to the beautiful, chaotic world of parenthood! As a certified Doula and Maternal Health Educator, I’ve witnessed firsthand the incredible joys and unique challenges that come with welcoming a new baby. Among these challenges, especially for those of us living in cozy homes with compact kitchens, is the seemingly endless parade of baby bottles. They multiply overnight, taking over every available surface, and can quickly transform your tranquil kitchen into a battleground of clutter.
You are not alone in feeling this overwhelm. The journey of feeding your baby, whether through breast milk or formula, involves a significant amount of preparation, cleaning, and organization. And when your kitchen real estate is limited, finding a system that works, that keeps things sanitary, and that doesn’t push you to the brink of despair, can feel like an impossible feat. But I’m here to tell you it’s not!
This guide is crafted with empathy and practical wisdom, designed specifically for couples trying to conceive, new dads, and new parents who are grappling with the realities of a tiny kitchen. We’ll explore professional, authoritative, and supportive strategies to help you conquer bottle clutter, streamline your feeding routine, and reclaim your kitchen space. Together, we’ll transform your tiny kitchen into an efficient, stress-free hub for your baby’s feeding needs, ensuring you can focus on what truly matters: cherishing those precious moments with your little one.
Understanding Your Bottle Workflow: The First Step to Sanity

Before we dive into specific organization hacks, it’s crucial to understand the lifecycle of a baby bottle in your home. This isn’t just about where to put them; it’s about optimizing the entire process from dirty to clean to ready-to-use. Thinking through your daily routine will illuminate bottlenecks and reveal the most effective places to implement changes.
Assessing Your Current Setup
Take a moment to observe your kitchen and your current bottle routine. Where do dirty bottles accumulate? Where do they dry? How do you store clean ones? Be honest with yourself about what’s working and, more importantly, what’s causing frustration. Is it the drying rack taking up too much space? Are bottle parts scattered everywhere? Identifying these pain points is the first step toward creating a truly functional system.
“Organization isn’t about perfection; it’s about creating a flow that supports your daily life and reduces stress, especially during the demanding early months of parenthood.” – A Doula’s Insight
Consider the typical journey of a bottle in your home:
- Collection: Where do used bottles go before washing?
- Washing: Do you handwash, use a dishwasher, or a combination?
- Sterilizing: What method do you use (steam, UV, boiling)?
- Drying: Where do bottles and their components dry?
- Storage: Where do clean, dry bottles reside until needed?
- Preparation: Where do you mix formula or warm milk?
Mapping this journey will help you visualize the ‘hot zones’ in your kitchen and where strategic organization can make the biggest impact.
Estimating Your Daily Bottle Needs
How many bottles do you actually need on a daily basis? This can vary greatly depending on whether you’re exclusively bottle-feeding, combination feeding, or pumping and storing. Overstocking on bottles, while tempting, can exacerbate clutter in a small kitchen. A good rule of thumb is to have enough bottles for a 24-hour period, plus one or two spares. For many families, this means 6-10 bottles, along with their corresponding nipples, rings, and caps. Knowing your actual needs helps you avoid unnecessary purchases and focus on organizing the essentials.
Think about your washing frequency. If you wash bottles once a day, you’ll need more on hand than if you wash after every use. Adjust your bottle count to match your routine, aiming for efficiency without excess.
Maximizing Vertical Space: Your Tiny Kitchen’s Best Friend

In a tiny kitchen, the mantra is simple: go vertical. Counter space is often a luxury, so looking up and utilizing wall space, cabinet interiors, and even the often-overlooked area above your sink can unlock significant storage potential. This approach keeps your countertops clear for essential tasks and reduces visual clutter, contributing to a calmer environment.
Wall-Mounted Drying Racks and Shelves
Forget the bulky drying rack hogging your precious counter. Explore wall-mounted options that fold down or are designed to be sleek and minimalist. There are innovative drying racks that attach directly to your wall, allowing bottles to drip dry without occupying a single inch of counter space. Similarly, installing a small, sturdy floating shelf above your prep area or sink can provide a dedicated spot for clean, dry bottles or even your sterilizer when not in use. Look for options with hooks or rails for hanging smaller bottle parts.
“When every square inch counts, look beyond the horizontal. Vertical storage is a game-changer for tiny kitchens, creating functional zones out of thin air.” – Professional Organizer’s Tip
Consider:
- Magnetic strips: For small metal bottle parts or cleaning brushes.
- Pegboards: Customizable and versatile for hanging various bottle components and cleaning tools.
- Over-the-door organizers: For pantry doors, these can hold extra supplies or less frequently used items.
Ensure any wall-mounted solutions are installed securely and are easily accessible for daily use. Safety is paramount, so avoid placing heavy items on shelves directly above where you prepare food or where your baby might reach.
Over-the-Sink Solutions
The space directly above your sink is often underutilized. This area is ideal for drying bottles because any drips go directly into the sink, preventing water messes on your limited counter space. Options include:
- Roll-up drying racks: These silicone or metal racks fit over one side of your sink, providing a stable surface for drying bottles and accessories. When not in use, they roll up compactly for storage.
- Over-the-sink dish racks: Similar to roll-up racks but often more robust, these can hold a larger volume of bottles and are perfect for air drying.
- Suction cup organizers: Small baskets or shelves with strong suction cups can attach to the tiles above your sink, holding bottle brushes, soap, or even a few nipples.
By strategically placing drying solutions over the sink, you effectively create a dedicated ‘wet zone’ that keeps the rest of your kitchen dry and tidy.
Cabinet Organizers and Dividers
Don’t let the inside of your cabinets become a chaotic free-for-all. Even small cabinets can be optimized with smart inserts and dividers. Think about:
- Tiered shelves: Double your cabinet storage by adding extra levels for bottles or formula containers.
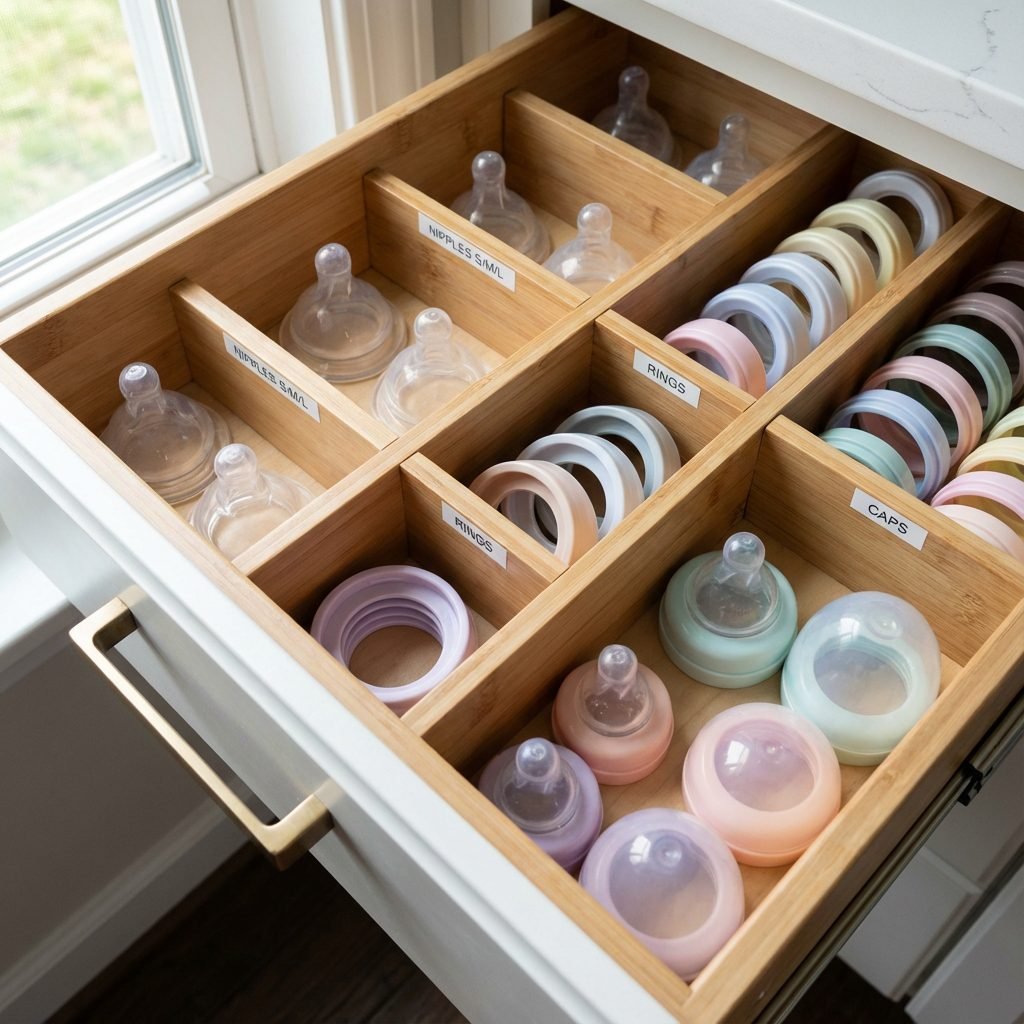
- Drawer dividers: Essential for keeping nipples, rings, and caps separated and easy to find. Look for adjustable or modular dividers to customize your space.
- Pull-out drawers/baskets: For deeper cabinets, these allow you to access items at the back without rummaging.
- Door-mounted racks: Utilize the inside of cabinet doors for shallow storage of smaller items like bottle brushes or pacifiers.
When organizing cabinets, group similar items together. All bottle nipples in one bin, all rings in another. This prevents the ‘digging’ frustration and saves precious time, especially during those bleary-eyed night feedings.
Smart Storage Solutions for Small Footprints
Beyond verticality, the key to successful organization in a tiny kitchen lies in choosing products and methods that are inherently space-saving. Every item should earn its place, and multi-functional tools are your best friends. Let’s explore some clever ways to store your bottle army without sacrificing your kitchen’s functionality or your peace of mind.
Collapsible and Stackable Bottle Racks
Traditional bottle drying racks can be bulky. For tiny kitchens, consider collapsible or stackable designs. Collapsible racks can be folded flat and tucked away in a drawer or cabinet when not in use, freeing up valuable counter space. Stackable racks, on the other hand, build upwards, making the most of a small footprint on your counter. Some even come with modular components that can be reconfigured to fit different bottle sizes or kitchen layouts.
- Benefits of Collapsible Racks: Easy to store, ideal for occasional use or when guests are over.
- Benefits of Stackable Racks: Maximizes vertical space on the counter, often with integrated drainage.
When selecting a rack, prioritize ease of cleaning, durability, and how well it fits your specific bottle type. A well-chosen rack can significantly reduce drying time and clutter.
Drawer Organizers and Bins
Drawers are often overlooked as prime real estate for bottle components. Instead of tossing nipples, rings, and caps into a drawer to become a jumbled mess, invest in good quality drawer organizers. These can be simple plastic trays, bamboo dividers, or expandable inserts that create compartments for each type of bottle part. Clear bins are particularly useful as they allow you to see contents at a glance, reducing search time.
“A place for everything, and everything in its place. This simple principle is transformative in a tiny kitchen, especially for small, easily lost items like bottle nipples and caps.” – Efficiency Expert for Parents
Consider dedicating an entire drawer, or at least a significant portion of one, solely to baby feeding accessories. This centralizes all the small bits and pieces, making assembly quicker and less frustrating. Labeling bins, even with simple handwritten tags, can also be incredibly helpful for new dads and other caregivers.
Designated Bottle Zones
Even in a tiny kitchen, creating a ‘zone’ for bottle-related activities can dramatically improve efficiency. This means having a specific area where all bottle washing, sterilizing, drying, and storing occurs. This zone doesn’t have to be large; it just needs to be cohesive.
For example, your zone might consist of:
- A dedicated bin in the sink for dirty bottles.
- A compact sterilizer and drying rack placed above the sink or on a small, designated counter space.
- A cabinet or drawer directly adjacent to this area for storing clean bottles and their parts.
By having everything in one logical flow, you minimize movement around the kitchen, prevent items from migrating to other surfaces, and keep your overall kitchen tidier. This ‘mini-station’ approach is incredibly effective for maintaining order and reducing mental load during busy feeding times.
The Sterilization & Drying Dilemma: Streamlining the Process
Cleaning and sterilizing baby bottles is a non-negotiable part of infant care, but it can feel like a never-ending chore, especially when space is at a premium. The goal here is to streamline this crucial process so it integrates seamlessly into your tiny kitchen without adding to the clutter or your stress levels.
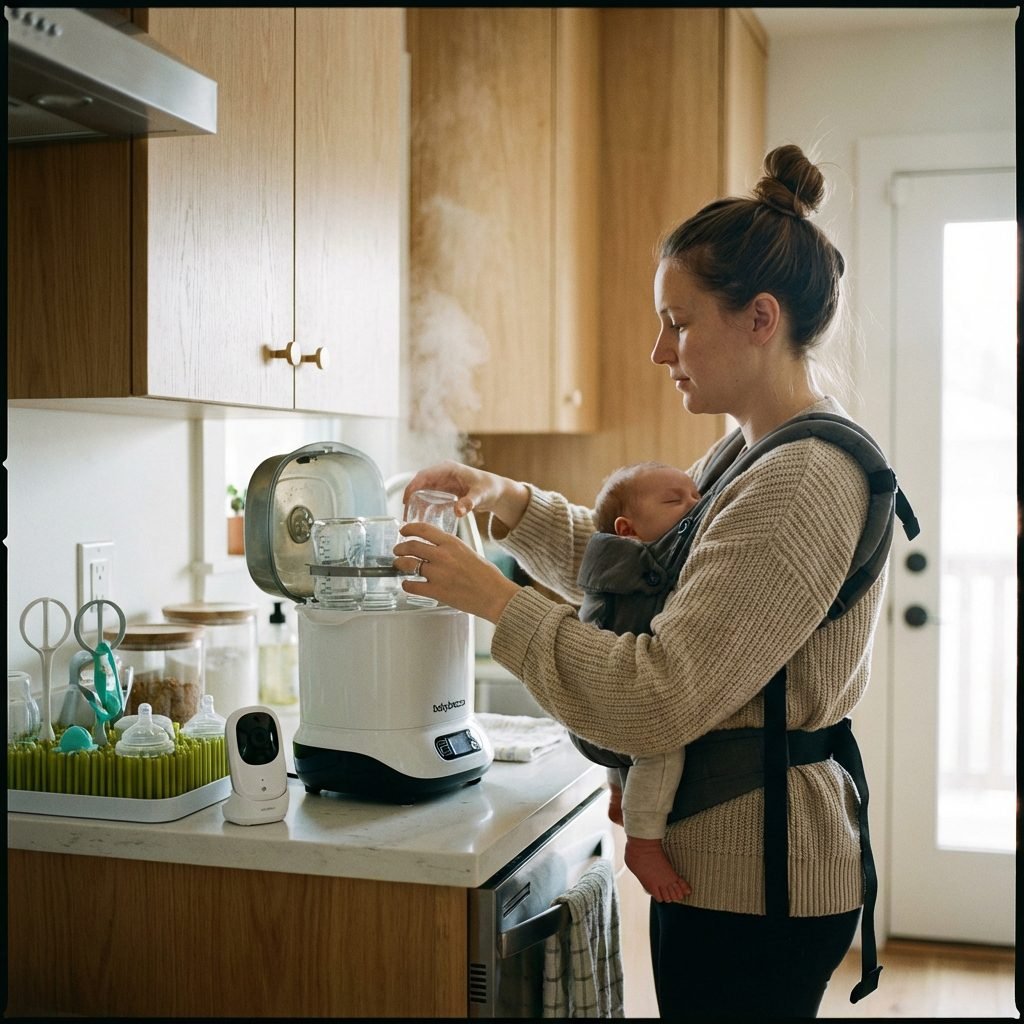
Compact Sterilizers: Steam vs. UV
Choosing the right sterilizer for a small kitchen is key. Traditional electric steam sterilizers can be effective but often have a larger footprint. However, many brands now offer compact versions designed for smaller spaces. Alternatively, UV sterilizers are gaining popularity; they typically use less water, require no drying time (as items come out dry), and can often sterilize other baby items like pacifiers and toys. While UV sterilizers might have a higher upfront cost, their efficiency and space-saving nature can be a significant advantage in a tiny kitchen.
| Sterilizer Type | Pros for Tiny Kitchens | Cons for Tiny Kitchens |
|---|---|---|
| Electric Steam Sterilizer | Fast sterilization, effective against germs, some compact models available. | Requires counter space, needs water, items come out wet and need drying. |
| UV Sterilizer | No water needed, items come out dry, multi-functional (toys, phones), often sleek design. | Higher initial cost, takes longer than steam, some models can be bulky. |
| Microwave Steam Sterilizer | Very compact (fits in microwave), affordable, fast. | Requires microwave access, items come out wet, limited capacity. |
| Boiling Method | No special equipment needed (just a pot), very effective. | Requires stove access, takes time, pot takes up space, items come out wet. |
Consider your personal preferences, budget, and the available space. A microwave sterilizer, for instance, is incredibly space-efficient as it only requires your microwave during use and can be stored in a cabinet afterwards.
Space-Saving Drying Racks
Once sterilized, bottles need to dry thoroughly. As discussed, wall-mounted or over-the-sink options are excellent. Beyond these, look for:
- Grassy drying racks: These often have a small footprint and the ‘blades’ hold bottles upright, allowing air circulation. Some even come with a removable tray for easy water disposal.
- Tree-style drying racks: These are compact and tall, utilizing vertical space on a small counter area.
- Foldable racks: Perfect for putting away when not in active use.
The goal is to find a drying solution that allows for maximum airflow to prevent mold and mildew, without permanently occupying precious counter space. Consider placing a small, absorbent drying mat underneath any counter-top rack to catch drips and protect your surfaces.
Dishwasher Baskets and Bottle Holders
If you have a dishwasher, even a compact one, leverage it! Specialized dishwasher baskets and bottle holders are designed to keep nipples, rings, and caps securely in place during the wash cycle. This not only cleans them effectively but also keeps them contained, preventing them from scattering or melting. Using your dishwasher reduces the need for extensive handwashing and the associated clutter of sponges, brushes, and drying parts.
Remember to check if your bottle parts are dishwasher safe. For smaller items, a mesh bag or a dedicated basket will prevent them from falling through the racks. This simple integration can save significant time and effort, streamlining your entire bottle cleaning process.
Maintaining Sanity: Tips for Long-Term Organization
Creating an organized system for your baby bottles is a fantastic achievement, but the real challenge lies in maintaining it amidst the beautiful chaos of new parenthood. These tips are designed to help you sustain your organized kitchen and, most importantly, protect your mental well-being.
The “One In, One Out” Rule
This simple principle is a cornerstone of sustainable organization, especially in small spaces. For every new bottle or feeding accessory you acquire, consider if there’s an old one that can be donated, recycled, or discarded. This prevents accumulation and ensures your carefully curated system doesn’t become overwhelmed. It also encourages thoughtful purchasing, making you question if you truly need that extra set of bottles.
“Parenthood is a marathon, not a sprint. Your organizational systems should be designed for sustainability, not just initial setup. Small, consistent efforts yield big results.” – Doula’s Advice on Sustainable Parenting
Apply this rule not just to bottles, but to all baby items that tend to accumulate. Regularly decluttering helps maintain order and reduces the mental load of managing too much stuff.
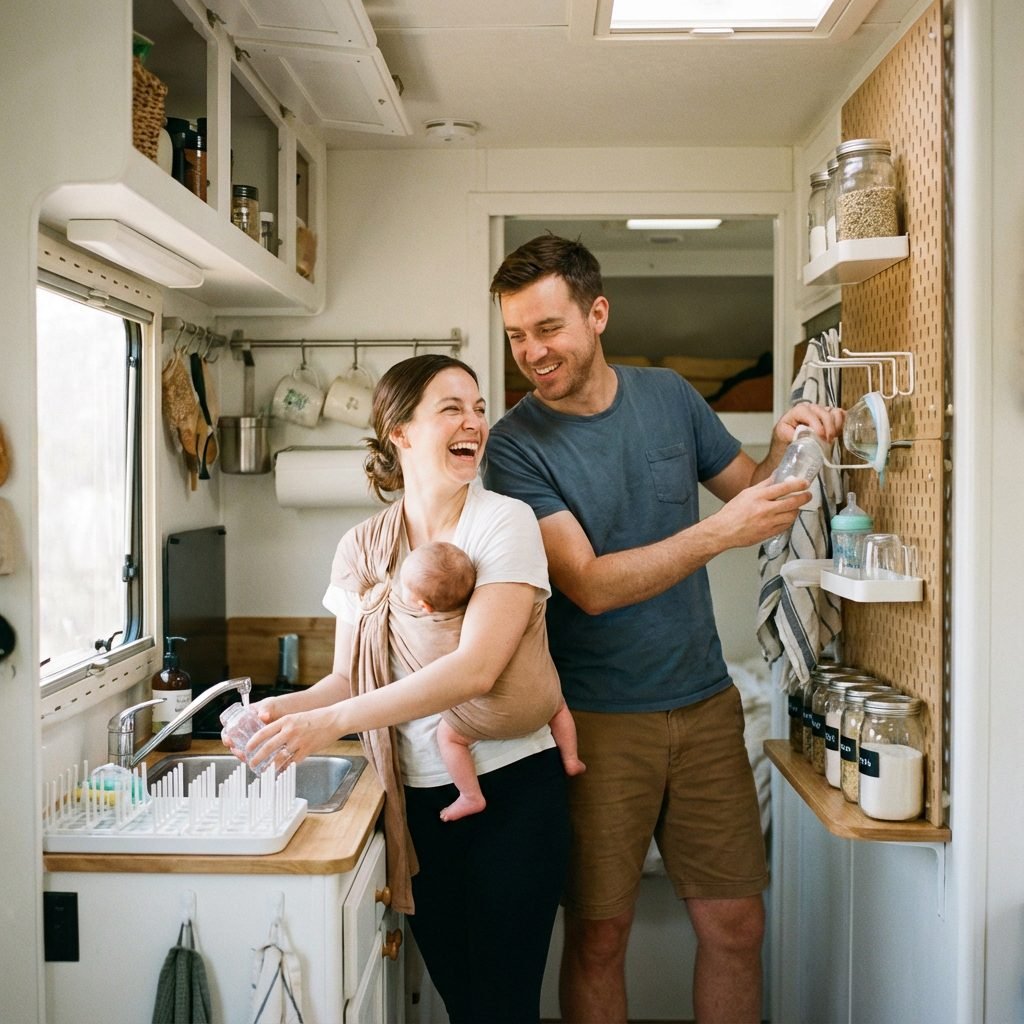
Involving Your Partner: Teamwork Makes the Dream Work
Parenthood is a team sport, and bottle organization is no exception. Clearly communicate your new system and expectations with your partner or any other caregivers. Assigning specific tasks, such as one person washing bottles while the other puts them away, can distribute the workload and reinforce the organizational structure. This shared responsibility not only lightens your load but also ensures that the system is understood and maintained by everyone in the household.
A quick, five-minute reset at the end of the day, where everyone contributes to putting away stray items and preparing for the next day’s bottles, can make a huge difference in waking up to a calm, organized kitchen rather than a cluttered one.
Regular Decluttering and Review
Your baby’s needs will change rapidly, and so might your feeding routine. What works perfectly at two months might need adjustment at six months. Schedule a brief, regular review of your bottle organization system – perhaps once a month. Ask yourself:
- Is this system still working for us?
- Are there any new pain points?
- Do we have bottles or parts we no longer use?
- Can anything be further optimized or simplified?
This periodic review allows you to adapt and refine your system, ensuring it remains efficient and supportive as your baby grows. Don’t be afraid to experiment and make changes. The goal is always to reduce stress and increase efficiency, giving you more time and energy to connect with your little one.
Remember, an organized kitchen isn’t just about aesthetics; it’s about creating a functional, peaceful environment that supports your family’s well-being. By implementing these strategies, you’re not just organizing bottles; you’re investing in your sanity and the harmony of your home.
Conclusion
The journey of parenthood is filled with countless joys and an equal measure of practical challenges. In a tiny kitchen, the seemingly simple task of organizing baby bottles can quickly escalate into a source of significant stress. However, by adopting an empathetic, fact-based, and proactive approach, you can transform this challenge into an opportunity for efficiency and calm.
We’ve explored how understanding your bottle workflow, maximizing vertical space, employing smart storage solutions, streamlining sterilization, and maintaining consistent habits can collectively create a harmonious and functional feeding station in even the most compact kitchens. Remember, these strategies are not about achieving perfection, but about fostering a system that supports your family’s needs and reduces your daily overwhelm.
As a Doula and Maternal Health Educator, I want to remind you that you are doing an incredible job. Every step you take to create a more organized and peaceful home environment is a step towards greater well-being for both you and your baby. Embrace these practical tips, adapt them to your unique space, and give yourself grace on days when things aren’t perfectly tidy. The goal is sanity, not spotless perfection. With a little planning and consistent effort, you can conquer the bottle clutter and enjoy the beautiful journey of feeding your little one, even in your tiny kitchen.