The Ultimate Nesting Checklist: Deep Clean Your Entire Home in 7 Days
That sudden, undeniable urge to clean, organize, and prepare every corner of your home for your baby’s arrival is a powerful thing. Welcome to the nesting instinct. It’s a primal, deeply ingrained drive that many expectant parents experience, a way of taking control and creating a safe, welcoming environment for your little one. It’s your heart’s way of saying, ‘We’re getting ready for you.’
But let’s be honest—while the motivation is strong, the physical and emotional energy during the third trimester can be low. The sheer scale of deep cleaning an entire house can feel overwhelming. Where do you even begin? How do you do it safely? And how can you get it all done without completely exhausting yourself right before the marathon of labor and newborn care begins?
We hear you. That’s why we’ve created this ultimate 7-day nesting checklist. Think of us as your supportive doula, guiding you through a manageable, day-by-day plan. We’ll break down the tasks into logical, bite-sized pieces, focusing on safety, efficiency, and—most importantly—your well-being. This isn’t about achieving perfection; it’s about creating peace of mind. Let’s channel that incredible nesting energy together and build a beautiful, ready space for your growing family.
Before You Begin: Safety, Supplies, and a Supportive Mindset

Setting the Stage for a Safe and Successful Nesting Week
Before we dive into the daily tasks, let’s lay a crucial foundation. Your health and your baby’s health are the absolute top priority. Nesting should feel empowering, not stressful or risky. Here’s how to prepare for the week ahead.
Prioritize Pregnancy-Safe Cleaning
Many conventional cleaning products contain harsh chemicals with strong fumes that aren’t ideal for anyone, especially an expectant parent. Your respiratory system is more sensitive during pregnancy, and it’s wise to minimize exposure to volatile organic compounds (VOCs). Opt for natural, non-toxic alternatives. You can either purchase green cleaning brands or make your own simple, effective solutions.
| Cleaning Task | Pregnancy-Safe Alternative | Recipe/Notes |
|---|---|---|
| All-Purpose Surface Cleaner | White Vinegar & Water Solution | Mix equal parts white vinegar and water in a spray bottle. Add a few drops of lemon or lavender essential oil for a pleasant scent. |
| Glass Cleaner | Vinegar Solution | Use the same 1:1 vinegar and water solution. Wipe with a microfiber cloth for a streak-free shine. |
| Scrubbing Paste | Baking Soda & Water | Create a paste with baking soda and a little water. Excellent for scrubbing sinks, tubs, and tile grout. |
| Disinfectant | Hot Water, Soap, & Hydrogen Peroxide | Clean surfaces first with hot, soapy water. For extra disinfecting, you can wipe down with a 3% hydrogen peroxide solution (let it sit for a few minutes before wiping). |
| Air Freshener | Simmer Pot or Essential Oil Diffuser | Simmer a pot of water with citrus peels and cinnamon sticks, or use a diffuser with pregnancy-safe essential oils like lavender or chamomile. |
Listen to Your Body & Enlist Your Village
This is not the time to be a superhero. Your body is already doing the incredible work of growing a human. Pay close attention to its signals.
- No Heavy Lifting: Delegate any tasks that involve moving furniture or lifting heavy boxes. Your partner, a friend, or a family member can be your designated muscle.
- Avoid Ladders: Your center of gravity has shifted, making you less stable. Stay firmly on the ground and ask for help reaching high places.
- Ensure Good Ventilation: Keep windows open while you clean to circulate fresh air and minimize any fumes, even from natural products.
- Take Frequent Breaks: Sit down, put your feet up, and hydrate often. Listen for signs of fatigue, dizziness, or Braxton Hicks contractions, and rest immediately if they appear.
Your partner is nesting too, even if it looks different. This is a wonderful opportunity for new dads and partners to contribute in a tangible, meaningful way. Share this list and tackle it as a team. It’s one of the first of many team projects in your parenting journey.
Day 1 & 2: The Nursery and Baby Zones
Creating a Serene and Safe Haven for Your Little One
Let’s start with the most joyful part of nesting: preparing the baby’s dedicated spaces. This is where the reality of your new arrival truly begins to sink in. Focusing here first builds momentum and provides a huge emotional boost for the week ahead.
Day 1: The Nursery Deep Clean
- Declutter and Empty: If the room was previously a guest room or office, completely clear it out. This is the perfect time to donate or store items you no longer need.
- Wipe Down Everything: Start from the top and work your way down. Wipe the ceiling fan blades, light fixtures, and the tops of door and window frames. Then, wipe down the walls with a damp cloth and a mild, unscented soap. Don’t forget light switches and doorknobs.
- Clean Windows: Wash the inside of the windows and wipe down the sills and tracks. A clean window lets in more of that beautiful, soft sunlight.
- Deep Clean the Floors: If you have carpet, now is the ideal time to have it professionally steam-cleaned (using non-toxic solutions) or to rent a machine and do it yourself (or delegate it!). For hardwood or laminate, give it a thorough vacuum and a deep mop.
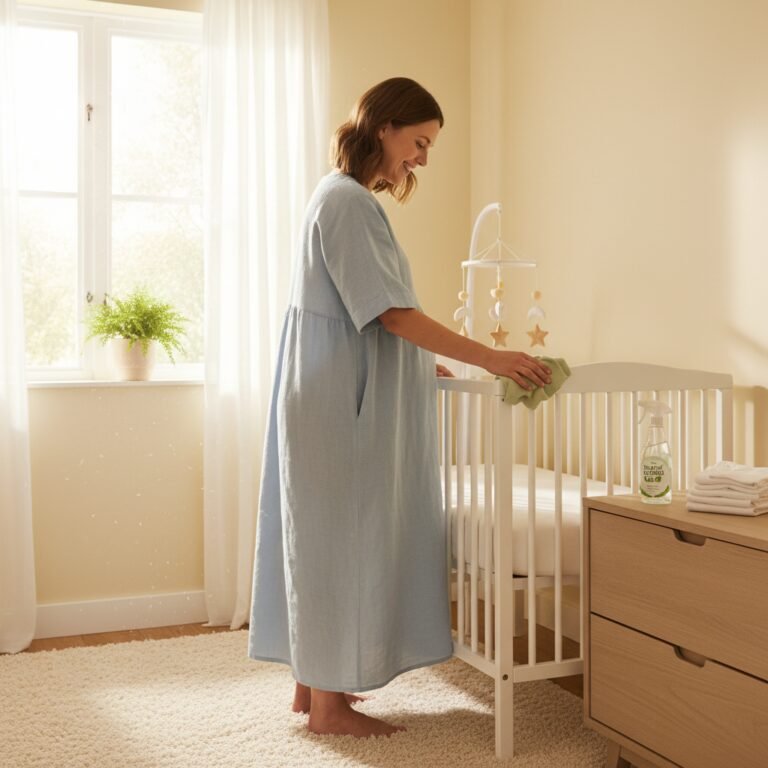
- Assemble Furniture: If you haven’t already, now is the time to assemble the crib, changing table, and any other furniture. Let it air out in the well-ventilated room.
Day 2: Baby Gear, Clothing, and Setup
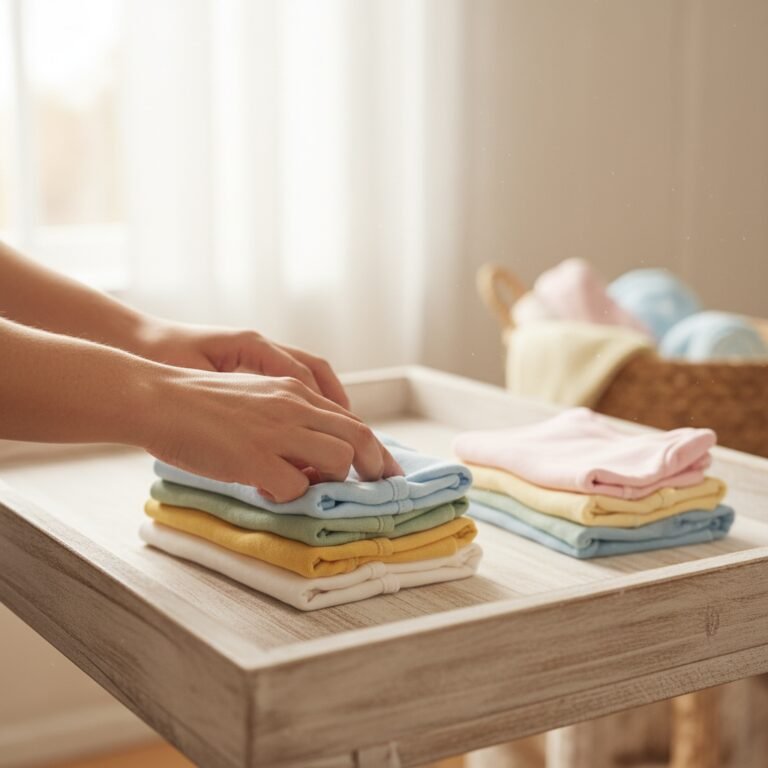
- Wash All Linens and Clothing: Wash all baby clothes, swaddles, burp cloths, crib sheets, and blankets. Use a gentle, fragrance-free detergent designed for sensitive skin. This removes any dust or chemicals from the manufacturing and shipping process.
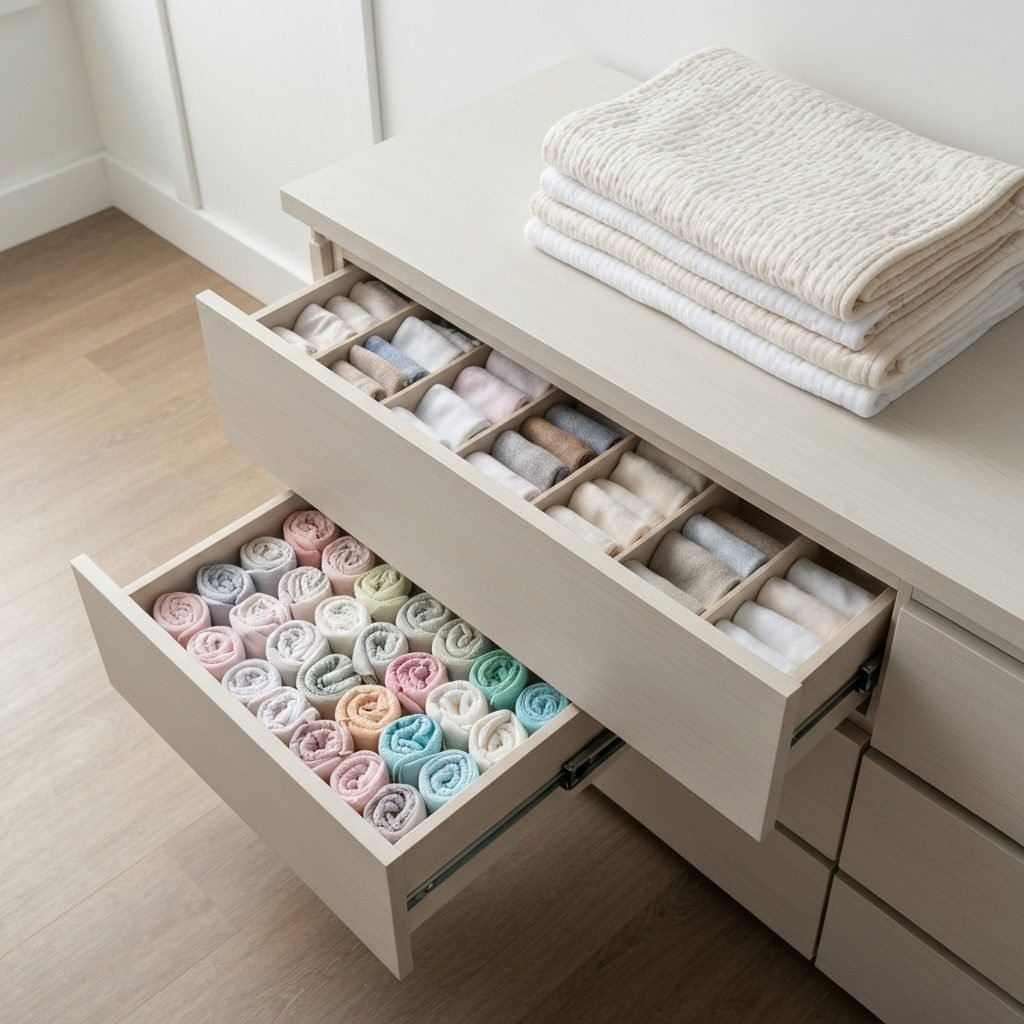
- Organize the Closet and Dresser: Neatly fold and put away all the clean clothes. Use drawer dividers to keep tiny socks, hats, and mittens organized. It’s helpful to organize by size (Newborn, 0-3 Months, etc.) to make finding things easier later.
- Sanitize Toys and Gear: Wipe down any plastic toys, the diaper pail, and other baby gear with a non-toxic cleaner. Check all items for safety recalls while you’re at it.
- Set Up the Changing Station: Stock the changing table with diapers, wipes, diaper cream, and a change of clothes. Having everything within arm’s reach is a game-changer for middle-of-the-night changes.
- Install Safety Features: If you have them, install blackout curtains to help with baby’s sleep, and ensure any heavy furniture is securely anchored to the wall.
Take a moment to stand in the clean, prepared nursery. Breathe it in. This is the room where you will rock, soothe, and bond with your baby. It is a space built with love.
Day 3 & 4: Kitchen and Bathrooms – The Hygiene Hubs
Sanitizing and Stocking the Most Important Rooms
With the nursery ready, we turn our attention to the high-traffic zones that require a focus on hygiene. A clean kitchen makes meal prep and bottle washing less stressful, and a sanitized bathroom is essential for both your postpartum recovery and baby’s bath time.
Day 3: The Kitchen Deep Dive
- Refrigerator and Freezer Purge: Empty the fridge and freezer completely. Wipe down all shelves and drawers with a food-safe cleaner (like a vinegar solution). Toss any expired food and organize what’s left, making space for postpartum meals you might freeze.
- Clean the Oven and Stovetop: Use a non-fume oven cleaner or a baking soda paste to scrub the inside of the oven. Degrease the stovetop, control knobs, and the range hood filter.
- Microwave and Small Appliances: Clean the inside of the microwave by heating a bowl of water and vinegar to loosen grime. Wipe down your coffee maker, toaster, and any other countertop appliances.
- Cabinets and Pantry Organization: Wipe down the inside and outside of all cabinets. Go through your pantry, check expiration dates, and organize items so that healthy snacks and easy-to-prepare foods are readily accessible for you during the postpartum period.
- Deep Clean the Sink and Dishwasher: Scrub the sink and faucet until they sparkle. Run the dishwasher on an empty, hot cycle with a cup of vinegar on the top rack to clean and sanitize it.
Day 4: The Bathroom Blitz
- Scrub the Shower, Tub, and Toilet: Use your baking soda paste and a good brush to scrub tile, grout, and fixtures. Thoroughly clean and disinfect the toilet, both inside and out.
- Wash Linens: Gather all bath towels, hand towels, bathmats, and the shower curtain and wash them in hot water.
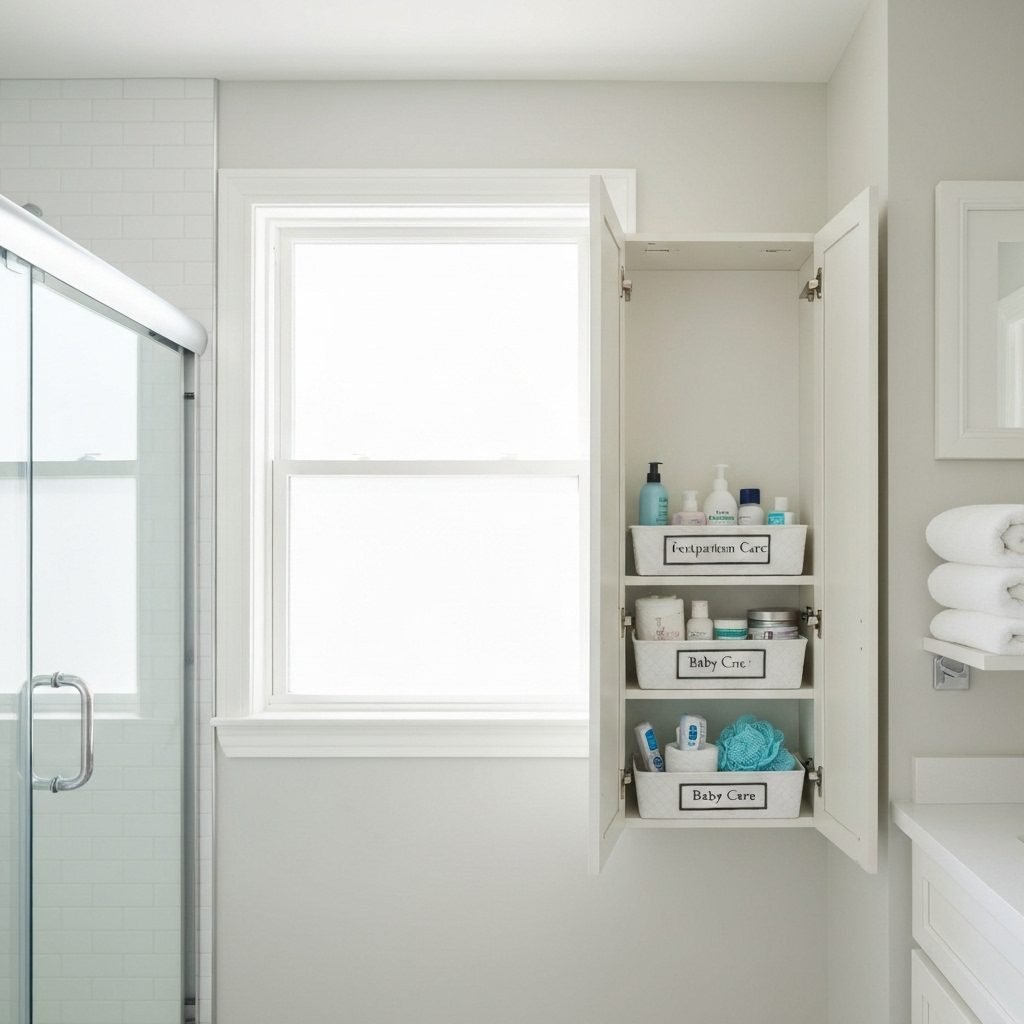
- Organize the Medicine Cabinet: Safely dispose of any expired medications. Create a dedicated ‘Postpartum Care’ basket for yourself with items like pads, perineal spray, and pain relievers. Create a separate ‘Baby Care’ basket with a thermometer, nail clippers, and nasal aspirator.
- Clean the Vanity and Mirror: Clear off the countertops, wipe down all surfaces, and clean the sink and mirror. Organize your drawers and under-sink storage.
- Mop the Floors: Give the bathroom floors a final, thorough mopping with a disinfecting cleaner.
Day 5 & 6: Living Spaces and Final Preparations
Creating a Calm Retreat and Tying Up Loose Ends
Now that the core areas are done, it’s time to focus on the spaces where you’ll be spending a lot of time resting, recovering, and bonding as a new family. We’ll also tackle those often-overlooked spots to ensure the whole house feels fresh and ready.
Day 5: Master Bedroom and Living Room
- Dust Everything: Just like in the nursery, work from top to bottom. Dust ceiling fans, light fixtures, bookshelves, electronics, and all other surfaces.
- Wash All Bedding and Linens: Strip the beds and wash all sheets, duvet covers, and pillowcases. This is also a good time to wash any throw blankets and pillow covers from the living room sofa.
- Vacuum Upholstery and Under Furniture: Use your vacuum’s upholstery attachment to clean sofas and chairs. Be sure to vacuum underneath cushions and move furniture (with help!) to clean underneath.
- Clean Windows and Curtains: Wash windows and either launder or vacuum curtains and blinds.
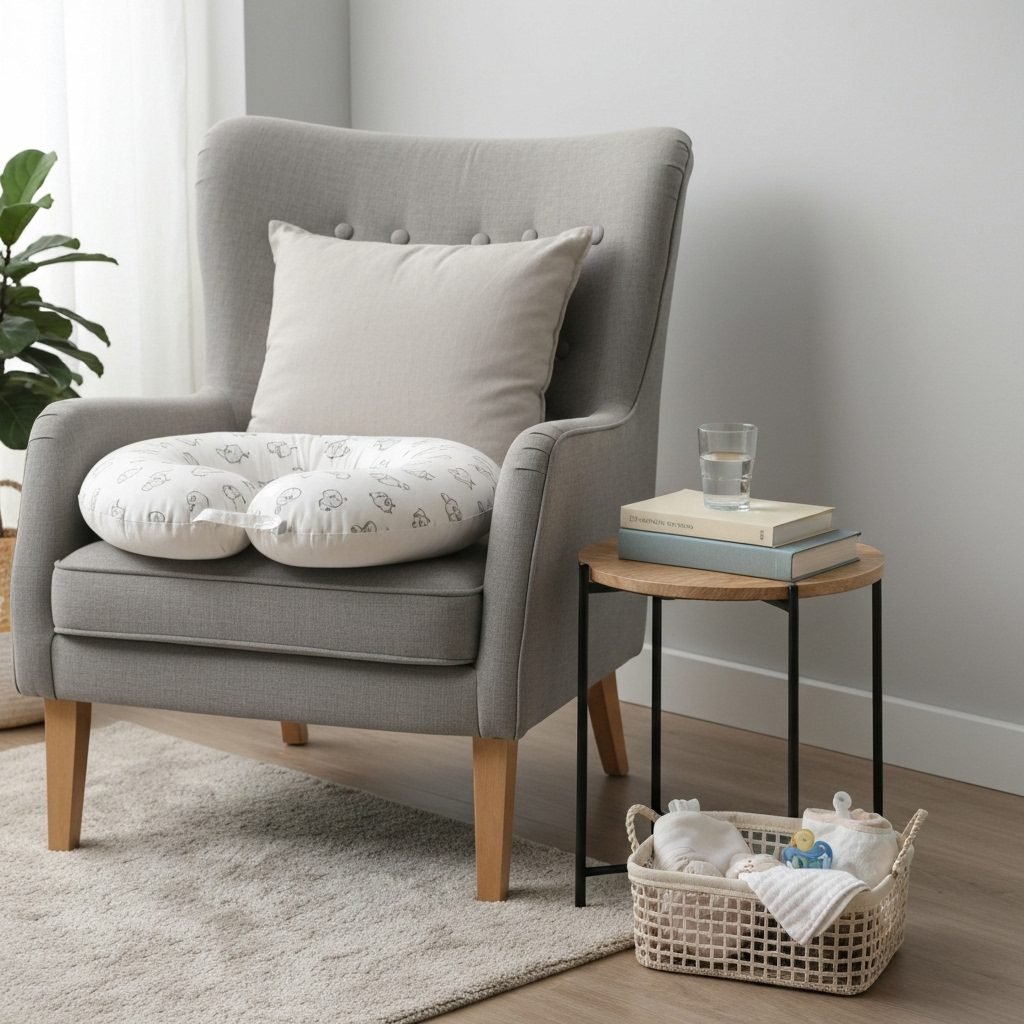
- Set Up a ‘Nursing Nook’ or ‘Comfort Corner’: In your living room or bedroom, designate a comfortable chair with everything you’ll need within arm’s reach: a side table with water, snacks, your phone charger, the TV remote, a book, and a basket with burp cloths and a nursing pillow.
Day 6: The Forgotten Spaces & Household Stock-Up
- Tackle the Laundry Room: Wipe down your washer and dryer. Clean out the lint trap thoroughly. Organize your detergents and supplies.
- Clear the Entryway: Your entryway will be the first thing you see when you bring the baby home. Make it a calm and clear space. Organize shoes, coats, and bags to reduce clutter.
- Final Household Sweep: Wipe down all remaining doorknobs, light switches, and railings. Do a final vacuum and mop of all floors.
- Check Safety Devices: Test all smoke alarms and carbon monoxide detectors and replace the batteries if needed.
- Stock Up on Essentials: Do a final inventory and stock up on household items like toilet paper, paper towels, soap, laundry detergent, and pet food. The last thing you’ll want to do with a newborn is run out of toilet paper!
Day 7: Rest, Admire, and Pack

The Most Important Day: Nurturing Yourself
You did it. You’ve worked so hard all week. Today, the most important task on your checklist is to stop. The physical work of nesting is complete, and now the emotional and physical work of resting and preparing for birth begins. Cleaning can wait. Your body and mind need this day of peace.
- Put Your Feet Up: Literally. Elevating your feet can help with third-trimester swelling. Settle into your newly created ‘comfort corner’ and relax.
- Admire Your Hard Work: Walk through your clean, organized home. Take deep breaths. Acknowledge what you and your partner have accomplished. Feel the peace and readiness of the space you’ve prepared. This is a tangible act of love.
- Take a Warm Bath: A soothing bath can ease aching muscles and calm your mind. Add some Epsom salts and a few drops of lavender essential oil for a spa-like experience.
- Pack Your Hospital Bag (or Finish Packing): With a clear mind, calmly go through your hospital bag checklist. Lay everything out and pack it neatly. Place it by the door so it’s ready to go at a moment’s notice.
- Connect with Your Partner: Spend some quality time together. Talk about your hopes and fears. Enjoy these last moments as a family of two. Order your favorite takeout, watch a movie, and just be together.
Remember, the goal of nesting isn’t a perfect home; it’s a prepared heart. You have created a beautiful, safe space for your baby. Now, give yourself the gift of rest. You’ve earned it.
Conclusion
You’ve journeyed through the seven days, and your home is now a sanctuary, ready to welcome its newest member. More than just a clean space, it’s a physical manifestation of your love and anticipation. Every wiped counter, every folded onesie, every organized basket is a love letter to the baby you’re about to meet.
Please remember to be gentle with yourself. If you didn’t get to every single item on the list, that is more than okay. You did what you could, and that is enough. Your baby won’t notice the dust bunnies behind the sofa; they will only notice the warmth of your arms and the love in your voice.
The nesting instinct has been fulfilled. Now, your final and most important task is to rest, restore your energy, and turn your focus inward. The next chapter of your adventure is about to begin, and you are ready. You have built the nest; soon, it will be time to welcome your little bird home.