The Cutest DIY Hospital Door Hangers to Announce Baby’s Arrival in Style
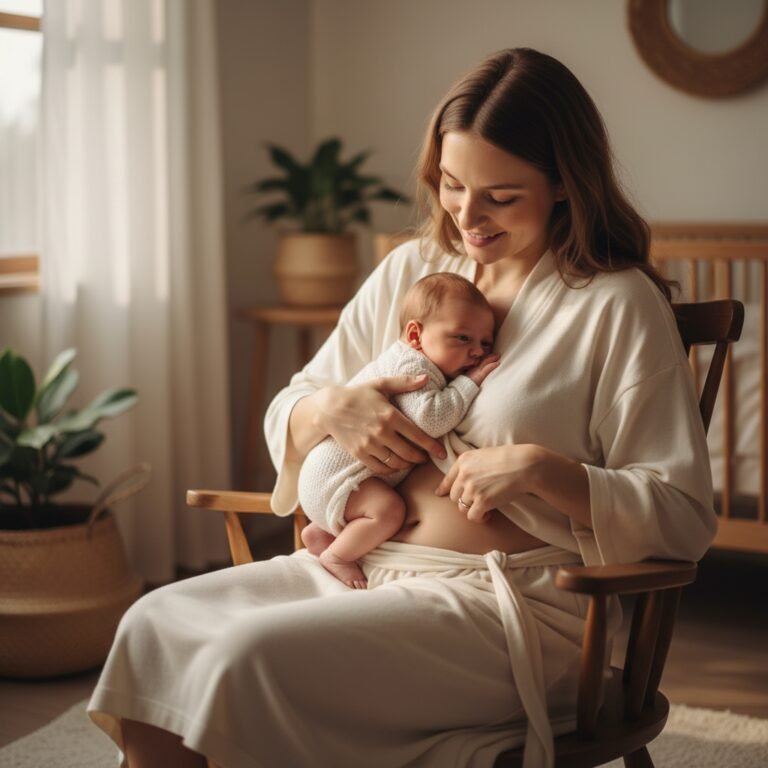
As you count down the weeks and days to meeting your little one, a powerful, primal instinct often takes over: nesting. It’s that deep-seated urge to prepare, organize, and create a warm, welcoming space for your baby. For many expectant parents, this energy is channeled into washing tiny clothes, organizing the nursery, or packing the perfect hospital bag. But what about a project that’s just for you, a creative outlet to pour all that love and anticipation into? Enter the DIY hospital door hanger.
This isn’t just another item on a checklist. Crafting a door hanger for your hospital room is a beautiful, modern tradition that serves as your baby’s very first, personalized “Hello, World!” It’s a symbol of your journey, a celebration of their arrival, and a precious keepsake you’ll treasure long after you’ve brought your baby home. It’s a project that can calm anxieties, provide a joyful distraction, and become a wonderful bonding activity for you and your partner. In this guide, we’ll walk you through everything you need to know—from gathering supplies to step-by-step instructions and adorable theme ideas—to create a door hanger that is as unique and special as the little one you’re about to meet.
More Than Just a Sign: The Heart Behind a DIY Door Hanger

In the whirlwind of preparing for a baby, it’s easy to get caught up in the practicalities. But creating a hospital door hanger is an act of pure heart. It’s a mindful activity that allows you to pause, connect with your creativity, and focus on the beautiful new life you’re bringing into the world. For many, the process itself is as meaningful as the finished product.
A Tangible Expression of Love
Every brushstroke, every carefully tied ribbon, every chosen color is a small infusion of your love and excitement. Unlike store-bought items, a handmade hanger tells a story—your story. It’s a testament to the time you spent dreaming of your baby while you crafted it. This project allows you to channel your feelings into something tangible, creating a physical representation of your joy that will greet friends, family, and even the hospital staff who come to celebrate with you.
A Nesting Project with a Purpose
The nesting instinct is strong, but sometimes it can manifest as anxious energy. A creative project like this provides a positive and productive outlet. It focuses your mind, soothes your nerves, and gives you a sense of accomplishment during a time of waiting. It can be a solo project for quiet reflection or a wonderful opportunity for connection.
Imagine this: a quiet afternoon, your favorite music playing, you and your partner sitting together, laughing and sharing ideas as you paint and decorate. These are the moments of connection that strengthen your bond as you prepare to transition into your new roles as parents. This simple craft becomes a cherished memory before the baby even arrives.
A Forever Keepsake
Long after you’ve left the hospital, this door hanger becomes a treasured piece of memorabilia. You can hang it on the nursery door at home, store it in a baby box with their first hat and hospital bracelet, or even bring it out to celebrate their first birthday. It will always serve as a beautiful reminder of those first, magical moments when your family grew by one. It’s not just a sign for a hospital door; it’s the first page in your baby’s storybook.
Gathering Your Creative Toolkit: Essential Materials & Supplies
Before you can bring your vision to life, you’ll need to gather your materials. The beauty of a DIY project is its flexibility—you can choose supplies that fit your style, budget, and skill level. Here’s a comprehensive list to get you started, broken down by category.
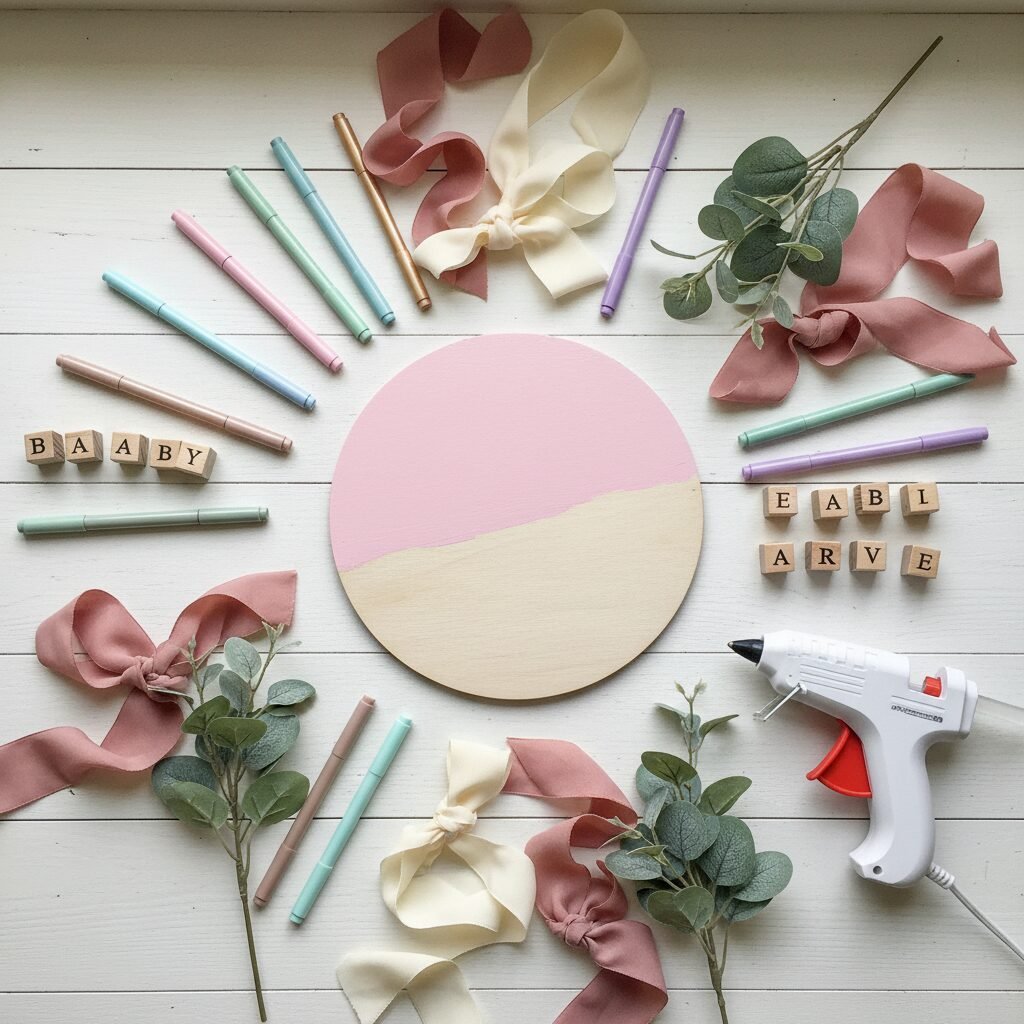
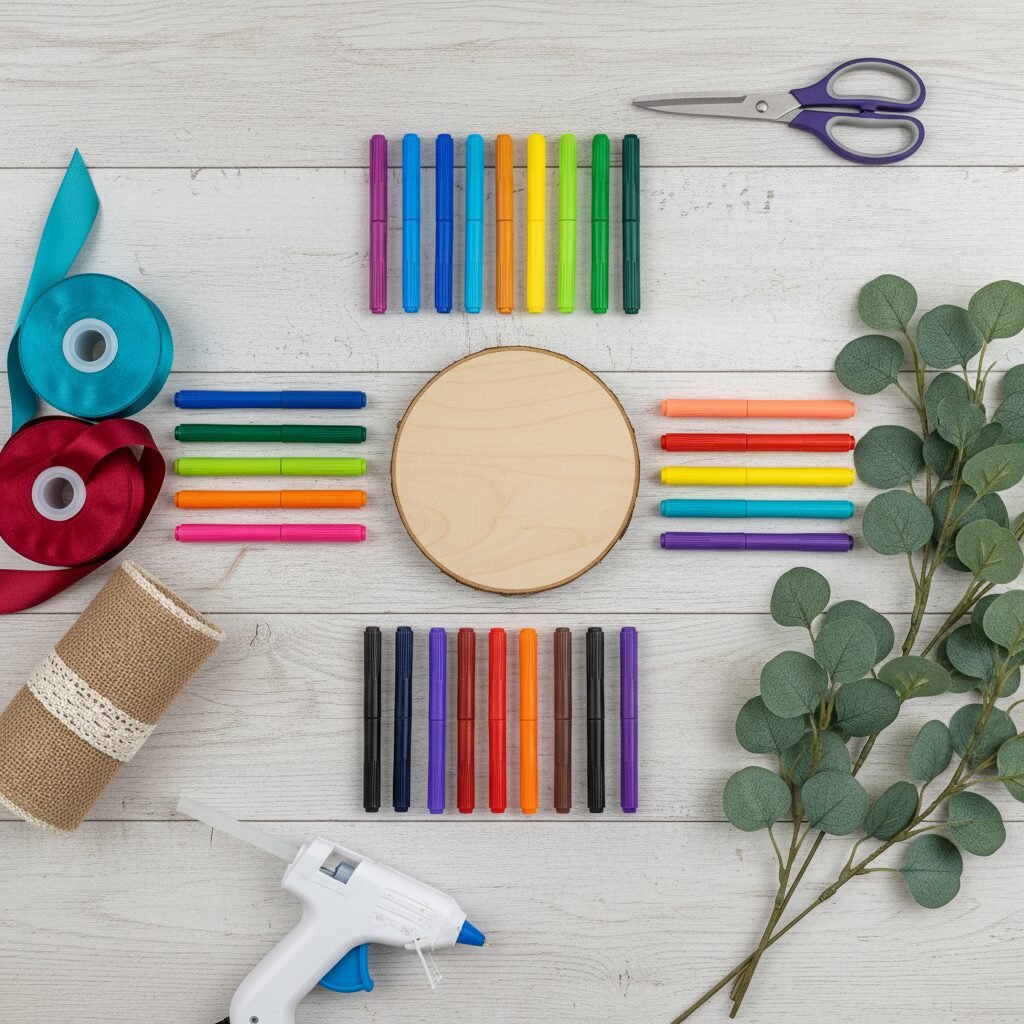
1. The Base: Your Canvas
This is the foundation of your project. Choose something sturdy that fits your aesthetic.
- Wooden Rounds or Plaques: This is the most popular choice. They come in various sizes (12-18 inches is common), are easy to paint, and provide a classic, rustic look. You can find them at most craft stores.
- Canvas: A standard artist’s canvas offers a clean, modern backdrop. It’s lightweight and very easy to work with.
- Embroidery Hoop: For a delicate, bohemian, or vintage feel, an embroidery hoop with fabric stretched across it can be a beautiful and unique base.
- Chalkboard Sign: A small, framed chalkboard offers a rustic charm and the practical advantage of being able to easily write and update birth stats.
2. The Lettering: Announcing Your News
How you add your baby’s name and stats is a key design element.
- Acrylic Paints & Brushes: For the truly hands-on artist. A set of fine-tipped brushes is essential for detailed lettering.
- Paint Pens: A fantastic, user-friendly option! They offer great control, come in various colors and finishes (like metallic), and are much less messy than traditional paint.
- Adhesive Vinyl Letters: If you have a cutting machine like a Cricut or Silhouette, you can create flawless, professional-looking lettering. You can also buy pre-made vinyl letter stickers.
- Wooden Letters: Small, lightweight wooden letters can be painted and glued on for a 3D effect.
- Stencils: For those who aren’t confident in their freehand skills, stencils are a lifesaver for achieving perfect lettering.
3. The Embellishments: Adding Personality & Flair
This is where you can truly let your creativity shine and tie your theme together.
- Ribbons and Twine: Essential for creating a bow and the hanger itself. Choose a variety of textures and widths that match your color scheme. Burlap, satin, and grosgrain are popular choices.
- Faux Flowers and Greenery: Silk or fabric flowers, eucalyptus sprigs, or lambs ear can add a beautiful, soft touch. They are durable and will last forever.
- Wooden Beads: Stringing wooden beads onto the twine hanger adds a lovely modern or boho touch.
- Themed Cutouts: Small, laser-cut wooden shapes (like animals, stars, or a moon) can be painted and added to fit your theme.
- Yarn or Pom-Poms: For a soft, whimsical look, consider adding small yarn pom-poms or tassels.
4. The Tools: Putting It All Together
- Hot Glue Gun & Glue Sticks: Your best friend for securely attaching embellishments.
- Scissors: For cutting ribbon and twine.
- Pencil & Eraser: For sketching out your design before you commit with paint.
- Sandpaper (optional): If using a wooden round, a light sanding can create a smoother surface for painting.
- Clear Sealant Spray (optional): A matte or gloss sealant can protect your finished work from smudges and scratches.
Your Step-by-Step Guide to Crafting the Perfect Door Hanger

Now that you have your supplies, it’s time for the fun part! Don’t feel intimidated; we’ll break it down into simple, manageable steps. Remember to enjoy the process and don’t strive for perfection—strive for something made with love.
- Step 1: Prepare Your Base. If you’re using a wooden round, you may want to lightly sand the surface to ensure it’s smooth. Wipe away any dust with a clean cloth. Apply one or two coats of your chosen background color with acrylic paint. Let it dry completely between coats. If you’re using a canvas, it’s likely already primed and ready to go!
- Step 2: Plan and Sketch Your Design. Before you pick up a paint pen, use a pencil to lightly sketch your layout. Decide where the baby’s name will go—this is usually the focal point. Plan where you’ll leave space for the birth statistics (date, time, weight, length). Lightly mark where you might place your larger embellishments like flowers or bows. This simple step prevents mistakes and helps you visualize the final product.
- Step 3: Add the Lettering. This is the moment of truth! Take a deep breath. Using your paint pens, stencils, or vinyl, carefully add the baby’s name. Go slowly and steadily. It’s often best to start with the name and then add the labels for the stats (e.g., ‘Weight:’, ‘Length:’). You’ll fill in the actual numbers after the baby is born. Pro Tip: If you’re nervous about freehanding, practice on a piece of paper first to get a feel for the paint pen’s flow.
- Step 4: Attach Your Embellishments. Heat up your hot glue gun. Start by arranging your larger items, like faux flowers or greenery, typically at the top or cascading down one side. Once you’re happy with the placement, secure them with a small dab of hot glue. Be careful with your fingers! Layer smaller items on top to add depth and dimension.
- Step 5: Create the Bow and Hanger. The bow is often the crowning touch. Create a multi-layered bow using different ribbons for texture and color. Secure the center of the bow with floral wire or a small piece of twine. Attach it to the top of your sign with hot glue. For the hanger, cut a generous length of sturdy twine or wide ribbon. Staple or hot glue the ends securely to the back of your sign. You can thread wooden beads onto the hanger before attaching it for extra detail.
- Step 6: The Final Touches. Step back and look at your creation. Is there anything else it needs? A few small painted dots? A touch of glitter? Once you’re completely happy, you can spray it with a clear sealant to protect it, though this is optional. Finally, pack a permanent marker (like a Sharpie) in your hospital bag so you can fill in those precious birth stats as soon as your little one arrives!
Adorable Theme Ideas to Spark Your Imagination

Feeling stuck for a theme? The possibilities are endless! Your theme can match the nursery decor, reflect your family’s personality, or simply be something you find beautiful. Here are a few popular and charming ideas to get your creative juices flowing.
Rustic Woodland
This theme is perfect for nature lovers and works well for any gender. It’s warm, cozy, and timeless.
- Base: A natural or lightly stained wooden round.
- Colors: Earth tones like forest green, deep brown, burnt orange, and cream.
- Lettering: A simple, clean font in white or black paint.
- Embellishments: Faux eucalyptus, pinecones, tiny deer or bear wooden cutouts, and a burlap or plaid ribbon bow.
Sweet & Floral
A classic and feminine choice, perfect for a baby girl. It’s delicate, pretty, and full of grace.
- Base: A wooden round painted in a soft pastel like pink, lavender, or mint green.
- Colors: Shades of pink, peach, cream, and soft greens.
- Lettering: An elegant script or calligraphy font, perhaps in a metallic gold or rose gold paint pen.
- Embellishments: A cascade of silk flowers like roses, peonies, and hydrangeas, paired with lambs ear greenery and flowing satin ribbons.
Modern & Minimalist
For parents who love clean lines and a simple, chic aesthetic. This style is sophisticated and understated.
- Base: A canvas or a wooden round painted in a solid neutral like white, grey, or black.
- Colors: A monochromatic scheme (black and white) or a simple two-color palette.
- Lettering: A bold, sans-serif font. The focus is on typography.
- Embellishments: Very few are needed. A simple sprig of greenery or a hanger made of twine and natural wooden beads is all it takes to complete the look.
Whimsical Adventure
This theme is all about fun, imagination, and the great adventure to come. It’s playful and full of character.
- Base: A wooden round painted like a sky with clouds or a night sky with stars.
- Colors: Bright and cheerful or deep and celestial blues.
- Popular Motifs: Hot air balloons, safari animals (lions, elephants, giraffes), mountains (‘Our Greatest Adventure’), or a space theme with planets and rockets.
- Embellishments: Themed wooden cutouts, yarn pom-poms that look like clouds, and colorful ribbons.
Conclusion
As you pack your finished creation into your hospital bag, take a moment to admire what you’ve made. This door hanger is so much more than wood and paint and ribbon. It’s a vessel for your hopes, your dreams, and the boundless love you already feel for your child. It’s one of the first of many things you will do to make the world a beautiful place for them.
When the time comes, hanging it on that hospital door will be a proud, joyful moment—a beautiful announcement to everyone who passes by that a miracle has happened in that room. And years from now, when you stumble upon it in a memory box, you’ll be transported back to this precious, fleeting time of anticipation and the incredible moment you first met your baby.
You are preparing a beautiful welcome for your little one. Trust your instincts, embrace your creativity, and know that you are already the most wonderful parent for your baby. The best is yet to come.
Congratulations on your growing family. We wish you a safe and beautiful birth experience, and a lifetime of happiness with your new arrival.