Photoshop Magic: How To Take Professional Newborn Photos With Your iPhone
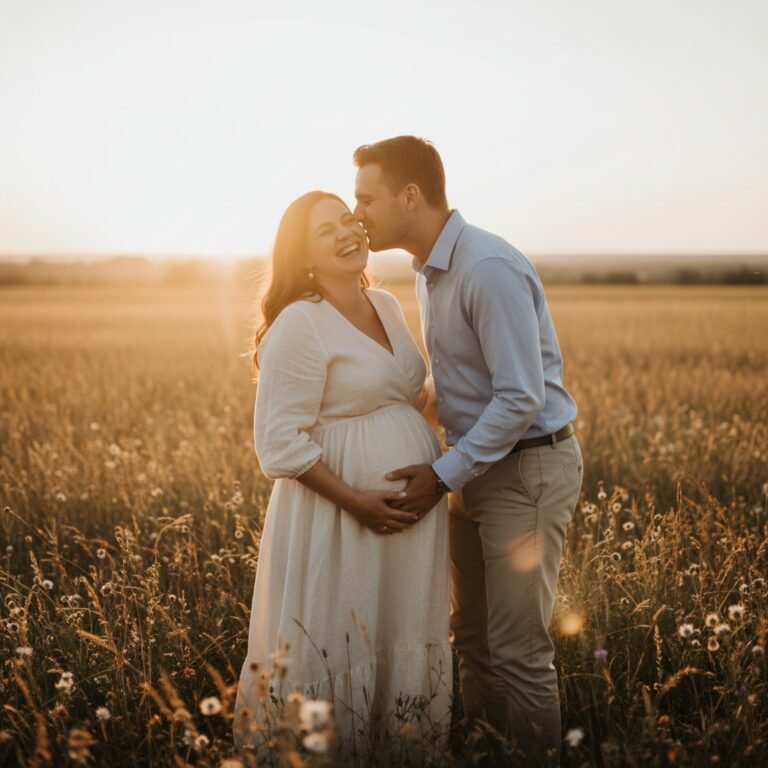
The first few weeks with your newborn are a whirlwind of love, sleepless nights, and moments so fleeting you wish you could bottle them up forever. Professional newborn photos are a beautiful way to do just that, but they often come with a significant price tag and the logistical challenge of leaving the house with a brand-new baby. What if you could create those same dreamy, professional-quality portraits yourself, using a tool you already have in your pocket?
Welcome to the magic of DIY newborn photography. This guide is designed for you—the new dad, the loving mom, the couple navigating this incredible new chapter. We understand your desire to capture every tiny detail without the stress or expense. We will walk you through, step-by-step, how to transform your home into a cozy studio, master the powerful camera on your iPhone, and use the magic of Photoshop to add that final, professional polish. You don’t need to be a professional photographer to create images you’ll cherish for a lifetime. You just need a little guidance, a lot of patience, and the baby you already adore. Let’s begin this beautiful project together.
Creating Your Cozy At-Home Studio: Light, Props, and Safety

Setting the Stage for Picture-Perfect Moments
Before you even think about picking up your phone, the most crucial step is preparing your space. A successful newborn photoshoot is built on a foundation of safety, comfort, and beautiful light. The goal isn’t to replicate a commercial studio, but to create a warm, serene environment where your baby can be peaceful and you can be creative.
Harnessing Natural Light
The single most important element in any great photograph is light. Forget about your phone’s flash—it’s harsh and unflattering for a baby’s delicate features. Instead, become a light-seeker in your own home.
- Find the Biggest Window: Identify the room in your house with the largest window that lets in plenty of indirect sunlight. A north-facing window is often ideal as it provides soft, consistent light throughout the day.
- Timing is Everything: Pay attention to the light at different times. Mid-morning or late afternoon often provides the most beautiful, soft, and directional light. Avoid direct, harsh midday sun, which creates strong shadows.
- Diffuse the Light: If the light is still too direct, you can easily soften it by hanging a thin, white sheet or sheer curtain over the window. This acts as a giant softbox, creating a gentle, wrapping light that is perfect for newborn skin.
Building Your ‘Set’
Your set should be simple, comfortable, and free of distractions. The focus should always be on your baby.
- Backgrounds: You don’t need fancy backdrops. A simple, neutral-colored blanket (cream, grey, beige) draped over a bed, couch, or even the floor works perfectly. Ensure it’s pulled taut to avoid distracting wrinkles. A soft, fluffy rug can also be a wonderful texture.
- Posing Surface: A large beanbag (like a Boppy pillow) covered with blankets provides a safe and comfortable surface to pose your baby. Always have a spotter (your partner or a friend) with their hands right next to the baby for safety.
- Props with Purpose: Less is more. Choose props that add to the story without overwhelming it. Think soft swaddles, simple knit hats or headbands, and maybe a special family heirloom. Avoid anything that is too large, brightly colored, or could be a safety hazard.
Prioritizing Safety and Comfort Above All
Remember, no photo is worth compromising your baby’s comfort or safety. Your role as a parent comes first, and your role as a photographer second.
A comfortable baby is a sleepy, cooperative baby. Keep the room warmer than usual, as newborns lose body heat quickly. A space heater (kept a safe distance away) or turning up the thermostat can make a huge difference. Have a white noise machine or app running to help soothe them. Most importantly, never force a baby into a pose. Their safety is paramount. Avoid any complex poses you’ve seen online that require compositing or expert handling. Simple, natural positions are not only safer but often the most beautiful.
Your iPhone is Your Wand: Camera Settings and Techniques
Unlocking the Power of Your iPhone’s Camera
Modern iPhones have incredibly sophisticated cameras capable of producing stunning results. The key is to move beyond the basic point-and-shoot and take control of a few key settings. These simple adjustments can elevate your photos from simple snapshots to deliberate portraits.
Essential Camera Settings
Before you start, open your Camera app and make these adjustments. You’ll be amazed at the difference they make.
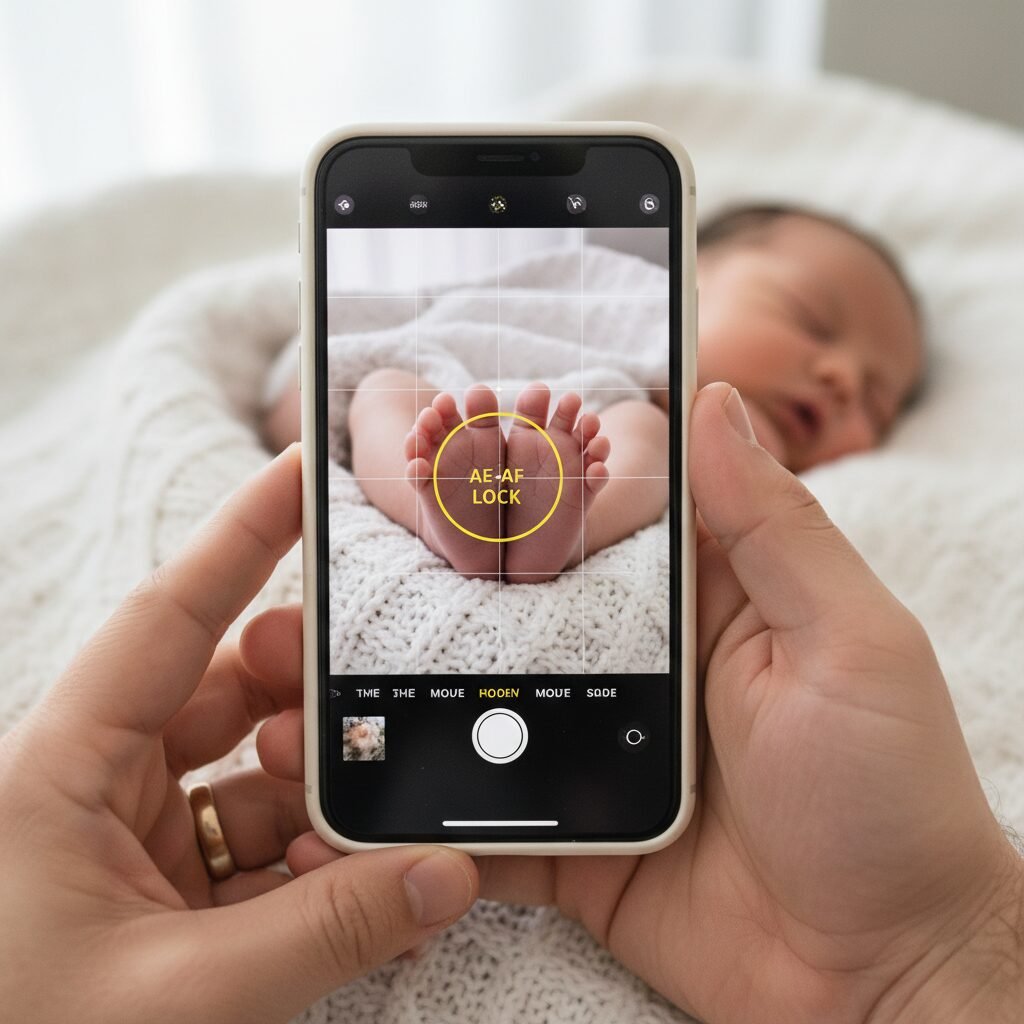
- Engage Portrait Mode: This is your secret weapon. Portrait Mode uses software to mimic the shallow depth of field of a professional DSLR camera, creating a beautifully blurred background (known as ‘bokeh’). This makes your baby pop and eliminates distracting elements in your home.
- Lock Focus and Exposure: Tap and hold on your baby’s face on the screen until you see the ‘AE/AF LOCK’ box appear. This locks the focus and exposure, ensuring that even if you or the baby moves slightly, the camera won’t constantly try to readjust, which can lead to blurry or poorly lit shots. Once locked, you can slide your finger up or down on the sun icon to manually brighten or darken the image.
- Turn Off the Flash: Navigate to the flash icon and ensure it is turned off. As mentioned, the built-in flash is harsh and should be avoided at all costs. Natural light is your best friend.
- Consider Shooting in RAW: On newer iPhone Pro models, you can enable Apple ProRAW in your camera settings. A RAW file captures much more image data than a standard JPEG. This gives you significantly more flexibility in Photoshop to adjust colors, exposure, and details without losing quality. It’s the closest you can get to a professional digital negative.
Composition and Angles
How you frame your shot is just as important as your camera settings. Think like a storyteller.
- Get on Their Level: Avoid shooting down on your baby from a standing position. Get low, on your belly if you have to, to be at eye level. This creates a more intimate and engaging portrait.
- Shoot from Above: For classic newborn shots, shooting directly from above can be beautiful. Stand safely over the baby (perhaps on a sturdy stool, with a spotter) to capture their peaceful, sleeping face.
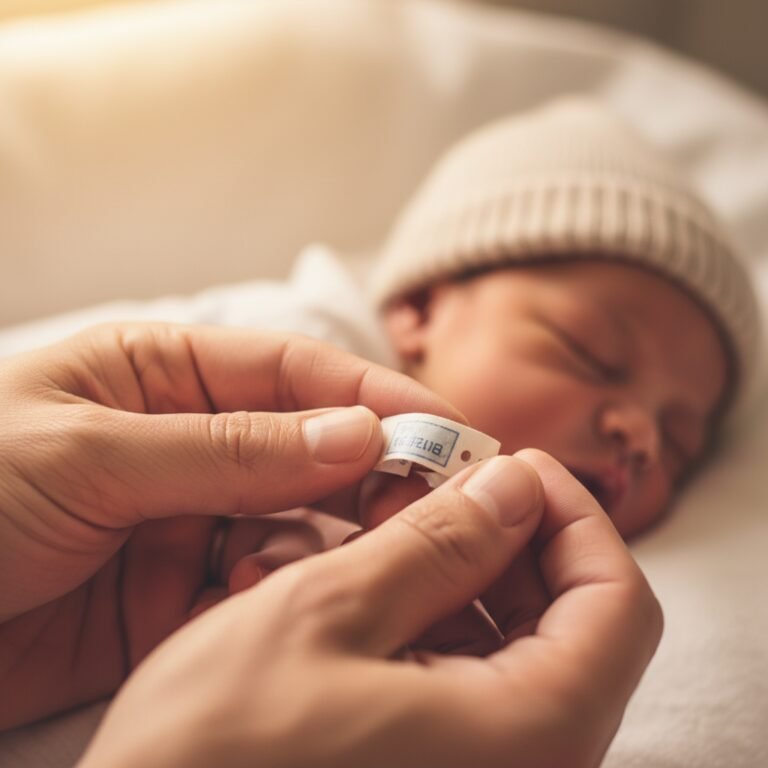
- Fill the Frame: Don’t be afraid to get close. Fill the entire frame with your baby’s face, or focus on the tiny details—their curled fingers, tiny toes, the swirl of hair on their head. These detail shots are often the most cherished.
- Rule of Thirds: Imagine a tic-tac-toe grid over your screen. Instead of placing your baby dead center, try placing them along one of the lines or at an intersection point. This often creates a more balanced and visually interesting composition.
The Photoshop Magic: Your Essential Editing Workflow
The Digital Darkroom: A Beginner’s Guide to Photoshop
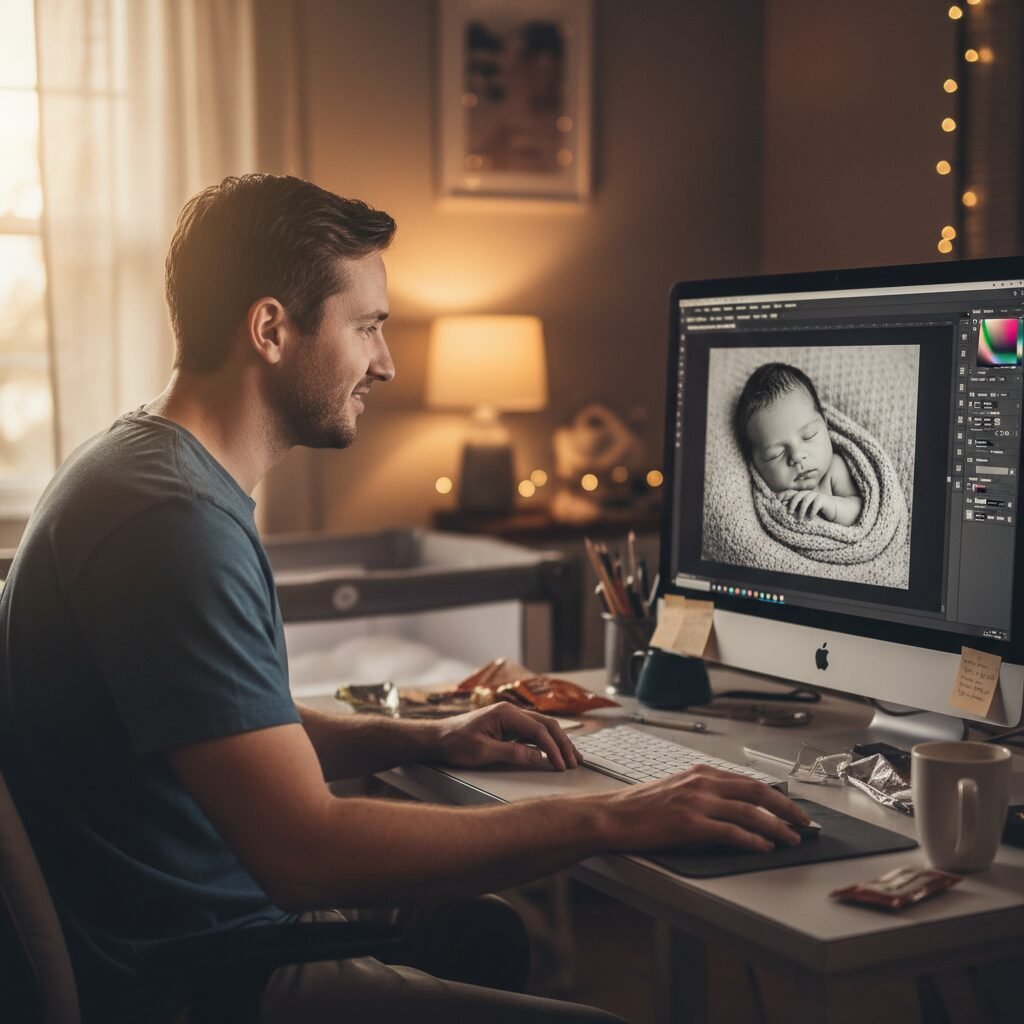
This is where the ‘magic’ truly happens. Shooting a good photo is half the battle; the other half is the edit. A gentle, professional edit can transform a great iPhone photo into a breathtaking work of art. Don’t be intimidated by Photoshop; we’ll focus on a few simple, powerful tools that make all the difference.
Step-by-Step Editing Process
Follow this workflow for a consistent, professional finish. Remember, the goal is to enhance, not alter. We want the baby to look like the best version of themselves.
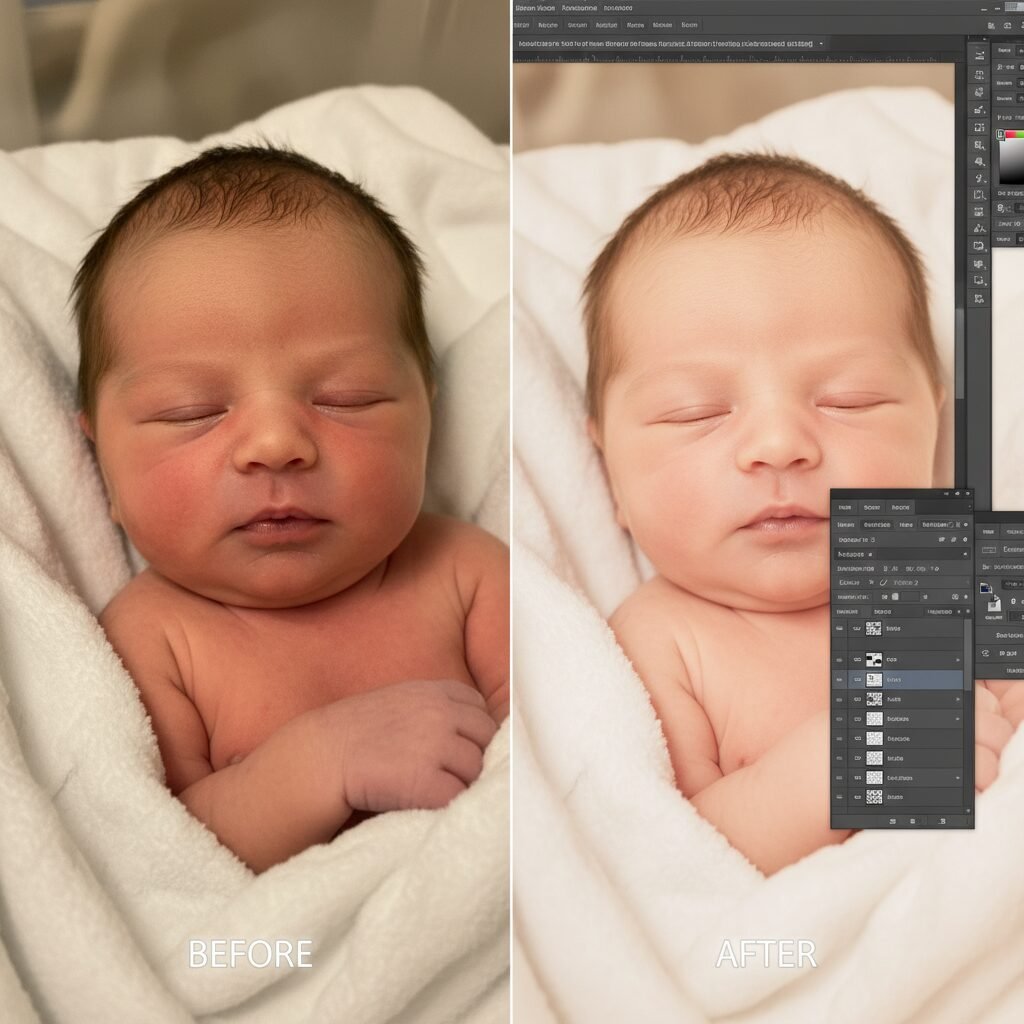
- Basic Adjustments in Camera Raw: When you open your photo (especially a RAW file) in Photoshop, it will likely open in the Adobe Camera Raw filter first. This is the place for global adjustments. Gently increase the Exposure if the image is too dark, add a touch of Contrast, and slightly lift the Shadows to bring out detail. The most important slider here is Temperature. Use it to warm up the photo and achieve that creamy, warm skin tone.
- Cropping and Composition: Once in the main Photoshop workspace, use the Crop Tool (C) to refine your composition. Straighten any crooked horizons and crop in tighter to eliminate distracting background elements you missed while shooting.
- Gentle Skin Retouching: Newborn skin is rarely perfect. They often have flakes, scratches, or baby acne. Create a new blank layer. Select the Spot Healing Brush Tool (J) and make sure ‘Sample All Layers’ is checked in the top bar. Now, you can simply click on any small blemishes, and Photoshop will magically remove them. For larger patches of redness, use the Clone Stamp Tool (S) at a very low opacity (15-20%) to gently paint over the area with a sample of clear skin from a nearby spot.
- Evening Out Skin Tones: Newborns can have blotchy, red, or even slightly jaundiced skin. We can fix this with Adjustment Layers. Go to Layer > New Adjustment Layer > Hue/Saturation. In the properties panel, click on the dropdown that says ‘Master’ and select ‘Reds’. Gently decrease the saturation and slightly increase the lightness. This will reduce the redness in the skin. You can do the same for ‘Yellows’ if needed. Use the layer mask to paint this effect only where it’s needed.
- Adding a Touch of Polish: Create a final ‘Stamp Visible’ layer by pressing Ctrl+Alt+Shift+E (or Cmd+Option+Shift+E on Mac). This merges all your work into a new layer. You can now add a very subtle vignette to draw the eye towards the baby. Go to Filter > Lens Correction > Custom and use the vignette slider. Finally, you can run a gentle sharpening filter to make details like eyelashes pop.
The key to a good edit is subtlety. Zoom out frequently to check your work and use the ‘before/after’ toggle to ensure you haven’t gone too far. Your baby is already perfect; your job is just to let that perfection shine through.
Pro-Level Polish: Advanced Tricks and Common Pitfalls
Elevating Your Images and Avoiding Common Mistakes
Once you’ve mastered the basics, a few extra techniques can take your photos to the next level. Equally important is knowing the common mistakes that can make a photo look amateurish. This section is about refining your craft and developing a discerning eye.
Advanced Techniques for a Polished Look
- Using Photoshop Actions: Actions are pre-recorded sets of editing steps that you can play back on any photo with a single click. There are many high-quality newborn photography actions available for purchase online. They can automate steps like skin smoothing and color toning, saving you time and giving your photos a consistent, professional look.
- The ‘Composite’ Image for Safety: Some classic newborn poses, like the ‘head in hands’ pose, are always created as a composite of two or more images. The baby is safely supported by a parent’s hand in each shot, and then the hands are edited out in Photoshop using layer masks. Never attempt a pose that leaves the baby unsupported. Learning basic compositing is a safe way to achieve these advanced looks.
- Black and White Conversion: A timeless black and white photo can be incredibly powerful. Don’t just desaturate the image. Use a Black & White Adjustment Layer in Photoshop. This allows you to control the brightness of the original colors, giving you rich, dynamic monochrome portraits. For example, you can darken the reds to make skin look smoother.
Common Mistakes and How to Avoid Them
Knowing what not to do is as crucial as knowing what to do. Here’s a quick reference guide to help you avoid common pitfalls.
| Common Mistake | The Professional Solution |
|---|---|
| Over-smoothing Skin | Never make a baby’s skin look like plastic. The goal is to reduce blemishes, not eliminate all texture. Always work on a separate layer and use tools at a low opacity (20-30%) so the natural skin texture shows through. |
| Unnatural, ‘Instagram Filter’ Colors | Stick to natural, warm skin tones. Avoid heavy-handed color filters that make the baby look orange or magenta. Use the Temperature and Tint sliders in Camera Raw for subtle, realistic adjustments. |
| Busy, Distracting Backgrounds | The baby is the star. Before you shoot, clear the clutter. A stray phone charger or a patterned pillow can ruin an otherwise perfect photo. If you can’t remove it, try to crop it out or use the Clone Stamp tool to carefully remove it in Photoshop. |
| Unsafe Posing | This is the most critical point. Never place a baby in a glass bowl, suspend them in a sling, or position them in any way that could compromise their breathing or stability. Stick to simple, grounded poses on a soft surface with a spotter always present. |
| Harsh Lighting and Shadows | This usually happens from using a direct flash or shooting in harsh sunlight. The solution is to always use soft, diffused natural light from a window. This creates gentle shadows that define the baby’s features beautifully without being distracting. |
By being mindful of these details, you’ll not only create more beautiful images but also ensure the entire process is a safe, positive, and loving experience for your family.
Conclusion
You’ve done it. You’ve learned how to transform a fleeting moment into a timeless treasure. By combining the incredible technology in your pocket with a little digital magic, you’ve empowered yourself to become your family’s first and most important storyteller. These images will be more than just beautiful pictures; they will be a testament to your love, your creativity, and those precious, quiet moments in the early days of parenthood.
Remember that perfection is not the goal. The most powerful photographs are not the ones with flawless skin or perfect lighting, but the ones that radiate emotion. It’s the photo of your partner’s hand gently cupping the baby’s head, the close-up of a tiny yawn, the peaceful expression on their face as they dream. These are the moments that matter.
Don’t put pressure on yourself to get it all right on the first try. Be patient with your baby, and be patient with yourself. This is a journey of learning and love. Cherish the process, celebrate your creations, and know that the love you pour into this project will shine through in every single photo you take. You have everything you need to capture the magic of this chapter beautifully.