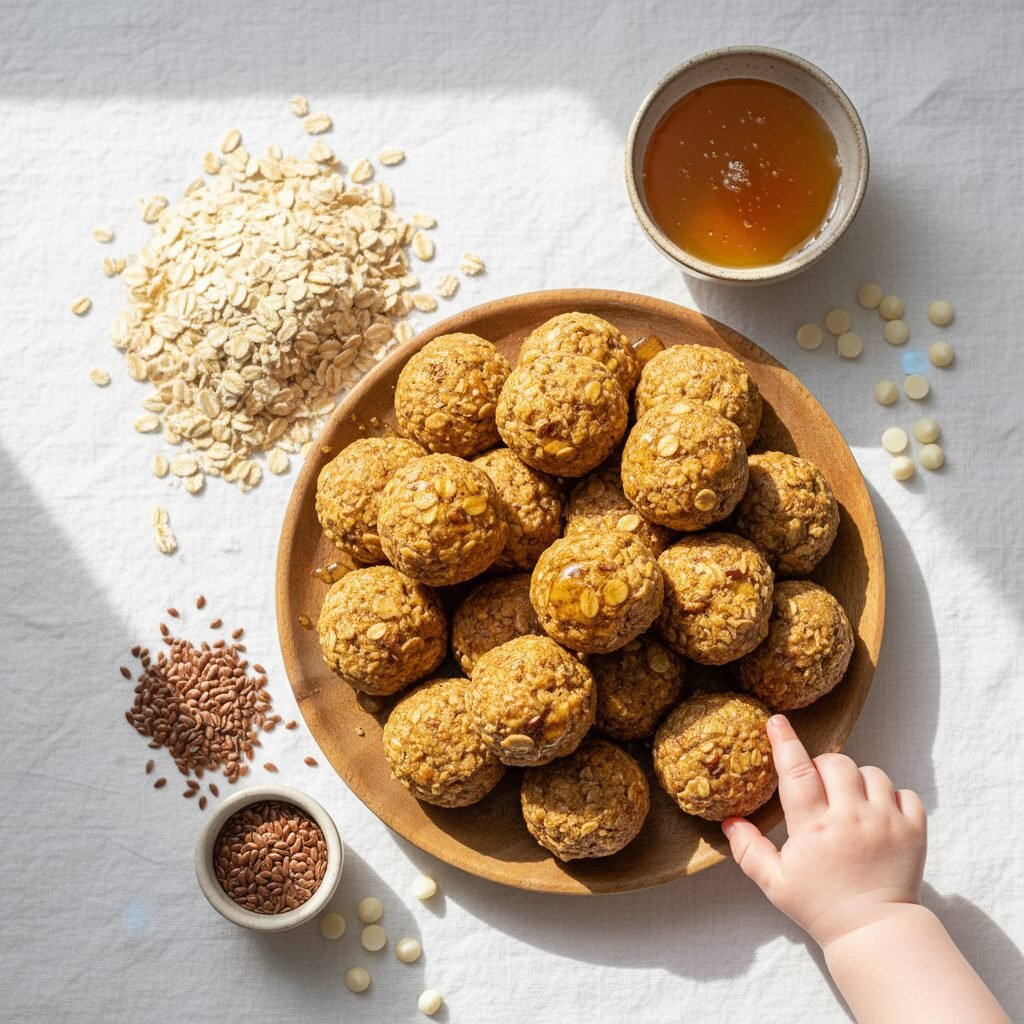
Milk Boosting Magic: 5 Minute No-Bake Lactation Bites Recipe
The journey of new parenthood is a whirlwind of profound love, sleepless nights, and constant learning. For breastfeeding mothers, one of the most common sources of anxiety is milk supply. Am I making enough? Is my baby getting what they need? These questions can be consuming. As a Doula and Maternal Health Educator, I want to assure you that you are not alone in these concerns, and there are gentle, supportive ways to nourish both yourself and your supply. That’s where these Milk Boosting Magic bites come in.
We understand that time is your most precious commodity. The thought of complex recipes is exhausting. This is why we’ve perfected a 5-minute, no-bake lactation bites recipe that is not only incredibly simple but also packed with ingredients traditionally used for centuries to support lactation. It’s a snack you can make with one hand while holding your baby in the other—a delicious, convenient tool in your postpartum toolkit. Let’s explore the science behind these powerful ingredients and create a treat that supports your body’s incredible work.
Understanding Galactagogues: The Science Behind Milk-Boosting Ingredients
Before we dive into the recipe, it’s empowering to understand why these ingredients are considered ‘magic’. The term for substances that may help increase milk production is galactagogues. While their effectiveness can vary from person to person, they are a cornerstone of nutritional support for lactating mothers worldwide. It’s important to remember that the most effective ways to establish and maintain a robust milk supply are frequent and effective milk removal (nursing or pumping), adequate hydration, and proper nutrition. These bites are a supplement to that foundation, not a replacement.
The Power Players in Our Recipe:
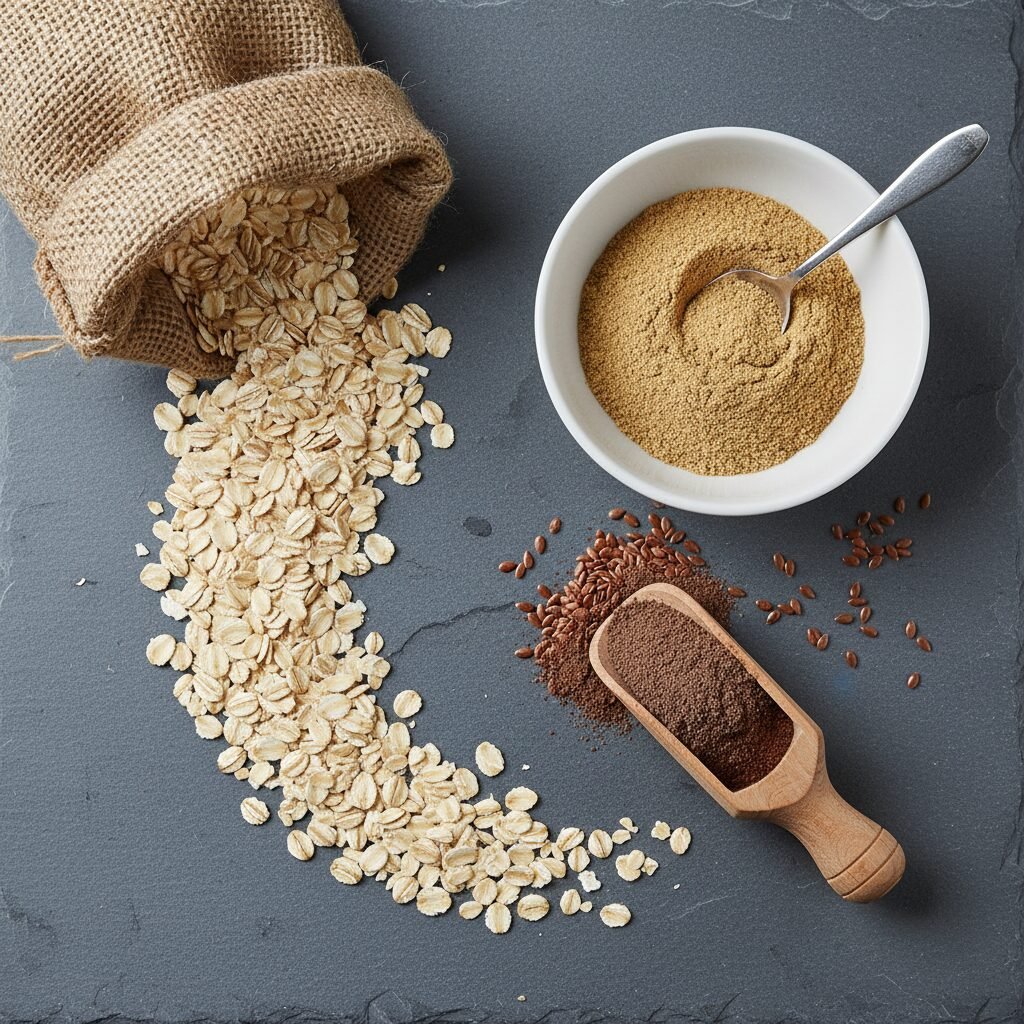
- Rolled Oats: Oats are a nutritional powerhouse. They are a fantastic source of iron, and low iron levels have been linked to reduced milk supply in some women. They are also rich in complex carbohydrates for sustained energy (a must for new parents!) and contain compounds called saponins, which are thought to have a positive impact on the hormones related to milk production.
- Brewer’s Yeast: Do not confuse this with nutritional yeast or baker’s yeast! Brewer’s yeast is a superfood packed with B-vitamins, iron, protein, and chromium. It has a long-standing reputation in the lactation community for its milk-boosting properties, though scientific studies are still catching up to anecdotal evidence. It does have a distinct, slightly bitter taste, so we balance it carefully in the recipe.
- Flaxseed Meal: Flaxseeds contain phytoestrogens, which are plant-based compounds that can mimic estrogen. They are also an excellent source of essential fatty acids, like omega-3s, which are crucial for a baby’s brain development and are passed through breast milk. Grinding them into a meal makes these nutrients more accessible to your body.
- Healthy Fats (Nut Butter): Healthy fats are vital for postpartum recovery and for creating rich, satisfying breast milk. Nut butters like almond or peanut butter provide protein and healthy fats, which contribute to the caloric needs of breastfeeding and help you feel full and energized.
“Nourishing the mother is the first step in nourishing the child. Simple, nutrient-dense foods can be a profound act of self-care during the postpartum period.”
The ‘Magic’ Ingredients & Equipment You’ll Need

Simplicity is key. You won’t need any fancy gadgets or hard-to-find ingredients. Most of these items are likely already in your pantry or can be easily found at your local grocery store. Brewer’s yeast is often in the health food aisle or can be purchased online.
Ingredients List:
- 2 cups Rolled Oats (Old-fashioned is best for texture, but quick oats work in a pinch)
- 1 cup Peanut Butter or Almond Butter (Choose a natural variety with no added sugar)
- 1/2 cup Honey or Maple Syrup
- 1/2 cup Ground Flaxseed Meal
- 1/4 cup Brewer’s Yeast
- 1 teaspoon Vanilla Extract
- Optional Add-ins: 1/2 cup of dark chocolate chips, shredded coconut, or chopped nuts.
Simple Equipment:
- A large mixing bowl
- A sturdy spatula or wooden spoon
- Measuring cups and spoons
- A baking sheet lined with parchment paper (for chilling)
- An airtight container for storage
The 5-Minute No-Bake Recipe: Step-by-Step Instructions
This is where the magic happens, and it truly couldn’t be easier. The goal is to get you a batch of delicious, supportive snacks with minimal effort. There’s no oven, no waiting for things to cool, just mixing, rolling, and chilling.
- Combine Wet Ingredients: In your large mixing bowl, add the peanut butter (or almond butter), honey (or maple syrup), and vanilla extract. Stir with your spatula until everything is well-combined and smooth.
- Add Dry Ingredients: Add the rolled oats, ground flaxseed meal, and brewer’s yeast to the bowl with the wet ingredients. If you’re using any optional add-ins like chocolate chips, add them now.
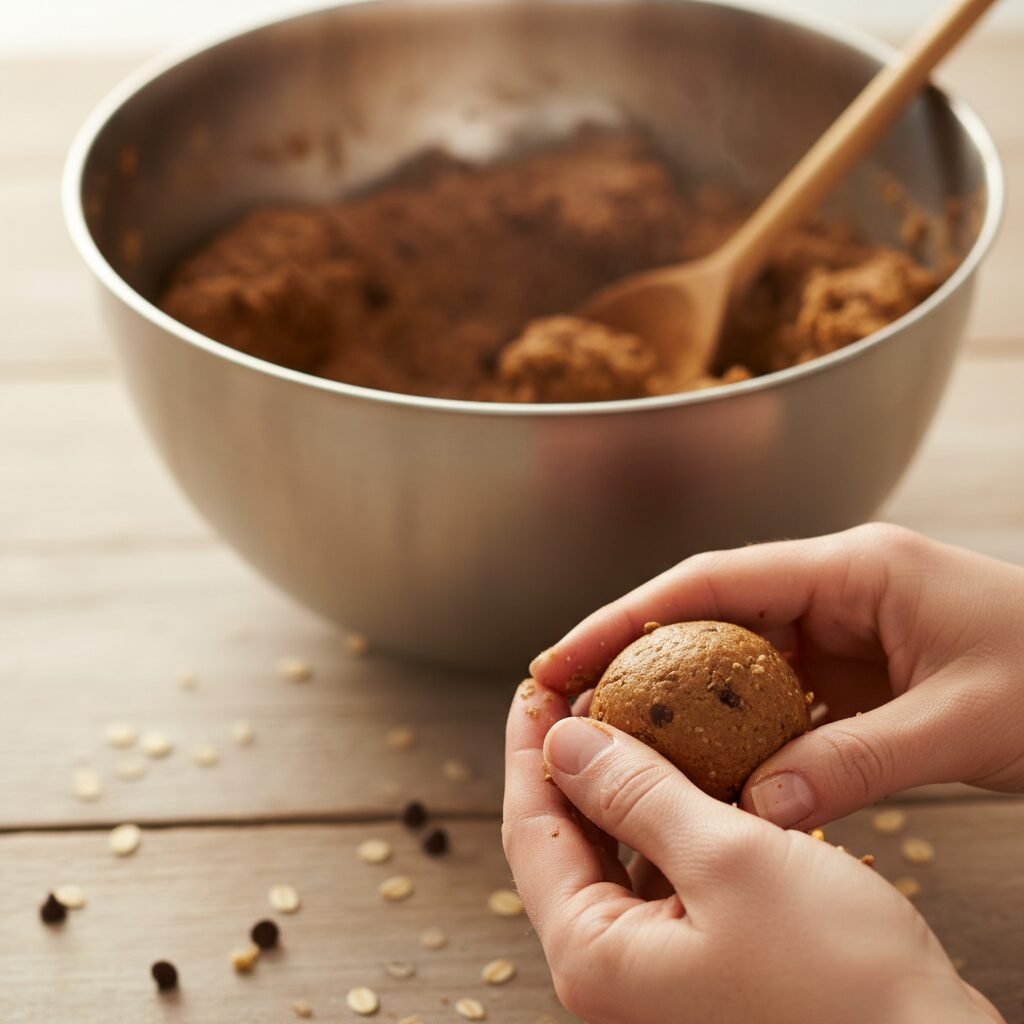
- Mix Thoroughly: This is the most ‘strenuous’ part! Use your spatula or spoon (or even clean hands) to mix everything together until a thick, uniform dough forms. If the mixture seems too dry, add another tablespoon of honey or nut butter. If it’s too sticky, add a few more oats.
- Roll into Bites: Scoop out about a tablespoon of the mixture at a time and roll it between your palms to form a ball, about 1-inch in diameter. Place the finished balls on your parchment-lined baking sheet.
- Chill to Set: Place the baking sheet in the refrigerator for at least 30 minutes to an hour. This helps the bites firm up and hold their shape. Once firm, they are ready to eat!
Customizing Your Bites & Smart Storage Solutions
One of the best things about this recipe is its versatility. You can easily adapt it to your taste preferences or dietary needs. Here are a few ideas to get you started, along with the best ways to keep your bites fresh.
Flavor Variations & Dietary Swaps:
- Nut-Free Option: For a nut-free version, substitute sunflower seed butter (SunButter) for the peanut or almond butter.
- Chocolate Cherry: Add 1/2 cup of dark chocolate chips and 1/2 cup of dried, chopped cherries for a decadent twist.
- Coconut Cream: Use almond butter, add 1/2 cup of unsweetened shredded coconut to the mix, and roll the finished balls in more coconut before chilling.
- Vegan-Friendly: Ensure you use maple syrup instead of honey and check that your optional add-ins (like chocolate chips) are dairy-free.
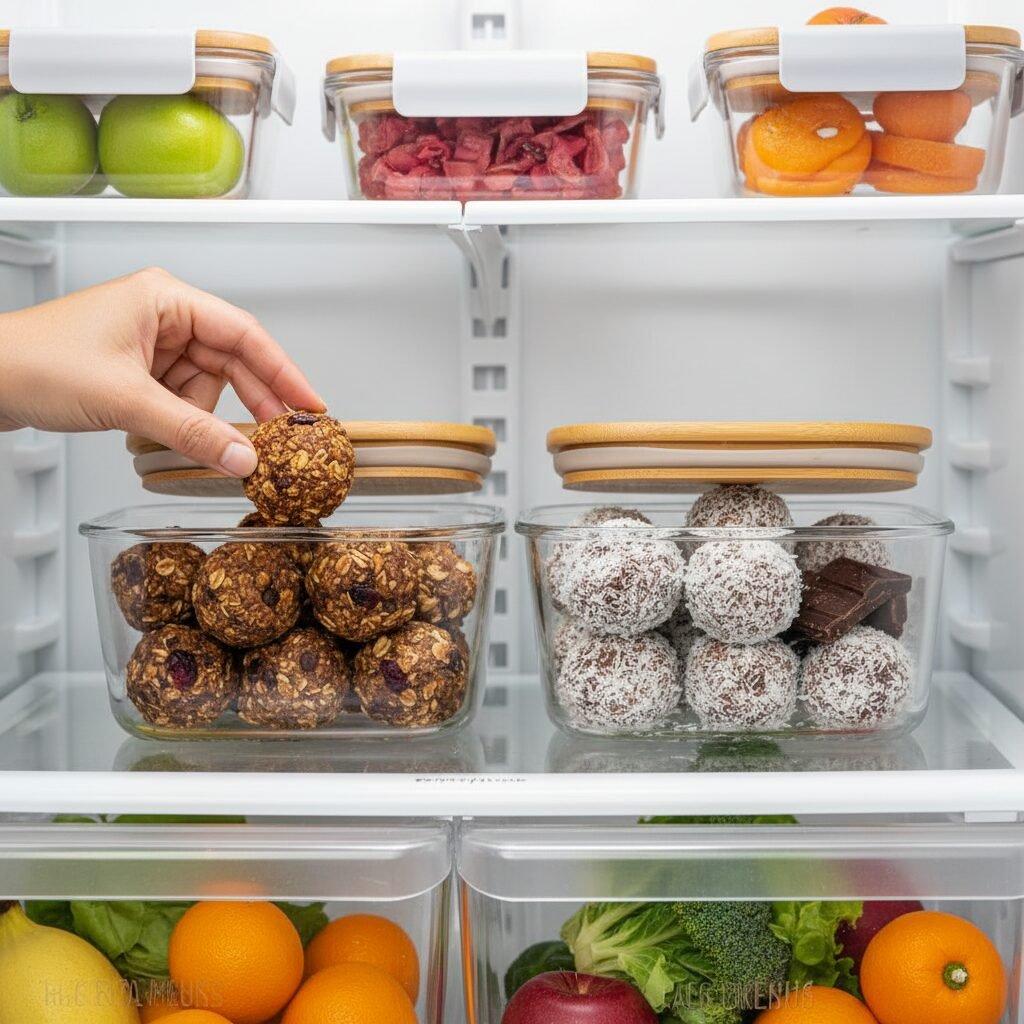
Storage Guide for Busy Parents:
Proper storage ensures you always have a quick snack ready when hunger strikes (which, for breastfeeding parents, is often!).
- In the Refrigerator: Store the finished bites in an airtight container in the refrigerator. They will stay fresh and delicious for up to two weeks.
- In the Freezer: These bites freeze beautifully! Place them in a single layer on the baking sheet and freeze until solid. Then, transfer them to a freezer-safe bag or container. They can be stored in the freezer for up to three months. You can eat them straight from the freezer for a firmer, chewier treat or let them thaw for a few minutes at room temperature.
Beyond the Bites: A Holistic Approach to Supporting Milk Supply

While these lactation bites are a wonderful tool, it’s crucial to view them as part of a larger, holistic approach to lactation. True milk supply is a matter of supply and demand, supported by your overall well-being. Think of these bites as one piece of a beautiful puzzle.
The Pillars of Milk Production:
- Frequent & Effective Milk Removal: This is the single most important factor. Whether you are nursing directly or pumping, your body makes more milk in response to milk being removed. Aim to nurse or pump at least 8-12 times in a 24-hour period, especially in the early weeks. Ensure your baby has a deep, comfortable latch or that your pump flanges are the correct size.
- Hydration: Breast milk is about 88% water. You don’t need to force fluids, but a good rule of thumb is to drink to thirst. Keep a large water bottle with you wherever you nurse or pump as a visual reminder.
- Adequate Nutrition & Calories: Your body needs an extra 400-500 calories per day to produce milk. Focus on a balanced diet rich in whole foods—lean proteins, healthy fats, fruits, vegetables, and complex carbs. These lactation bites are a perfect way to get in some of those extra, nutrient-dense calories.
- Rest and Stress Management: This is often the hardest part for new parents. Stress and exhaustion can inhibit the hormones responsible for milk let-down. Accept help when it’s offered. Sleep when the baby sleeps, even if it’s just for 20 minutes. Practice deep breathing. Your well-being is not a luxury; it’s a necessity.
If you have persistent concerns about your milk supply, please do not hesitate to reach out for professional help. An International Board Certified Lactation Consultant (IBCLC) is the gold standard for lactation care and can provide personalized, evidence-based support for you and your baby.
Conclusion
Embracing the postpartum period is about finding small, meaningful ways to care for yourself as you care for your new baby. This 5-minute no-bake lactation bites recipe is more than just a snack; it’s a simple act of self-nourishment. It’s a way to fuel your body with wholesome ingredients, support your lactation goals, and reclaim a few precious moments for yourself in the beautiful chaos of new parenthood. Remember to be gentle with yourself, trust your body, and know that you are doing an incredible job.
Disclaimer: The information provided in this article is for educational purposes only and is not a substitute for professional medical advice, diagnosis, or treatment. While the ingredients in this recipe are traditionally used to support lactation, you should always consult with your healthcare provider or a certified lactation consultant (IBCLC) for personalized advice regarding your health and milk supply.


