
How To Make Stunning Breast Milk Jewelry At Home For Under $20
The journey of parenthood is filled with countless precious moments, and for many, breastfeeding stands out as a uniquely intimate and powerful experience. It’s a period of deep connection, nurturing, and unwavering dedication, creating a bond that words often fail to capture. As a Doula and Maternal Health Educator, I’ve witnessed firsthand the profound significance this journey holds for new parents. While the memories are etched in our hearts, there’s a growing desire to create tangible reminders of this fleeting, yet foundational, chapter.
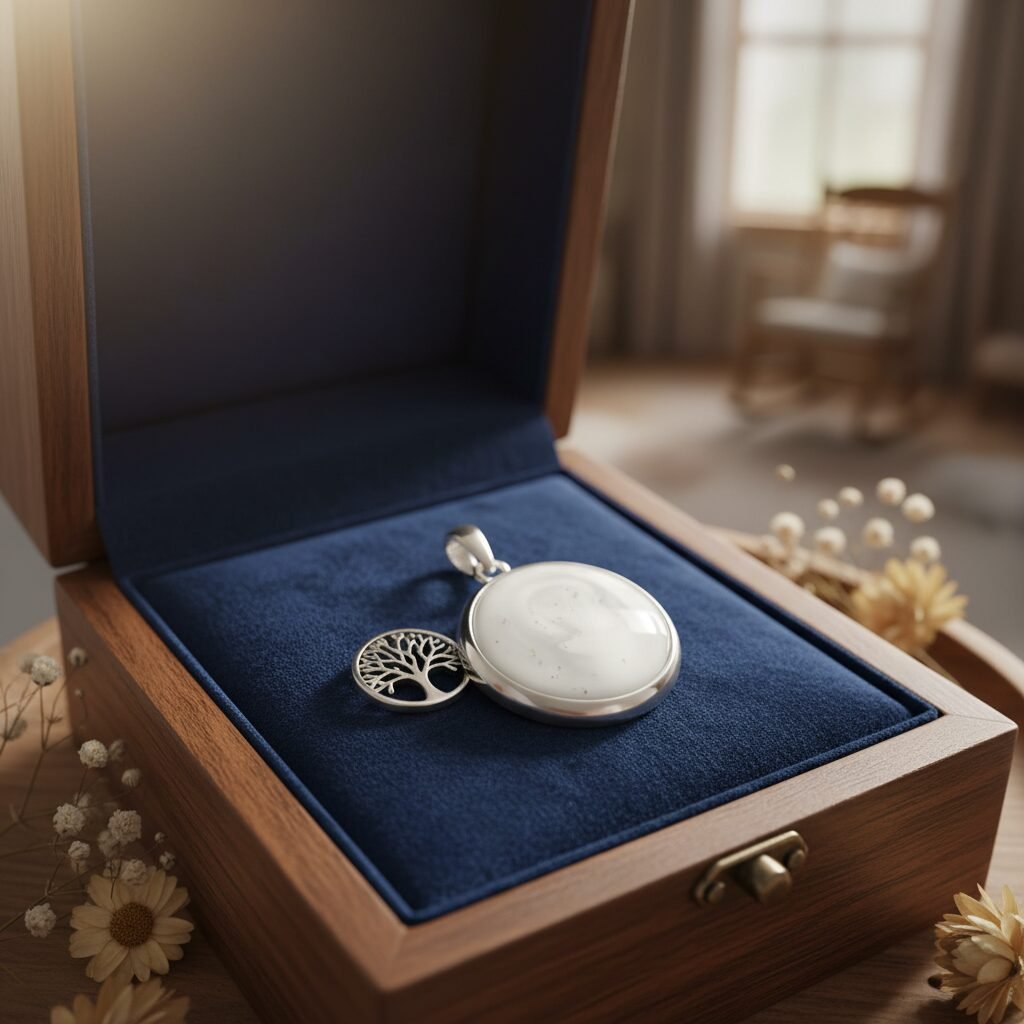
Enter breast milk jewelry – a beautiful, increasingly popular way to commemorate this special time. These bespoke pieces serve as a wearable symbol of love, sacrifice, and the incredible bond between a parent and child. While professional services can be costly, the good news is that crafting your own stunning breast milk jewelry at home is not only achievable but can also be incredibly affordable, often for under $20. This guide is designed to walk you through every step, transforming your precious breast milk into a timeless keepsake that you and your family will cherish for generations. Let’s embark on this creative and deeply meaningful journey together.
Why Create Breast Milk Jewelry? A Timeless Keepsake of Love

For new parents, the decision to breastfeed, or even the attempt, is often a deeply personal and emotional one. It’s a commitment that involves physical demands, emotional highs and lows, and an unparalleled level of intimacy with your baby. This period, though sometimes challenging, is incredibly significant, fostering a unique bond that strengthens with every feeding. Breast milk jewelry offers a profound way to honor and remember this extraordinary chapter.
Think of it as a tangible anchor to those fleeting moments: the quiet nights spent nursing, the comfort and nourishment you provided, and the incredible resilience of your body. It’s not merely a piece of adornment; it’s a narrative, a whisper of a time when you were everything to your little one. For mothers, it’s a celebration of their incredible strength and nurturing spirit. For partners, it’s a beautiful tribute to the mother’s dedication and a shared memory of their family’s early days.
Creating this jewelry yourself adds another layer of meaning. It’s an act of love, a mindful process that allows you to reflect on your journey as you transform a precious bodily fluid into a beautiful, lasting symbol. It’s an opportunity to connect with your experience, to honor your body, and to celebrate the unique bond you share with your child, all while crafting something truly unique and personal. This keepsake will serve as a constant reminder of the love, effort, and joy woven into your breastfeeding story, long after the nursing days are over.
Gathering Your Materials: The Under $20 Essential Toolkit
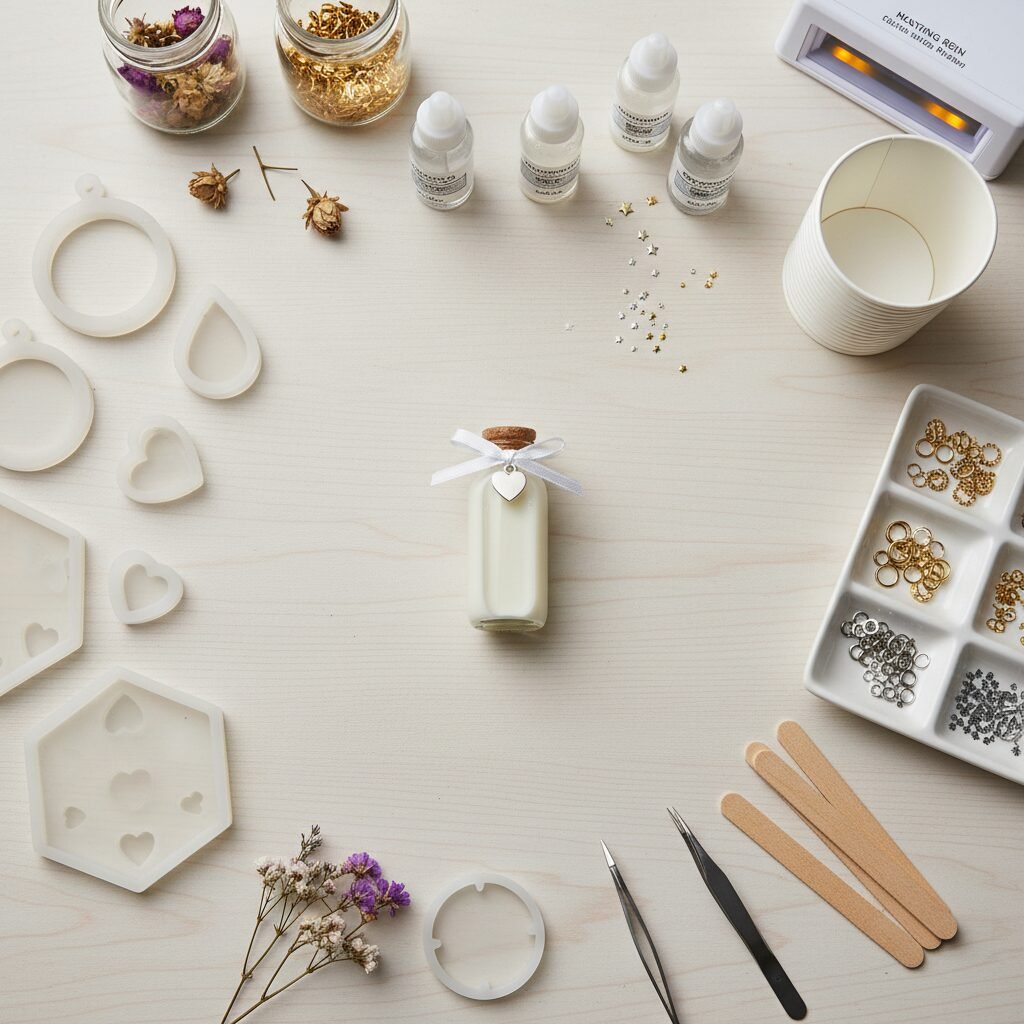
One of the most appealing aspects of DIY breast milk jewelry is its affordability. With a little resourcefulness, you can gather all the necessary supplies for under $20. The key is to select budget-friendly options without compromising on the quality of your finished piece. Here’s what you’ll need:
Essential Supplies List:
- Breast Milk (10-15ml): Fresh or frozen milk works perfectly. Even a small amount is sufficient.
- Breast Milk Preservation Powder/Kit (Approx. $5-$10): This is crucial. Look for borax (sodium tetraborate) or specific breast milk preservation powders available online. These powders help solidify and prevent spoilage.
- Clear Resin (UV Resin or Epoxy Resin – Approx. $5-$15 for small quantities):
- UV Resin: Cures quickly under a UV lamp or strong sunlight. Great for small, quick projects. A small bottle can be very affordable.
- Epoxy Resin: A two-part liquid that mixes together and cures over 12-72 hours. Often more durable but requires precise mixing. Small starter kits are budget-friendly.
- Silicone Jewelry Molds (Approx. $2-$5 for a set): Look for small, versatile molds like spheres, hearts, squares, or bezels. Etsy or Amazon have many affordable options.
- Mixing Cups & Stir Sticks (Approx. $1-$3 for a pack): Small disposable plastic cups or silicone cups and wooden stir sticks are ideal.
- Jewelry Findings (Approx. $3-$7 for a starter set): This includes:
- Bezels: Metal frames to hold your resin piece.
- Jump Rings: Small metal rings to connect components.
- Necklace Chains: Basic silver or gold-plated chains.
- Earring Hooks: For making earrings.
- Pliers (Optional, but Recommended): Basic jewelry pliers for opening/closing jump rings.
- Disposable Gloves: To protect your hands from resin.
- Parchment Paper or Silicone Mat: To protect your work surface.
- Optional Embellishments (Under $5 total): Fine glitter, mica powder for shimmer, or tiny dried flowers can add a personal touch.
By sourcing these items from craft stores, online marketplaces, or even dollar stores for basic tools, you can easily stay within your budget. Remember, quality over quantity is key for resin and preservation powder, but other items can be found very affordably.
The Preservation Process: Transforming Milk into a Solid Gem
This is the most critical step in creating lasting breast milk jewelry. Proper preservation ensures your keepsake remains beautiful and stable for years to come. The goal is to solidify and dehydrate the milk, creating a fine powder that can be mixed into resin. Please follow these steps carefully:
-
Prepare Your Workspace:
Choose a clean, well-ventilated area. Lay down parchment paper or a silicone mat to protect your surfaces. Gather all your preservation materials, including your breast milk, preservation powder, measuring spoons, and a small, heat-safe glass bowl or jar.
-
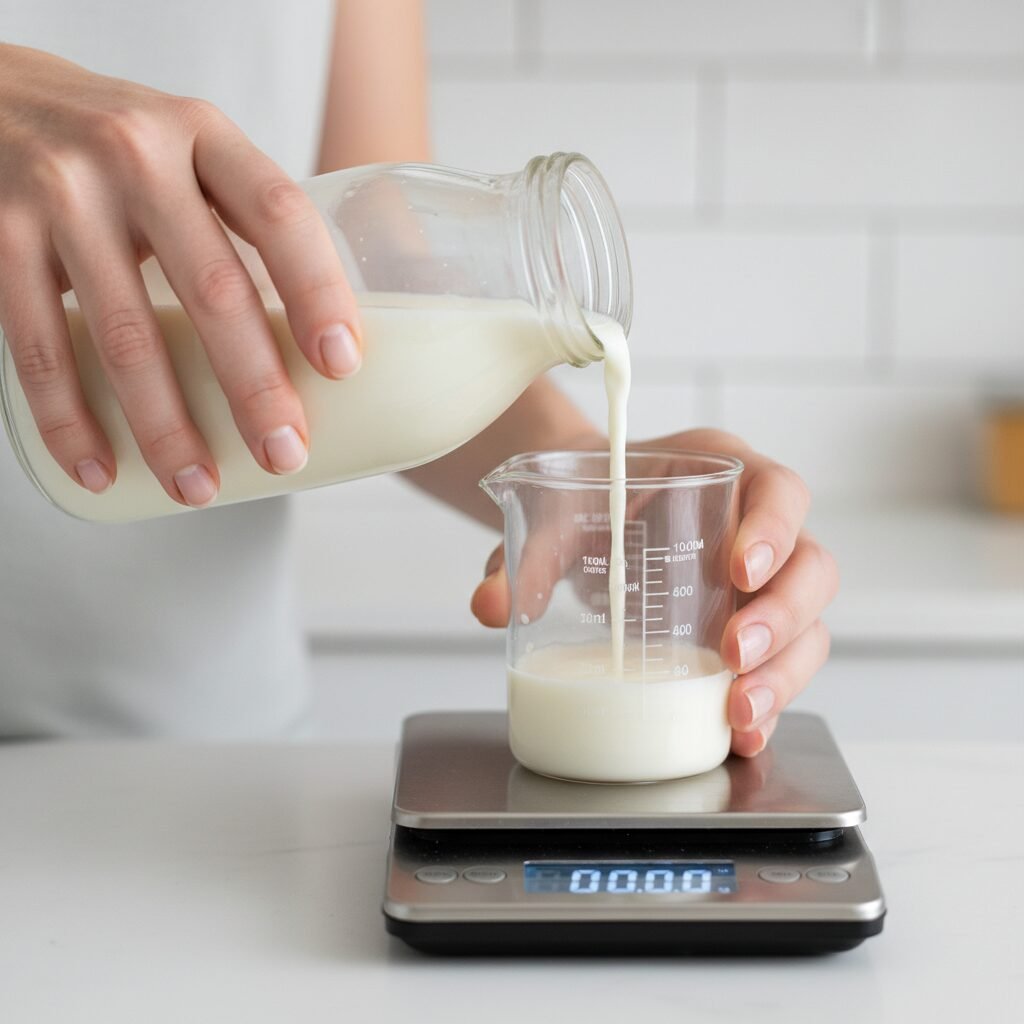
Measure Your Breast Milk:
You’ll typically need about 5-10ml of breast milk. While an exact measurement isn’t always critical, consistency helps. If using frozen milk, thaw it completely in the refrigerator.
-
Introduce the Preservation Powder:
Slowly add your chosen preservation powder (e.g., borax or a specialized kit’s powder) to the breast milk. The ratio is usually around 1 part powder to 5-10 parts milk, but always follow the specific instructions of your preservation powder. Stir continuously and gently with a clean stir stick. You will notice the milk beginning to coagulate and thicken. This is a natural chemical reaction where the milk proteins bind with the powder.
-
Gentle Heating (Optional, but Recommended for Thoroughness):
For some methods, gently heating the mixture can aid in complete coagulation and sterilization. If heating, use a double boiler method: place your glass bowl with the milk mixture over a pot of simmering water. Stir constantly over low heat for 5-10 minutes, or until the mixture forms a thick, curdy paste. Do not boil the milk directly, as this can scorch it and affect its color. Remove from heat once a solid, curd-like consistency is achieved.
-
Allow to Dry Completely:
This step requires patience. Spread the thickened breast milk mixture thinly onto a piece of parchment paper or a silicone mat. Place it in a dry, dust-free area away from direct sunlight. Depending on your climate, this could take 24-72 hours. To speed up the process, you can use a food dehydrator on its lowest setting (around 100-110°F or 40-45°C) for several hours, or a very low oven (e.g., 150°F or 65°C) with the door slightly ajar, checking frequently to prevent browning. The goal is bone-dry, crumbly pieces.
-
Grind into a Fine Powder:
Once completely dry, the preserved milk should be hard and brittle. Carefully transfer the dried pieces into a clean mortar and pestle or a small, dedicated coffee grinder. Grind the pieces into the finest powder possible. The finer the powder, the smoother and more uniform your finished jewelry will be. Sift the powder through a fine mesh sieve if necessary to remove any larger chunks. Store this precious powder in an airtight container until you’re ready to mix it with resin.
Crafting Your Keepsake: Step-by-Step Jewelry Assembly
With your breast milk preserved and transformed into a fine powder, you’re now ready for the exciting part: creating your jewelry! This process involves mixing the preserved milk with resin and carefully pouring it into your chosen molds. Remember to work in a clean, well-ventilated space and wear gloves.
-
Prepare Your Resin:
- For Epoxy Resin: Carefully measure Part A and Part B according to the manufacturer’s instructions (usually a 1:1 or 2:1 ratio by volume). Mix them thoroughly but gently for 3-5 minutes, scraping the sides and bottom of your mixing cup. Improper mixing can lead to uncured or sticky resin.
- For UV Resin: No mixing is required. It comes ready to use.
-
Incorporate Breast Milk Powder:
Once your resin is mixed (if using epoxy), slowly add your preserved breast milk powder. Start with a small amount (e.g., a pinch for a small pendant) and mix it thoroughly into the resin. The more powder you add, the more opaque and ‘milky’ your final piece will be. Experiment with ratios in a small test batch if you’re unsure. Aim for a consistency that is still pourable but visibly milky. If desired, this is also the stage to mix in any glitter, mica powder, or tiny dried flowers.
-
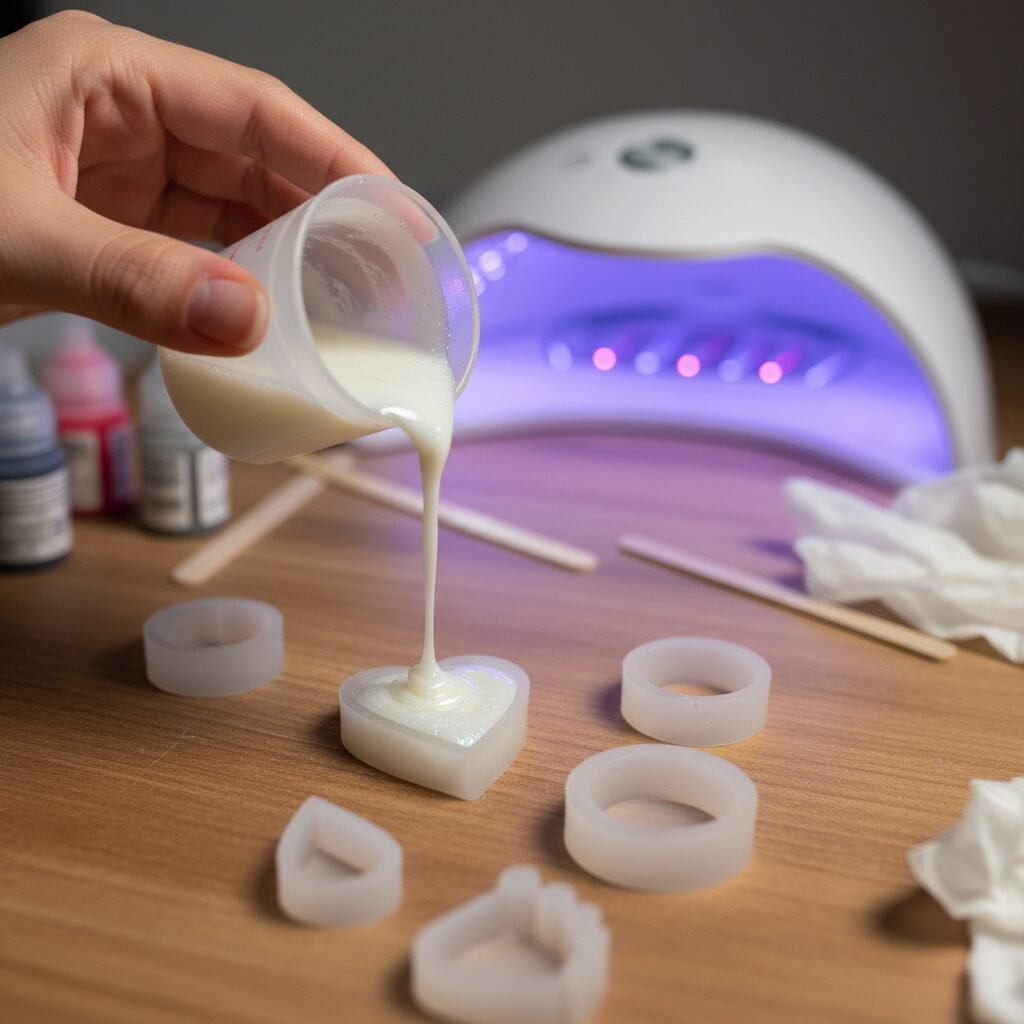
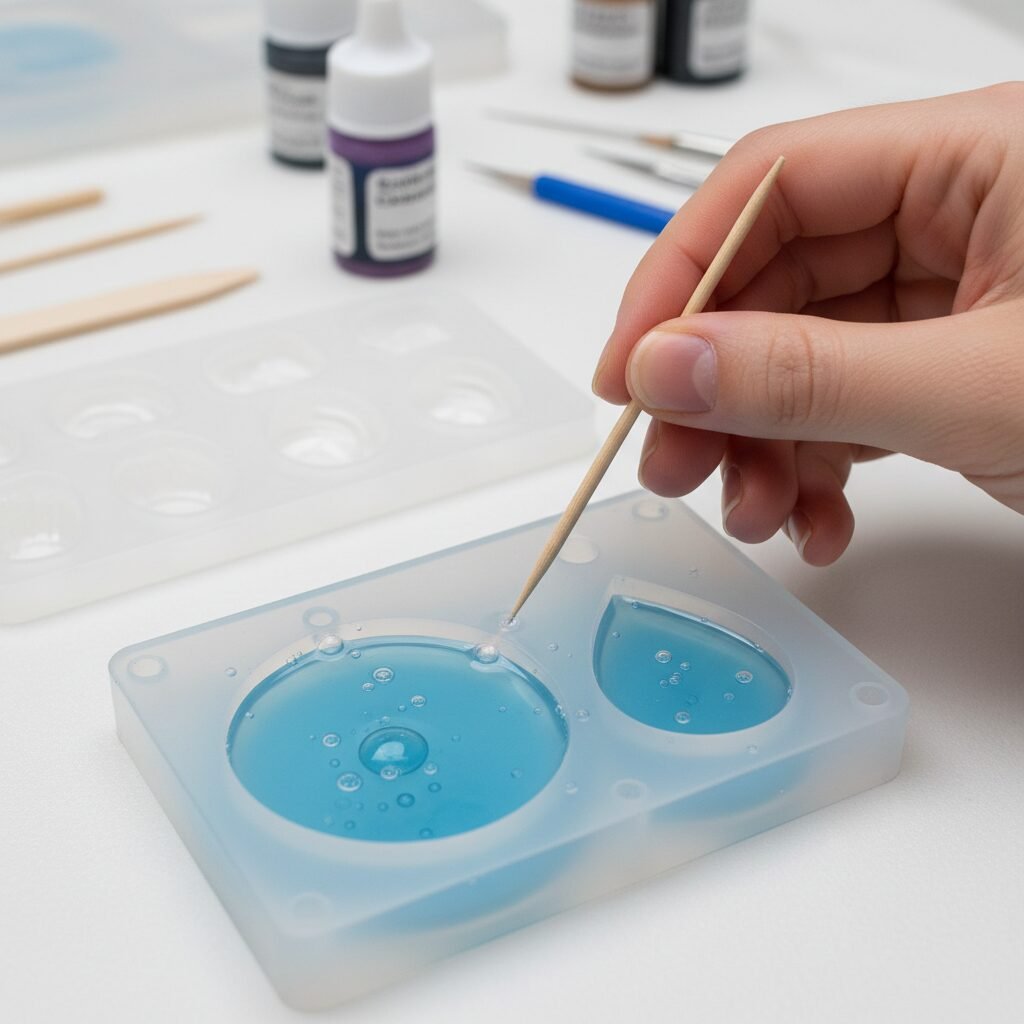
Fill Your Molds or Bezels:
Carefully pour the resin-milk mixture into your silicone molds or bezels. Fill them slowly to minimize bubbles. For bezels, you might pour in layers, allowing each layer to partially cure before adding the next, especially if you’re embedding items. Use a toothpick or a fine-tipped tool to gently guide the resin into all corners and to pop any surface bubbles.
-
Curing Your Jewelry:
- For UV Resin: Place your mold or bezel under a UV lamp. Cure for 2-5 minutes, depending on the lamp’s wattage and the thickness of your piece. If you don’t have a UV lamp, strong direct sunlight can also cure UV resin, but it will take longer (10-30 minutes, depending on sun intensity).
- For Epoxy Resin: Place your molds in a dust-free, warm, and dry area. Epoxy resin typically takes 12-24 hours to cure to a touch-dry state and 72 hours for a full, hard cure. Avoid disturbing the pieces during this time.
-
Demolding and Finishing:
Once fully cured, carefully demold your pieces from the silicone molds. If using bezels, your piece is likely already set in place. Inspect your jewelry for any rough edges or imperfections. You can gently sand rough edges with fine-grit sandpaper (e.g., 400-800 grit) and then polish with a soft cloth. For extra shine, you can apply a thin top coat of clear resin and cure it.
-
Attach Jewelry Findings:
Using your jewelry pliers, open the jump rings and attach your finished breast milk gem to necklace chains, earring hooks, or other findings. Ensure all connections are secure. If you’ve used bezels, you might need a strong jewelry adhesive to secure the resin piece firmly within the bezel, though often the resin itself acts as the adhesive if poured correctly.
Congratulations! You’ve just created a unique and deeply meaningful piece of breast milk jewelry. Take a moment to admire your handcrafted keepsake, a testament to your incredible journey.
Troubleshooting & Tips for Stunning Results
Even with careful preparation, DIY crafting can sometimes present challenges. Don’t be discouraged if your first attempt isn’t perfect! Here are common issues and expert tips to help you achieve professional-looking results:
Common Issues and How to Solve Them:
- Bubbles in Your Resin:
Bubbles are a common culprit for imperfect resin pieces. They can appear during mixing or pouring.
- Solution: When mixing epoxy resin, stir slowly and deliberately. After pouring, gently exhale over the surface (the CO2 helps pop bubbles), or use a toothpick to manually remove them. A quick, gentle pass with a heat gun or torch (held far away, for just a second) can also bring bubbles to the surface and pop them. For UV resin, bubbles are less common but can be removed with a toothpick before curing. Warming your epoxy resin bottles in a warm water bath before mixing can also reduce viscosity and thus bubbles.
- Yellowing of the Resin/Milk:
Over time, some resins can yellow, and improper milk preservation can also lead to discoloration.
- Solution: Ensure your breast milk is preserved thoroughly and dried completely before mixing with resin. Use high-quality, UV-resistant resin, especially if the jewelry will be exposed to sunlight. Store your finished jewelry away from direct sunlight.
- Incomplete Curing or Sticky Resin:
This is usually a sign of incorrect resin mixing or insufficient curing time/light.
- Solution: For epoxy resin, ensure you are measuring Part A and Part B precisely according to the manufacturer’s instructions (using a digital scale for accuracy is best for weight-based ratios). Mix thoroughly for the recommended time. For UV resin, ensure your UV lamp is strong enough and that you’re curing for the full recommended duration. If a piece is slightly tacky, try placing it under the UV lamp for an extended period or in direct sunlight for a full day.
Expert Tips for Success:
- Work in a Dust-Free Environment: Dust particles can easily settle on wet resin and get permanently trapped. Work in a clean room, perhaps after running a humidifier, or use a cover to protect your curing pieces.
- Use High-Quality Resin: While we’re aiming for under $20, investing a little more in a reputable brand of resin can make a significant difference in clarity, durability, and yellowing resistance.
- Practice on Non-Precious Materials First: If you’re new to resin crafting, do a few practice runs with regular glitter or colored powder before using your precious breast milk powder. This helps you get a feel for mixing, pouring, and curing.
- Patience is Key: Don’t rush any step, especially the preservation and curing phases. Rushing can lead to disappointing results.
- Document Your Process: Keep notes on the ratios of milk powder to resin, curing times, and any specific techniques you used. This helps you replicate successful results or troubleshoot future issues.
- Consider a Top Coat: For extra protection and shine, apply a very thin layer of clear resin (either UV or epoxy) as a final top coat after your piece has fully cured.
- Safety First: Always wear gloves when handling resin, and work in a well-ventilated area to avoid inhaling fumes.
By keeping these tips in mind, you’ll be well on your way to creating beautiful, professional-quality breast milk jewelry that you’ll be proud to wear and cherish.
Caring for Your Cherished Breast Milk Jewelry
Congratulations on creating a truly unique and meaningful keepsake! To ensure your breast milk jewelry remains as stunning as the day you made it, proper care and maintenance are essential. Resin, while durable, can be susceptible to certain environmental factors. Following these guidelines will help preserve its beauty and integrity for years to come.
- Avoid Prolonged Direct Sunlight: While UV light cures resin, continuous exposure to strong sunlight can cause some resins to yellow or become brittle over time. Store your jewelry in a cool, dry place, ideally in a jewelry box or pouch, when not wearing it.
- Keep Away from Harsh Chemicals: Perfumes, lotions, hairsprays, household cleaners, and even some hand sanitizers can react with resin, causing discoloration or damage. Always put on your jewelry after applying cosmetics and remove it before cleaning or swimming.
- Clean Gently: To clean your breast milk jewelry, simply wipe it with a soft, damp cloth. For a deeper clean, a mild soap solution can be used, but ensure you rinse it thoroughly with clean water and dry it completely immediately afterward. Avoid abrasive cleaners or harsh scrubbing, which can scratch the resin surface.
- Store Properly: When not being worn, store your jewelry in an individual pouch or a compartment within a jewelry box. This prevents it from scratching against other pieces and minimizes exposure to dust and humidity.
- Remove Before Water Activities: Although resin is water-resistant, it’s best to remove your jewelry before showering, swimming, or engaging in any prolonged water exposure. This prevents potential water damage to the resin or any metal findings.
- Handle with Care: While resin is durable, it’s not indestructible. Avoid dropping your jewelry on hard surfaces or subjecting it to extreme impacts, which could cause chipping or cracking.
By following these simple care instructions, your handcrafted breast milk jewelry will continue to be a beautiful and cherished reminder of your unique breastfeeding journey, a timeless symbol of love and connection that you can wear with pride.
Conclusion
Creating breast milk jewelry at home is more than just a craft project; it’s an intimate act of love, a tangible celebration of a deeply personal and transformative journey. From the tender moments of nursing to the incredible dedication involved, your breastfeeding experience is unique, powerful, and worthy of being cherished forever. By following this guide, you’ve gained the knowledge and confidence to transform those precious memories into a beautiful, wearable keepsake, all for under $20.
This handcrafted piece is a testament to your strength, your nurturing spirit, and the unbreakable bond you share with your child. It’s a whisper of love, a symbol of resilience, and a reminder of a fleeting yet profound chapter in your parenting story. As a Doula and Maternal Health Educator, I encourage you to embrace this creative process, allowing it to be another meaningful step in honoring your unique path. Wear your breast milk jewelry with pride, knowing it’s not just an adornment, but a story, a memory, and a piece of your heart, beautifully preserved for a lifetime.


