Don’t Throw It Away! 5 Cute Ways to Preserve Your Positive Test Forever
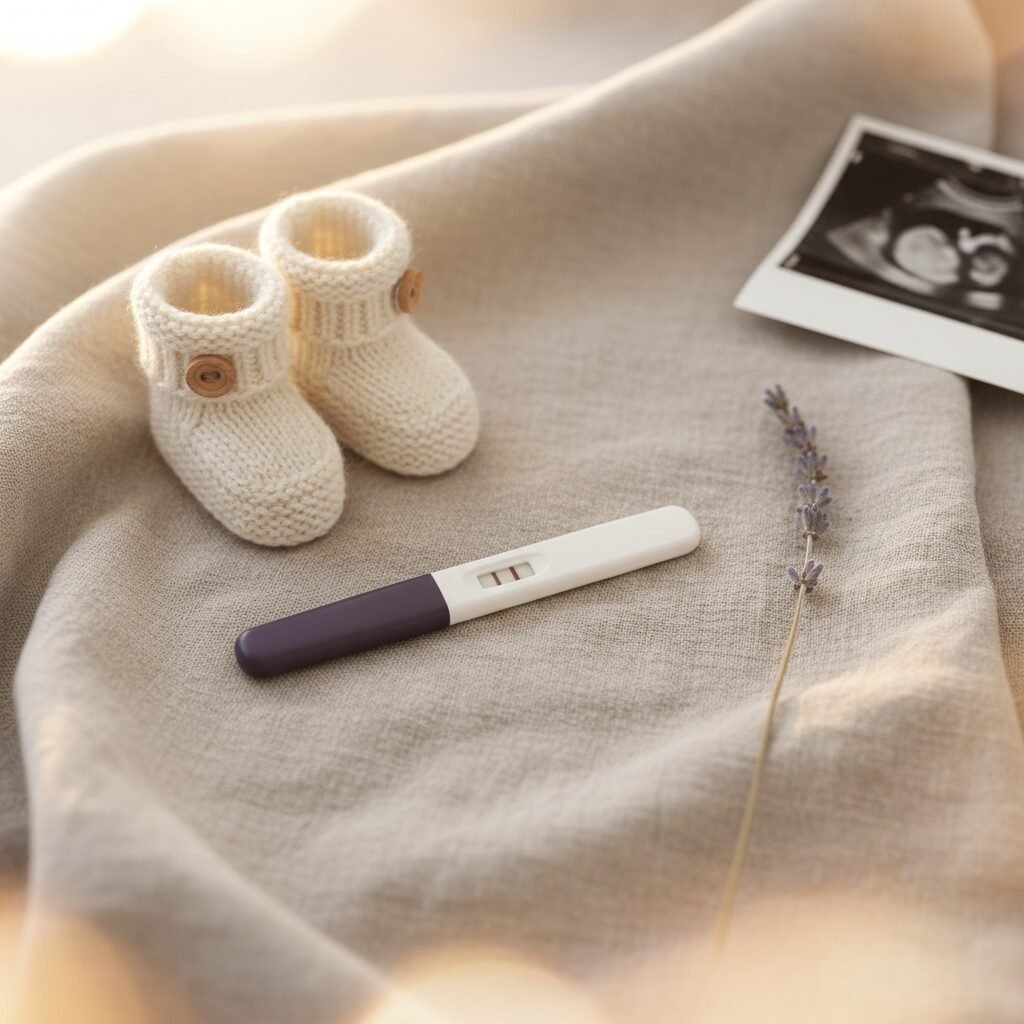
There are moments in life that are truly transformative, moments that cleave time into a definitive ‘before’ and ‘after.’ For many, seeing those two pink lines, that digital ‘Pregnant,’ or that simple plus sign is one of those moments. It’s a rush of disbelief, joy, fear, and overwhelming love, all condensed into a single glance at a small plastic stick. In an instant, your future rearranges itself into a beautiful new shape.
After the initial shock and celebration, a practical question often arises: what do you do with the test? It feels too significant to throw away, yet too personal to leave on the bathroom counter. For many couples on the path to parenthood, especially those who have navigated the challenging road of trying to conceive, this object is a powerful symbol of hope realized. It’s the very first proof of the tiny life you’ve been dreaming of.
As a doula and maternal health educator, I’ve seen firsthand how important these early milestones are. They are the anchors that ground you during the whirlwind of pregnancy and the sleepless nights of new parenthood. Preserving that first positive test is about more than just holding onto a piece of plastic; it’s about honoring the beginning of your story. It’s the first page of your child’s life, a tangible reminder of the moment your family began to grow. So, before you tuck it away in a drawer or reluctantly toss it in the bin, consider transforming it into a beautiful keepsake you can cherish forever. Here are five heartfelt ways to do just that.
More Than Plastic: Why This Memento Matters

Before we dive into the creative methods, let’s take a moment to honor why this small object holds such immense emotional weight. In our digital world, we have few tangible artifacts of life’s biggest moments. A positive pregnancy test is a physical, real-world confirmation that everything is about to change. It’s a private victory, a shared secret between partners before the rest of the world is let in.
For the new dad or non-birthing partner, it’s often the very first piece of evidence that makes the abstract concept of a baby feel breathtakingly real. It’s something they can hold, look at, and connect with. For the person who took the test, it’s the validation of weeks of waiting, wondering, and hoping. It’s the culmination of a journey that may have been long, emotional, and filled with uncertainty.
This little test is your first family heirloom. It’s a testament to your journey, a symbol of your love, and the very first artifact of your child’s existence.
Years from now, when your child is running through the house, this keepsake can be a touchstone. It can be a way to start the conversation about where they came from, a story you tell them about the day you knew they were coming. During challenging moments in pregnancy or parenting, looking at this simple confirmation can remind you of the profound joy and anticipation you felt at the very beginning. It’s a powerful anchor to the love that started it all.
Preparation is Key: How to Safely Clean and Preserve Your Test
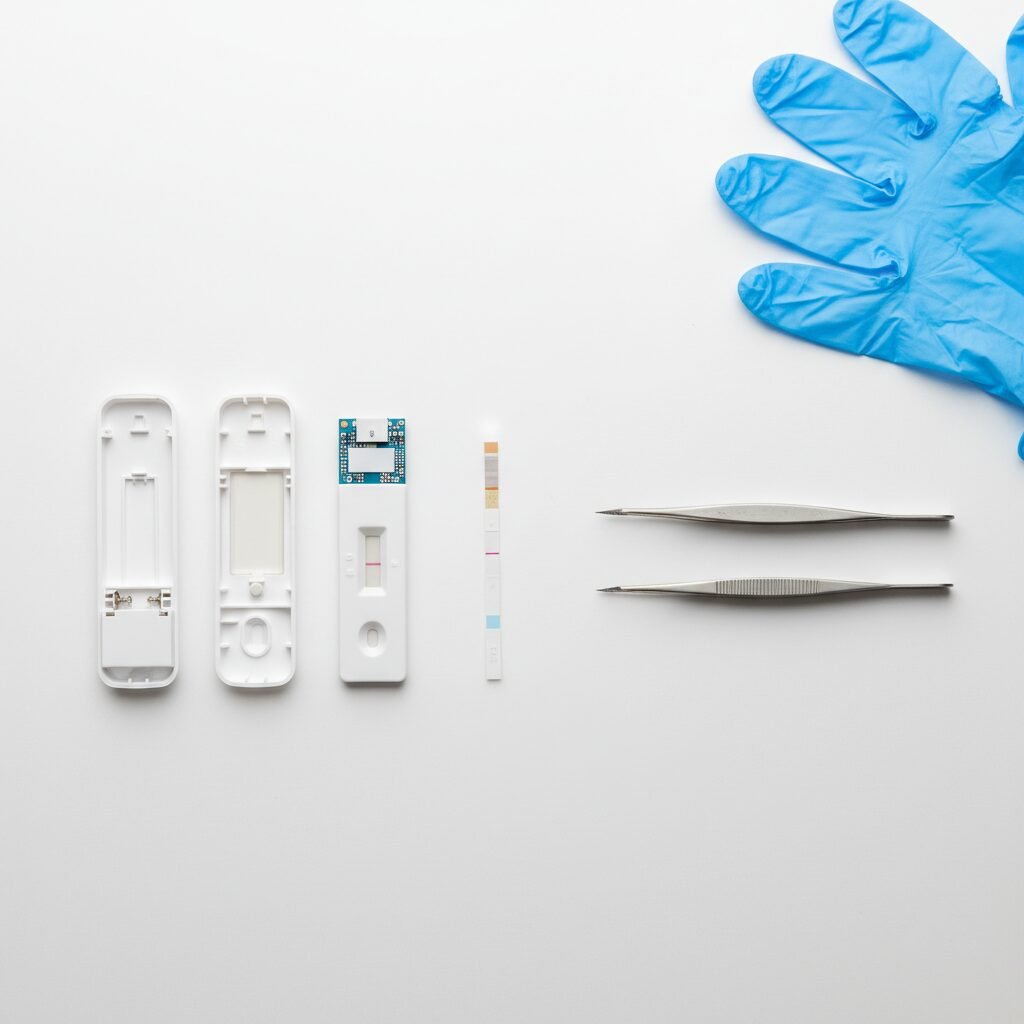
Before you can turn your pregnancy test into a lasting memento, it’s crucial to prepare it properly. This step is non-negotiable, as it ensures your keepsake remains clean, safe, and beautiful for years to come, preventing any discoloration, mold, or unpleasant odors. While it might seem a bit clinical, this process is simple and essential for long-term preservation.
Materials You’ll Need:
- Your positive pregnancy test
- Small pliers or a flathead screwdriver
- Disposable gloves
- Tweezers
- A clean, dry cloth or paper towel
Step-by-Step Preservation Guide:
- Put on Gloves: Start by putting on a pair of disposable gloves. While the test is likely dry, it’s always best practice for hygiene.
- Disassemble the Casing: Most pregnancy tests are housed in a plastic shell. Carefully use small pliers or a flathead screwdriver to gently pry the casing open at the seams. It should pop open into two halves. Be gentle to avoid cracking the plastic if you plan to use it.
- Identify the Test Strip: Inside, you will find the absorbent tip and the paper test strip—this is the part with the control and test lines that you want to preserve. It’s the ‘brains’ of the operation.
- Carefully Remove the Strip: Using a pair of clean tweezers, gently lift the paper test strip out of the plastic housing. Avoid touching it with your fingers. The strip contains the dye that formed your precious lines.
- Let it Air Dry Completely: Place the test strip on a clean, dry paper towel in a well-ventilated area, away from direct sunlight (which can fade the lines over time). Let it air dry for at least 24-48 hours. This step is critical to ensure all moisture is gone, which prevents any potential for mold growth.
- Clean the Casing (Optional): If your chosen keepsake method involves using the original plastic casing, you can wipe it down with a gentle disinfectant wipe and let it air dry completely as well.
A Word of Caution: Do not use water or harsh cleaning chemicals directly on the paper test strip itself. This can cause the dye lines to bleed, fade, or disappear entirely. The key is simply to let it dry out thoroughly and naturally.
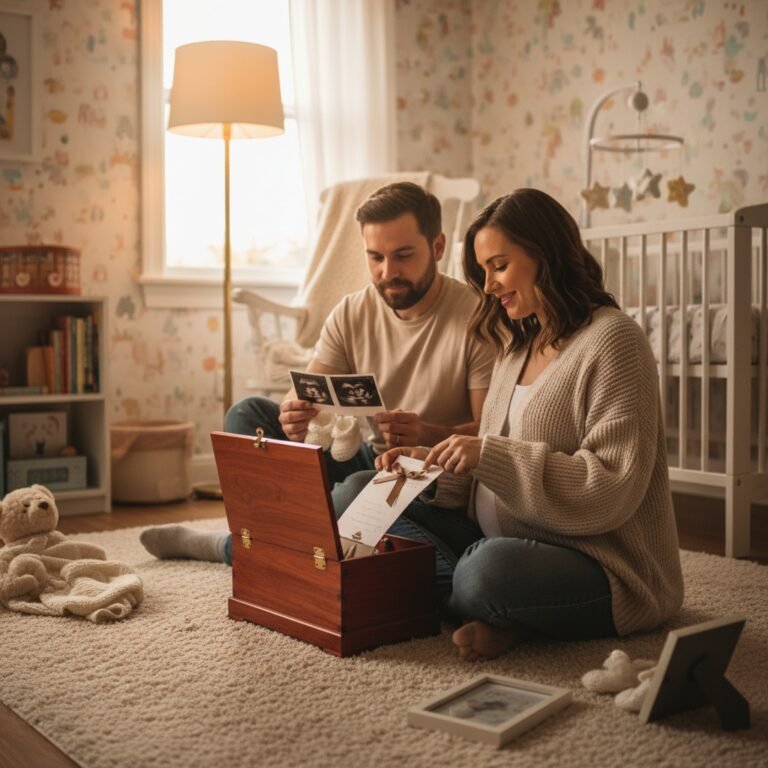
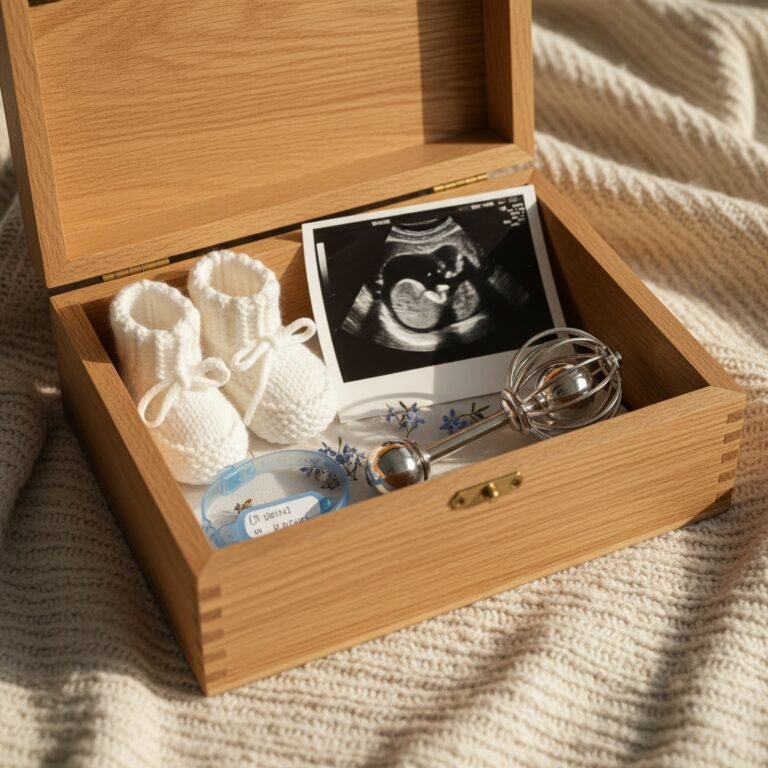
Idea #1: The Shadow Box Chronicle
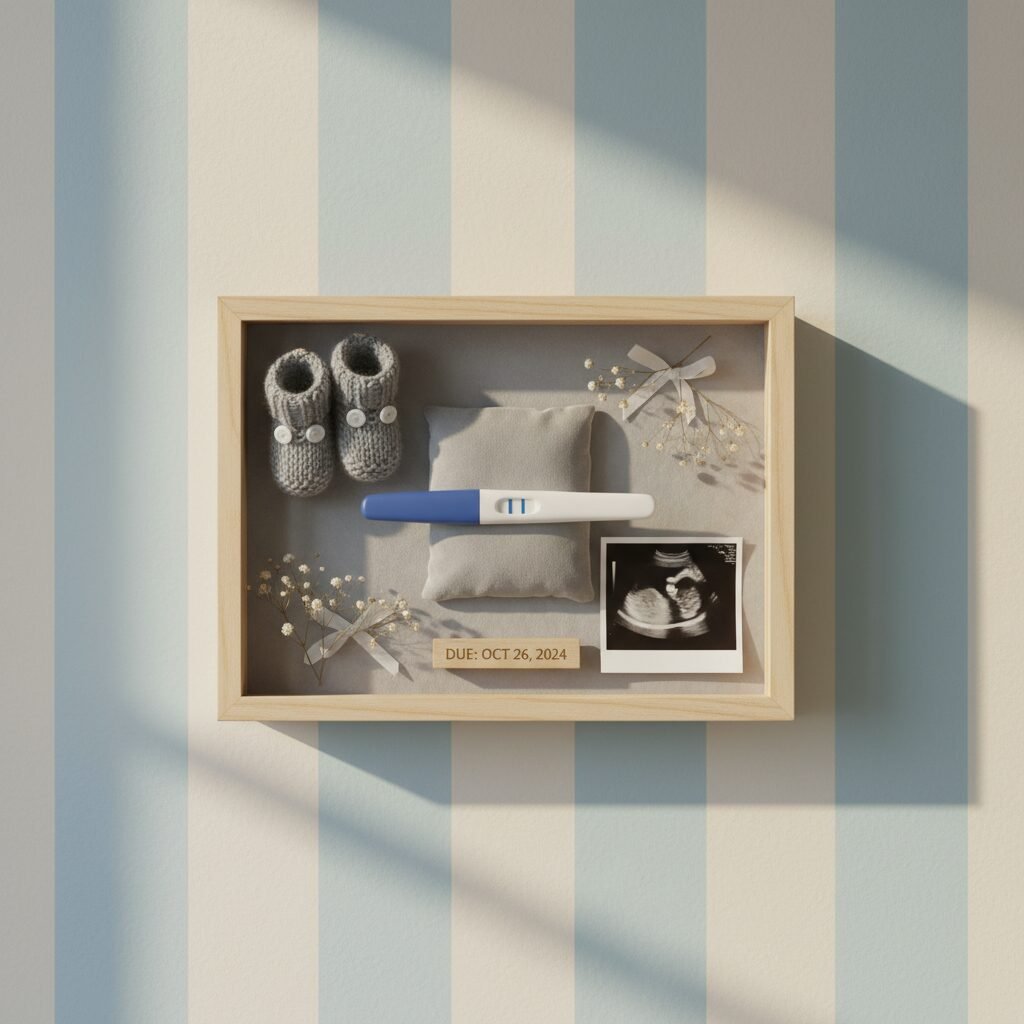
A shadow box is a classic and beautiful way to create a visual narrative of your journey’s beginning. It allows you to contextualize the pregnancy test by surrounding it with other meaningful items, turning a single memento into a rich, multi-dimensional story.
Creating Your Story:
The beauty of a shadow box is its versatility. You can make it as simple or as elaborate as you wish. Start with a box that fits your home’s decor—they come in various sizes, depths, and finishes, from rustic wood to modern black.
Use a small dab of acid-free craft glue or a glue dot to secure the prepared test strip (or the reassembled test) to the backing of the shadow box. Then, build the story around it. Consider adding:
- The First Sonogram Photo: The first grainy, black-and-white picture of your baby is the perfect companion to the test.
- Hospital Bracelets: If you’re creating this after the birth, your and your baby’s hospital bracelets add a powerful touch.
- Tiny Keepsakes: A pair of baby’s first booties, a pacifier, or their first tiny hat.
- Announcement Items: The card you used to announce your pregnancy, or a small wooden sign that says “Coming Soon” or “And Then There Were Three.”
- A Calendar Page: Circle the date you found out, or the baby’s due date.
Arrange the items artfully, playing with depth and layout. This chronicle becomes a beautiful piece of nursery decor or a cherished display in your home, forever capturing the magic of those first few weeks.
Idea #2: Encased in Time with Resin Art
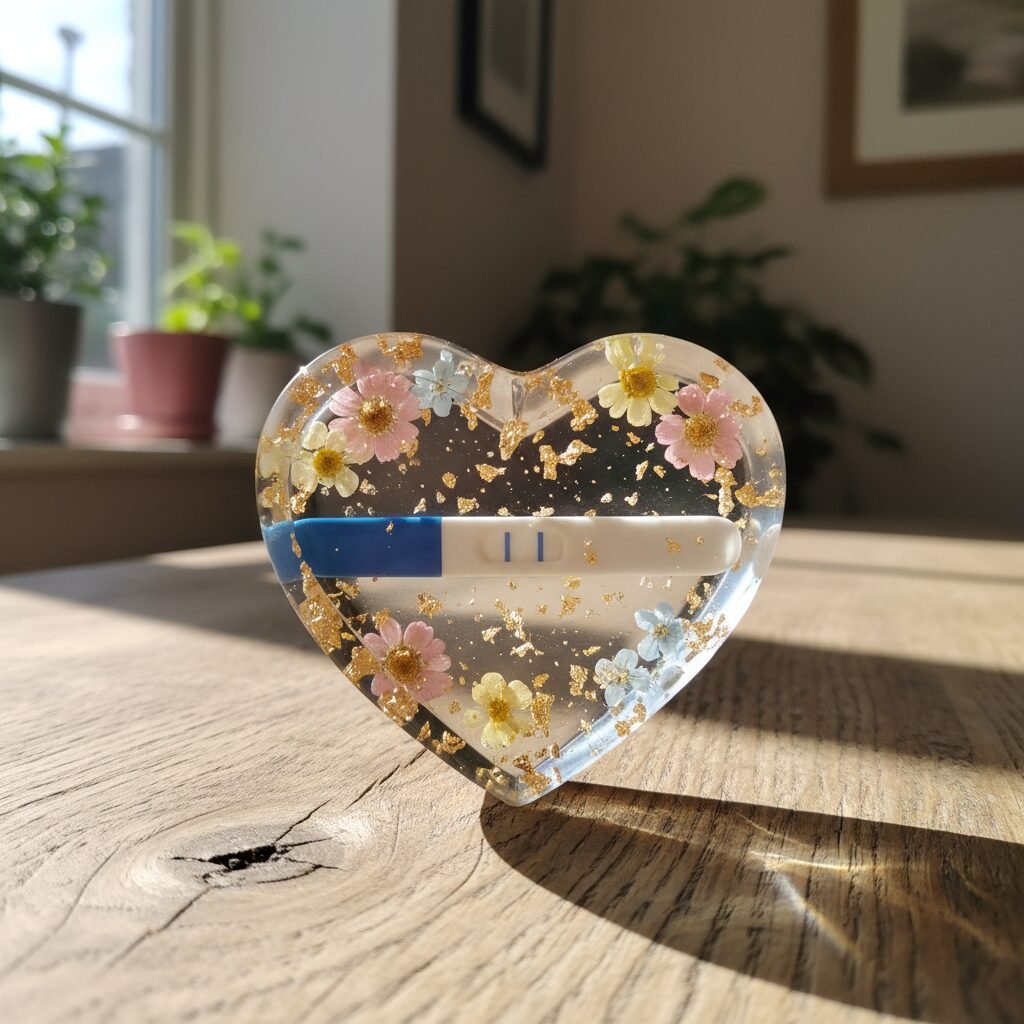
For a modern and incredibly durable keepsake, consider encasing your pregnancy test strip in epoxy resin. This method creates a crystal-clear, permanent memento that can be shaped into a paperweight, a decorative tile, or a small sculpture. It magnifies the test strip, preserving it flawlessly and protecting it from air, moisture, and time.
The Resin Process:
Working with resin requires care and attention to detail, but the results are stunning. You will need a two-part epoxy resin kit, a silicone mold in your desired shape (heart, square, and circle are popular choices), and any decorative elements you wish to include.
Safety First: Always work in a well-ventilated area and wear gloves and eye protection, as resin can be irritating before it cures.
- Follow the kit’s instructions to mix the resin and hardener precisely.
- Pour a thin base layer into your mold and let it set slightly. This prevents your items from sinking to the bottom.
- Gently place your fully dried test strip onto the semi-set layer using tweezers.
- Add other delicate elements. Dried flowers that match your nursery theme, flakes of gold or silver leaf, or fine, iridescent glitter can add a touch of magic.
- Slowly pour the remaining resin over the top, ensuring the test strip is fully submerged. Use a toothpick to pop any air bubbles that rise to the surface.
- Let the resin cure completely according to the manufacturer’s instructions, which can take 24-72 hours.
The result is a solid, glass-like object that holds your precious memory suspended in time. It’s a sophisticated and artistic way to honor the moment your life changed.
Idea #3: A Yearly Reminder: The Holiday Ornament
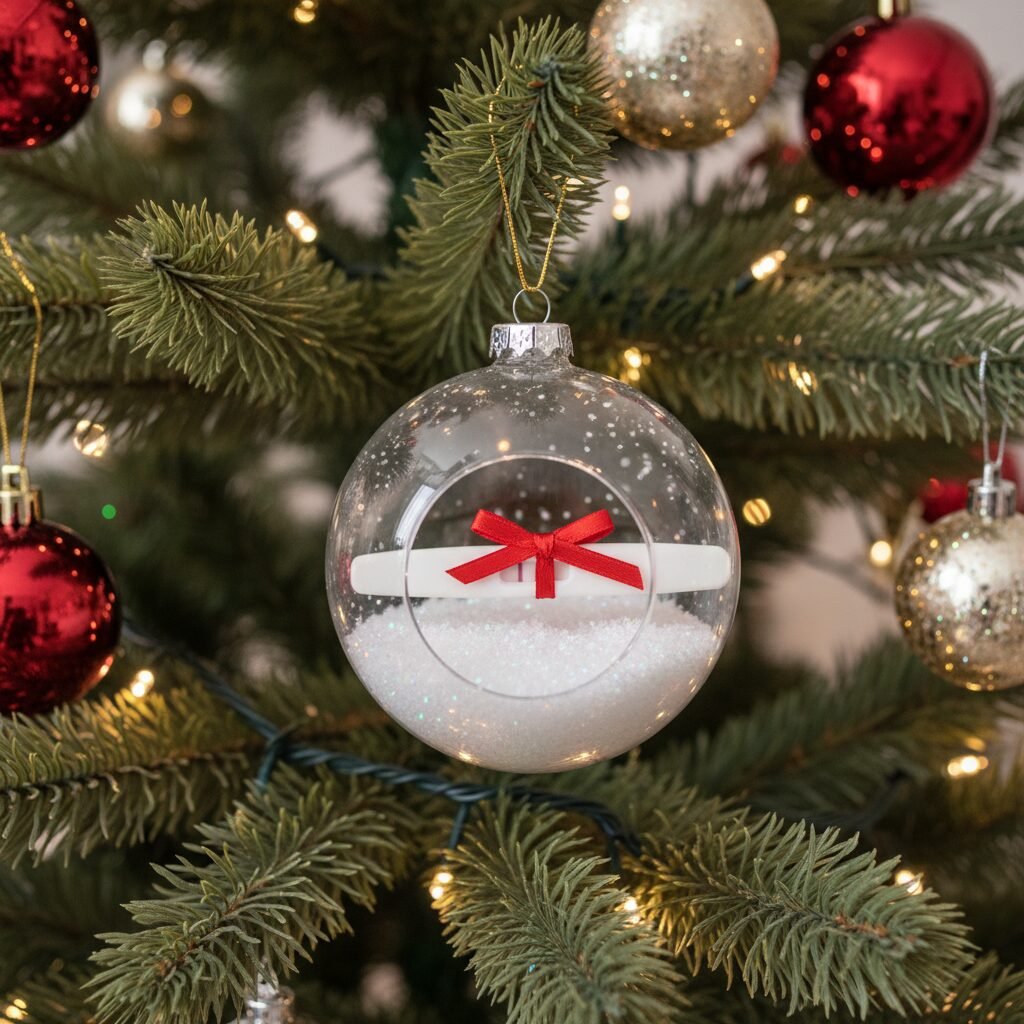
Imagine, years from now, decorating your holiday tree with your child and telling them the story of a very special ornament—the one that represents the year you found out they were coming. Turning your positive test into a holiday ornament creates a beautiful family tradition.
Crafting Your Ornament:
This is one of the simplest yet most meaningful methods. You will need a clear, fillable ornament, which can be found at any craft store. They come in glass or plastic and various shapes.
Carefully roll the dried test strip (or keep it flat if the ornament’s opening allows) and slide it inside. From there, you can personalize it to your heart’s content:
- Fill the ornament with iridescent fake snow or glitter that matches your holiday decor.
- Add tiny beads or pearls in pink, blue, or a neutral gold.
- Roll up a miniature copy of your first sonogram and tie it with a thin ribbon to place alongside the test.
- Use a paint pen to write the year or “Expected [Year]” on the outside of the ornament.
Finish it by tying a beautiful velvet or satin ribbon to the top for hanging. Each year, as you unpack your decorations, you’ll be greeted by this sweet reminder of the greatest gift you ever received. It’s a tradition that grows in meaning with each passing year.
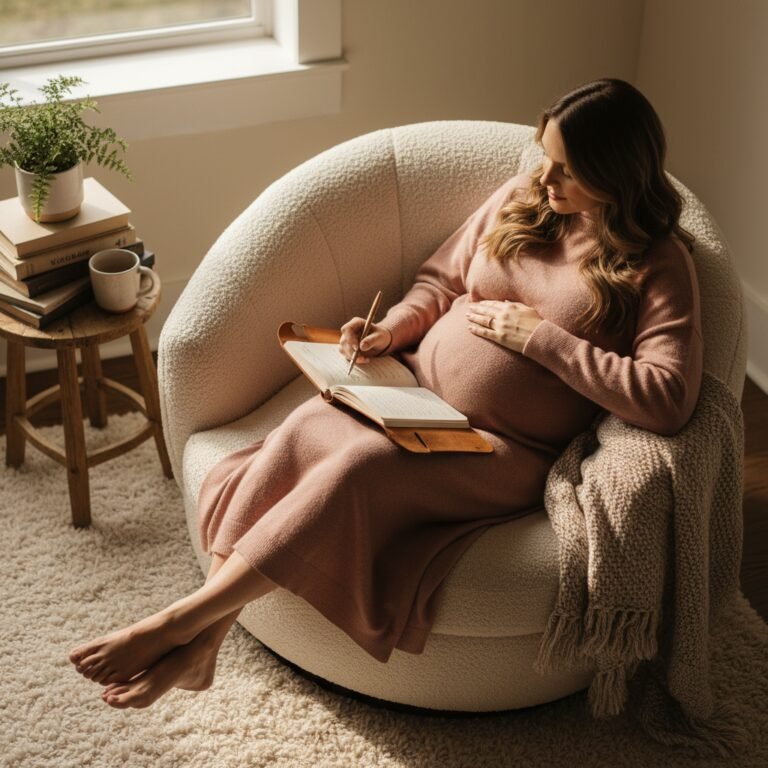
Idea #4: The First Chapter: A Scrapbook Dedication
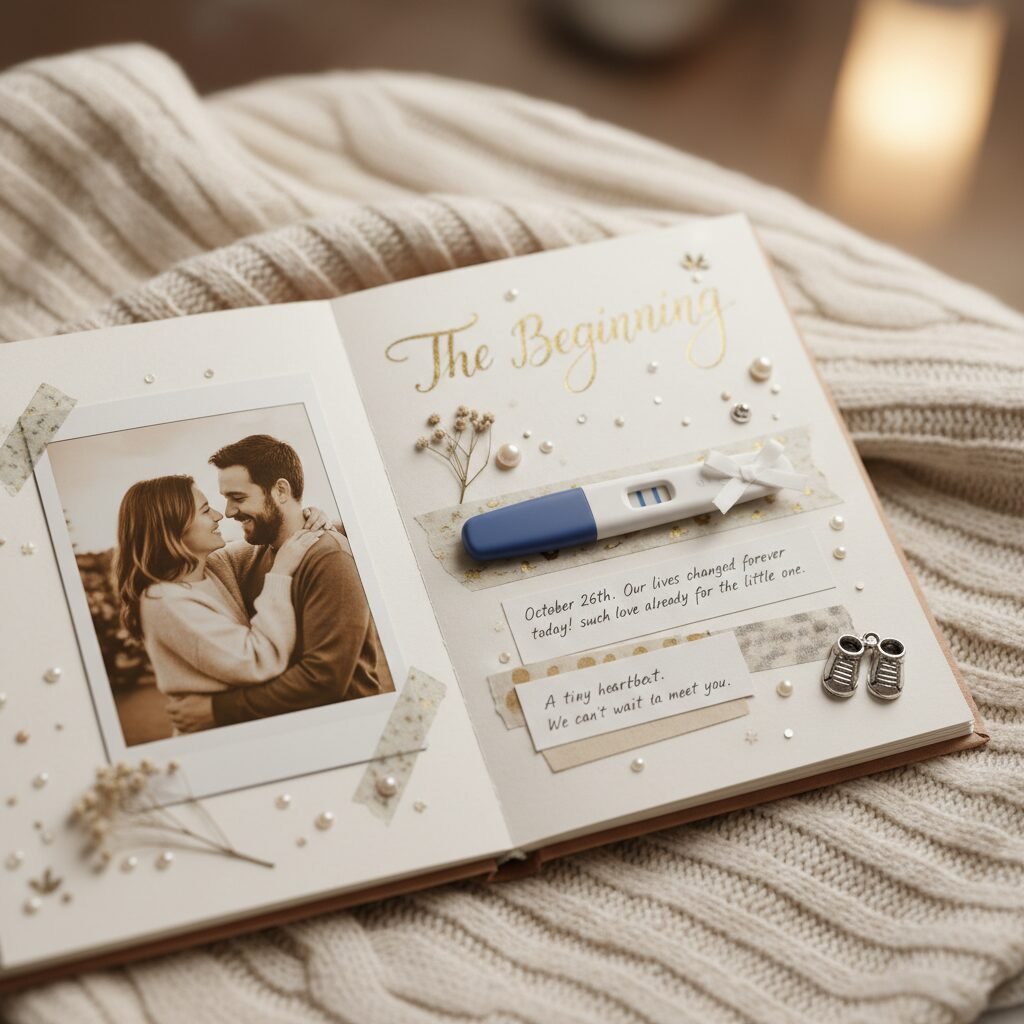
If you’re a memory keeper who loves journaling and photos, dedicating the first page of your baby’s scrapbook or album to the positive test is a natural fit. This method focuses on telling the whole story of that pivotal day, with the test itself as the centerpiece.
Designing Your Page:
Choose an archival-quality scrapbook and materials to ensure your memories last. On the first page, create a title like “The Day We Knew,” “Our Greatest Adventure Begins,” or simply the date.
Mount the dried test strip securely using photo-safe adhesive. Then, surround it with the story. This is your chance to write a letter to your future child, describing the emotions of that moment.
- Journal Everything: How did you feel? Who did you tell first? What were your immediate hopes and dreams for this tiny, new life? Don’t hold back.
- Include Photos: If you have them, include photos of your reactions. Even a simple selfie of the two of you, beaming (or looking shocked!), will become a priceless treasure.
- Add Details: Note the time of day, where you were, and any funny or sweet anecdotes from that moment.
This scrapbook page becomes the prologue to your child’s life story, a deeply personal and detailed account of the moment they went from a dream to a reality. It’s a quiet, intimate way to preserve the memory just for your family.
Conclusion
That little plastic stick represents so much more than a simple result; it’s the starting line of the most profound journey you will ever take. Whether you choose to frame it in a grand shadow box, encase it in timeless resin, hang it as a yearly tradition, or nestle it within the pages of your family’s story, you are honoring the significance of this moment. You are creating a tangible link to the overwhelming love and boundless hope you felt at the very beginning.
There is no right or wrong way to cherish a memory. Choose the method that speaks to your heart and your family’s style. As you move through your pregnancy and into the beautiful chaos of parenthood, this small keepsake will serve as a powerful reminder of where it all began. It’s the beginning of your baby’s story, and it’s a story worth preserving forever.