Don’t Throw It Away! 5 Stunning Ways to Display Your Baby’s Hospital Bracelet
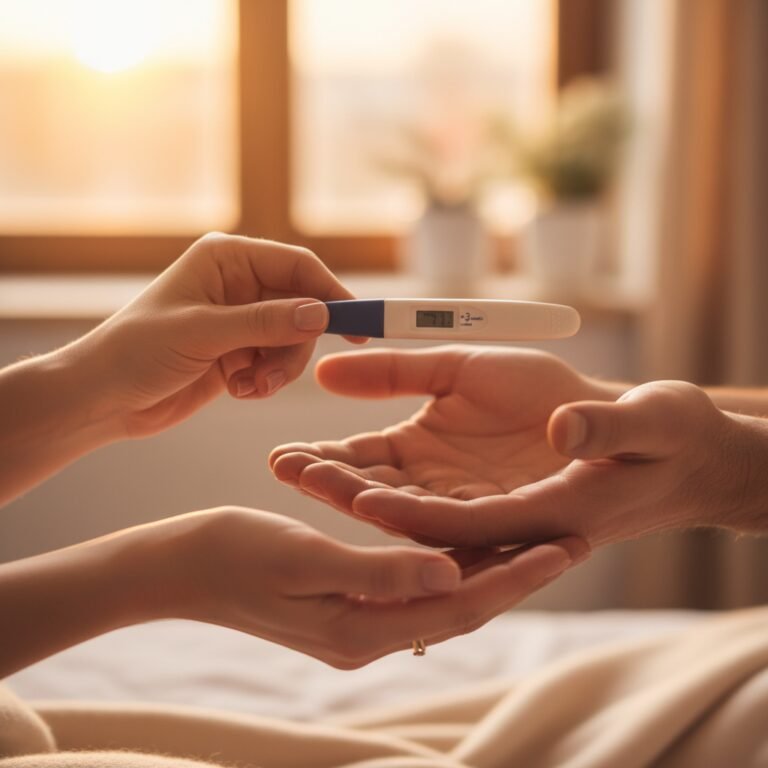
The first few days with your newborn are a whirlwind of emotions, sleepless nights, and overwhelming love. In the blur, you collect a handful of tiny items: a striped hospital beanie, a first swaddle, and that small, unassuming plastic bracelet with their name printed in blocky letters. It may seem like a simple piece of plastic, but it’s so much more. It’s the first thing that officially identified your child in the big, wide world. It’s a tangible link to the moment your life changed forever. For many parents, including new dads who proudly wore their own matching band, this bracelet is a symbol of that profound connection.
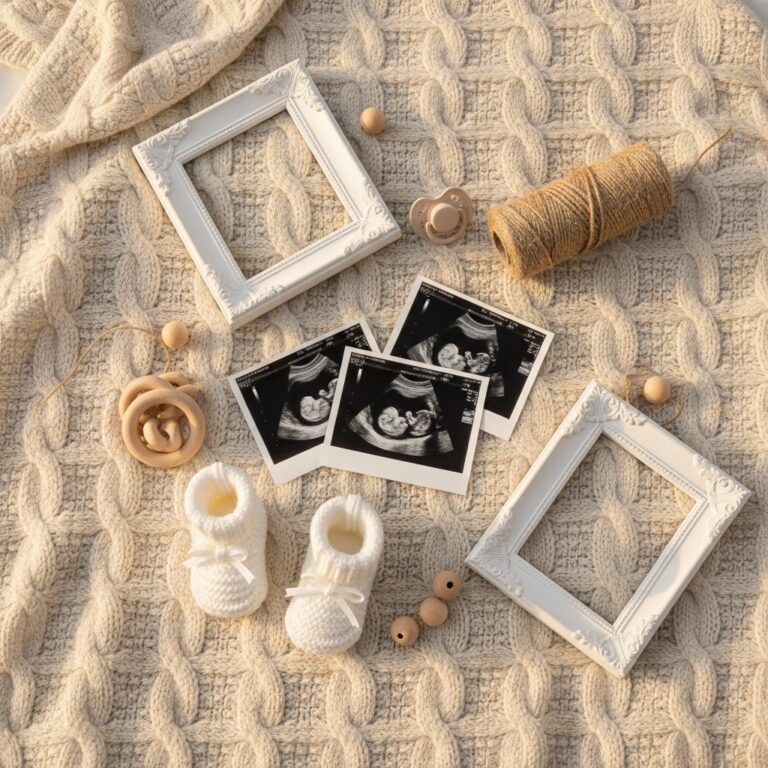
Instead of letting this precious memento get lost at the bottom of a drawer, why not transform it into a beautiful piece of art that tells the story of your family’s beginning? Preserving these early memories is a powerful way to honor your journey into parenthood. Here are five stunning, heartfelt, and achievable ways to display your baby’s hospital bracelet, turning a simple keepsake into a timeless treasure.
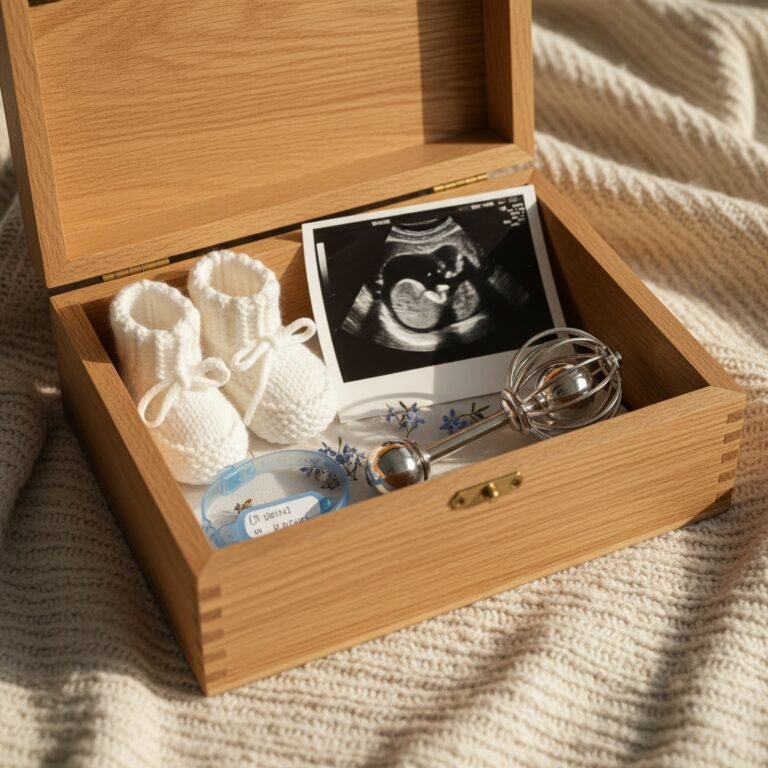
1. Create a Timeless Shadow Box of Firsts
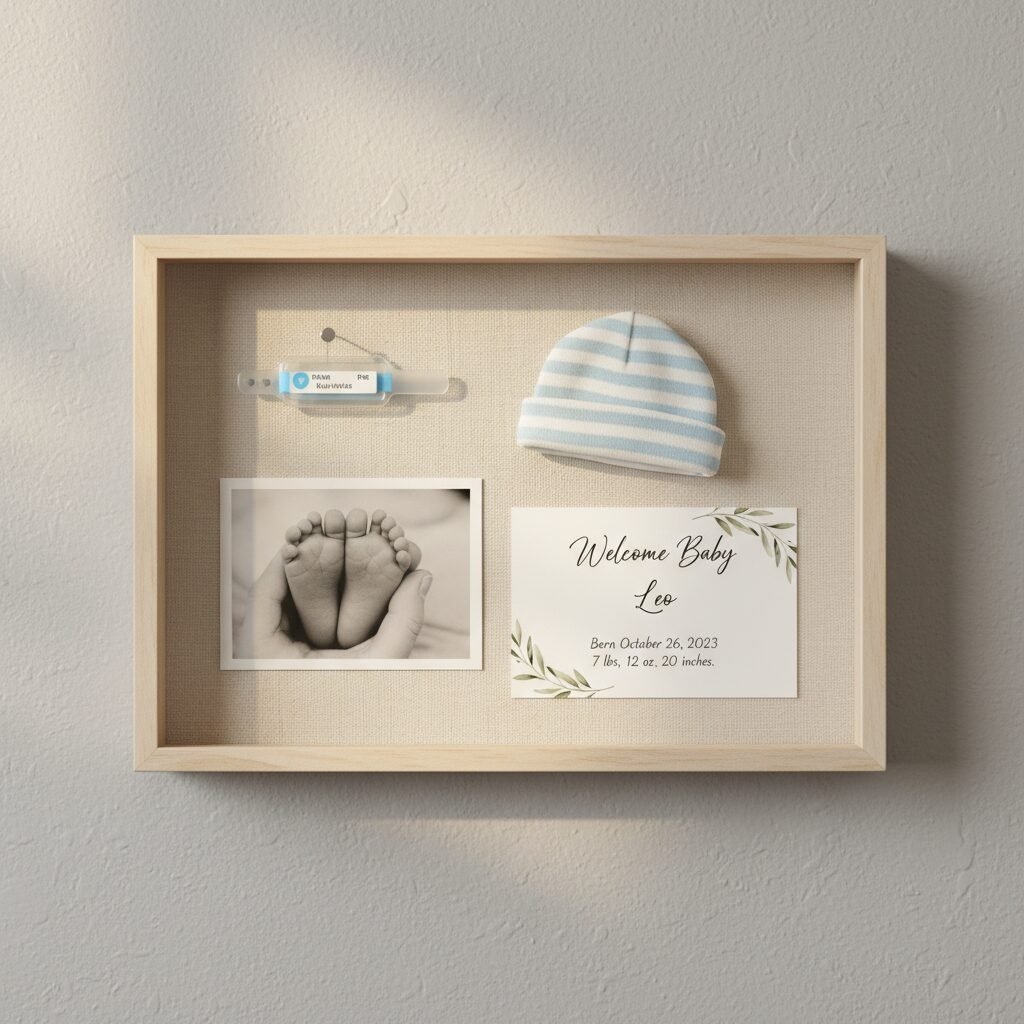
A shadow box is perhaps the most classic and comprehensive way to preserve your baby’s first memories. It acts as a miniature museum, a three-dimensional story of their arrival. This method allows you to group the hospital bracelet with other significant items, creating a rich, visual narrative that you can hang in the nursery or your office.
Why It’s a Great Choice:
This option is incredibly personal and versatile. You can include as many or as few items as you like, and the final product is a beautiful piece of custom art that captures the essence of those first few days. It’s a project that both parents can work on together, selecting the most meaningful mementos to include.
What You’ll Need:
- A shadow box frame (available in various sizes and finishes)
- Acid-free scrapbook paper or linen for the backing
- Straight pins or archival-safe adhesive dots
- Your baby’s hospital bracelet(s) (both baby’s and parents’)
- Other keepsakes: a newborn photo, the hospital beanie, a copy of the birth announcement, baby’s footprint card, or a tiny pair of mittens.
Step-by-Step Instructions:
- Prepare Your Canvas: Open the back of the shadow box and fit your chosen backing paper or fabric securely against the backboard. A neutral color often works best to make the items pop.
- Design Your Layout: Before you attach anything, arrange all your items on the backboard. Place the largest item, like the photo or birth announcement, first to act as an anchor. Then, arrange the smaller items around it. Try different layouts until you find one that feels balanced and tells a story.
- Secure the Bracelet: Gently shape the hospital bracelet into a circle. Use two or three strategically placed straight pins to secure it to the backing. Pin through the backing material, not the bracelet itself, to hold it in place without causing damage.
- Add Other Mementos: Use pins or acid-free adhesive dots to secure the other items. For fabrics like the hat, pins work well. For paper items, adhesive dots are ideal.
- Final Touches: Once you are happy with the arrangement, carefully clean the inside of the glass, close up the shadow box, and secure the backing. Your beautiful display of firsts is now ready to be hung and admired.
2. Craft a Yearly Sentimental Ornament
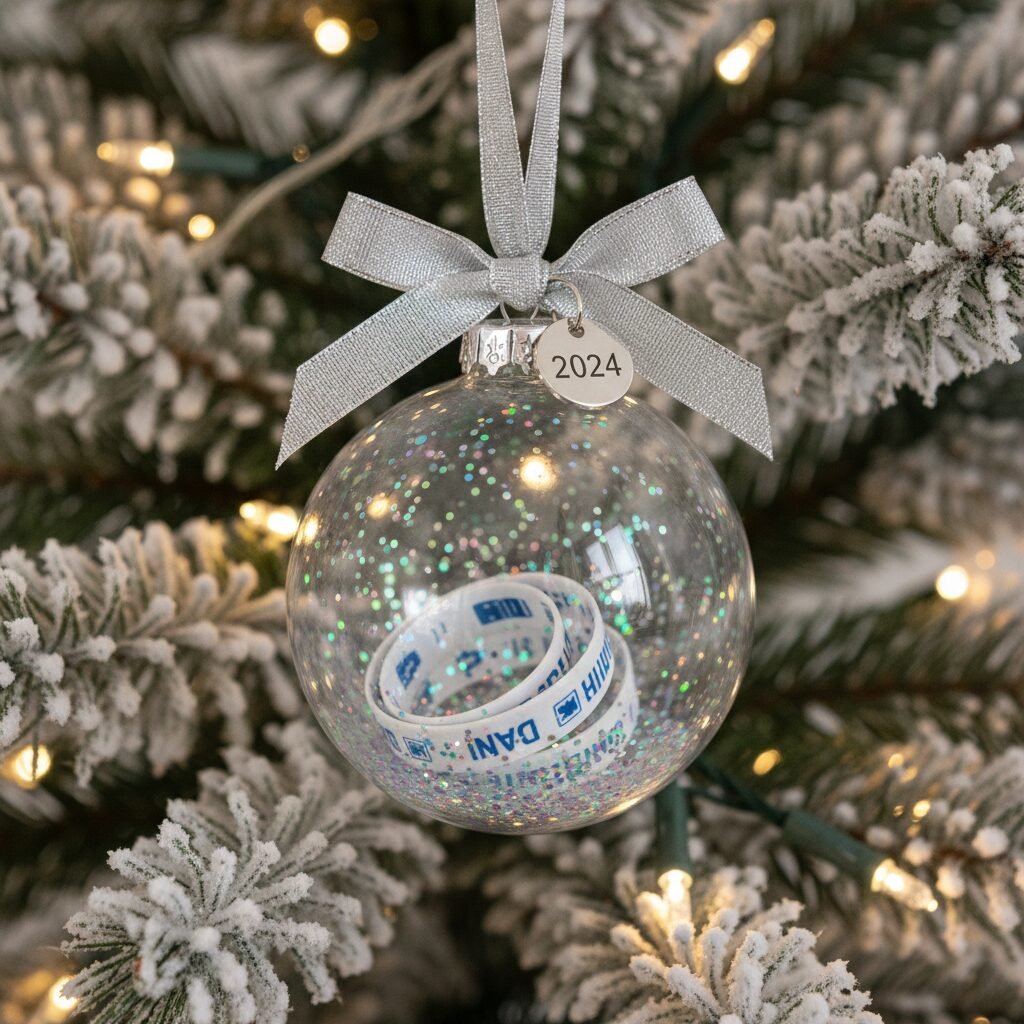
Imagine unpacking your holiday decorations each year and finding a delicate ornament that holds a sweet reminder of your baby’s first days. Creating a keepsake ornament is a simple yet profoundly touching way to incorporate this memory into a cherished family tradition. Every year, as you hang it on the tree, you’ll be transported back to that first magical holiday season as a new family.
Why It’s a Great Choice:
This DIY project is incredibly easy, affordable, and creates a tradition that your child can appreciate as they grow older. It doesn’t take up wall space and becomes a special part of your family’s annual celebrations. It’s a wonderful, subtle reminder of how much your family has grown.
What You’ll Need:
- A clear, fillable ornament (glass or plastic/acrylic)
- Your baby’s hospital bracelet
- Tweezers
- Optional fillers: tiny pearls, faux snow, silver or gold glitter, or a small ribbon with their birth stats printed on it.
- A beautiful ribbon for hanging.
Step-by-Step Instructions:
- Prepare the Ornament: Carefully remove the metal top from the fillable ornament. Make sure the inside is clean and dry.
- Insert the Bracelet: Gently curl the hospital bracelet so it can fit through the opening. Using tweezers can help you carefully guide it inside and position it how you like. You can let it rest naturally at the bottom or gently coax it to unfurl slightly.
- Add Fillers (Optional): If you wish, add a pinch of your chosen filler. A little bit of sparkle or faux snow can add a magical touch. Be careful not to add so much that it hides the bracelet. A tiny, rolled-up piece of paper with their name, date of birth, and weight is another sweet addition.
- Seal and Hang: Place the metal top back on the ornament securely. Thread a beautiful ribbon through the loop for hanging. You can even use a fine-tipped permanent marker to write your baby’s name and the year on the outside of the ornament.
Each year, this small ornament will serve as a powerful symbol of your family’s beginning—a quiet, sparkling reminder of the greatest gift you ever received.
3. Preserve it Forever in a Modern Resin Keepsake
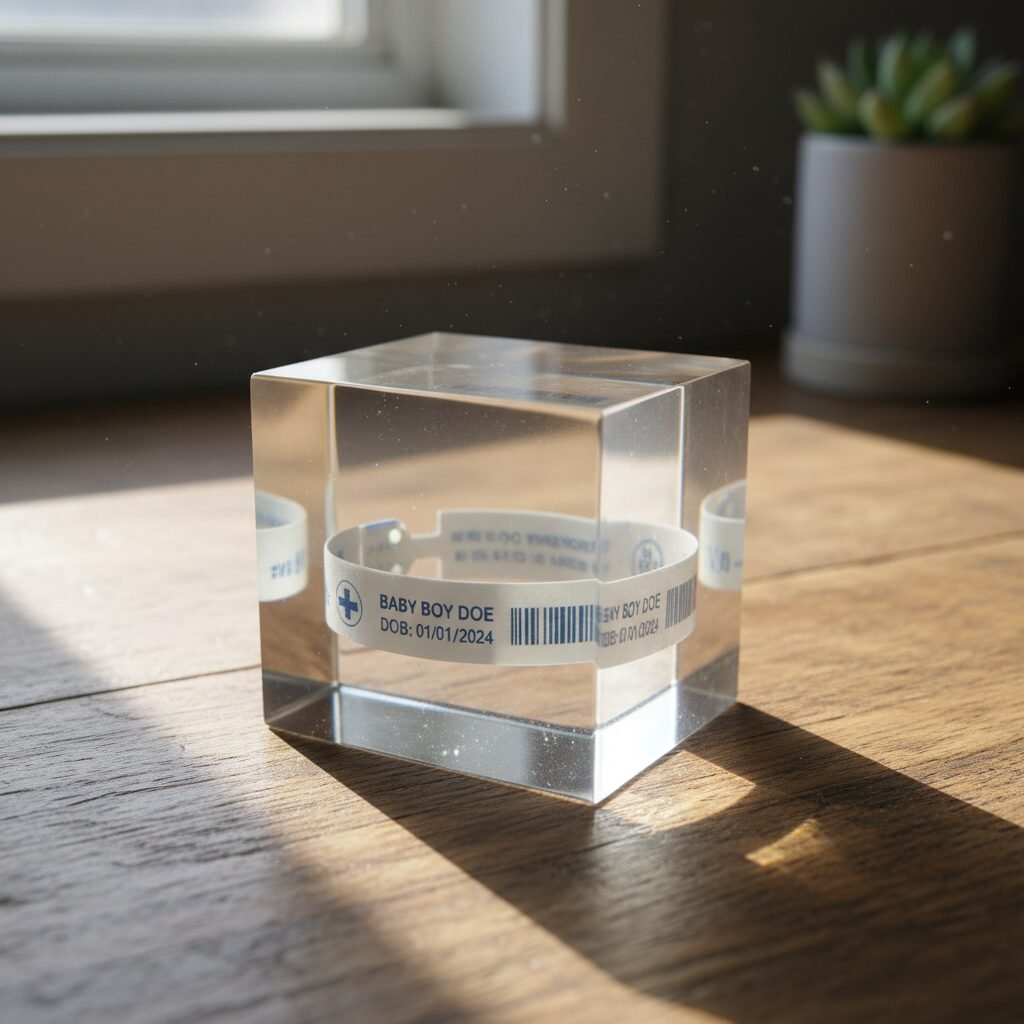
For parents who appreciate a more modern aesthetic, embedding the hospital bracelet in resin creates a stunning, permanent, and crystal-clear display. The resin encases the bracelet, protecting it from air, moisture, and time, literally freezing that moment forever. You can create decorative objects like a paperweight for your desk, a set of coasters, or a small decorative block to place on a shelf.
Why It’s a Great Choice:
Resin preservation offers unparalleled durability and a sleek, modern look. It transforms the bracelet into a solid, tangible object of art that can be handled and admired up close without fear of damage. This is a fantastic option for a dad’s office or a modern living room.
Important Safety Note:
Working with epoxy resin requires caution. Always work in a well-ventilated area, wear gloves and safety glasses, and follow the manufacturer’s instructions on your resin kit precisely.
What You’ll Need:
- A clear epoxy resin kit (includes resin and hardener)
- A silicone mold in your desired shape (e.g., square, circle, heart)
- Mixing cups and stirring sticks
- Disposable gloves and safety glasses
- Your baby’s hospital bracelet
Step-by-Step Instructions:
- Set Up Your Workspace: Cover your work surface with plastic sheeting. Ensure your space is well-ventilated and you are wearing your safety gear.
- Prepare the Bracelet: Make sure the bracelet is completely clean and dry. Arrange it in the shape you want it to be preserved in.
- Mix the Resin: Following the kit’s instructions, mix the resin and hardener in a disposable cup. Stir slowly and thoroughly for the recommended time (usually 2-3 minutes) to minimize air bubbles.
- Pour the First Layer: Pour a thin layer of resin into the bottom of your silicone mold. This will be the base. Use a heat gun or a lighter held several inches away to gently pop any bubbles that rise to the surface. Let this layer cure for the time specified in the instructions (this is called a ‘gel’ stage).
- Position the Bracelet: Once the first layer is slightly tacky, gently place the hospital bracelet onto it. This prevents it from floating to the top.
- Pour the Final Layer: Mix a new batch of resin and pour it over the bracelet, filling the mold to the top. Again, remove any air bubbles.
- Cure Completely: Cover the mold to protect it from dust and let it cure for the full time recommended by the manufacturer (typically 24-72 hours). Once fully cured, you can de-mold your beautiful, permanent keepsake.
4. Embellish Your Baby’s First-Year Book
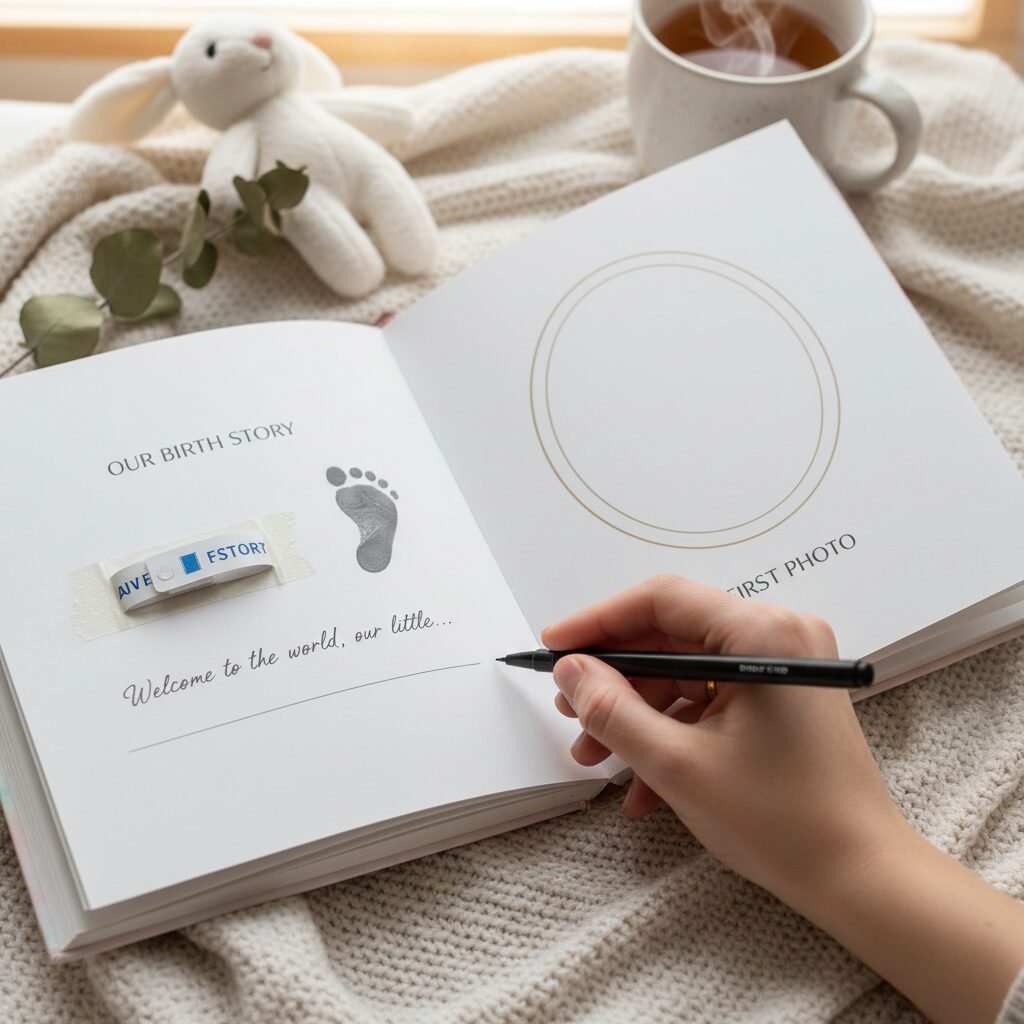
Your baby’s first-year book is the primary chronicle of their milestones, from their first smile to their first steps. Integrating the hospital bracelet directly into its pages makes perfect sense, grounding the story of their life with a real, tangible object from day one. It adds a wonderful, interactive, and sentimental layer to the book itself.
Why It’s a Great Choice:
This is arguably the simplest method, requiring no special tools or artistic skills. It keeps the memento safe within the context of your baby’s story, ensuring it won’t get lost. When you look through the book with your child years from now, you can show them the very first thing that ever had their name on it.
What You’ll Need:
- Your baby’s first-year book or scrapbook
- Archival-safe adhesive, such as photo corners, acid-free glue dots, or washi tape
- An acid-free, archival-quality pen
Step-by-Step Instructions:
- Choose the Perfect Page: The ideal spot is typically on the page detailing the birth story, next to their birth stats (date, time, weight, length), or alongside the first photo taken at the hospital.
- Secure the Bracelet: Position the bracelet on the page. The best way to attach it without causing damage is by using photo corners on either end, creating a small ‘strap’ that holds it in place. Alternatively, a few well-placed acid-free glue dots on the back will work. Avoid using standard tape, as its acid content can cause the paper and bracelet to yellow over time.
- Add a Caption: Use your archival-quality pen to write a short note next to the bracelet. It could be something simple like, “The very first thing that had your name on it,” or a more detailed memory from that day.
- Allow to Dry: If you used any adhesive, let the page sit open for a little while to ensure it’s fully set before closing the book.
5. Design a ‘Time Capsule’ Memory Box
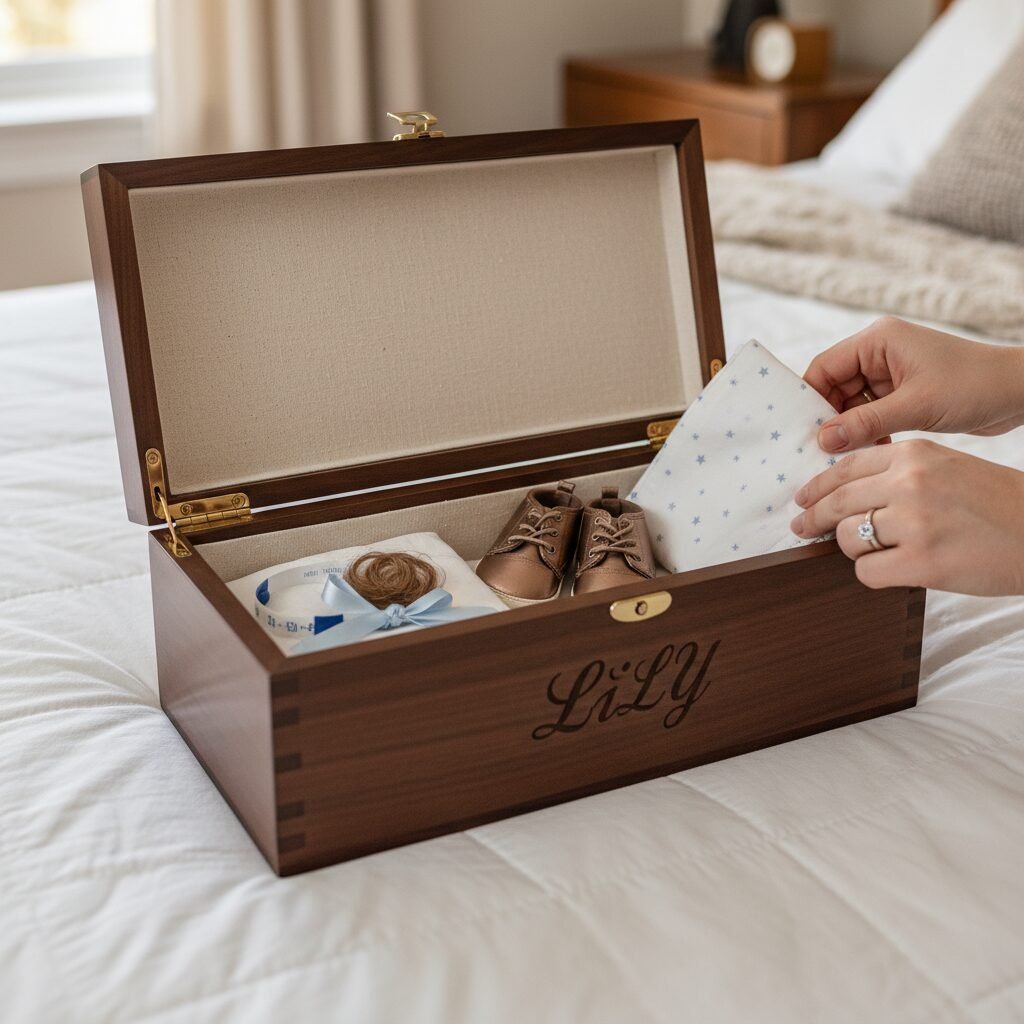
Sometimes, the most treasured items are the ones kept safely tucked away, to be brought out and revisited on special occasions. A dedicated memory box acts as a personal time capsule for your child. It’s a sacred space to hold not just the hospital bracelet, but other precious ‘firsts’ that you’ll collect along the way.
Why It’s a Great Choice:
This option is for the parent who loves the idea of collecting memories over time. It’s a low-pressure, ongoing project that becomes richer with each addition. On a milestone birthday, like their 16th or 18th, you can present this box to your child—a powerful gift of memories and love. It respects the fragility of these items while giving them a place of honor.
What You’ll Need:
- A beautiful, sturdy box. This could be a wooden box, a decorative photo box, or even a small silver keepsake box.
- Acid-free tissue paper or a small velvet pouch
- Other ‘firsts’: a lock of hair from their first haircut, their first lost tooth, their first pair of shoes, a favorite pacifier.
Step-by-Step Instructions:
- Select Your Vessel: Choose a box that feels special and is durable enough to last for years. Consider getting it personalized with your child’s name, initials, or birthdate engraved or painted on top.
- Protect the Bracelet: To protect the bracelet from fading or becoming brittle, wrap it carefully in acid-free tissue paper or place it inside a small, soft cloth pouch. This is especially important for the ink on the bracelet.
- Create a Collection: Place the protected bracelet inside the box. As your child grows, make a conscious effort to add other small, significant items to the collection.
- Store it Safely: Keep the memory box in a safe, dry place away from direct sunlight, such as on a shelf in a closet or in a hope chest.
- Revisit and Share: Make a point to open the box together on your child’s birthday each year. It’s a beautiful way to share stories and reflect on how far you’ve all come as a family.
Conclusion
That small hospital bracelet is more than just a piece of plastic; it’s a bookmark for the first page of your child’s life story and your journey as a parent. It represents a promise, a beginning, and a love so immense it can feel overwhelming. By choosing to display it, you are honoring that beginning and creating a focal point for memory and reflection. Whether you frame it in a shadow box, hang it on your tree, encase it in resin, place it in a baby book, or protect it in a time capsule, you are sending a clear message: This moment mattered. You matter. Our story matters. In the busy, often chaotic, life of a new parent, taking a moment to create one of these keepsakes is an act of love—for your baby, for your partner, and for yourself.