Numbness and Pain? How To Desensitize Your C-Section Scar For Good
Welcoming a child into the world via Cesarean section is a monumental event. It’s a major abdominal surgery that brings forth life, and the scar it leaves behind is a powerful testament to your strength. But in the whirlwind of caring for a newborn, the physical and emotional recovery of the birthing parent can sometimes be overlooked. One of the most common, yet least talked about, aspects of this recovery is the strange and often uncomfortable sensations around the C-section scar: numbness, hypersensitivity, tingling, or sharp, zinging pains.
If you’re touching your abdomen and feel a disconnect—as if that part of your body isn’t quite yours—or if the slightest brush of fabric against your scar sends shivers of discomfort, please know you are not alone. These experiences are a normal part of the healing process as nerves, skin, and muscle mend. The good news is that you don’t have to simply wait and hope it gets better. There is a proactive, gentle, and empowering process you can use to help your body and brain reconnect: scar desensitization.
This guide will walk you through the why, what, and how of managing your C-section scar sensitivity. We’ll explore the physiological reasons behind these sensations and provide a safe, step-by-step approach to scar massage and desensitization that can help you reduce pain, improve feeling, and reclaim a positive connection with your incredible body.
Why Your C-Section Scar Feels Numb, Tingly, or Painful
Understanding the Layers of Healing
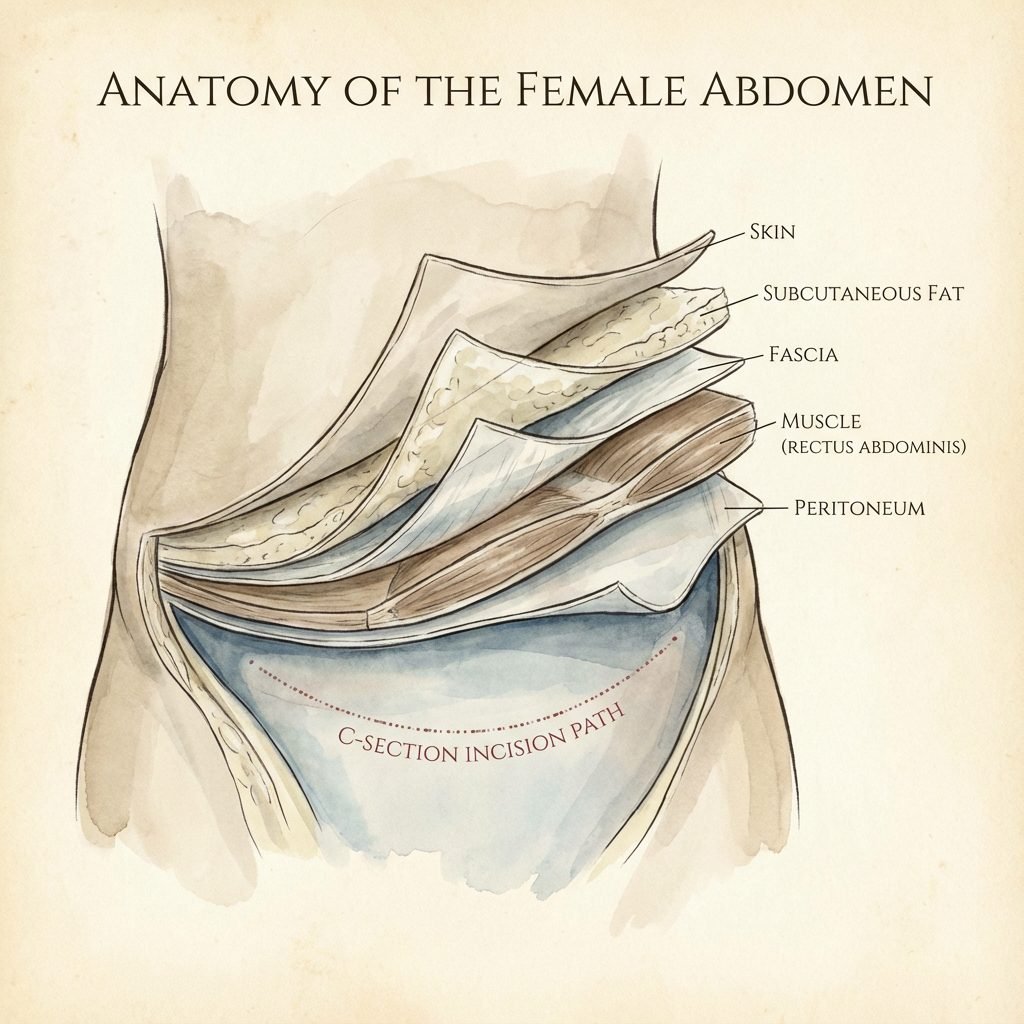
To understand why your scar feels the way it does, it helps to visualize what happens during a C-section. The incision isn’t just a single cut through the skin. A surgeon must carefully work through multiple layers to safely reach your baby:
- Skin: The outermost layer.
- Subcutaneous Fat: The fatty tissue just beneath the skin.
- Fascia: A strong layer of connective tissue that covers the abdominal muscles.
- Abdominal Muscles: These are typically separated, not cut, to allow access.
- Peritoneum: A thin membrane lining the abdominal cavity.
- Uterus: The final layer, which is incised to deliver the baby.
Throughout these layers are countless tiny sensory nerves. During surgery, some of these nerves are inevitably cut. This disruption is the primary reason for the altered sensations you experience postpartum. Your brain is no longer receiving clear signals from that area, leading to a range of feelings:
- Numbness: This occurs when the nerve signals are completely interrupted. The area may feel like it’s been injected with Novocain, and it can be unsettling to touch a part of your body and feel nothing.
- Hypersensitivity or Pain: As nerves begin to regenerate and heal, they can become overactive. The signals they send to the brain can be chaotic and misinterpreted as pain, burning, or extreme sensitivity to touch. Even the light pressure of clothing can feel overwhelming.
- Tingling or ‘Zingers’: These electric-shock-like sensations are also classic signs of nerve regeneration. Think of it as the nerve pathways ‘rebooting’ and occasionally sending out a jolt of energy.
It’s crucial to understand that these sensations are not a sign that something is wrong; they are a sign that a complex healing process is underway. The numbness can last for months or even years for some, but for many, feeling gradually returns. Desensitization techniques can significantly support and speed up this process.
The ‘Why’ Behind the ‘How’: The Goal of Scar Desensitization
Retraining Your Brain and Tissues
Scar desensitization isn’t just about rubbing your scar; it’s a sophisticated process of retraining your nervous system. The core principle is based on neuroplasticity—the brain’s amazing ability to reorganize itself by forming new neural connections. When you systematically introduce safe, gentle stimuli to the scarred area, you are essentially re-educating your brain on how to interpret sensations from that region correctly.
The primary goals of this practice are:
- To Decrease Hypersensitivity: By gradually exposing the area to different textures and pressures, you teach the overactive nerves to calm down. The brain learns that these touches are safe and not a threat, reducing the pain response over time.
- To Improve Numbness: Stimulating the numb areas encourages blood flow and nerve regeneration. While it can’t guarantee a full return of sensation for everyone, it can significantly awaken dormant pathways and improve the connection between skin and brain.
- To Prevent Restrictive Adhesions: As the layers of tissue heal, they can sometimes stick together, forming adhesions. This can limit mobility, cause a ‘puckering’ of the scar, and sometimes lead to deeper pelvic pain. Gentle scar massage, a key part of desensitization, helps ensure the tissue layers glide smoothly over one another.
- To Reconnect Emotionally: A C-section can be a traumatic event for some, and the scar can be a physical reminder. Intentionally and gently touching your scar can be a powerful act of self-care and acceptance. It helps you reclaim this part of your body as your own, transforming the scar from a source of discomfort into a symbol of your journey to motherhood.
Your scar is not a flaw. It is a beautiful map that tells the story of your child’s birth. Tending to it with care is a way of honoring that journey and your own incredible body.
Your Gentle, Step-by-Step Guide to Scar Desensitization at Home
Before you begin, the most important step is to get clearance from your doctor, midwife, or a pelvic floor physical therapist. You must wait until your incision is fully closed and healed, with no scabs, weeping, or signs of infection. This is typically around 6-8 weeks postpartum, but it varies for everyone.
Phase 1: Indirect Exposure (Weeks 6-8 Postpartum, or as cleared)
The goal here is to get your brain used to sensations near the scar without overwhelming it. Dedicate 5-10 minutes each day to this practice.
- Gather Your Textures: Find a few items with very different, soft textures. Examples include a cotton ball, a silk scarf, a soft baby brush, a fluffy makeup brush, or a soft washcloth.
- Begin Away From the Scar: Start by gently stroking, tapping, or brushing the skin on your abdomen about two inches above your scar. Pay attention to the sensation. Does it feel normal?
- Move Closer: Slowly work your way down towards the scar, using different textures. Notice if the sensations change as you get closer. If you feel any anxiety or discomfort, pause, take a deep breath, and return to an area that feels comfortable. The goal is exposure, not pain.
Phase 2: Direct, Light Touch (When Phase 1 is comfortable)
Now, you’ll begin to introduce touch directly to the scar itself.
- Fingertip Tapping: Using the pads of your fingers, gently tap along the length of your scar. Think of the light patter of raindrops. This introduces a new type of light stimulus.
- Texture on the Scar: Take your softest texture (like the silk scarf or cotton ball) and gently brush it directly across the scar. Move in different directions: horizontally, vertically, and in small circles.
Phase 3: Introducing Scar Massage & Gentle Pressure
Once your scar tolerates light touch without pain or a stress response, you can begin gentle massage to address the deeper tissue layers and prevent adhesions. You can use a small amount of unscented oil (like coconut or vitamin E oil) if you like.
- Clockwise Circles: Using the pads of one or two fingers, apply gentle pressure and make small circles along the entire length of the scar.
- Vertical & Horizontal Strokes: Gently push and pull the skin of the scar up and down, then side to side. You’re not just sliding over the skin; you’re trying to move the scar itself. Imagine it’s a piece of tape you’re gently trying to wiggle.
- Skin Rolling: This is a more advanced technique. Try to gently pinch the skin just above the scar and ‘roll’ it between your thumb and index finger. Then, try the same with the scar itself. If it’s too sensitive or stuck, don’t force it. This is a great technique to ask a pelvic floor physical therapist to demonstrate.
Sample Progression Schedule
Healing is not linear. This is just a sample guide. Listen to your body and stay in a phase as long as you need.
| Phase | Frequency | Techniques | Goal |
|---|---|---|---|
| Phase 1: Indirect Touch | 5-10 mins, 1-2x daily | Brushing/tapping skin around the scar with various soft textures (cotton, silk, soft brush). | Calm the surrounding nerves and prepare the brain for direct contact. |
| Phase 2: Direct, Light Touch | 5 mins, 1x daily | Lightly tapping directly on the scar with fingertips. Brushing the scar with the softest textures. | Acclimate the scar’s nerves to direct, non-threatening sensation. |
| Phase 3: Gentle Massage | 5-10 mins, 1x daily | Circular, vertical, and horizontal massage with gentle but firm pressure directly on the scar. | Mobilize scar tissue, prevent adhesions, and improve blood flow. |
| Advanced Techniques | As comfortable, a few times a week | Skin rolling and gentle scar lifting. Introduce gentle vibration with an approved tool. | Address deeper restrictions and further improve tissue mobility. |
Beyond Massage: Tools and Professional Support
Enhancing Your Healing Toolkit
While your hands are your best tool, several other resources can support your scar recovery journey.
Helpful Tools for Home Use
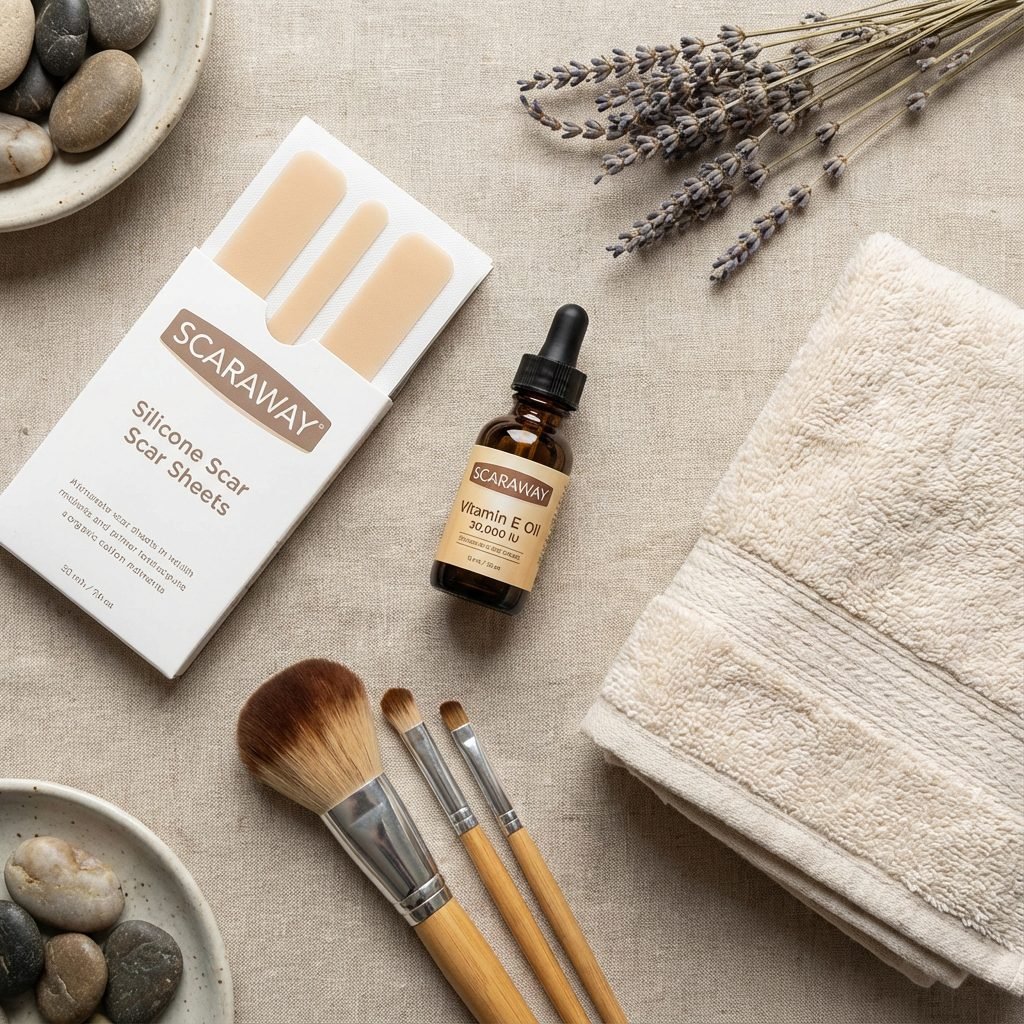
- Silicone Scar Sheets or Gels: These are clinically shown to be effective in improving scar appearance, texture, and color. They work by hydrating the scar tissue and providing a protective barrier, which can help soften the scar and may reduce hypersensitivity for some. They are typically worn for several hours a day.
- Soft Brushes: A set of clean, soft-bristled brushes (like makeup or artist’s brushes) can provide a wide range of textural input for your desensitization exercises.
- Vibration: Gentle vibration can be an excellent tool for waking up numb nerves. Some people use the back of an electric toothbrush (covered with a clean cloth) or a dedicated, gentle massager. It is essential to discuss this with a physical therapist first, as too much intensity can be counterproductive.
The Invaluable Role of a Pelvic Floor Physical Therapist
If there is one professional to add to your postpartum support team, it’s a pelvic floor physical therapist (PT). They are specialists in the musculoskeletal issues that occur during and after pregnancy and birth, including C-section recovery.
A pelvic floor PT can:
- Properly assess your scar: They can determine the degree of restriction and sensitivity and rule out any underlying issues.
- Perform manual therapy: They are trained in advanced techniques like myofascial release to break down stubborn adhesions that you may not be able to address on your own.
- Create a personalized plan: They will provide a tailored exercise and recovery program that addresses not just your scar, but your entire core and pelvic floor system.
- Guide you safely: They can teach you proper massage techniques and advise on when and how to safely incorporate tools like vibration.
Listening to Your Body: Red Flags and When to Call Your Doctor
When Healing Needs a Helping Hand
Desensitization should be a gentle process. It should never be excruciatingly painful. A certain level of discomfort or strange sensation is normal as you work on the tissue, but sharp, radiating pain is a sign to stop and consult a professional. It’s vital to stay attuned to your body and watch for any signs that your incision is not healing properly.
Contact your doctor or midwife immediately if you experience any of the following:
- Signs of Infection: Increased redness spreading from the incision, significant swelling, warmth to the touch, pus or foul-smelling discharge from the scar, or a fever.
- Incision Opening: Any sign that your scar is pulling apart or opening (dehiscence).
- Sudden Increase in Pain: If your pain level suddenly worsens, becomes sharp, or doesn’t respond to approved pain relief.
- A Large, Hard ‘Shelf’: While some swelling above the scar is normal, a large, hard, painful, or persistent overhang could indicate a fluid collection (seroma) or other issue that needs medical attention.
- Concerns About Your Mood: Postpartum recovery is emotional as well as physical. If you are feeling overwhelmed, disconnected, or experiencing symptoms of postpartum depression or anxiety, please reach out to your provider or a mental health professional. Your emotional well-being is paramount.
Remember, advocating for your health is one of the most important things you can do as a new parent. There is no such thing as a ‘silly question’ when it comes to your recovery. Trust your instincts and seek support whenever you need it.
Conclusion
Your C-section recovery is a unique and personal journey. The sensations of numbness, tingling, and pain around your scar are a shared experience for so many parents, and learning to manage them is a profound act of self-care. By patiently practicing scar desensitization and massage, you are not only promoting physical healing and reducing discomfort, but you are also fostering a renewed connection with a body that has performed the incredible feat of growing and birthing a child.
Be patient and compassionate with yourself. Some days you will feel more progress than others. Celebrate the small victories—the first time you can wear jeans without discomfort, the moment you touch your scar and feel a flicker of normal sensation. Your body is resilient, and with time and gentle attention, you can heal comfortably and completely.
Embrace your scar as a part of your story. It is a mark of love, strength, and the beautiful path you took to meet your baby. Continue to listen to its needs, seek support from professionals like pelvic floor physical therapists when necessary, and know that you are doing an amazing job.
Medical Disclaimer: The information provided in this article is for educational and informational purposes only and is not intended as medical advice. It is not a substitute for professional medical advice, diagnosis, or treatment. Always seek the advice of your physician, midwife, or other qualified health provider with any questions you may have regarding a medical condition. Never disregard professional medical advice or delay in seeking it because of something you have read in this article.