How To Make A Gorgeous No-Sew Milestone Blanket For Under $20
Watching your baby grow during their first year is a whirlwind of joy, wonder, and countless ‘firsts.’ Each month brings new discoveries, new smiles, and rapid changes you’ll want to remember forever. Milestone blankets have become a cherished tradition for new parents, offering a beautiful backdrop to document this incredible journey. However, boutique blankets can be expensive, and the pressure to have everything ‘perfect’ can be overwhelming.
What if you could create a stunning, high-quality, and deeply personal milestone blanket yourself, without needing any sewing skills and for less than the cost of a few fancy coffees? It’s not only possible, but it’s also a wonderfully relaxing and rewarding project for an expecting parent or a thoughtful, handmade gift for a loved one. This guide will provide you with everything you need to know, from selecting the perfect materials to tying the final knot, ensuring you have a gorgeous keepsake to treasure for years to come.
More Than Just a Photo Prop: The Heart Behind a DIY Blanket
Before we dive into the ‘how-to,’ let’s talk about the ‘why.’ In a world of mass-produced baby items, taking the time to create something with your own hands infuses it with a special kind of love. A DIY milestone blanket is more than just a prop; it’s a tangible piece of your love story with your child, crafted during those quiet moments of anticipation.
The Unbeatable Benefits of Going DIY:
- Complete Customization: You are the designer. Match the blanket perfectly to your nursery theme, choose your baby’s birthstone colors, or opt for a timeless neutral palette. From whimsical patterns to minimalist solids, the choice is entirely yours.
- Incredible Cost-Effectiveness: High-quality milestone blankets can retail for $50 or more. By sourcing your own materials—especially during fabric store sales—you can easily create a larger, plusher, and more personalized blanket for under $20.
- A Meaningful Nesting Project: The nesting instinct is real! Channeling that energy into a creative, useful project can be incredibly calming and fulfilling during the final weeks of pregnancy. Every knot you tie is a small, hopeful preparation for your baby’s arrival.
- The Perfect Handmade Gift: A handmade milestone blanket is a truly heartfelt and impressive baby shower gift. It shows a level of care and thoughtfulness that store-bought items simply can’t match. It’s a gift that will be used, cherished, and featured in photos for an entire year.
Creating something for your baby is a powerful act of love and preparation. It connects you to them before they even arrive and becomes a part of the story you’ll one day share.
Gathering Your Supplies: The Under $20 Shopping List
The beauty of this project lies in its simplicity. You don’t need a long list of complicated tools. A quick trip to a local craft store or an online fabric retailer is all it takes. The key is to look for sales, especially on fleece, which is frequently discounted.
Here is a detailed breakdown of everything you’ll need and an estimated cost to keep you on budget.
| Item | Recommended Size/Quantity | Estimated Cost | Notes & Tips |
|---|---|---|---|
| Top Fleece Fabric | 1.5 yards (e.g., a print or pattern) | $7 – $10 | Choose a high-quality, anti-pill fleece. This will be the main backdrop for your baby. Lighter, solid colors often work best for photos. |
| Bottom Fleece Fabric | 1.5 yards (e.g., a solid color) | $7 – $10 | This will be the back of your blanket. A coordinating solid color creates a beautiful, finished look for the fringe. |
| Sharp Fabric Scissors or Rotary Cutter | 1 | $0 – $5 | You may already own scissors. A rotary cutter and mat are faster and create cleaner lines but are not essential. |
| Ruler or Measuring Tape | 1 | $0 – $2 | A long yardstick or a clear acrylic ruler is ideal for marking straight lines for the fringe. |
| Optional: Milestone Markers | Varies | $1 – $3 | This could be felt for cutting out numbers, a wooden hoop from the embroidery section, or a special teething ring you already own. |
Total Estimated Cost: $15 – $25. By catching a fabric sale (often 30-50% off), you can easily bring this project home for well under the $20 mark. Look for coupons on craft store apps before you shop!
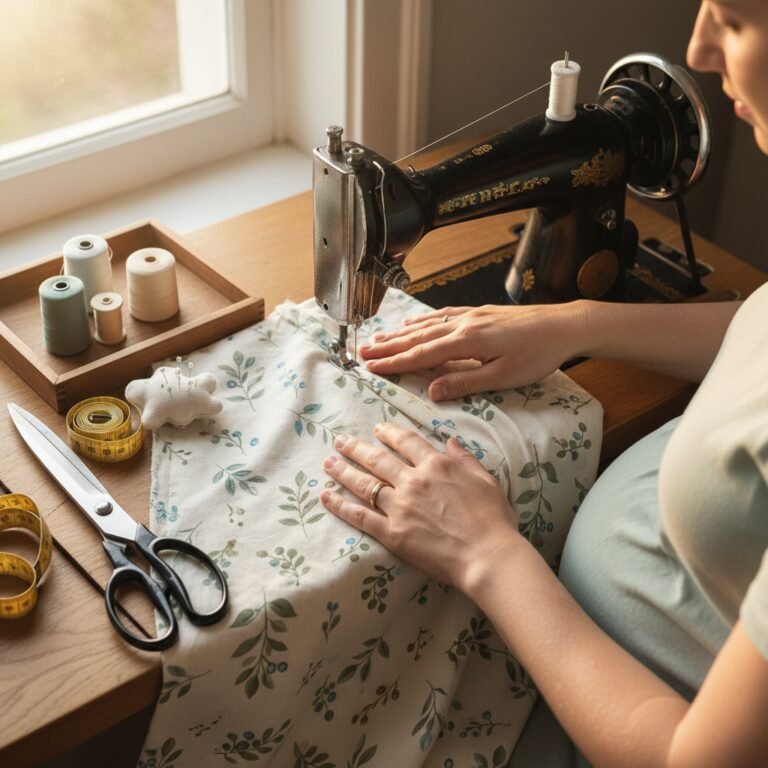
Creating Your Blanket: A Simple Step-by-Step Guide
This is where the magic happens! Set aside an hour or two, put on some music or a favorite podcast, and enjoy the process. The method is simple: you’ll be cutting a fringe around the edge of two pieces of fabric and tying them together. That’s it!
-
Prepare Your Workspace and Fabric
Lay your bottom piece of fleece on a large, flat surface (a clean floor works perfectly). Make sure it is smooth and free of wrinkles. Place your top piece of fleece directly on top, again smoothing it out. Align the edges as best you can. Don’t worry if they aren’t perfect; you will trim them in the next step.
-
Trim and Square Up the Fabric
Using your ruler and rotary cutter (or scissors), trim all four sides so that both pieces of fabric are the same size and the edges are straight. A typical size for a milestone blanket is around 40×50 inches, but 1.5 yards of fabric will give you a generous size to work with, roughly 54×60 inches before trimming.
-
Cut Out the Corners
This is a critical step to prevent the corners from bunching up. From each of the four corners, measure and cut out a square. A 4×4 inch or 5×5 inch square is a good size. You will be cutting this square through both layers of fabric at the same time.
-
Cut the Fringe
Now it’s time to create the fringe. You will be making cuts along all four sides of the blanket. The cuts should be the same depth as the square you cut from the corners (e.g., 4 or 5 inches deep). The width of each strip should be about 1 to 1.5 inches. Consistency is more important than perfection. Use your ruler to guide you. Cut the strips through both layers of fabric simultaneously. Continue until all four sides have a full fringe.
-
Tie the Knots
This is the final, meditative step. Take one top strip and its corresponding bottom strip and tie them together in a double knot. A double knot ensures the blanket will hold up beautifully in the wash. Snug the knot up to the base of the fringe. Continue this process all the way around the blanket. It can be helpful to work on one side at a time to get into a rhythm.
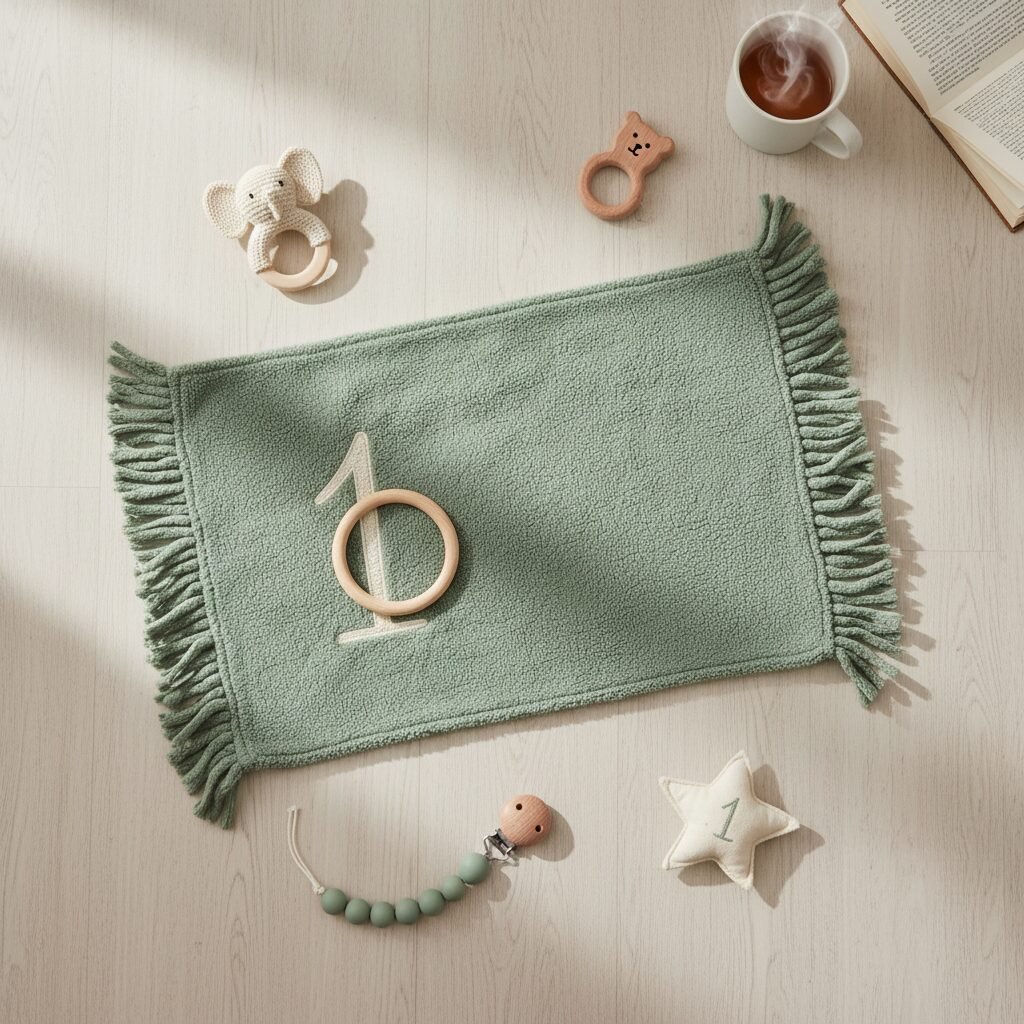
Personalizing Your Creation: Adding the Milestone Markers
With your beautiful blanket complete, the final touch is creating the markers to indicate the months. This is another opportunity to get creative and personalize the blanket to your style.
No-Sew Options for Numbers and Words:
- Felt Cutouts: This is the easiest and most popular method. Purchase a few sheets of stiff felt in a contrasting color. You can print numbers 1-12 and the words ‘month’ and ‘months’ from your computer to use as templates, then simply trace and cut them out. They are reusable and photograph beautifully.
- Iron-On Vinyl: For a more permanent, professional look, consider using heat transfer vinyl (HTV). You can buy pre-cut numbers and letters or cut your own if you have access to a machine like a Cricut or Silhouette. Follow the package instructions to iron them onto the blanket.
- Stencils and Fabric Paint: If you have a steady hand, stencils and fabric paint can create a lovely, customized look. Be sure to use paint specifically designed for fabric and follow the instructions for heat-setting it to ensure it’s washable.
Ideas for the Circular Marker:
You’ll also need something to circle the correct number each month. Think beyond the simple circle and consider items that can grow with your theme or add a touch of personality:
- A simple wooden or felt wreath.
- An embroidery hoop.
- A favorite wooden teething ring.
- A beautifully shaped leaf or floral sprig (real or faux).
- A small, cherished stuffed animal that can appear in each photo.
Capturing the Moment: Tips for Stunning Milestone Photos
You’ve created the perfect backdrop; now it’s time to capture those memories. Taking great milestone photos doesn’t require professional photography skills, just a little planning and consistency.
Setting the Scene for Success:
- Find the Light: Natural light is your best friend. Lay the blanket on the floor near a large window where there is plenty of bright, indirect sunlight. Avoid harsh, direct sun which creates strong shadows. Turn off all overhead artificial lights to prevent yellow color casting.
- Consistency is Key: Try to take the photo at the same time of day, in the same spot, each month. This creates a beautiful, cohesive series that truly highlights your baby’s growth.
- The Overhead Shot: The classic milestone photo is taken from directly above. Stand safely on a sturdy chair or step-stool to get the best angle. Make sure the entire blanket is in the frame.
- Engage Your Baby: A happy, comfortable baby makes for the best photos. Take the pictures after a nap and a feeding. Have a partner or friend stand behind you to make silly faces or shake a rattle to get your baby to look up towards the camera.
- Add Personal Touches: Feel free to add a small prop that is meaningful to you, like a letter board with a cute saying, the stuffed animal they sleep with, or a seasonal item like a small pumpkin in the fall.
Remember, the goal is not perfection. It’s about capturing a moment. If your baby is fussy, or the photo isn’t perfectly centered, that’s okay. These pictures are a real-life chronicle of your beautiful journey together.
Conclusion
There you have it—a simple, enjoyable, and incredibly affordable way to create a cherished keepsake for your baby’s first year. This no-sew milestone blanket is more than just a craft project; it’s an investment of your time and love, resulting in a beautiful tool to celebrate the fleeting moments of infancy. You’ve learned how to select the right materials on a budget, master the simple knotting technique, and style beautiful photos that your family will look back on with joy for a lifetime. As you watch your little one grow month by month against the backdrop you created, you’ll be reminded of the love and anticipation that went into every single knot.