Immortalize Your Bump: The Ultimate DIY Belly Casting Guide For Beginners
Pregnancy is a journey of profound transformation, a fleeting chapter filled with anticipation, wonder, and a unique beauty that is all your own. As you watch your body nurture new life, it’s natural to want to capture and preserve these precious moments. While photos and journals are wonderful, a belly cast offers something uniquely tangible: a three-dimensional sculpture of your beautiful bump, a timeless keepsake that immortalizes the exact shape and form of your baby’s first home.
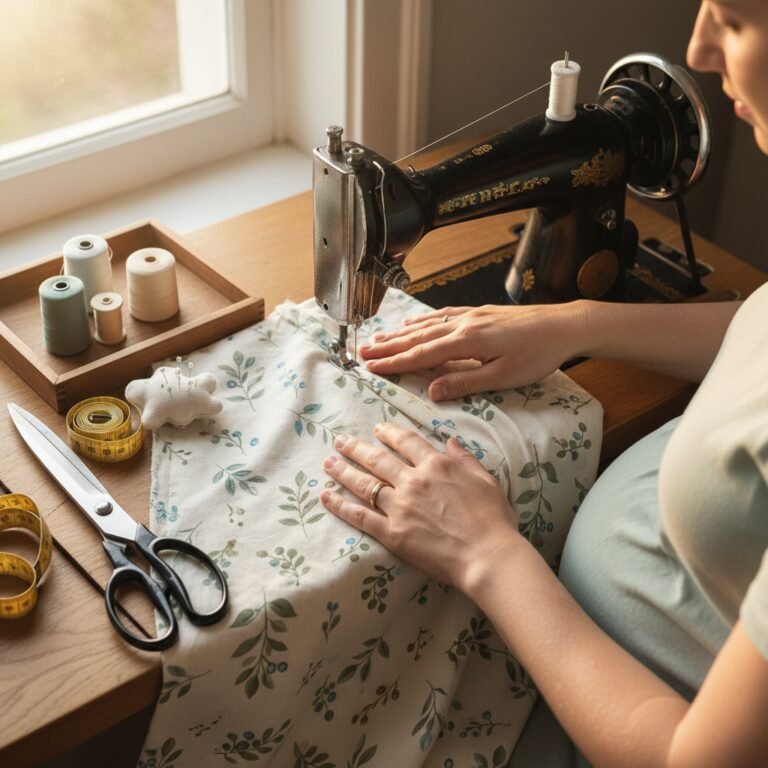
Creating a belly cast is more than just a craft project; it’s an intimate and empowering experience. It’s a moment to pause, connect with your body and your baby, and create a lasting symbol of your journey into parenthood. For many, it becomes a cherished family activity, a way for partners to participate and show their love and support in a hands-on, creative way. This guide is designed for beginners, providing you with everything you need to know to create a safe, beautiful, and meaningful belly cast from the comfort of your own home.
Gathering Your Supplies: What You’ll Need for the Perfect Cast

Before you begin, gathering the right materials is the most critical step to ensure a smooth, safe, and successful casting process. You have two main options: purchasing an all-in-one belly casting kit or sourcing the supplies individually. Kits are convenient and ensure all materials are skin-safe, while sourcing them yourself may offer more customization or be slightly more cost-effective.
Essential Materials Checklist:
- Plaster Bandages: This is the core material. Look for medical-grade plaster of Paris bandages. You will need approximately 4-6 rolls, depending on the size of the area you wish to cast (e.g., just the belly or the full torso).
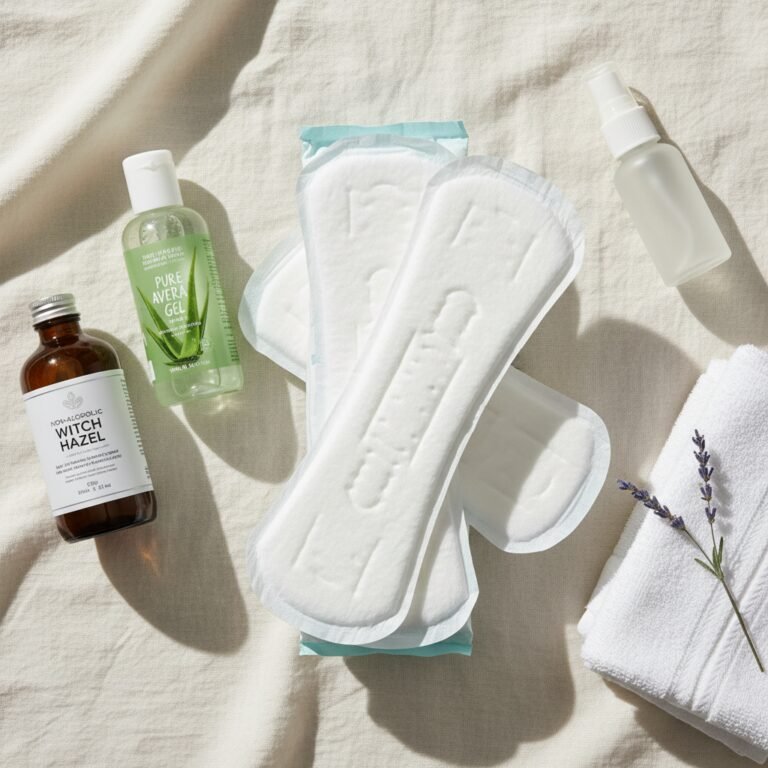
- Lubricant: An absolute must-have to prevent the plaster from sticking to your skin and hair. A thick layer of petroleum jelly is the gold standard. You can also use other natural, thick oils like coconut oil, but petroleum jelly provides the most reliable barrier.
- Drop Cloth or Old Sheets: This process is wonderfully messy! Protect your floors and furniture with a plastic drop cloth, old towels, or sheets.
- A Bowl of Lukewarm Water: The water activates the plaster. Lukewarm temperature is most comfortable on the skin.
- Scissors: For cutting the plaster bandages into manageable strips before you begin.
- Old Clothes/Towel: Wear something you don’t mind getting plaster on, or simply use a towel to cover areas you aren’t casting.
- A Partner or Friend: This is not a solo project. You will need a helper to apply the strips, especially on hard-to-reach areas, and to provide support.
To help you decide between a kit and sourcing your own supplies, consider the following comparison:
| Factor | All-in-One Kit | DIY Sourcing |
|---|---|---|
| Convenience | Very high. Everything you need is in one box. | Lower. Requires purchasing multiple items from different stores (craft store, pharmacy). |
| Safety | Generally very safe. Reputable kits use skin-safe, medical-grade materials. | Requires diligence. You must ensure the plaster bandages are intended for body casting and are non-toxic. |
| Cost | Typically $20-$40. Can be slightly more expensive. | Can be slightly cheaper, especially if you buy materials in bulk. |
| Customization | Limited to the materials provided in the kit. | Full control over the quantity and quality of each supply item. |
Prepping Your Space and Yourself for a Smooth Process

Proper preparation is the key to a stress-free and enjoyable casting experience. Rushing this stage can lead to unnecessary mess and discomfort. Take your time to set up your environment and prepare your body.
Setting the Scene:
- Choose Your Location: The bathroom or kitchen is often ideal due to easy-to-clean floors. Ensure the room is warm and comfortable, as you’ll be stationary with exposed skin for about 30 minutes.
- Protect Your Surfaces: Lay your drop cloth or old sheets down, covering a wide area. Remember that drips are inevitable.
- Decide on Your Pose: The most common pose is sitting comfortably on a stool or chair, leaning back slightly. This allows for easy access to the bump. You can also stand, but this can be tiring. Discuss and decide on the most comfortable and stable position for you before you begin. Have pillows on hand for back support.
- Prepare the Plaster: Before applying any lubricant, have your helper cut the plaster rolls into strips of varying lengths. Shorter strips (6-8 inches) are great for curving around the breasts and under the belly, while longer strips (12-18 inches) work well for covering the main part of the bump.
Preparing Your Skin:
This is arguably the most important preparation step. Do not skip this.
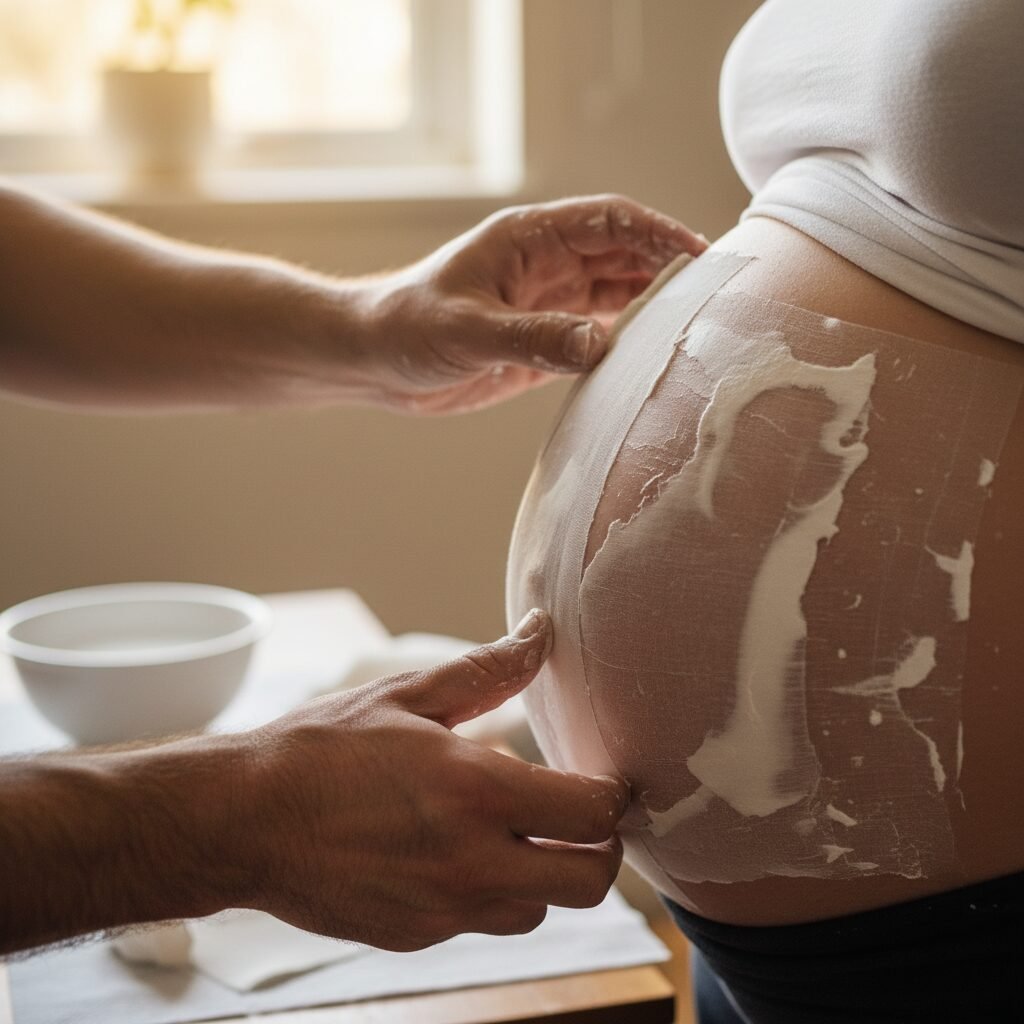
- Using your hands, apply a very thick, generous layer of petroleum jelly to every inch of skin that will be covered by plaster. This includes your entire belly, sides, and up onto your breasts if you are casting your torso.
- Pay special attention to areas with hair, such as the ‘happy trail’ (linea nigra). The lubricant creates a crucial barrier that allows the cast to be removed easily and painlessly. If you miss a spot, the plaster can pull at skin and hair upon removal.
Take a deep breath and relax. This is a moment of connection. Put on some calming music, dim the lights, and treat this as a special ritual celebrating your body and your baby.
The Step-by-Step Casting Process: From Plaster to Masterpiece
With your space and skin prepped, it’s time for the main event. Work efficiently but calmly. Your helper should take the lead on this part while the pregnant person focuses on staying comfortable and still.
- Dip the Strip: Your helper will take one plaster strip at a time and submerge it in the bowl of lukewarm water for just a few seconds until it’s saturated.
- Squeeze Gently: Remove the strip from the water and gently squeeze it between two fingers to remove the excess water. It should be wet, but not dripping heavily.
- Apply and Smooth: Immediately lay the wet strip onto the lubricated skin. Use gentle but firm pressure with your palms and fingers to smooth the strip down, removing any air bubbles and ensuring it conforms to the body’s curves.
- Overlap for Strength: Each new strip should overlap the previous one by about an inch. This overlapping creates a strong, unified shell. Start from the bottom and work your way up, or create a crisscross pattern for extra reinforcement.
- Build in Layers: One layer of plaster is not enough. You will need to build up the cast with at least 3-4 complete layers to ensure it is strong and won’t crack or break when removed or during the drying process.
- Be Patient and Still: Once all layers are applied, the pregnant person needs to remain as still as possible while the plaster sets. It will feel cool at first, then gradually warm up. This is a normal chemical reaction. The cast should be hard to the touch in about 15-20 minutes.
- The Removal: This is the moment of truth! The pregnant person should lean forward slightly. This will help the edges of the cast pull away from the skin. Your helper can gently wiggle the edges to release the seal, and the cast should lift off easily. If you applied enough lubricant, it will feel like taking off a mask.
Finishing Your Cast: Curing, Trimming, and Preparing for Decoration
Your cast is off, but the project isn’t quite finished. Proper finishing will turn your rough cast into a smooth, durable piece of art.
Drying and Curing
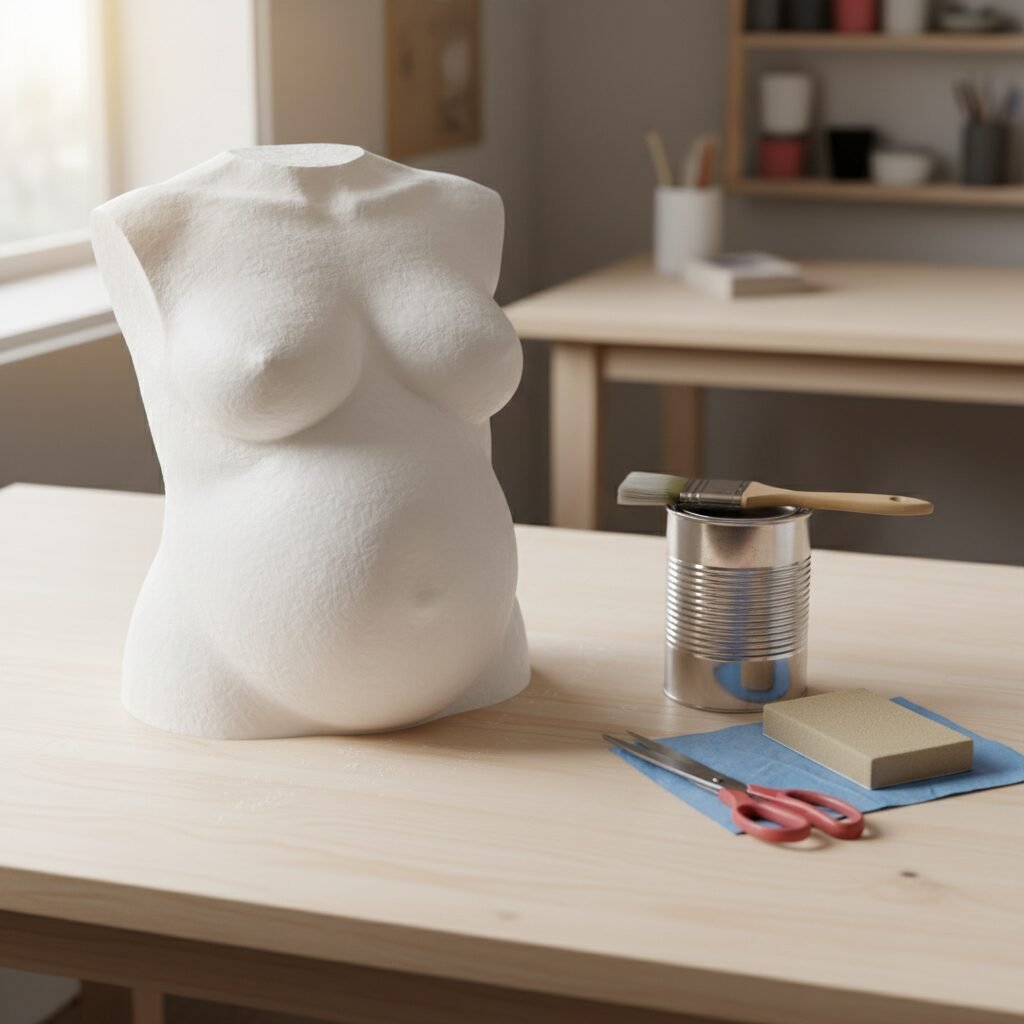
Place the cast hollow-side-up in a warm, dry, well-ventilated area. It needs to air dry completely, which can take 24 to 48 hours. Do not try to speed up the process with a hairdryer or by placing it in the oven, as this can cause it to crack. You’ll know it’s fully dry when it’s lightweight and no longer feels cool or damp to the touch.
Trimming and Sanding
Once completely dry, the edges of the cast will likely be rough and uneven.
- Use a strong pair of scissors or a craft knife to carefully trim the edges into a smooth, pleasing shape. You can follow the natural edge or create a more stylized oval or circle.
- To smooth the surface, you can use fine-grit sandpaper (around 220-grit). Lightly sand the entire surface to knock down any bumps or rough spots from the plaster bandages. Wipe away any dust with a dry cloth afterward.
Priming the Surface
To create the perfect canvas for decoration, it’s highly recommended to prime your cast.
- Apply one or two thin coats of gesso or a simple white acrylic primer. This seals the porous plaster, provides a uniform white base, and helps paint adhere better and appear more vibrant.
- Let the primer dry completely according to the manufacturer’s instructions before moving on to the final, creative step.
Unleashing Your Creativity: Ideas for Decorating Your Belly Cast
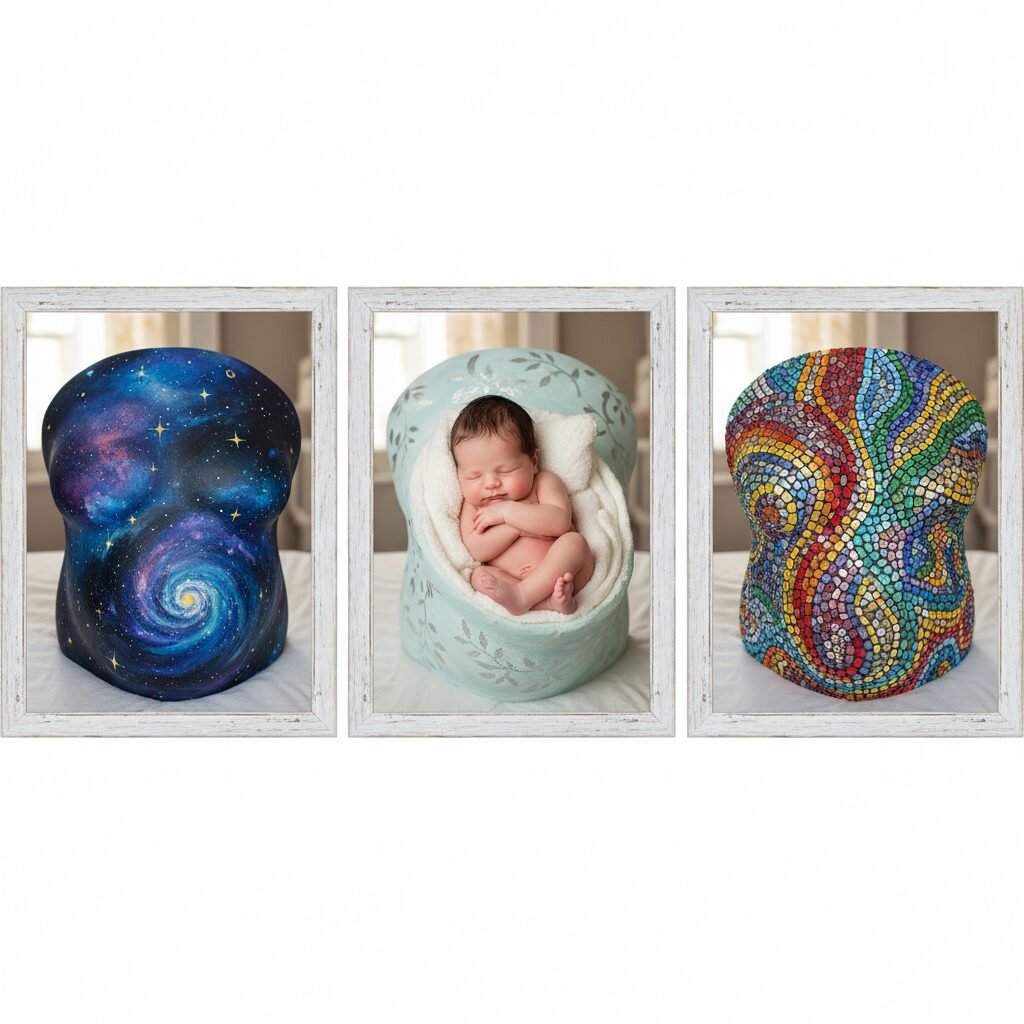
This is where your personal story comes to life! Your finished, primed belly cast is a blank canvas. There are no rules, so let your creativity flow. Here are some popular and inspiring ideas to get you started:
- Classic and Simple: A coat of pure white, silver, or gold spray paint can create an elegant, sculptural look that highlights the form itself.
- Nursery Theme: Paint the cast to match the theme and colors of your baby’s nursery. Think woodland creatures, celestial patterns, or soft pastels.
- Photo Prop: This is a beautiful trend. Use the cast as a prop in your newborn’s first photoshoot. The baby can be nestled safely inside the curve of the cast, showcasing just how tiny they were.
- Family Handprints: Once painted, have the parents and any older siblings add their handprints to the cast for a beautiful family memento.
- Baby Shower Guestbook: Bring the primed cast to your baby shower and have guests sign it with heartfelt messages and wishes for the baby using permanent markers.
- Mosaic Art: Adorn the cast with broken pieces of tile, sea glass, or small mirrors to create a stunning mosaic masterpiece.
- Decoupage: Use Mod Podge to apply decorative paper, fabric swatches, or even copies of your ultrasound photos to the surface.
Whatever you choose, the goal is to create something that feels meaningful to you and your growing family. This decorated cast can be hung on a wall as art, stored as a keepsake, or brought out on your child’s birthdays as a reminder of their very first home.
Safety First: Important Considerations for a Worry-Free Experience

While DIY belly casting is overwhelmingly safe, your comfort and well-being are paramount. Keeping a few key safety considerations in mind will ensure the experience is positive for everyone involved.
- Use Skin-Safe Materials: Never use craft-store plaster of Paris powder or industrial plaster directly on the skin. Always use medical-grade plaster bandages designed for body casting or orthodontics. These are non-toxic and designed to not overheat.
- Perform a Patch Test: If you have sensitive skin, it’s wise to do a small patch test. Apply a small, wet piece of the plaster bandage to your inner arm for 10-15 minutes to ensure you don’t have an adverse reaction.
- Prioritize Comfort: The pregnant person should be in a comfortable, well-supported position. Have water and snacks nearby. If at any point she feels dizzy, nauseous, or overly warm, stop immediately and gently remove the cast. The baby’s well-being comes first.
- Never Obstruct Breathing: This guide focuses on casting the belly and torso. Never attempt to cast the face, and be careful not to cover the nose or mouth area.
- Keep it Timely: While you don’t want to rush, try to work efficiently. The entire application process shouldn’t take more than 20-30 minutes, with another 15-20 minutes of setting time. Being in one position for too long can become uncomfortable during the later stages of pregnancy.
By following these guidelines, you can confidently and safely create a beautiful memento of this incredible time in your life.
Conclusion
Your finished belly cast is so much more than plaster and paint. It is a snapshot in time, a tangible memory of the kicks, the curves, and the quiet moments of connection you shared with your baby before you even met. It’s a story of love, anticipation, and the incredible power of the human body. Whether you display it proudly in your home or tuck it away as a private treasure, it will forever serve as a beautiful reminder of this chapter in your family’s story. We hope this guide has empowered you to embrace this creative journey and immortalize the beautiful bump that started it all.