Boho On A Budget: Stunning DIY Macrame Nursery Decor You Can Make Yourself
Welcome to Your Creative Nesting Journey!
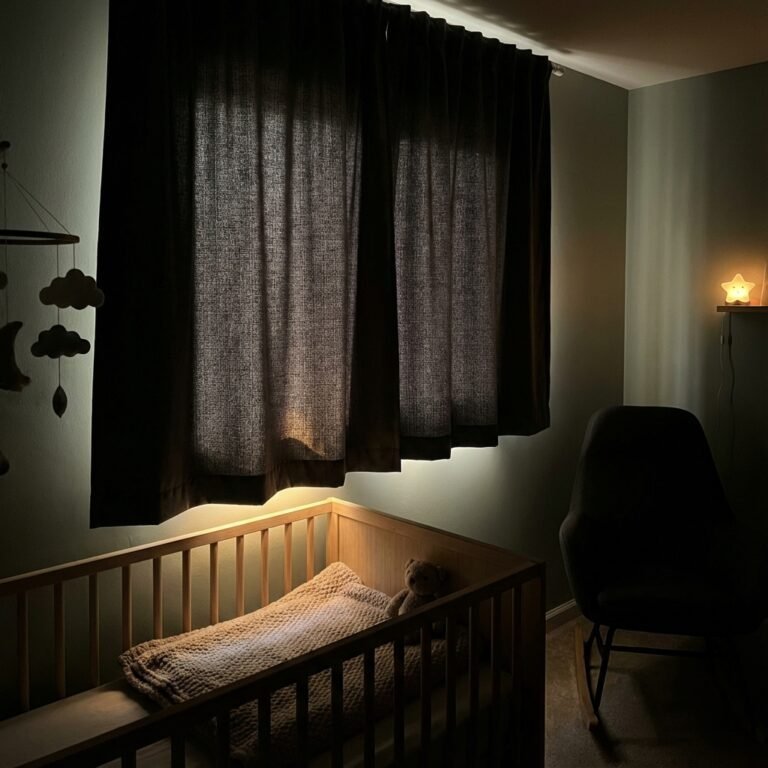
As you prepare for the arrival of your little one, or perhaps dream of the day you’ll welcome them, the nesting phase often brings an exciting urge to create a truly special space. For many new parents, the vision of a serene, natural, and calming nursery is paramount. The bohemian aesthetic, with its earthy tones, natural fibers, and intricate textures, perfectly embodies this tranquility. And what better way to infuse this style than with the timeless craft of macrame?
As a certified Doula and Maternal Health Educator, I understand the desire to create a loving, safe, and beautiful environment for your baby, often while navigating the many financial considerations that come with parenthood. That’s why I’m thrilled to guide you through creating stunning DIY macrame nursery decor that’s both budget-friendly and deeply personal. Imagine the pride and joy of knowing that each knot was tied with love, contributing to a unique space for your child. This isn’t just about decor; it’s about pouring your heart into preparing for a new life.
This comprehensive guide will walk you through everything you need to know, from selecting the right materials to mastering essential knots and completing beautiful projects. Get ready to unleash your creativity and craft a boho-chic nursery that feels uniquely yours, all while staying within your budget.
Why Macrame for Your Nursery? Embracing Boho Serenity
The allure of macrame in nursery design goes far beyond its aesthetic appeal; it brings a profound sense of warmth, texture, and handmade charm. For new parents, creating a tranquil environment is key, and macrame’s natural fibers and intricate patterns contribute to a soothing atmosphere, perfect for a baby’s developing senses.
The Aesthetic Appeal of Boho Macrame
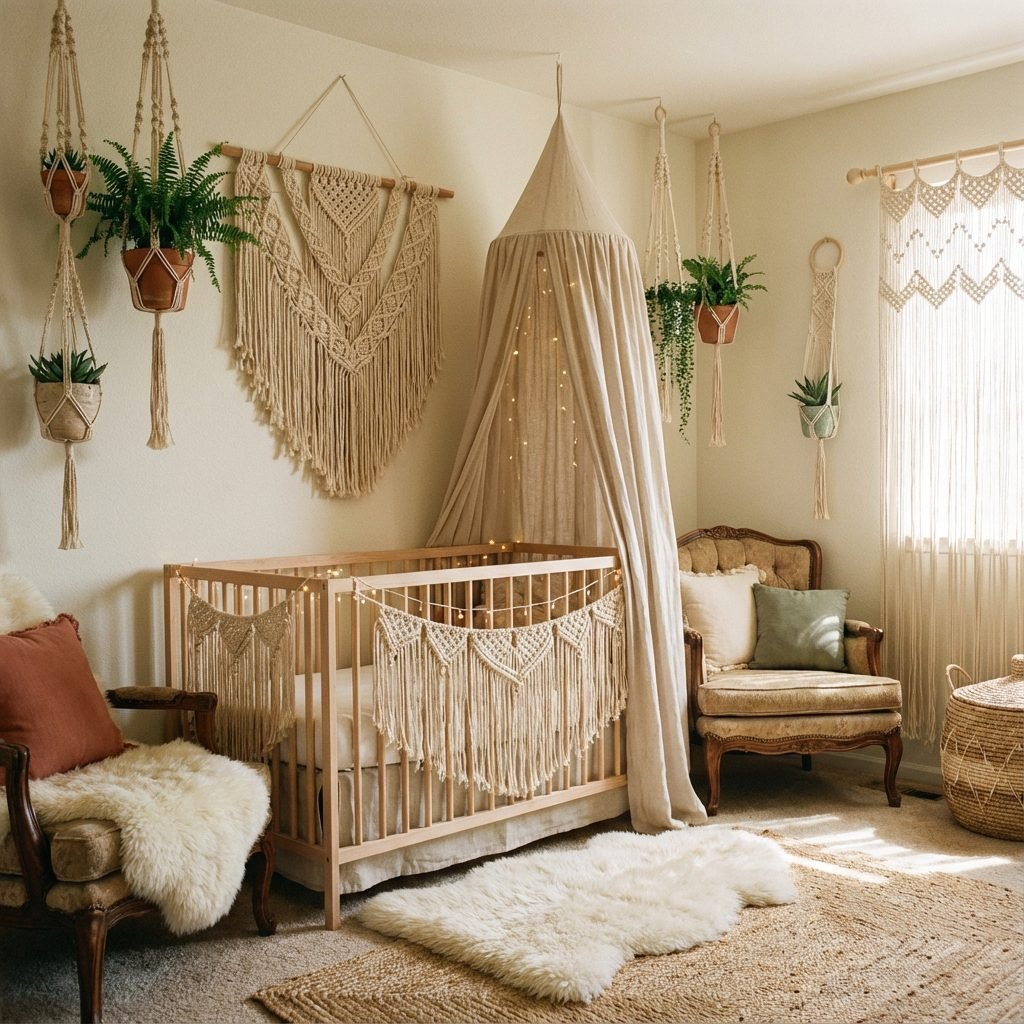
Bohemian decor is celebrated for its relaxed, free-spirited, and nature-inspired elements. Macrame, with its organic cotton ropes and intricate knot work, fits seamlessly into this style. It adds a tactile dimension that can soften a room, making it feel more inviting and cozy. The neutral color palette typically associated with macrame – creams, whites, and natural beiges – offers a calming backdrop, allowing other elements of the nursery to shine without overwhelming the senses.
The Benefits of DIY for New Parents
- Personal Touch: There’s an undeniable magic in creating something with your own hands for your baby. Each piece of DIY macrame decor will carry your unique energy and love, making the nursery truly one-of-a-kind.
- Budget-Friendly: Nursery furnishings and decor can quickly add up. Macrame is incredibly cost-effective. High-quality macrame cord is affordable, and a few basic tools are all you need, allowing you to achieve a high-end look without the designer price tag.
- Mindfulness and Connection: The act of knotting can be incredibly meditative and therapeutic. During pregnancy or the early stages of parenthood, finding moments of calm and focus can be invaluable. It’s a wonderful way to channel your nesting instincts into a productive, calming activity.
- Customization: When you DIY, you have complete control over the design, size, and color of your decor. This means your macrame pieces will perfectly complement your nursery’s theme and your personal style.
“Creating a nursery is more than just decorating; it’s an act of love, preparing a sacred space for your child. DIY projects, especially those as tactile and beautiful as macrame, allow parents to infuse that love into every detail, making the space truly their own.” – Certified Doula Affirmation
Embracing macrame for your nursery is not just about following a trend; it’s about creating a timeless, heartwarming space filled with intention and love. Let’s gather our materials and begin this beautiful journey together.
Essential Materials and Tools for Your Macrame Journey
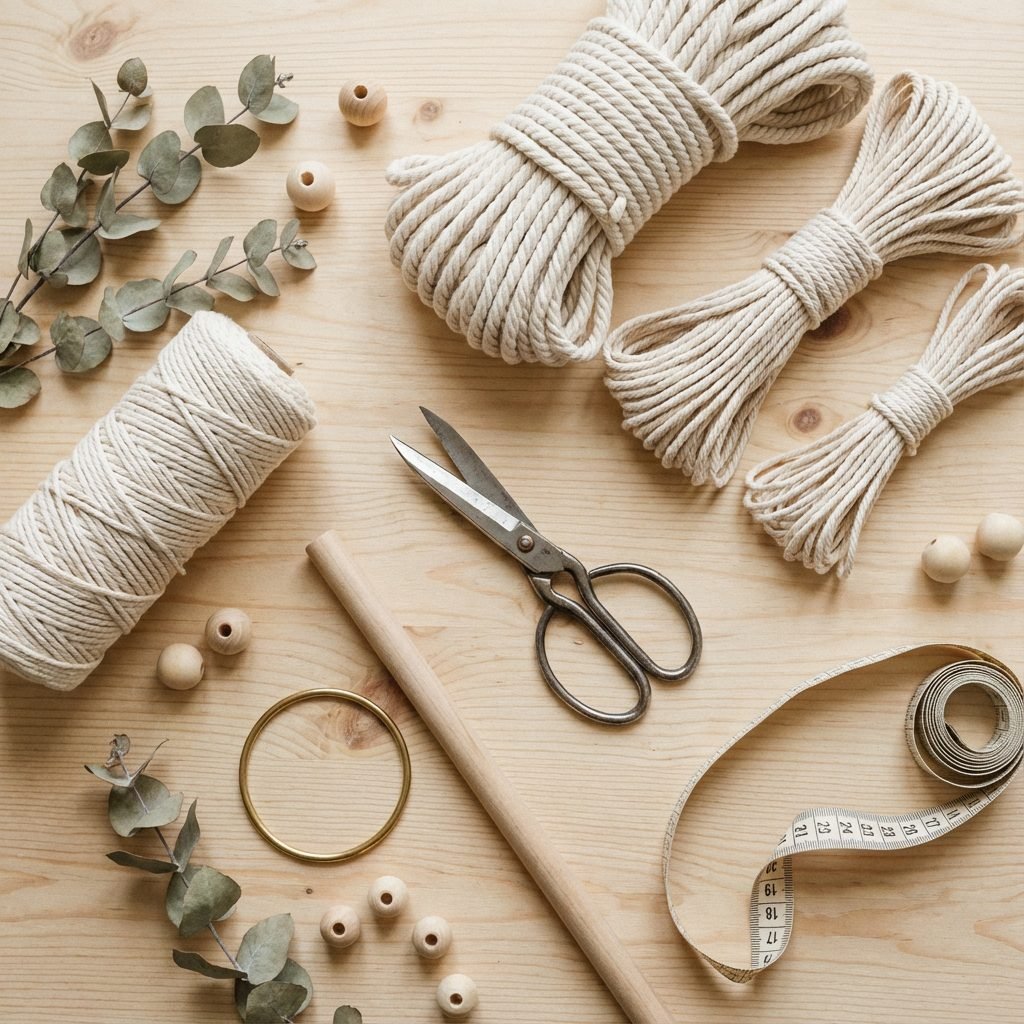
Before we dive into knotting, let’s ensure you have all the necessary supplies. The beauty of macrame is its simplicity; you don’t need a vast array of expensive tools. A few key items will set you up for success, keeping your project truly ‘boho on a budget’.
Choosing Your Macrame Cord
The type of cord you choose significantly impacts the look and feel of your finished piece. For nursery decor, safety and texture are key.
- Material: Opt for natural fibers like 100% cotton cord. It’s soft, easy to work with, environmentally friendly, and safe for a baby’s environment. Avoid synthetic cords that might shed microplastics or have a less natural feel.
- Type: Macrame cord comes in different constructions:
- Single-strand (twisted): This cord is made of many tiny fibers twisted together. It’s very soft, creates beautiful fringes when unraveled, and has a lovely drape. Ideal for delicate wall hangings and fringe elements.
- 3-ply (braided/twisted): Consists of three strands twisted together. It’s stronger and holds its shape well, making it excellent for plant hangers or items needing more structural integrity.
- Braided: This cord is woven, giving it a smooth, rope-like appearance. It’s very durable but doesn’t unravel for fringe.
For nursery decor, single-strand cotton is often preferred for its softness and ability to create beautiful, flowing designs.
- Thickness: Common sizes range from 3mm to 5mm. For beginners, 3mm or 4mm is a good starting point as it’s manageable and versatile. Thicker cords create bolder, larger knots, while thinner cords allow for more intricate detail.
Basic Tools You’ll Need
- Sharp Scissors: A good pair of sharp scissors is essential for clean cuts.
- Measuring Tape or Ruler: Accuracy is key in macrame, especially when cutting many cords of the same length.
- Dowel Rods, Driftwood, or Metal Rings: These serve as the foundation for many macrame projects. Dowel rods are inexpensive and uniform. Driftwood offers a more natural, organic boho feel. Metal rings are perfect for plant hangers and dreamcatchers.
- S-Hooks or Clamp: To hang your project while you work, making knotting much easier. A clothing rack, curtain rod, or even a sturdy doorknob can serve as a workstation.
- Tapestry Needle (Optional): Useful for weaving in loose ends for a neat finish.
- Comb (Optional): For creating perfectly brushed out fringes on your wall hangings.
| Material | Recommended Use for Nursery Decor | Why It’s Great |
|---|---|---|
| 100% Cotton Single-Strand Cord (3-4mm) | Wall hangings, feather garlands, mobiles | Soft, creates beautiful fringe, natural look |
| 100% Cotton 3-Ply Cord (3-5mm) | Plant hangers (for faux plants), sturdier wall decor | Stronger, holds shape, good for structural pieces |
| Wooden Dowel Rods (12-24 inches) | Base for wall hangings | Inexpensive, uniform, easy to find |
| Metal Hoops (4-10 inches) | Mobiles, small plant hangers | Circular shape, versatile |
With these simple materials and tools, you’re well-equipped to embark on your macrame journey. Remember, starting with quality natural fibers ensures a safe and beautiful result for your baby’s nursery.
Mastering Basic Macrame Knots: Your Foundation for DIY Decor
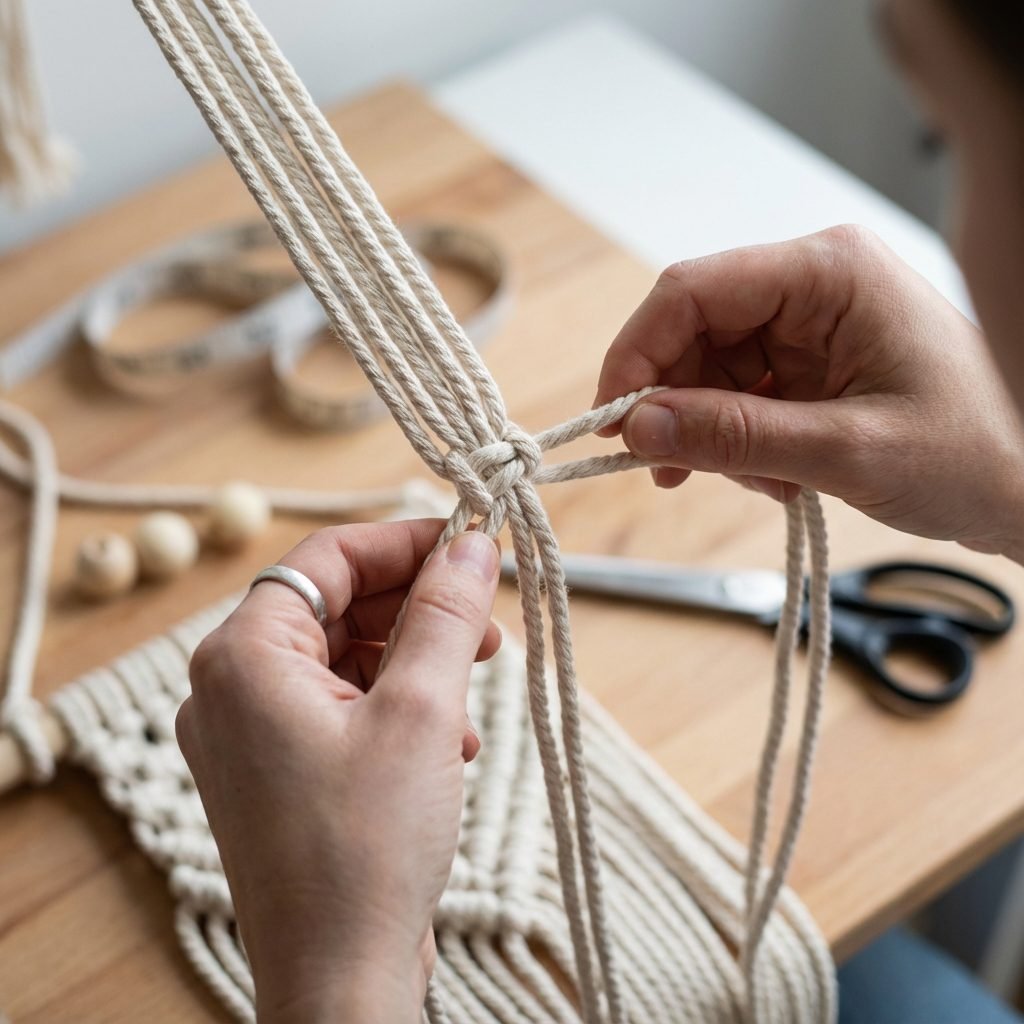
Every intricate macrame design is built upon a foundation of a few simple knots. Don’t be intimidated; these are easy to learn, and with a little practice, you’ll be knotting like a pro. We’ll focus on the essential knots that will enable you to create most of the popular macrame nursery decor.
1. The Lark’s Head Knot (Mounting Knot)
This is your starting point for almost any macrame project, used to attach your working cords to a dowel, ring, or base cord.
- Cut a length of macrame cord and fold it in half, creating a loop at the top.
- Place the loop over your dowel or ring from the front.
- Bring the two tail ends of the cord through the loop from behind.
- Pull the tail ends firmly to tighten the knot around the dowel/ring.
- Ensure both tails are of equal length if you plan to use them as working cords.
2. The Square Knot
The square knot is the most fundamental and versatile macrame knot, used to create beautiful patterns and textures. It consists of two half knots.
- Understanding Your Cords: When tying a square knot, you typically use four cords. The two outer cords are your ‘working cords’ (the ones you tie with), and the two inner cords are your ‘filler cords’ (the ones you tie around).
- First Half Knot (Left): Take the outermost left working cord and pass it over the two filler cords and under the outermost right working cord.
- Take the outermost right working cord, pass it under the two filler cords, and then up through the loop created by the left cord.
- Pull both working cords firmly to tighten the first half of the knot. This creates a ‘left-facing’ half knot.
- Second Half Knot (Right): Now, take the outermost right working cord and pass it over the two filler cords and under the outermost left working cord.
- Take the outermost left working cord, pass it under the two filler cords, and then up through the loop created by the right cord.
- Pull both working cords firmly to tighten the second half of the knot. This completes one full square knot.
“Patience and practice are your best friends in macrame. Don’t worry if your first knots aren’t perfect; each one is a step towards creating something beautiful with your hands, a testament to your love and dedication.” – Maternal Health Educator Insight
3. The Half Hitch Knot (Horizontal and Vertical)
Half hitch knots are used to create lines, curves, and textures. They can be tied horizontally, vertically, or diagonally.
- Understanding Your Cords: You’ll have a ‘holding cord’ (the one you tie around) and a ‘working cord’ (the one you use to tie the knot).
Horizontal Half Hitch Knot: Used to create horizontal bars or rows.
- Designate one cord as your holding cord and stretch it horizontally.
- Take a working cord and pass it over the holding cord, then under and back up through the loop you just created. Pull tight.
- Repeat this exact step with the same working cord around the holding cord. (Each half hitch knot requires two passes with the working cord around the holding cord).
- Continue with other working cords, always tying them twice around the same holding cord, moving across the row.
Vertical Half Hitch Knot: Used to create vertical lines or textures.
- Designate one cord as your holding cord and stretch it vertically.
- Take a working cord and pass it under the holding cord, then over and back down through the loop you just created. Pull tight.
- Repeat this exact step with the same working cord around the holding cord.
- Continue with other working cords, tying them twice around the same holding cord, moving down the column.
Practice these knots until you feel comfortable. You might find it helpful to watch some video tutorials alongside these instructions. Once you’ve mastered these three fundamental knots, a world of macrame possibilities opens up for your nursery decor!
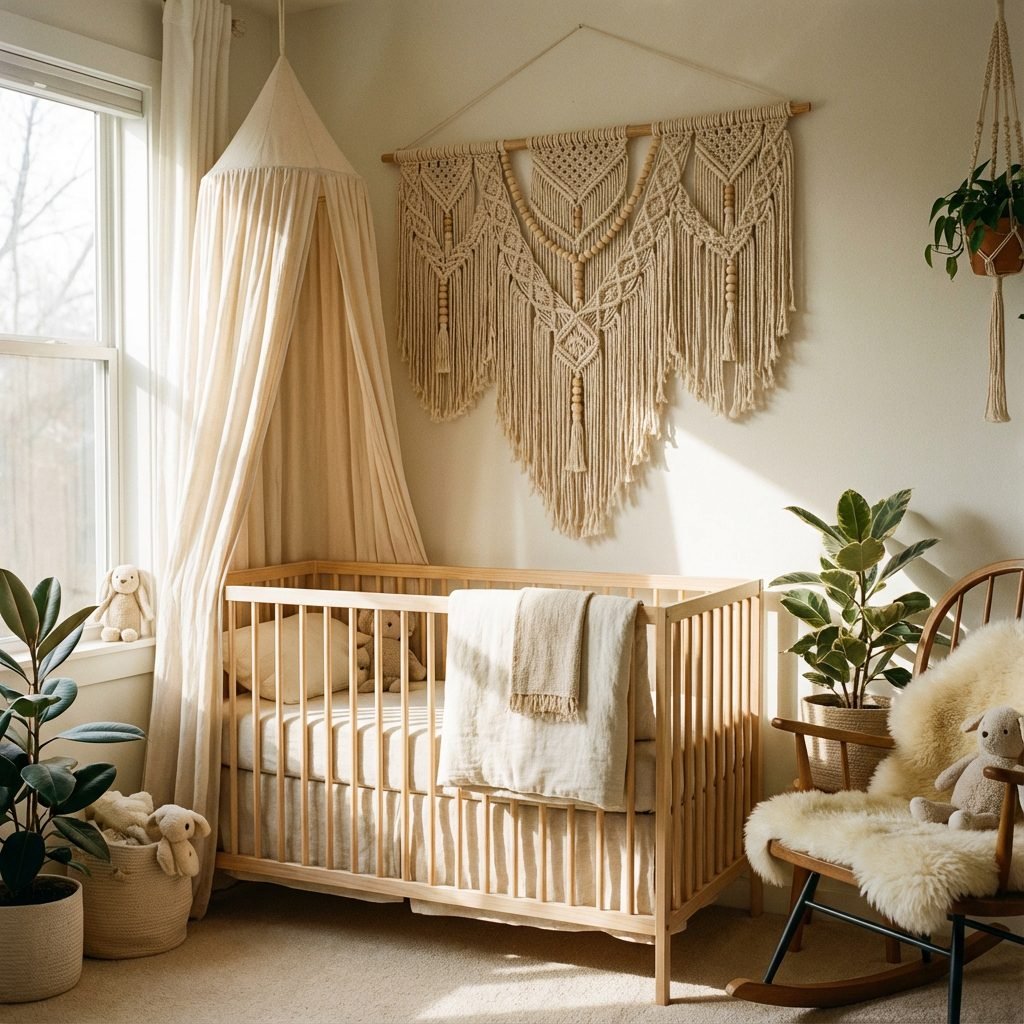
Project 1: The Dreamy Macrame Wall Hanging
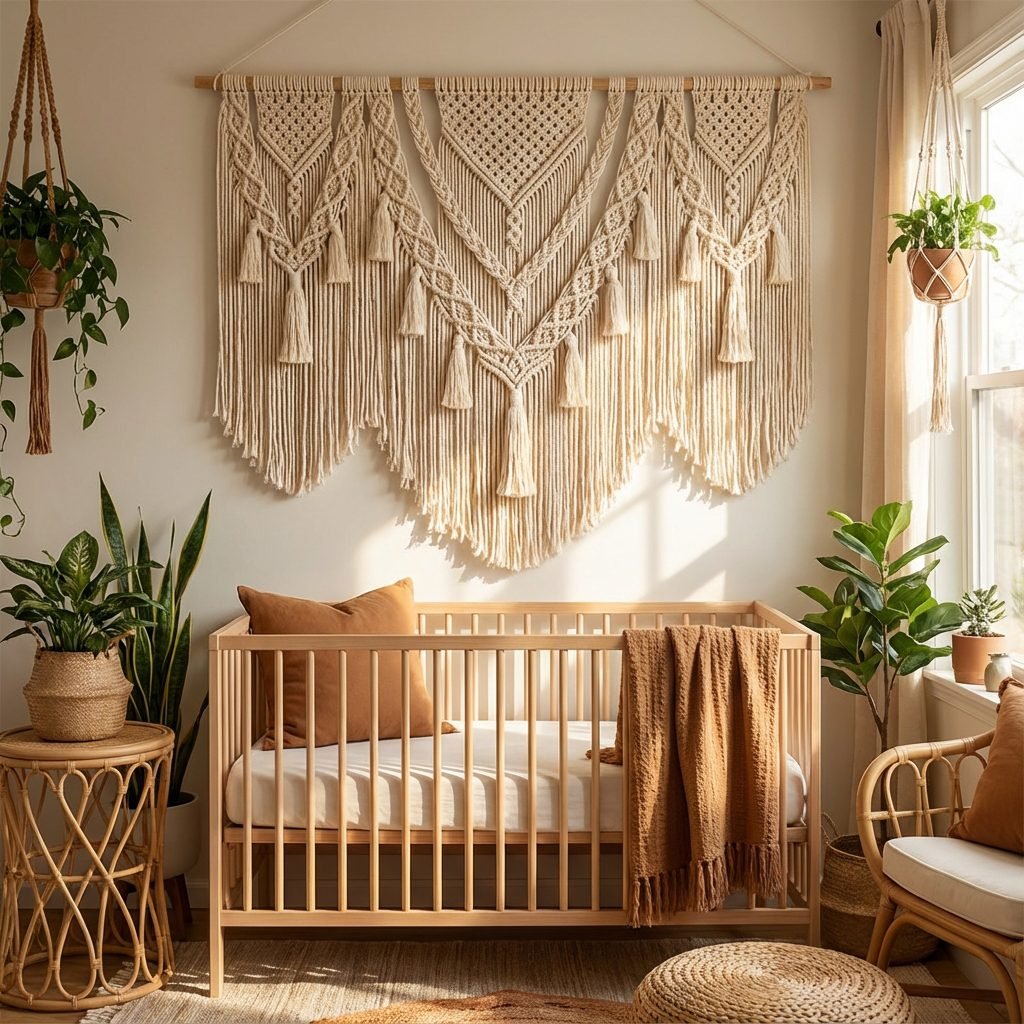
A macrame wall hanging is often the centerpiece of a boho nursery, adding immense texture and a calming focal point. This project is perfect for beginners and allows for a lot of creative freedom.
Materials Needed:
- Wooden dowel rod (12-24 inches, depending on desired width)
- Macrame cotton cord (3-4mm, approximately 150-200 feet for a medium-sized piece)
- Sharp scissors
- Measuring tape
Step-by-Step Instructions:
- Cut Your Cords: Decide on the finished length of your wall hanging. Multiply this length by 2 (for folding in half) and then by 2 again (as each cord forms two strands when attached). Add an extra 12-18 inches for knots and fringe. For example, if you want a 2-foot long hanging, you might cut cords that are 4 to 5 feet long. You’ll need 20-30 cords depending on your dowel length and desired fullness.
- Attach Cords to Dowel (Lark’s Head Knot): Fold each cut cord in half. Use the Lark’s Head Knot to attach all your cords to the dowel rod. Space them evenly across the dowel.
- Create Your Top Pattern (Square Knots): Begin by tying a row of square knots. You’ll use four cords for each square knot. Work from left to right, ensuring your knots are tight and even. You can create a full row of square knots, or leave gaps for a more minimalist look.
- Design a V-Shape or Diamond Pattern: For a classic macrame look, you can create a V-shape.
- Start a new row of square knots, skipping the first two outermost cords on each side. This will make your row of knots shorter, creating the inward slope of the ‘V’.
- Continue this pattern, making each subsequent row shorter than the last, until you reach a central point or desired width.
- To create a diamond, you would then start adding more knots in subsequent rows, working outwards to expand the shape again.
- Incorporate Half Hitch Knots (Optional): For added texture, you can add rows of horizontal half hitch knots. Designate a ‘holding cord’ (it can be one of your existing cords or an extra piece tied to the dowel) and tie your working cords around it to create a horizontal line.
- Add Vertical Elements (Optional): Use vertical half hitch knots to create long, textured lines or to define sections of your design.
- Finish with Fringe: Once your knotting is complete, trim the remaining cord tails to your desired length for the fringe. You can leave them straight, cut them into a ‘V’ shape, or comb them out for a softer, feathery look.
- Hang Your Creation: Tie a simple loop of cord to each end of your dowel for easy hanging.
Remember to step back frequently to assess your design and ensure symmetry. This piece will be a stunning, loving addition to your baby’s nursery!
Project 2: Adorable Macrame Plant Hangers (for Faux Plants!)
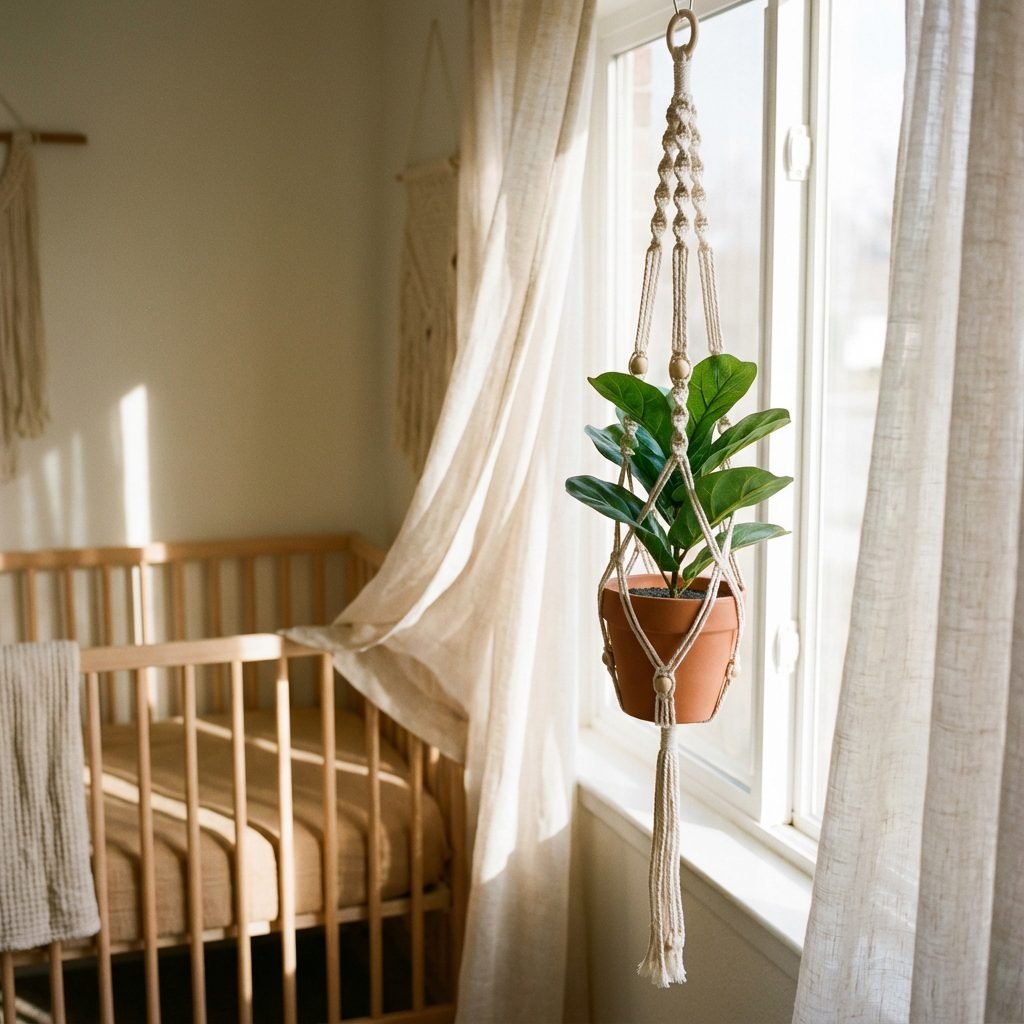
Plant hangers add a lovely touch of greenery and bohemian charm to a nursery. For safety, we strongly recommend using faux plants to avoid any risks associated with real plants (allergies, soil, accessibility for curious little hands). This project is simple, yet incredibly effective.
Materials Needed:
- Metal or wooden ring (3-4 inches diameter)
- Macrame cotton cord (3-4mm, approximately 60-80 feet for one hanger)
- Sharp scissors
- Measuring tape
- A small, lightweight faux plant pot and plant.
Step-by-Step Instructions:
- Cut Your Cords: Cut 8 pieces of macrame cord, each approximately 7-10 feet long (the longer the cords, the longer your hanger will be).
- Attach Cords to Ring (Lark’s Head Knot): Fold each of the 8 cords in half. Attach all 8 folded cords to the metal or wooden ring using Lark’s Head Knots. You should now have 16 working strands hanging from the ring.
- Create the Top Section (Gathering Knot): Gather all 16 strands together directly under the ring. Tie a tight gathering knot (also known as a wrapping knot or sinnet knot) around all the strands. To do this, take an extra piece of cord (about 12 inches), make a loop, place the loop along the main cords, and wrap the long end of the extra cord tightly around the main cords and the loop. Once wrapped, thread the long end through the bottom of the loop and pull the top end of the loop until the bottom end disappears into the wrapped section. Trim excess.
- First Row of Square Knots: Separate your 16 strands into four sections of four cords each. Starting with the first section, tie one square knot about 2-3 inches below the gathering knot. Repeat for the remaining three sections, ensuring the knots are at roughly the same height.
- Second Row of Square Knots (Staggered): Leave the two outermost cords from the first section and the two innermost cords from the second section. Combine the two inner cords from the first section with the two outer cords from the second section. Tie a square knot about 2-3 inches below the first row. Repeat this ‘staggered’ pattern across the remaining sections. This creates a netted effect.
- Continue Netted Pattern: Repeat the staggered square knot pattern for another 1-2 rows, depending on the desired depth of your plant hanger. This will form the basket where your pot will sit.
- Create the Pot Base (Gathering Knot): Once the netted section is deep enough to hold your pot securely, gather all 16 strands together again. Tie another tight gathering knot about 2-3 inches below the last row of square knots. This knot will form the base of the pot holder.
- Add Fringe and Trim: Trim the remaining cords below the base gathering knot to your desired length, creating a nice fringe.
“Bringing nature indoors, even through faux plants, creates a refreshing and stimulating environment for both parents and baby. These hangers allow you to elevate that greenery safely and stylishly.” – Certified Doula Insight
Place your lightweight faux plant pot into the macrame basket. Hang it securely from a ceiling hook, ensuring it’s out of your baby’s reach once they become mobile. These beautiful hangers add a touch of natural elegance to any nursery!
Project 3: A Chic Macrame Mobile or Teether Holder

A mobile is a classic nursery item, captivating a baby’s attention and adding a decorative touch. A macrame mobile, or even a smaller macrame teether holder, offers a unique, handmade alternative. Safety is paramount for this project, so ensure all knots are tight and any attached elements are securely fastened and baby-safe.
Materials Needed:
- Wooden hoop (6-8 inches diameter) or a small wooden dowel
- Macrame cotton cord (3mm, approximately 50-70 feet)
- Sharp scissors
- Measuring tape
- Wooden beads, wooden rings, or baby-safe wooden teether shapes (ensure they are unfinished and non-toxic)
Step-by-Step Instructions for a Macrame Mobile:
- Cut Your Cords: Cut 4-6 pieces of macrame cord, each about 4-5 feet long. These will be your main hanging strands. Cut another 10-12 pieces, each 2-3 feet long, for the decorative elements.
- Attach Main Hanging Strands: Fold each of the 4-6 long cords in half. Attach them evenly around the wooden hoop using Lark’s Head Knots. You should now have 8-12 strands hanging.
- Create Top Hanging Loop: Gather all the main hanging strands at the top. Tie a sturdy gathering knot to create a loop for hanging the mobile from the ceiling. Ensure this knot is exceptionally secure.
- Design Decorative Drops: Now, we’ll create the individual hanging elements that will dangle from the hoop. This is where your smaller cords and wooden elements come in.
- For Each Drop:
- Take two of your shorter cords (2-3 feet each). Fold them in half and attach them to the wooden hoop using Lark’s Head Knots, creating four working strands.
- Tie a series of square knots for about 2-3 inches.
- Thread a wooden bead onto the two inner filler cords. Push it up against your square knots.
- Continue with more square knots below the bead, or tie a small section of half hitch knots.
- You can alternate with wooden rings or other baby-safe shapes, securing them with knots above and below.
- Repeat this process for 4-6 drops, varying the lengths and patterns for visual interest. Ensure all beads and rings are tightly secured so they cannot slip off.
- Finish with Fringe: Once all your drops are complete and securely attached, trim the remaining cord tails at the bottom of each drop to create a soft, even fringe.
- Safety Check: Before hanging, thoroughly check all knots and attachments. Ensure there are no loose pieces that could become a choking hazard. The mobile should be hung well out of your baby’s reach, and removed once they can sit up or reach for it.
For a Simpler Teether Holder:
You can adapt this by using a smaller wooden ring or dowel. Attach fewer cords, tie a short section of square knots, thread a single baby-safe wooden teether, and secure it with another series of knots. Add a small loop at the top for attaching to a stroller or car seat. Always supervise baby when using!
“Mobiles aren’t just decor; they’re a first window into stimulating a baby’s visual development. Crafting one with your own hands infuses it with a unique energy that only a parent’s love can provide.” – Maternal Health Educator Insight
This project creates a truly unique and meaningful piece for your nursery, reflecting the care and attention you’ve poured into preparing for your little one.
Styling Your Boho Nursery: Bringing It All Together
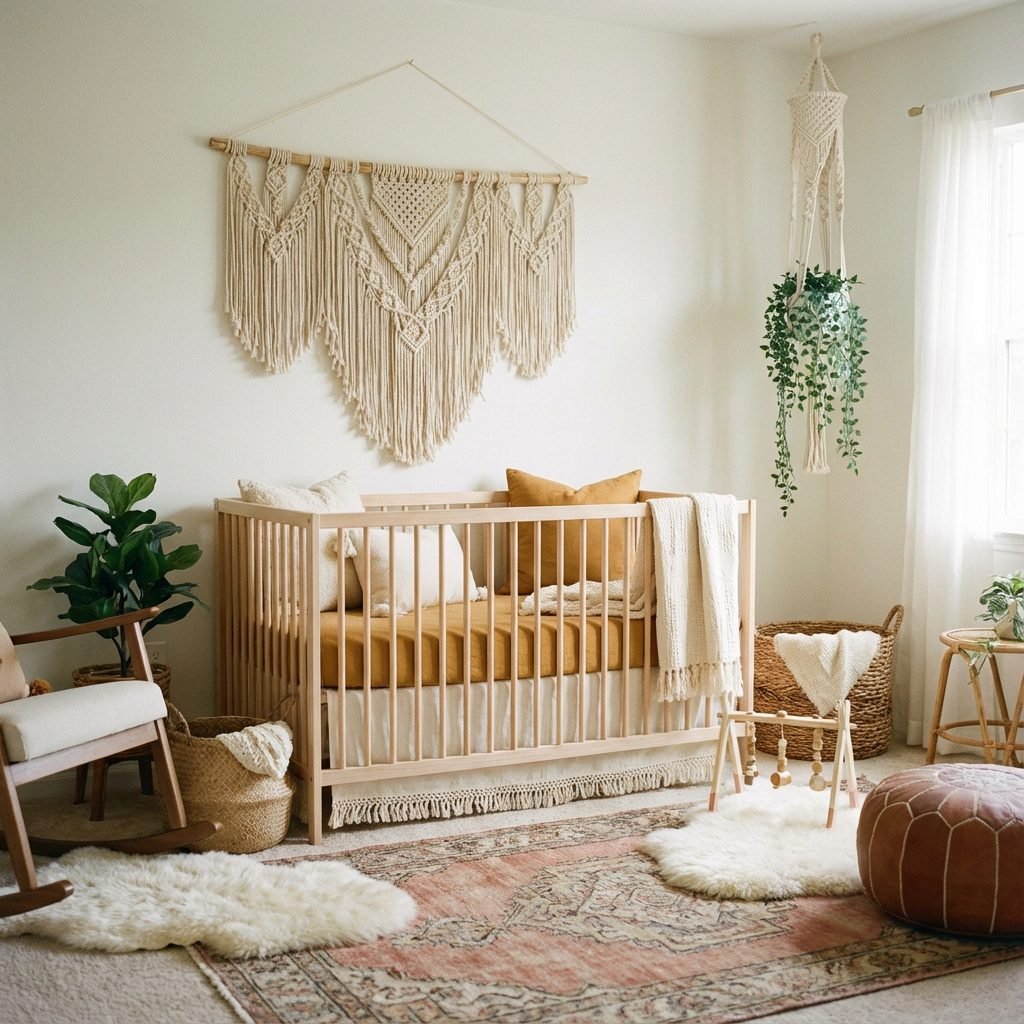
Now that you’ve crafted your stunning DIY macrame pieces, it’s time to integrate them into a cohesive, serene boho nursery. The key to a harmonious bohemian space lies in layering textures, embracing natural elements, and ensuring functionality and safety.
Integrating Your Macrame Decor
- Focal Point Wall Hanging: Position your largest macrame wall hanging above the crib (securely fastened and out of reach when baby is standing) or on a prominent wall. It instantly draws the eye and sets the tone.
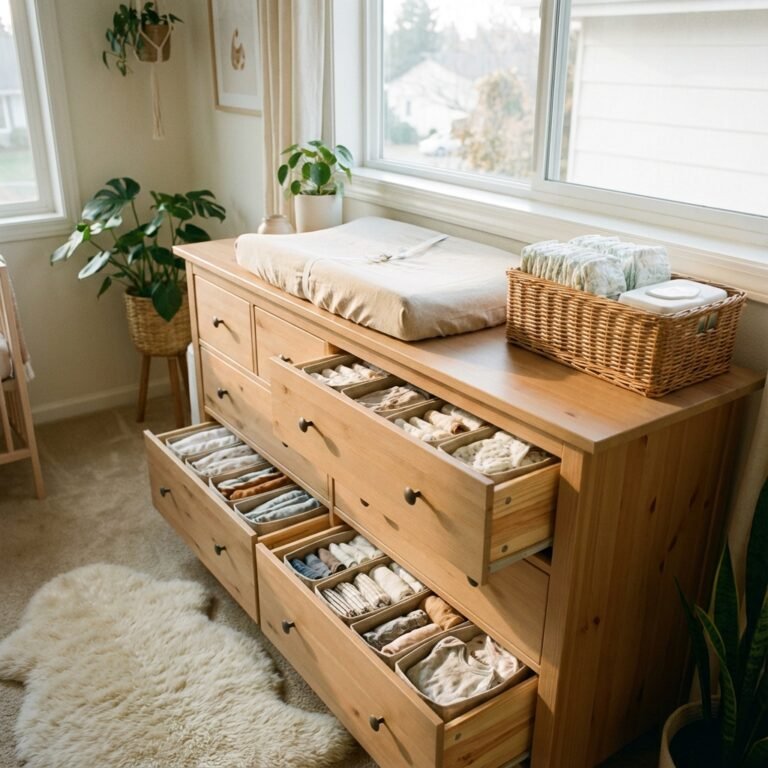
- Layered Textures: Combine your macrame with other natural textures. Think a jute rug, linen crib sheets, a chunky knit blanket, or a woven changing basket. These layers add depth and warmth.
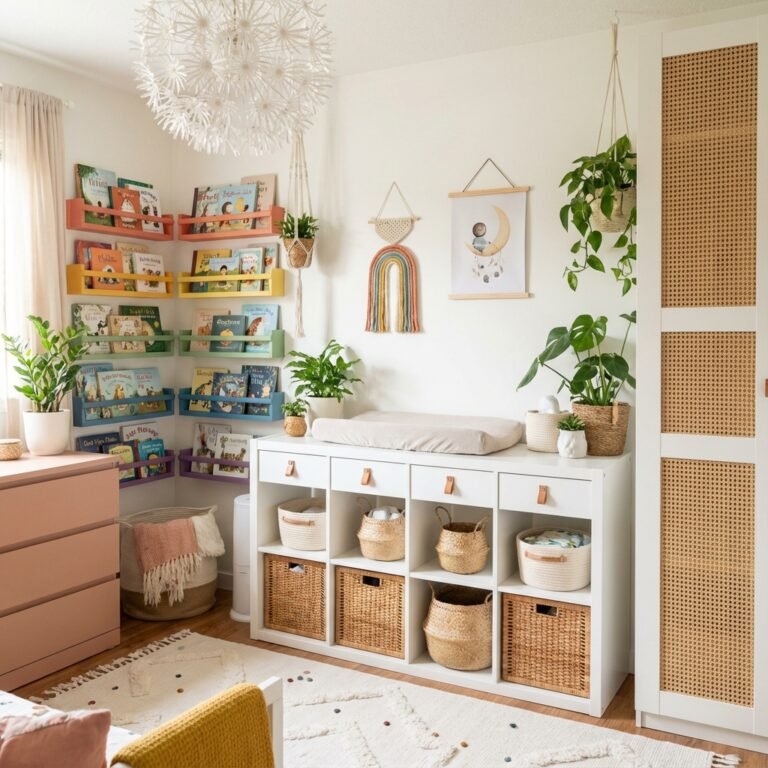
- Greenery (Faux & Safe!): Your macrame plant hangers are perfect for bringing in greenery. Opt for high-quality faux plants that are easy to clean and pose no risk to your baby. Place them in corners or hanging from the ceiling, ensuring they are well out of reach.
- Mobiles & Small Accents: Hang your macrame mobile above the crib at an appropriate height for visual stimulation, ensuring it’s securely attached and removed once your baby can reach for it. Small macrame ornaments can adorn shelves or drawer pulls.
Color Palette and Natural Elements
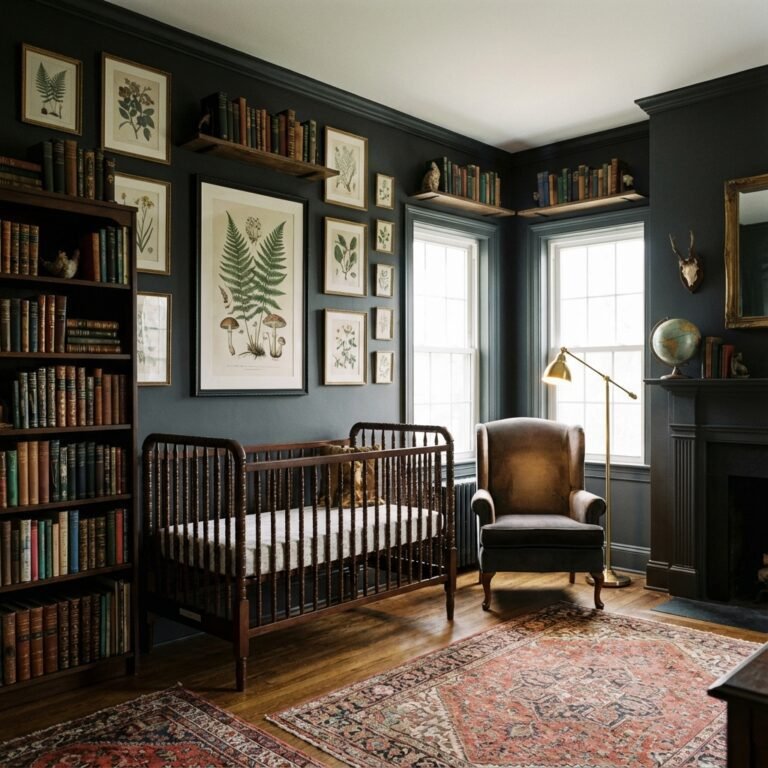
Boho nurseries thrive on a neutral, earthy color palette. Think creams, whites, muted greens, terracotta, and soft grays. These colors create a calming environment. Complement these with natural wood furniture (crib, dresser), rattan accents, and perhaps a touch of muted gold or brass in light fixtures.
Ensuring Safety and Functionality
As a doula, I cannot stress enough the importance of safety in a nursery. While creating a beautiful space is wonderful, ensuring it’s safe for your baby is paramount.
- Secure Attachments: All wall hangings, shelves, and especially mobiles must be securely fastened to the wall or ceiling, far out of reach of your baby’s crib.
- Out of Reach: Any decor that could pose a choking hazard (beads, small pieces) or strangulation risk (long cords) must be positioned well out of your baby’s grasp, both when they are lying down and when they start to sit, stand, or climb.
- Faux Plants Only: As mentioned, stick to faux plants in the nursery to avoid any risks from real plants (toxicity, soil, allergens).
- Cord Management: Ensure all electrical cords from lamps or monitors are tucked away and secured to prevent strangulation hazards.
- Furniture Stability: Secure all dressers and changing tables to the wall with anti-tip kits.
“A beautiful nursery is a wonderful gift, but a safe nursery is the greatest act of love. Always prioritize your baby’s well-being in every design choice.” – Certified Doula & Maternal Health Educator Guidance
By thoughtfully combining your handmade macrame pieces with other natural elements and prioritizing safety, you’ll create a truly enchanting and secure boho nursery that you and your baby will adore.
Conclusion
Your Beautiful, Handmade Nursery Awaits!
Congratulations, new parents and parents-to-be! You’ve embarked on a wonderful creative journey, transforming simple macrame cord into stunning, personalized decor for your baby’s nursery. The act of creating with your own hands is a profound expression of love and anticipation, and each knot you’ve tied carries that special energy into your little one’s space.
You’ve not only saved money by choosing the DIY route but have also infused the nursery with a unique character that store-bought items simply cannot replicate. From the serene wall hangings to the charming plant hangers and captivating mobiles, your macrame creations will contribute to a calming, natural, and deeply personal environment for your baby to grow and thrive in.
Remember, the goal is to create a nurturing haven, and your dedication to crafting these pieces speaks volumes about the loving home you are building. As your baby grows, these handmade treasures will serve as beautiful reminders of the care and effort you poured into preparing for their arrival. Embrace the joy of your accomplishment, and delight in the beautiful, budget-friendly boho nursery you’ve brought to life. Happy nesting, and cherish every moment!