Mold in Your Pump? The Lazy Mom’s Guide to Sanitizing Parts in 5 Minutes
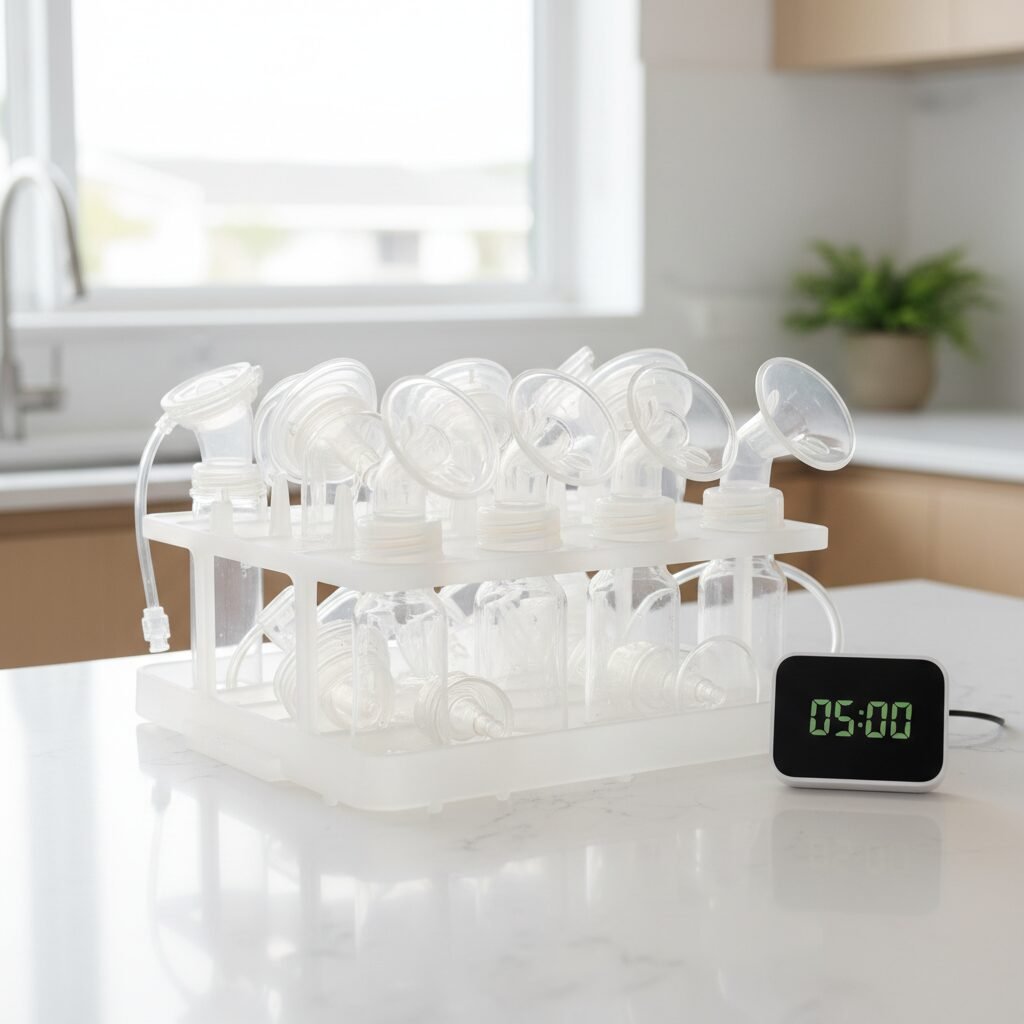
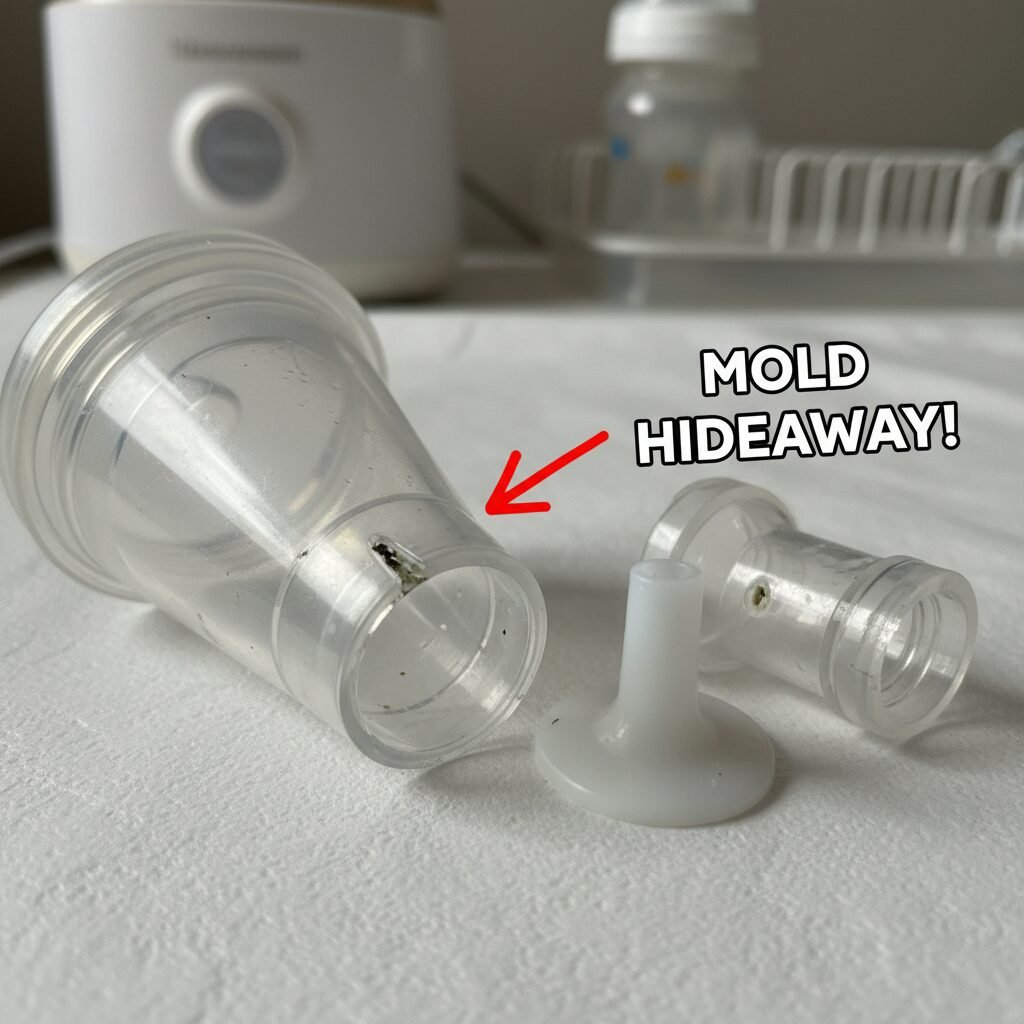
That moment of horror. You’re disassembling your breast pump parts after a middle-of-the-night session, and you see it: a tiny, dark speck in a crevice you swear you’ve cleaned a thousand times. Is it… mold? Panic sets in, followed by a tidal wave of guilt. For parents, especially those navigating the beautiful chaos of a new baby, the thought of accidentally exposing your child to something harmful is a heavy burden.
Let’s be clear: you are not a ‘lazy mom.’ You are an exhausted, multitasking, superhero of a parent running on lukewarm coffee and sheer love. The mental load is immense, and sometimes, the seemingly simple task of washing pump parts feels like a monumental chore. The term ‘lazy’ here isn’t a judgment; it’s a badge of honor for seeking a smarter, more efficient way to get things done without sacrificing your baby’s safety. This guide is designed for you. We will walk you through a fast, effective, and CDC-aligned method to sanitize your pump parts in about five minutes, giving you peace of mind and a few precious moments back in your day.
Why Mold is a Serious Health Risk for Your Baby
Understanding the Invisible Threat
Before we dive into the ‘how,’ it’s crucial to understand the ‘why.’ Mold is not just an unsightly nuisance; it’s a collection of microscopic fungi that can thrive in damp, dark environments—like the intricate nooks and crannies of a breast pump. For a newborn or infant with a developing immune system, exposure to mold spores can be particularly concerning.
According to the Centers for Disease Control and Prevention (CDC), mold exposure can lead to a range of health issues, particularly respiratory problems. An infant inhaling or ingesting mold spores could experience symptoms such as:
- Nasal stuffiness and coughing
- Wheezing and shortness of breath
- Red or itchy eyes or skin
- Allergic reactions
In rare but serious cases, for infants who are premature or have compromised immune systems, certain types of mold can cause severe infections. The milk collection system of a breast pump is a direct line to your baby’s nutrition. Any contamination within that system poses a direct risk. This isn’t about fear-mongering; it’s about empowering you with the knowledge to create the safest feeding journey possible. Your diligence in cleaning isn’t just a chore; it’s a profound act of protection.
“Proper cleaning and sanitization of breast pump equipment is a non-negotiable aspect of infant care. It directly impacts the health and safety of the most vulnerable population. A consistent routine is the best defense against microbial contamination.” – Maternal Health Educator
The 5-Minute Sanitizing Method: Your Step-by-Step Guide
This is where efficiency meets safety. This routine is designed to be performed after every single pumping session. Consistency is the key to preventing mold before it even has a chance to start. The goal is to make it so automatic you can do it half-asleep.
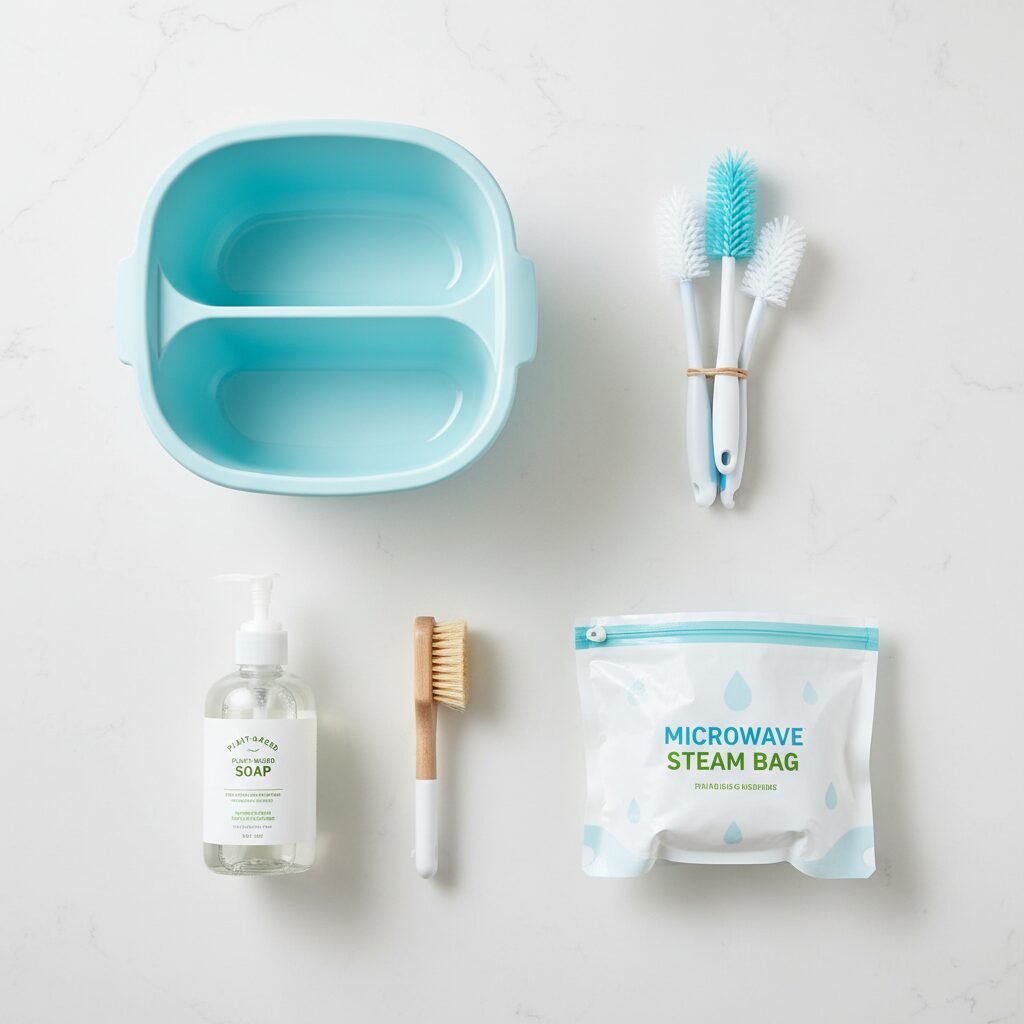
Step 1: Gather Your Arsenal (Prep takes 30 seconds)
Have a dedicated station for this. Don’t use your regular dish sponge or sink. Cross-contamination is a real risk.
- A dedicated wash basin: This should only be used for infant feeding items.
- A dedicated bottle brush and small nipple brush: Again, only for baby’s things.
- Soap: A gentle, fragrance-free dish soap, preferably one formulated for baby bottles.
- Microwave steam sanitizer bag: These are the ultimate ‘lazy’ hack. They are reusable, fast, and kill 99.9% of germs.
- A clean drying rack or paper towels: For air-drying the parts.
Step 2: The Immediate Rinse (Prep takes 30 seconds)
As soon as you are done pumping, take your parts to the sink. Disassemble them completely—flanges, connectors, valves, membranes, bottles. Rinse every single piece under cool running water to remove any remaining milk residue. Milk proteins can be stubborn if they dry.
Step 3: The Hot Soapy Wash (Prep takes 2 minutes)
Fill your dedicated basin with hot water and a few drops of soap. Place all the disassembled parts into the basin. Use your dedicated brushes to scrub every surface, paying close attention to threads, corners, and tiny parts like duckbill valves. The small brush is your best friend for getting into tight spots. This physical scrubbing is critical for removing the biofilm where bacteria and mold love to hide.
Step 4: The Clean Rinse and Prep for Sanitizing (Prep takes 1 minute)
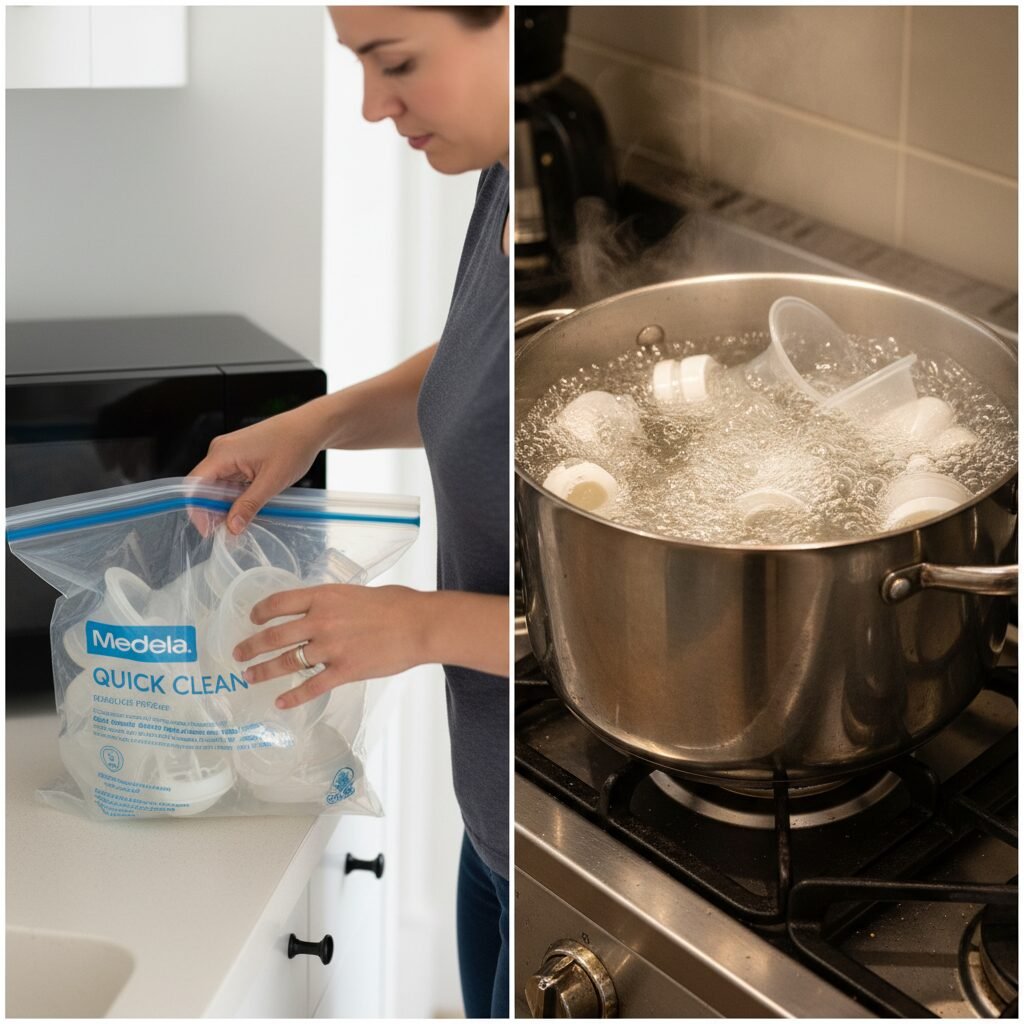
Rinse each part thoroughly under warm running water to remove all soap suds. While rinsing, add the recommended amount of water (usually about 2oz or 60ml) to your microwave steam bag. Place the wet, rinsed parts inside the bag. Do not overcrowd it; do it in two batches if necessary.
Step 5: The Steam Sanitize (Prep takes 90 seconds to 3 minutes, depending on microwave)
Seal the steam bag and place it in the microwave. Follow the bag’s instructions for the correct time based on your microwave’s wattage (typically 1.5 to 3 minutes). The steam created inside the bag reaches a temperature high enough to kill germs and mold spores effectively. This is faster and uses less water than boiling a large pot.
Step 6: The Final Air Dry (Prep takes 30 seconds)
Carefully remove the hot bag from the microwave. Open it away from your face to avoid a steam burn. Using clean hands or tongs, place the sanitized parts on a clean, unused paper towel or a dedicated drying rack. Allow them to air dry completely. Do not use a dish towel, as it can reintroduce germs. Storing parts while they are still damp is the number one cause of mold growth. Once fully dry, you can reassemble and store them in a clean, covered container until your next session.
Daily Cleaning vs. Deep Sanitizing: Finding the Right Balance
While the 5-minute method is your daily workhorse, it’s important to understand how it fits into a larger cleaning strategy. The CDC recommends a two-tiered approach: a thorough wash after every use, and regular sanitizing. Our 5-minute method cleverly combines both for maximum efficiency. However, some parents may prefer to separate these steps or want to know when a more intensive ‘deep clean’ is necessary.
Think of it like this: your daily wash prevents buildup, while a periodic deep sanitization acts as a system reset, ensuring any lingering microbes are eliminated. This is especially important if your baby was born prematurely, is younger than 3 months old, or has a weakened immune system. For healthy, full-term babies, daily sanitizing is considered best practice.
Here’s a breakdown to help you decide on the right rhythm for your family:
| Aspect | Daily Cleaning (The 5-Minute Method) | Weekly Deep Clean (Optional/As Needed) |
|---|---|---|
| Frequency | After EVERY pumping session. No exceptions. | Once a week, or if parts have been unused for a while. |
| Method | Hot, soapy wash in a dedicated basin followed by microwave steam bag sanitization. | Boiling parts in a pot of water for 5-10 minutes, or using a plug-in electric steam sterilizer. |
| Time Commitment | Approximately 5-7 minutes per session. | Approximately 15-20 minutes (including time for water to boil). |
| Primary Goal | To remove milk residue and prevent the immediate growth of bacteria and mold. | To provide an extra layer of microbial elimination and reset the cleanliness of all parts. |
| When It’s Essential | Always. This is the baseline for safe pumping. | Recommended for newborns under 3 months, immunocompromised infants, or if you suspect any contamination. |
Common Mistakes That Lead to Mold (And How to Avoid Them)
Even with the best intentions, small oversights can create a welcoming environment for mold. Being aware of these common pitfalls is the first step toward avoiding them entirely.
Mistake 1: The ‘Rinse and Store’ in the Fridge
The so-called ‘fridge hack,’ where you place used pump parts in a sealed bag in the refrigerator between sessions, is controversial. While it may slow bacterial growth, it does not stop it, nor does it prevent mold. The CDC does not recommend this method as a substitute for proper washing. Milk residue remains, and the cool, damp environment can still be a breeding ground. Avoid this and wash every time.
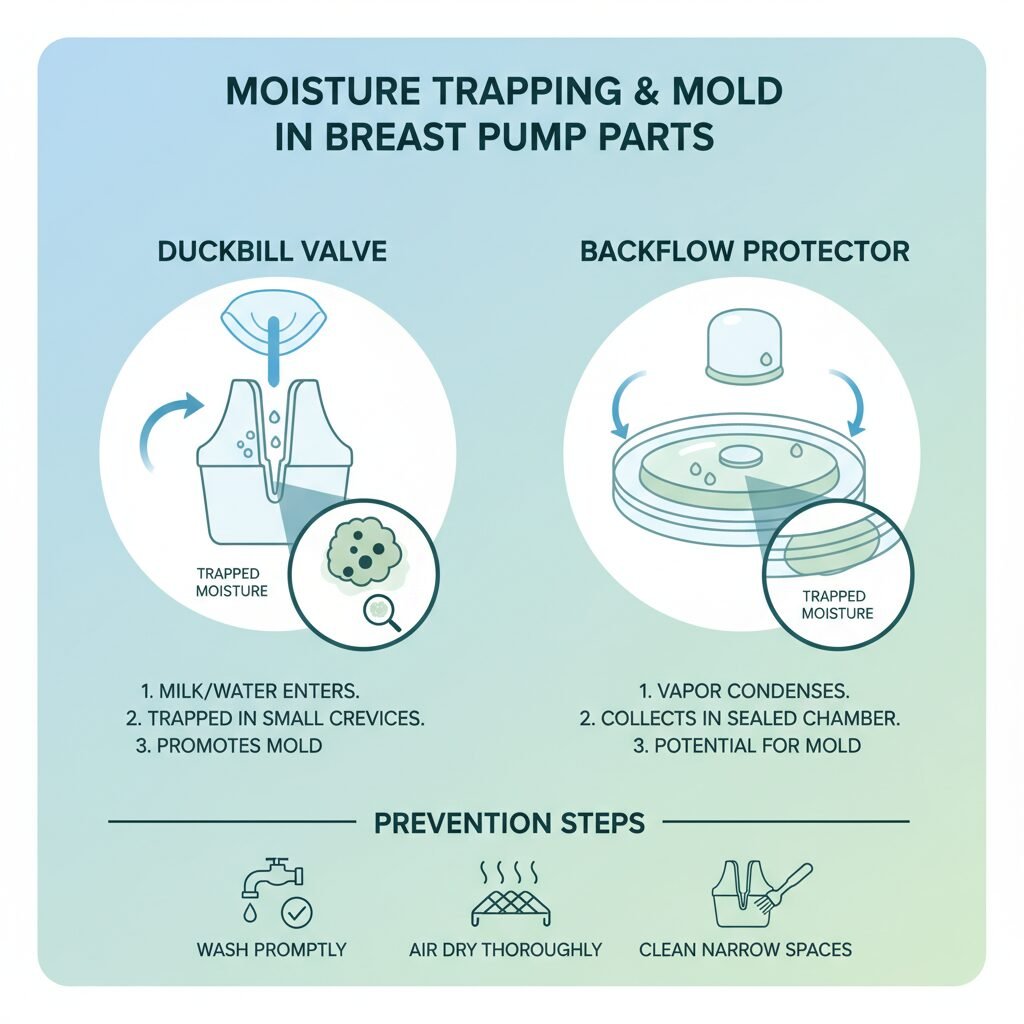
Mistake 2: Not Disassembling Completely
It’s tempting to wash the flange and connector as one piece. Don’t. Every pump is different, but most have small, removable parts like duckbill valves or membranes. These are the prime locations for moisture and milk to get trapped. Always take every single piece apart before washing.
Mistake 3: Using a Contaminated Sponge or Towel
Your kitchen sponge is one of the germiest items in your house. Never use it on your pump parts. The same goes for the dish towel hanging by the sink. These items can transfer bacteria directly onto your freshly cleaned parts. Always use a dedicated brush and air-dry on a clean surface.
Mistake 4: Storing Parts While Still Wet
This is perhaps the single biggest cause of mold. After sanitizing, you might be in a rush to put everything away. But sealing even slightly damp parts in a container or bag creates a mini-greenhouse perfect for mold growth. Patience is key. Let them air dry completely before reassembling or storing.
Mistake 5: Forgetting the Tubing
For most closed-system pumps, the tubing should never get wet or need washing, as it doesn’t come into contact with milk. However, condensation can sometimes build up. If you see droplets, disconnect the tubes and run the pump for a few minutes to air them out. If you ever see milk in the tubing, it must be thoroughly cleaned and dried, or replaced, as it’s nearly impossible to sanitize properly.
What to Do If You Find Mold
Finding mold can feel like a parenting failure, but it’s a surprisingly common issue. How you react is what matters. Do not panic. Just follow these clear, decisive steps.
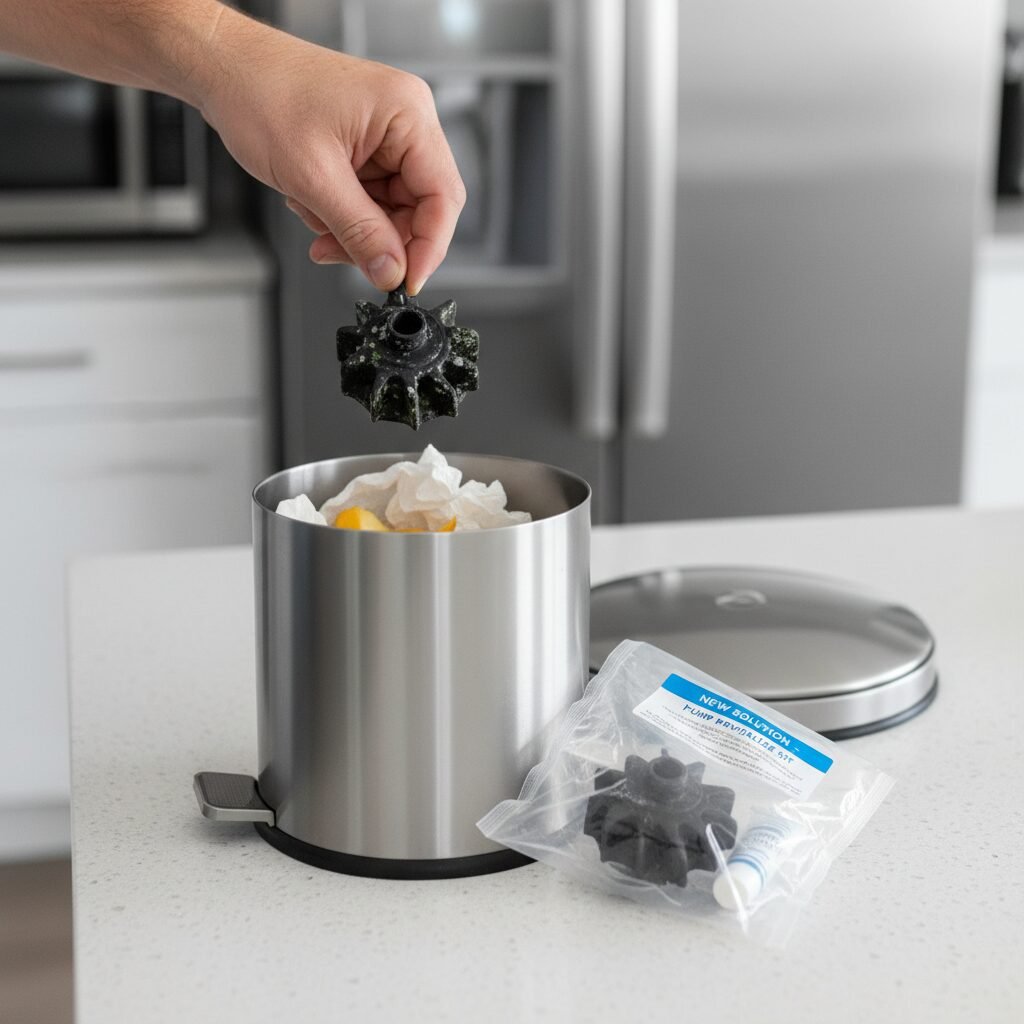
Step 1: Discard Immediately and Ruthlessly
Your baby’s health is worth more than a $10 piece of plastic. Do not try to scrub, bleach, or boil the mold away. Mold can have invisible ‘roots’ that penetrate the surface of silicone or plastic. Once a part has visible mold, it is compromised. Throw the affected part(s) away immediately.
Step 2: Quarantine and Deep Sanitize Everything Else
If one part had mold, spores could have contaminated the other parts. Gather every other piece of your pump kit—even the parts that look clean—and perform a deep sanitization. This is the time to boil them in a large pot of water for a full 10 minutes or run them through a long cycle in an electric sterilizer. This ensures any cross-contamination is dealt with.
Step 3: Inspect Your Tubing and Motor
Thoroughly inspect your tubing for any signs of moisture or discoloration. If you see anything suspicious, replace the tubing. It’s inexpensive and crucial for peace of mind. Consult your pump’s manual for instructions on how to inspect and clean the main pump unit. Most cannot be submerged in water, but the exterior can be wiped down with a disinfectant wipe.
Step 4: Replace and Forgive
Order replacement parts immediately. While you wait, you may need to rely on a manual pump (which also needs to be sanitized) or formula. Most importantly, forgive yourself. You are navigating an incredible, demanding journey. You caught the issue, you’re fixing it, and you’ve learned how to prevent it in the future. That isn’t failure; that is fantastic parenting.
Conclusion
Protecting your baby is your top priority, but it shouldn’t come at the cost of your sanity. The fear of mold is valid, but it’s a preventable problem. By adopting this fast and efficient 5-minute cleaning and sanitizing routine, you transform a dreaded chore into a simple, automatic habit. You are not cutting corners; you are optimizing your process to be both safe and sustainable for your life as a busy parent. Remember to be diligent, be consistent, and most of all, be kind to yourself. You are doing an amazing job providing for your little one, and mastering the pump-part-wash is just one more way you’re proving it.
Disclaimer: The information provided in this article is for educational purposes only and is not a substitute for professional medical advice, diagnosis, or treatment. Always seek the advice of your physician, pediatrician, or other qualified health provider with any questions you may have regarding a medical condition or the health and well-being of your child.


